MISS Transforaminal lumbar interbody fusion (TLIF)
1. Introduction
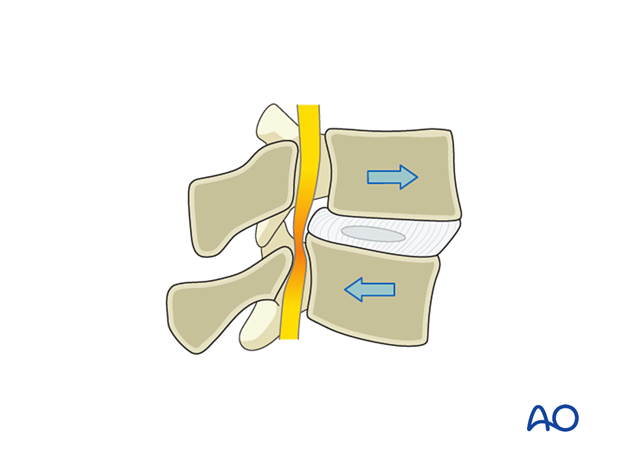
This is the minimally invasive procedure for TLIF. The goal of surgery is to directly decompress the nerve root, decompress the thecal sac when indicated, insert an interbody cage, and stabilize the segment with percutaneous pedicle screw instrumentation.
Reduction of spondylolisthesis, when present, is not always the goal of this operation.
Most of these patients have Grade I and Grade II spondylolisthesis. For higher-grade spondylolisthesis, this approach may not be appropriate.
It is up to the surgeon’s discretion whether percutaneous pedicle screws are placed before or after the TLIF.
In the procedure shown here, TLIF will be performed first.
2. Required instruments
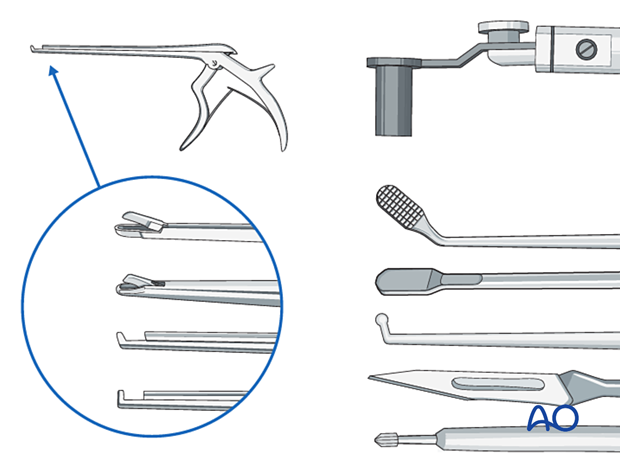
The following specialized instruments are recommended for this procedure:
- Tubular retractor system, 18–26 mm diameter tubes, variable lengths, or specular retractor
- Surgical microscope
- CSF repair kit
Bayonetted MISS instruments:
- Kerrison rongeurs 1–4 mm, 45° and 90° angle
- Pituitary rongeurs
- Ball tip nerve hook
- Knife
- Curettes of various sizes and angles
- Rasps
- Disc shavers
- Trials
- Interbody implant
- Nerve root retractor
- High-speed diamond or side-cutting (matchstick) burr with an extra-long angled or curved handpiece
- Suction
3. OR setup and patient positioning
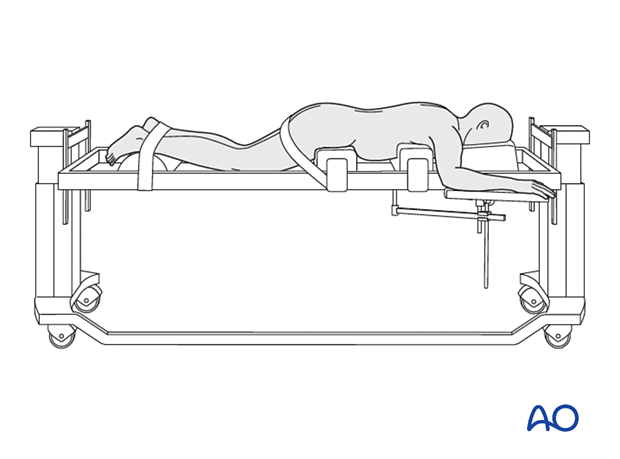
The patient is positioned prone with a free-hanging belly. The hips and chest are padded. The position should promote lordosis of the lumbar spine.
4. Visualization of the surgical field
Marking of the incision site
Palpate the spinous processes and mark the midline and the iliac crests bilaterally.
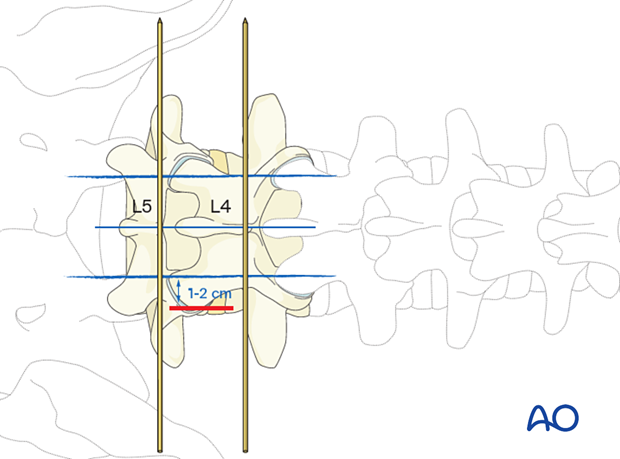
Based on the laterality of facet resection and interbody placement, K-wires and AP fluoroscopy are used to mark the cranial and caudal pedicles of the intended level horizontally and vertically.
Mark a vertical incision line 1–2 cm lateral to the ipsilateral lateral borders of the cranial and caudal pedicle on the side of the approach.
Incision
Perform a 4–5 cm skin incision at the location planned in the previous step. This incision can ultimately also be used for percutaneous pedicle screw insertion on the same side.
Dissect down to the fascia.
A 2.5 cm fascial incision is made medial to the skin incision.
Insert the first dilator, angle slightly medially, and “feel” for the base of the spinous process and lamina.
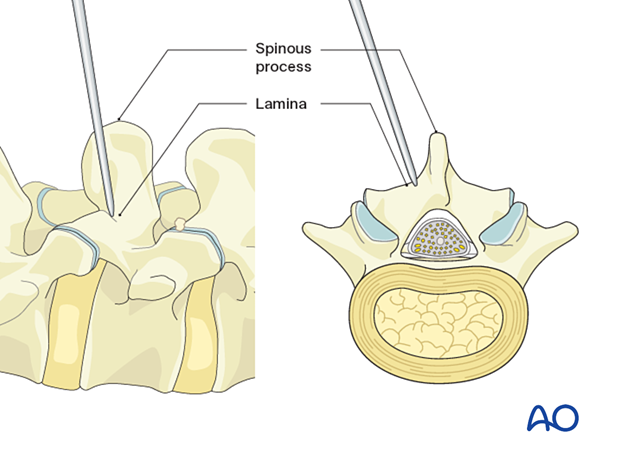
After the first dilator has been positioned on the bone, verify that it is located at the correct level using fluoroscopy.
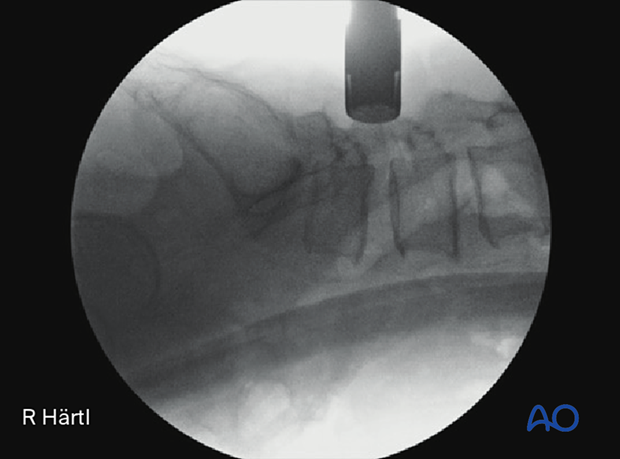
Proceed with sequential dilation guided by the first dilator.
Determine the required tube length and insert the final tubular retractor level to the skin.
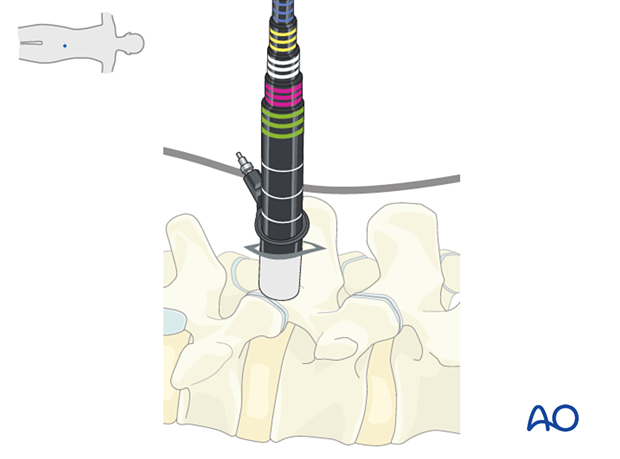
Secure the retractor to the table-mounted arm.

Visualization
Use the microscope for visualization. Alternatively, an exoscope or loupes and headlights may be used.
Insert the microscope so that the surgeon can be positioned parallel to the spine. This position will help with orientation.
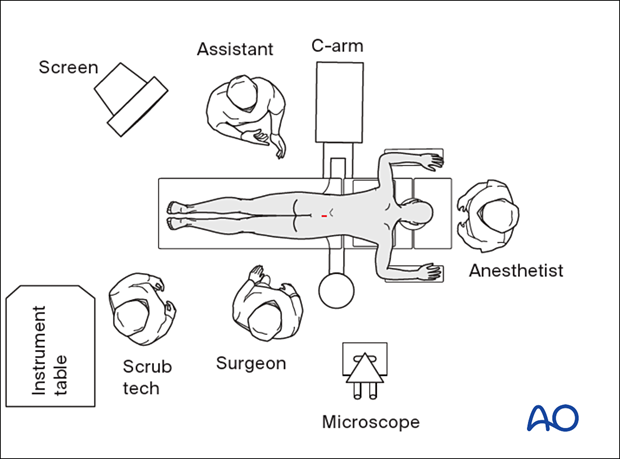
Under microscopic visualization, muscles overlying the bony structures are exposed with monopolar coagulation, and the facet capsule is opened.
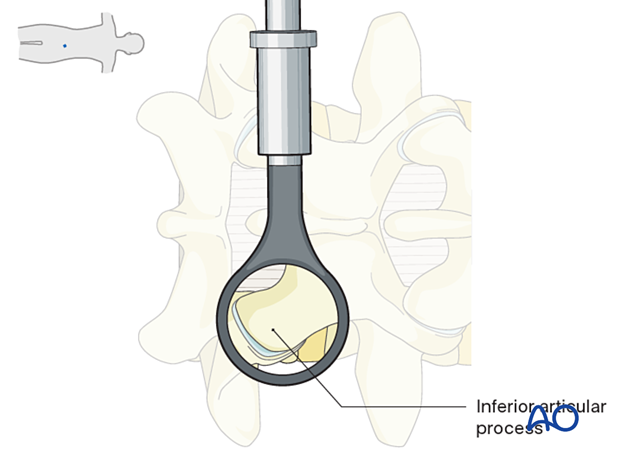
The lateral and inferior edges of the cranial lamina, the medial border of the ipsilateral facet joint, and the ipsilateral pars interarticularis should be visualized.
5. Ipsilateral decompression
Resection of the inferior articular process
Resect the inferior articular process using either a drill or an osteotome.
The main bony surgical landmarks are:
- Inferior medial border of the lamina (A)
- Pars interarticularis (B)
An L-shaped or curved course is taken from point A to point B.
Use a large pituitary rongeur to harvest the inferior articular process. This bone can be used for fusion later on.
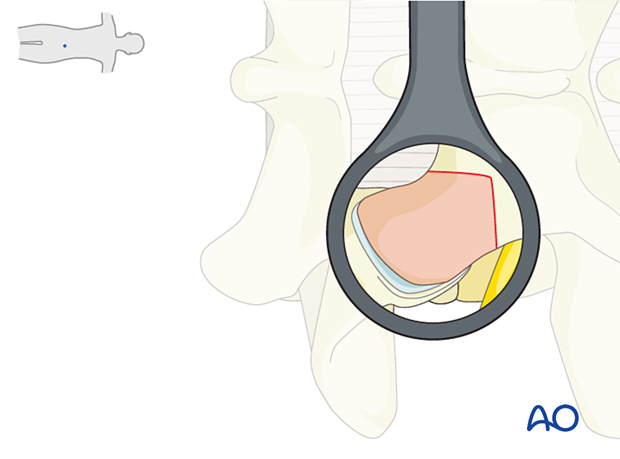
Resection of the superior articular process
Identify the superior wall of the caudal pedicle and then use a burr or an osteotome to disconnect and harvest the superior articular process.
This bone can be used for fusion later on.
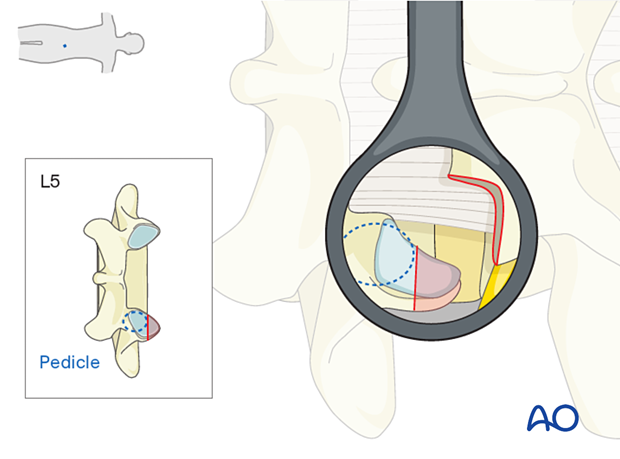
Resection of the ligamentum flavum
Release the ligamentum flavum from the underlying dura with a ball tip hook. Resect the ligamentum flavum from lateral to medial to expose the disc within the foramen.
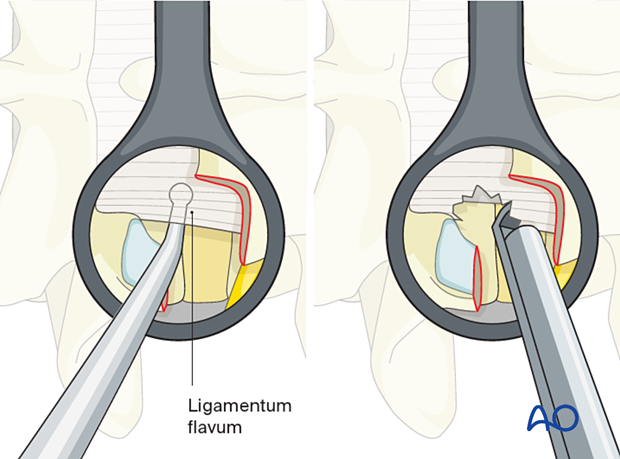
Discectomy
After removing the ligamentum flavum, the disc will be visible. The exiting nerve root passes under the remaining pars interarticularis at the cranial margin of the visible field, and the traversing nerve root may be visualized medially.
Bipolar coagulation with irrigation can be used to control epidural bleeding from vessels overlying the disc.
Ensure that the disc material is freed from the dura using a ball tip hook.
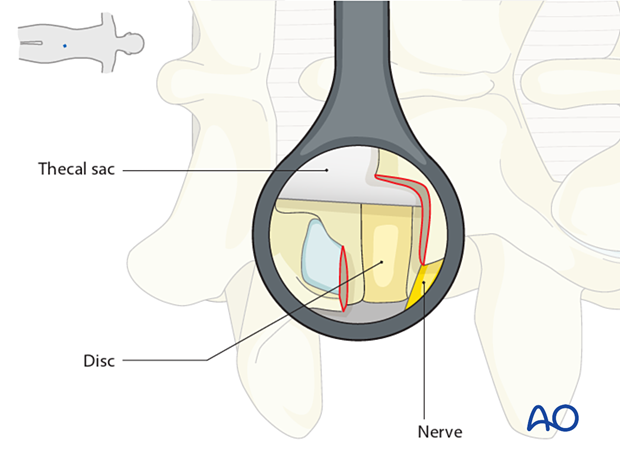
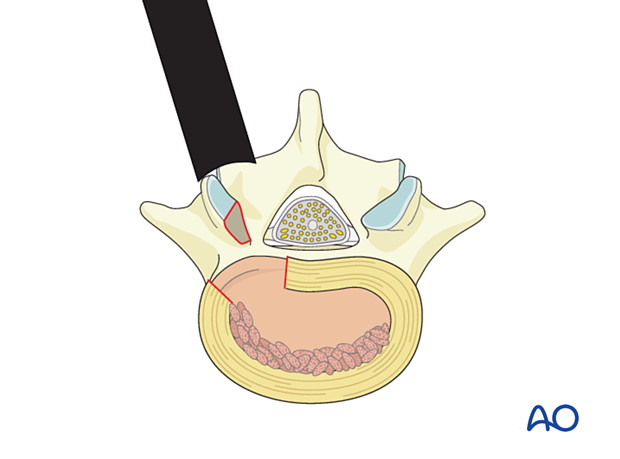
Open the disc using a box-shaped incision. Ensure all incisions are made from medial to lateral, away from the traversing nerve, and from superior to inferior, to avoid inadvertent injury of the exiting nerve root.
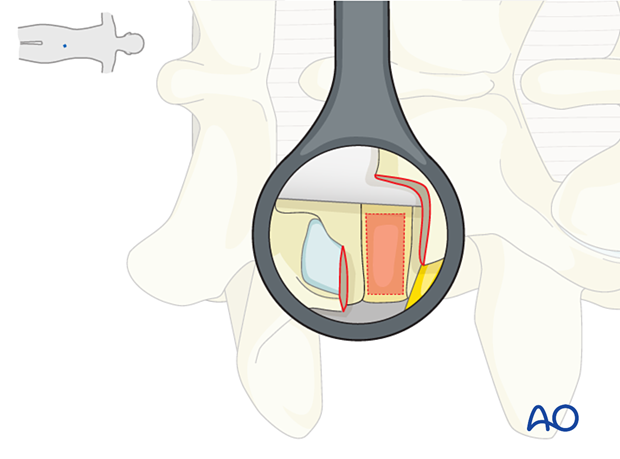
Perform a piecemeal discectomy using pituitary rongeurs and curettes.
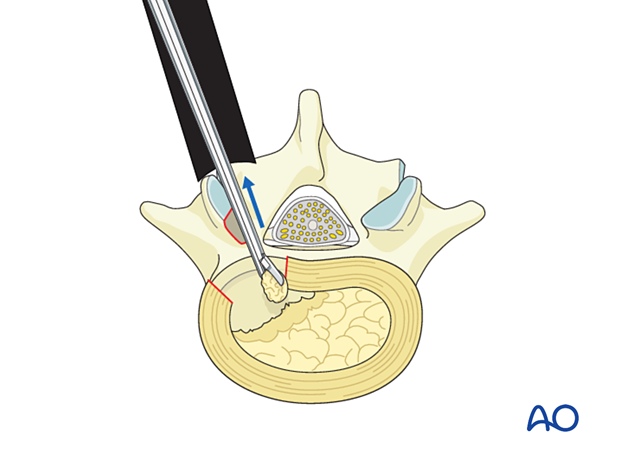
Decorticate the endplates using a rasp. Completely remove the cartilage from the vertebral endplates.
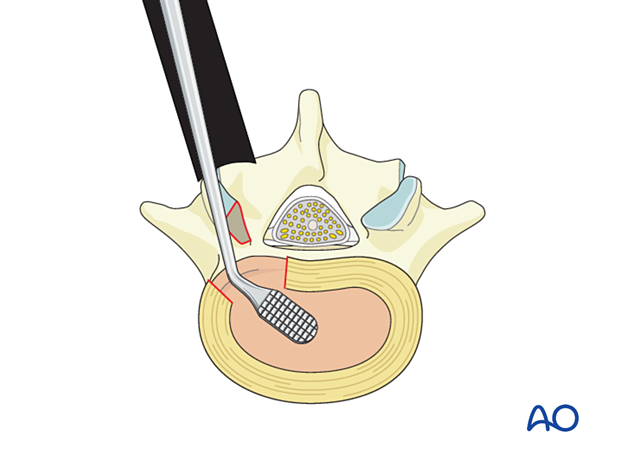
Insert a disc shaver into the disc space and rotate, progressively distracting the disc space. Remove the remaining disc material and continue using larger disc shavers until maximal distraction without endplate damage is achieved. A trial can be used to further confirm the optimal implant size.
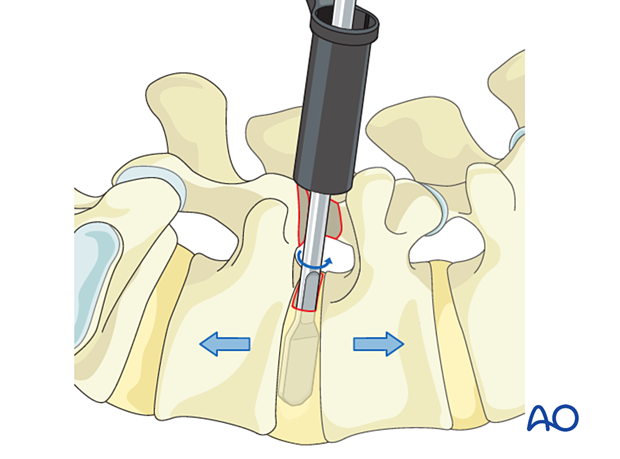
Pack morselized bone graft into the anterior portion of the discectomy space.
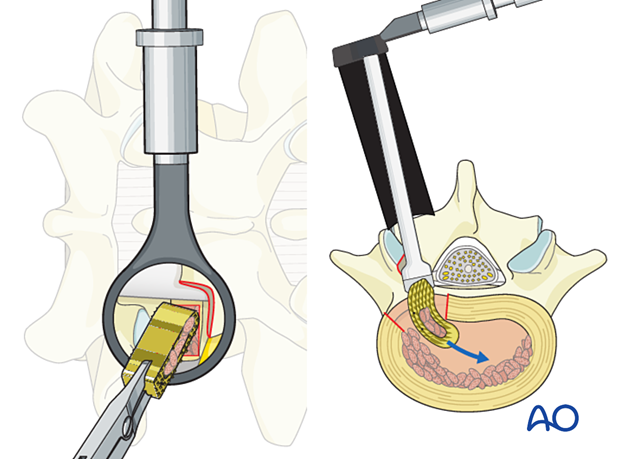
Structural implant
A structural implant of appropriate size, filled with additional bone graft, is impacted into the discectomy space, aimed medially towards the anterior third of the disc.
AP and lateral X-Rays are taken to confirm the appropriate positioning of the cage within the disc space.
In order to achieve the maximum lordosis, the cage should be positioned as anteriorly as possible.

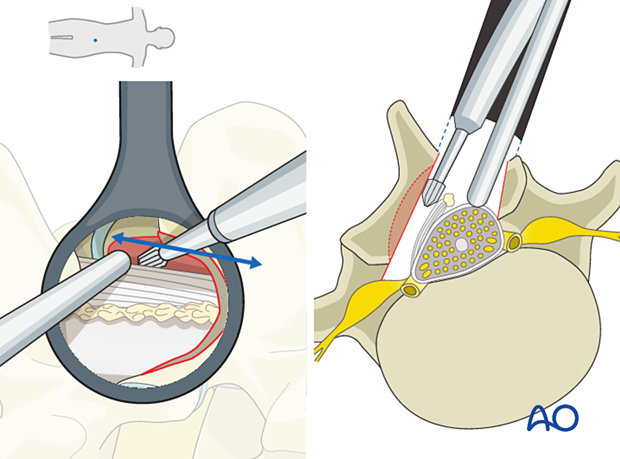
Additional decompression (if required)
If necessary, additional decompression can be performed with the table tilted to treat more central stenosis. More information can be found here:
6. Tube removal
Hemostasis is achieved with hemostatic agents or bipolar cautery.
Packing the tube with gauze for five minutes will usually allow coagulation to take place.
Topical steroids are not recommended so as not to interfere with the fusion process.
The tube is slowly removed. Any muscular bleeding should be identified and cauterized.
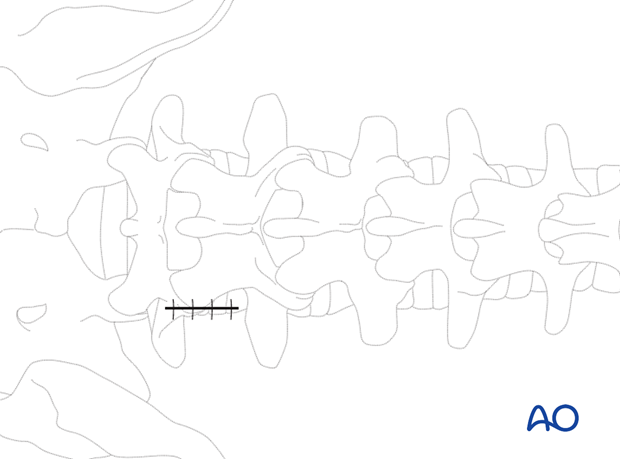
The fascia is typically closed using interrupted sutures. Infiltration of the muscle with local anesthetics is optional.
Standard multilayer closure of subcutaneous layers and skin is performed.
7. Aftercare
The patient can usually be discharged on the following day with a short course of pain medication.
Lumbar immobilization is typically not required for one-level procedures. For high-risk patients or multilevel fusion, lumbar immobilization is at the surgeon’s discretion.
Patients may feel incisional or muscular pain that usually subsides within a few days.


