Temporary external fixator
1. Note on illustrations
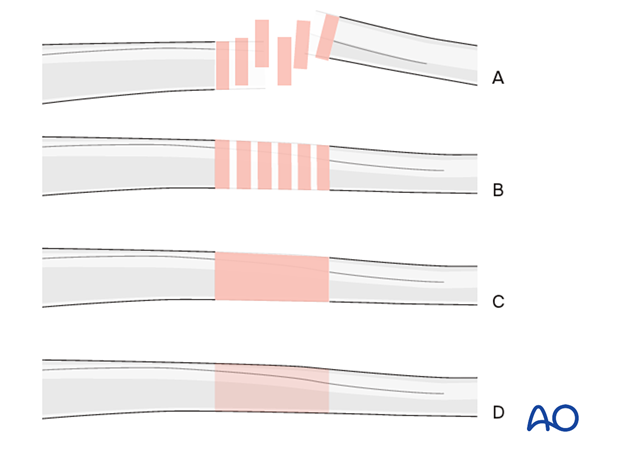
Throughout this treatment option, illustrations of generic fracture patterns are shown, as four different types:
A) Unreduced fracture
B) Reduced fracture
C) Fracture reduced and fixed provisionally
D) Fracture fixed definitively
2. Principles of joint-spanning external fixation
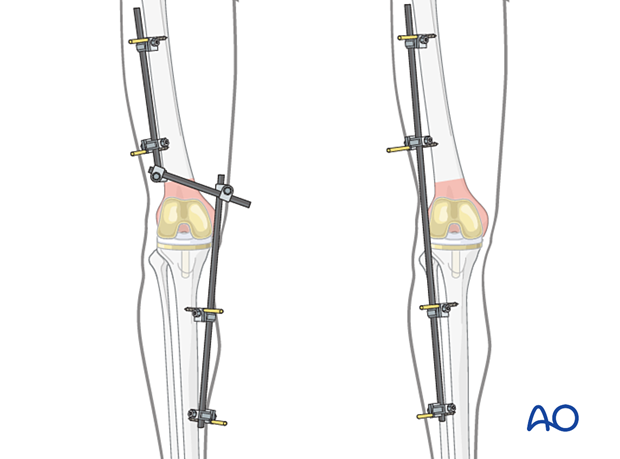
A joint-spanning external fixator is fixed to the femur and the tibia while the fracture zone is left virtually untouched (it is bridged). Provisional reduction is achieved with distraction.
Details of external fixation are described in detail in the basic technique for application of a modular external fixator.
Specific considerations for the tibia and the femur are given below.
3. Patient preparation
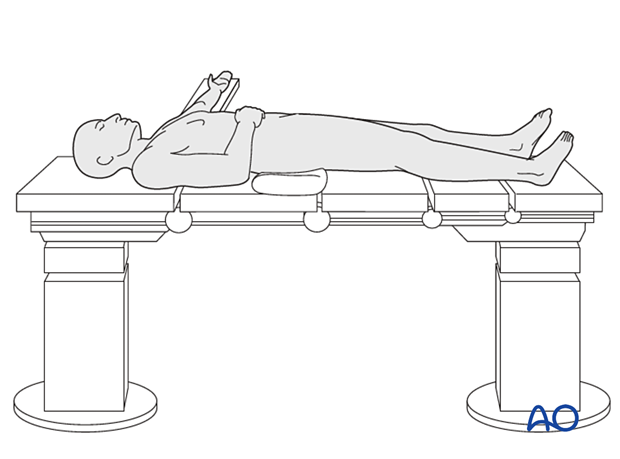
This procedure is normally performed with the patient in a supine position.
4. Safe zones for pin placement
Pin placement
For safe pin placement, make use of the safe zones and be familiar with the anatomy of the lower leg and the femur.
The safe zone for the femur is the anterolateral quadrant. In temporary external fixation, the pins should be placed so that they do not interfere with planned later definitive fixation.
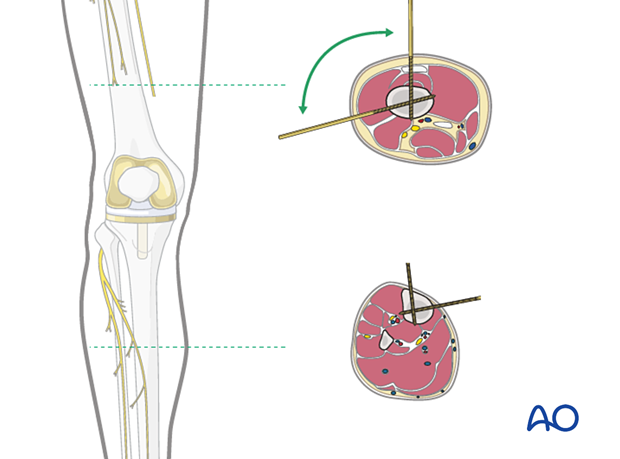
Soft-tissue dissection
In the femur, blunt dissection of the soft tissues will minimize muscular damage.
Using a straight clamp, prepare a channel for the insertion of the pin.

5. Tibial pin placement
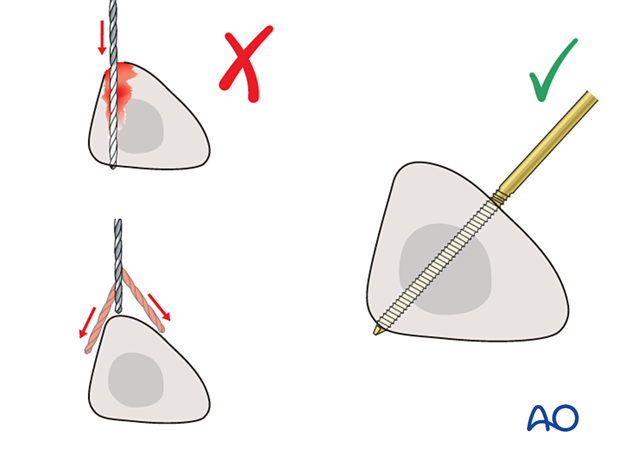
Drilling a hole in the thick tibial crest may be associated with excessive heat generation and there is a risk the drill bit may slip medially or laterally damaging the soft tissues. As the anteromedial tibial wall provides adequate thickness for the placement of pins, this trajectory is preferable. A trajectory angle (relative to the sagittal plane) of 20-60° for the proximal fragment and of 30-90° for the distal fragment is recommended.
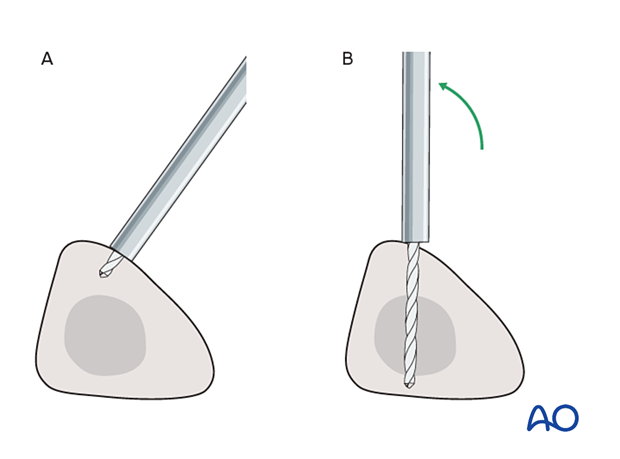
The pins may be placed more anteriorly to avoid the frame catching on the opposite leg. The drill bit is started with the tip just medial to the anterior crest and with the drill bit perpendicular to the anteromedial surface (A). As the drill bit starts to penetrate the surface, the drill is gradually moved more anteriorly until the drill bit is in the desired plane (B). This should prevent the tip from sliding down the medial or lateral surface.
6. Reduction and fixation
Restore length with a bolster behind the knee to give slight flexion.
It should be understood that a perfect reduction will not be obtained.
There are two typical strategies:
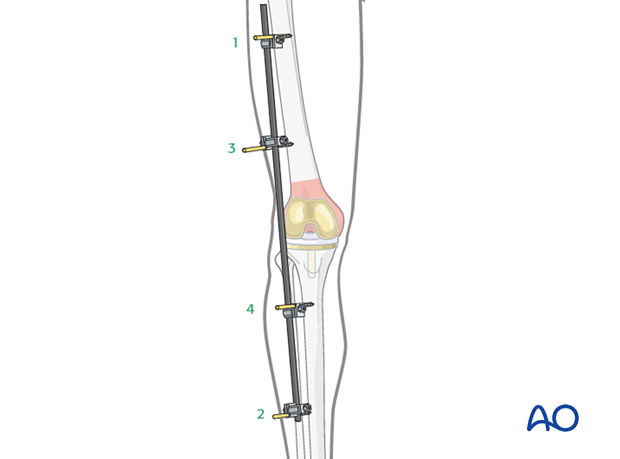
Achieve reduction using the external fixators bars as handles. This technique allows for direct manipulation of each segment. Once correct length rotation and coronal alignment have been achieved, the bars are secured with a connecting bar.
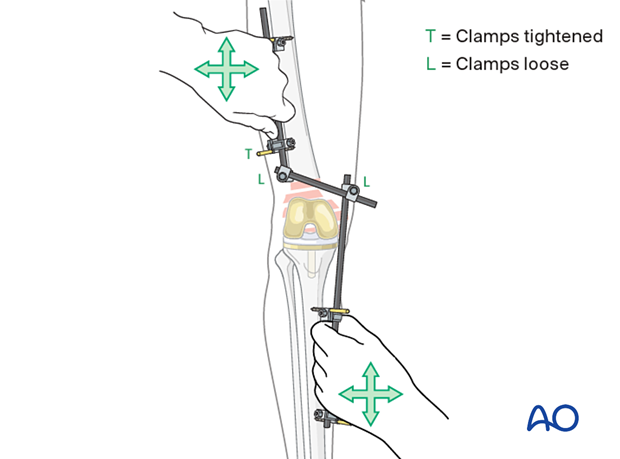
A single pin is placed in the proximal femur and the distal tibia, traction is applied to the ankle and a long single bar holds the leg at appropriate length and rotation.
An additional pin is placed in the distal femur and finally the proximal tibia, after coronal alignment.
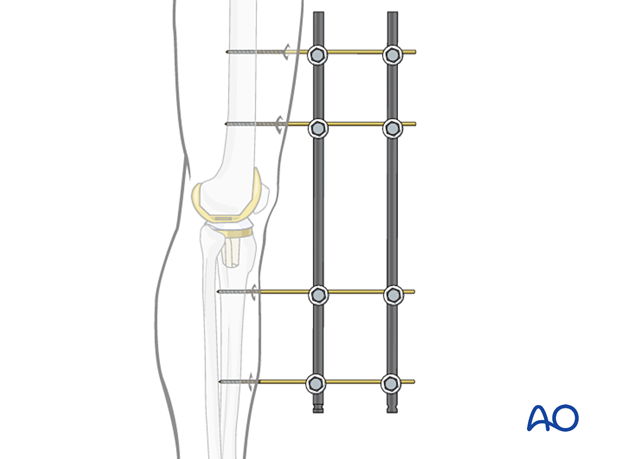
Further stability can be achieved with a supplementary bar.
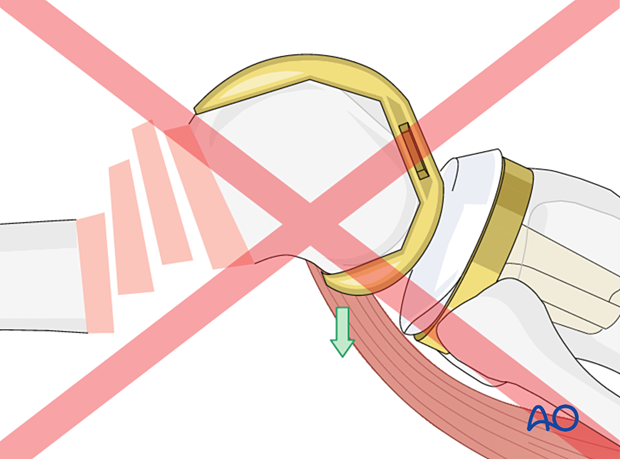
Pitfall: Hyperextension of the condylar block
Care must be taken that the fracture is not too distracted, since the pull of the gastrocnemius muscle would hyperextend the condylar block.
Insufficient distraction leads to insufficient reduction.
7. Aftercare following external fixation
Thromboembolic prophylaxis
Thrombo-prophylaxis should be given according to local treatment guidelines.
Pin-site care
Proper pin insertionThe pin-insertion technique is important to prevent postoperative complications. Pin care protocol includes:
- Correct placement of pins (see safe zones) avoiding ligaments and tendons, e.g., tibia anterior
- Correct insertion of pins (e.g., trajectory, depth) avoiding heat necrosis
- Extending skin incisions to release soft-tissue tension around the pin insertion (see inspection and treatment of skin incisions)
Local aftercare protocols to prevent pin tract infection are generally in place. The following points are recommended:
- The pin-insertion sites should be kept clean. Any crusts or exudates should be removed. The pins should be cleaned using regular water and soap (by taking a normal shower). The cleaning frequency depends on the circumstances and varies from daily to weekly but should be done in moderation.
- No ointments or antibiotic solutions are recommended for routine pin-site care.
- Dressings are not usually necessary once wound drainage has ceased.
In the case of pin loosening or pin tract infection, the following steps need to be taken:
- Remove all involved pins and place new pins in a healthy location.
- Debride the pin sites in the operating theater, using curettage and irrigation.
- Take specimens for a microbiological study to guide appropriate antibiotic treatment if necessary.
Before changing to a definitive internal fixation, an infected pin tract needs to heal. Otherwise, infection will result.
Follow up
See patient 7-10 days after surgery for a wound check. X-rays are taken to check the reduction.
Implant removal
The external fixator is usually removed before the definitive internal fixation. Occasionally, it may be maintained to aid in reducing the fracture during plate fixation, but in these cases, there must be no sign of any infection before going to the operating room.
