Anterior intrapelvic approach to the acetabulum
1. Introduction
This approach was first described for hernia repair by Rene Stoppa in 1975. It was revised for pelvic and acetabular surgery by Hirvensalo et al in 1993. A similar approach “Modified Stoppa” was described in 1994 by Cole et al.
It can be used to access the entire anterior column when supplemented with a lateral window and allows excellent visualization of the quadrilateral surface. This can be directly instrumented unlike in the ilioinguinal approach.
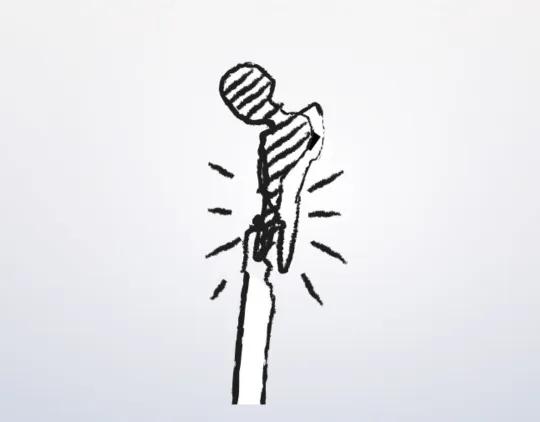
This approach can be used for ORIF of periprosthetic acetabular fractures.
During the anterior intrapelvic approach the surgeon must at all times protect the obturator neurovascular bundle and the lumbosacral nerve trunk.
Scar tissue due to previous exposure might obscure typical landmarks.
Exposure
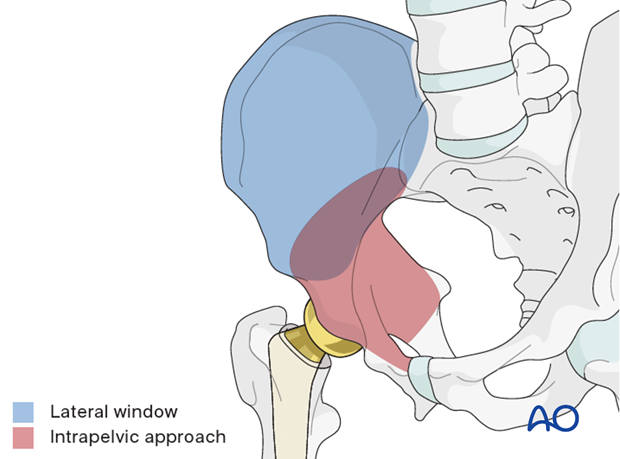
This approach to the anterior intrapelvic region (brown) allows visualization of:
- The pubic symphysis
- The entire quadrilateral surface
- The entire anterior column when combined with a lateral window (blue)
Setup
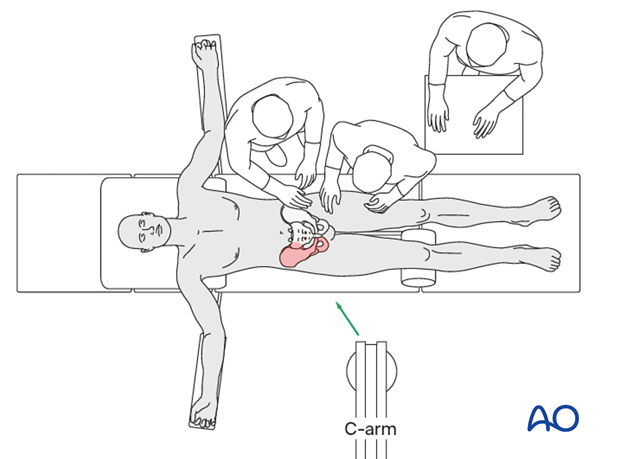
The injured leg should be included in the surgical field and a bolster or triangle, sterile wrapped, should be placed beneath the knee of the injured leg to relax the psoas and vessels.
The surgeon may choose to wear a head lamp to improve lighting of the surgical field.
2. Skin incision
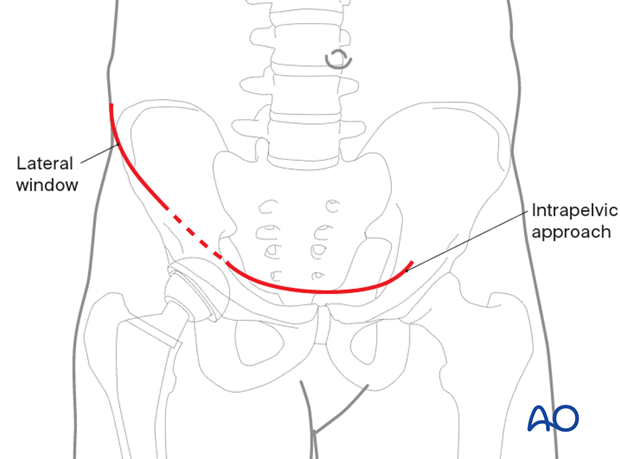
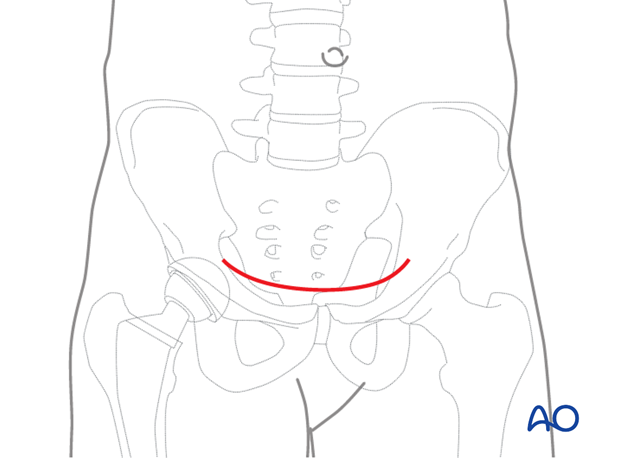
A Pfannenstiel incision is usually used placed just above the pubic symphysis, as this allows the incision to be joined to a lateral window incision, similar to that used in the classical ilioinguinal approach.
3. Superficial dissection
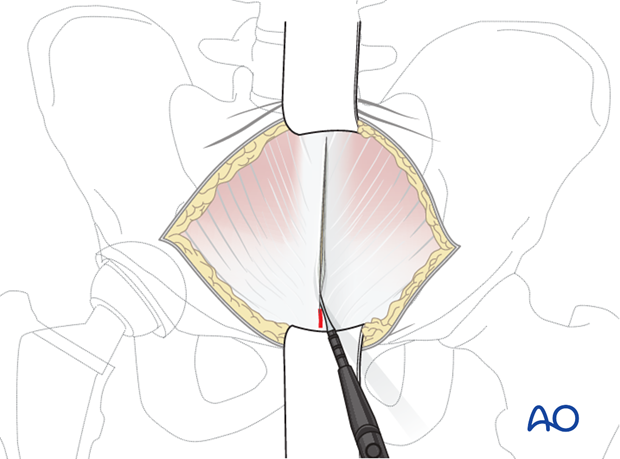
Divide the subcutaneous tissues in line with the skin incision in order to expose the fascia overlying both rectus muscles of the abdomen.
The rectus fascia is incised in longitudinal fashion along the linea alba.
4. Deep dissection
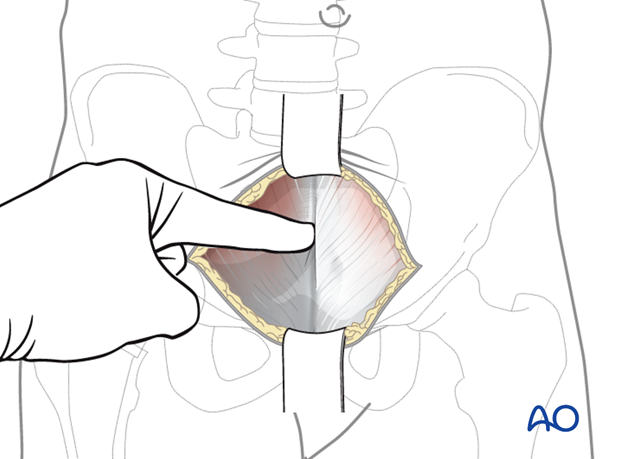
Both bellies of the rectus abdominis muscle are gently retracted laterally.
In the proximal part of the incision, care should be taken not to incise the peritoneum. The entire approach should stay in the pre-peritoneal space.
Careful blunt dissection of the bladder from the posterior aspect of the pelvis is key.
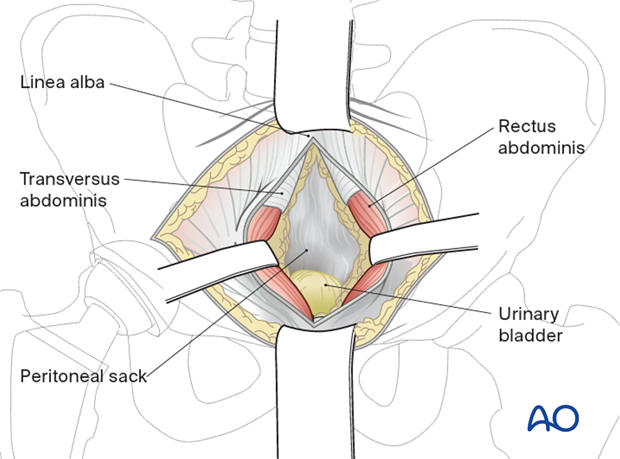
The medial part of the rectus muscle is partly detached from the upper and anterior part of the symphysis on the side of the fracture to allow the rectus to retract.
The upper border of the superior pubic ramus is identified (pecten pubis) and the blunt dissection using a finger or swab is carried laterally along the pelvic brim without yet incising the fascia.
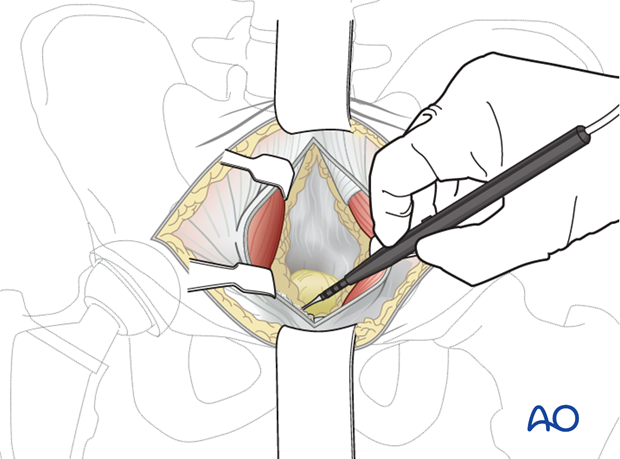
Exposing carefully along the medial surface of the superior ramus, the corona mortis vessels are identified and ligated (or clipped) as necessary. These are present in most cases and are usually venous. They can be substantial in some cases. The vessels sit above the fascia and are most easily identified if the fascia is not incised prior to ligation.
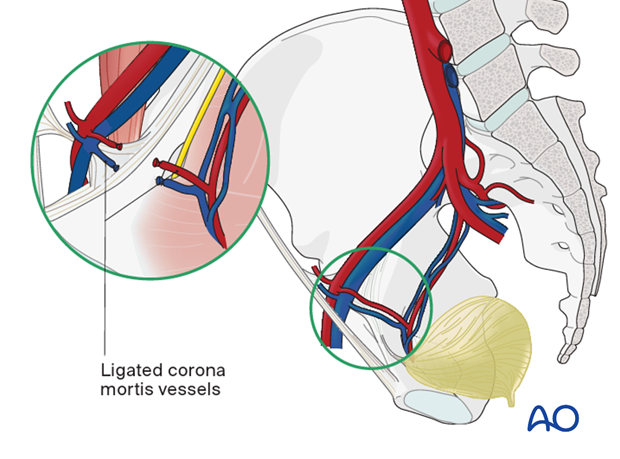
The thick periosteum from the superior pubic bone is dissected sharply using diathermy, allowing for deeper blunt dissection.
Dissection of the periosteum is continued further laterally following the upper border of the superior pubic bone to the direction of the pelvic brim exposing the beginning of the iliopectineal eminence.
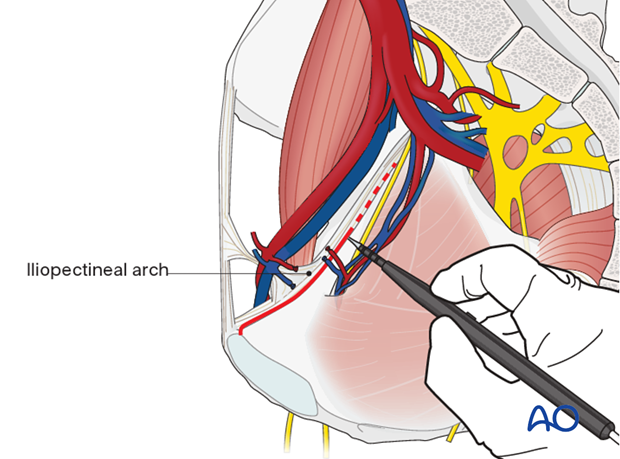
At this point the beginning of the iliopectineal arch should be dissected from the bone. This enables the elevation of the femoral vessels and nerve.
The dissection is continued subperiosteally more laterally following the upper border of the pelvic brim.
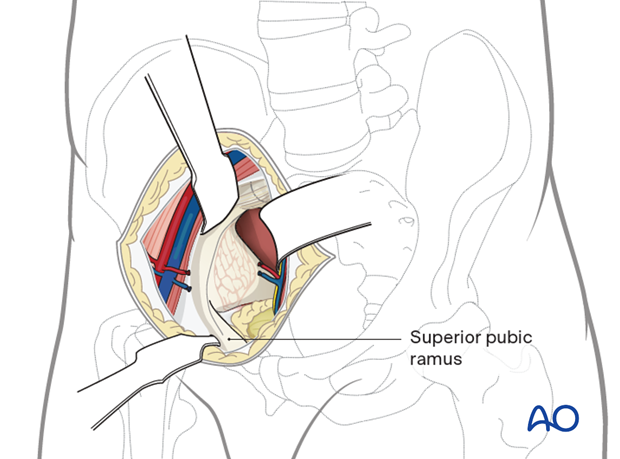
At this point the entire internal surface of the superior pubic ramus has been exposed.
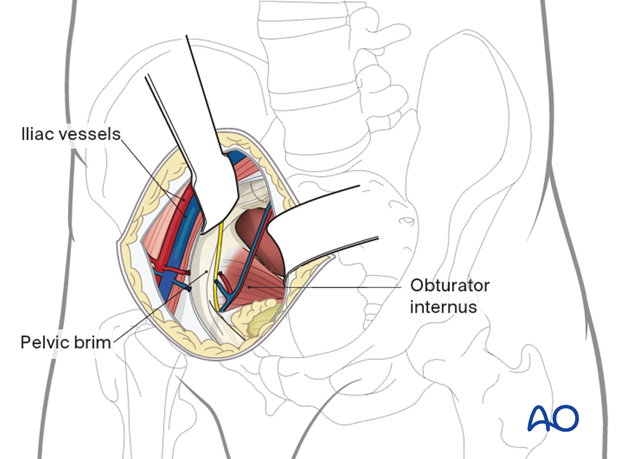
At this level, the obturator neurovascular bundle is crossing the quadrilateral surface. In most cases it should be mobilized. A spatula or malleable retractor is used to protect the obturator neurovascular bundle and pelvic floor.
With a Cobb elevator, the periosteum and obturator internus are elevated and the quadrilateral surface can be sufficiently exposed.
One Hohmann retractor should be put in the middle part of the superior pubic ramus and another curved Hohmann retractor is placed on the posterior top of the acetabulum on the iliac part of the pelvic brim.
Great care should be taken not to injure the external iliac vein which may be in close proximity to the elevators.
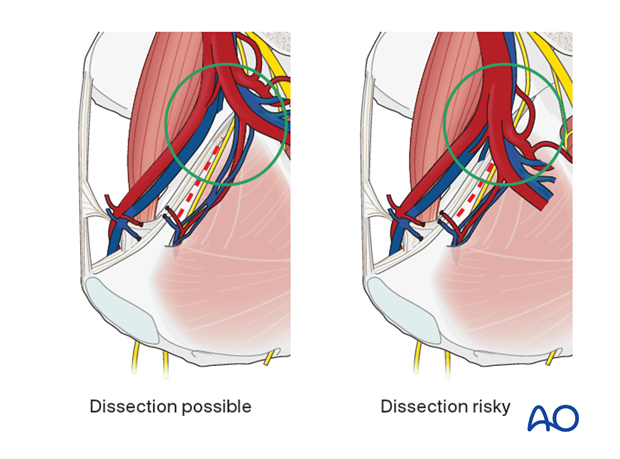
In some rare cases, the internal iliac artery bifurcates very distally and makes the dissection of the posterior part of the quadrilateral surface risky and limits the further dissection.
5. Retractors
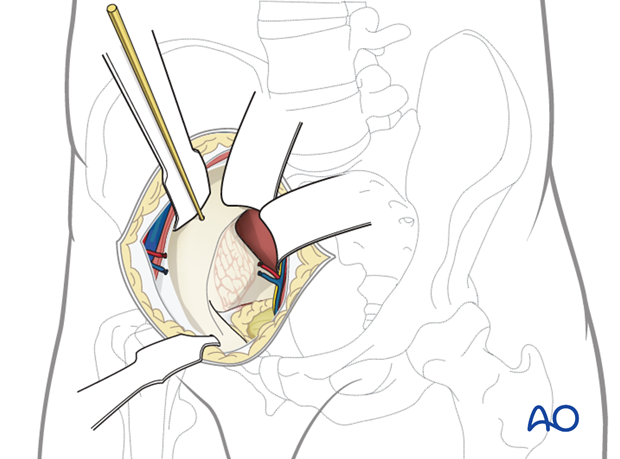
Exposure is developed steadily at the margins of the approach. The vessels and psoas can be retracted laterally. A K-wire is placed into the iliac wing behind which the retractor is placed, to prevent slippage down the wing.
A malleable retractor is placed in the interval between the quadrilateral surface and the obturator bundle. This can be challenging to place due to the variable tethering of the vessels proximally and distally. Care should be taken to avoid avulsion.
An additional retractor can be carefully placed in front of the sacrum. This can be either a malleable retractor or a blunt ended retractor hooked carefully into the sciatic notch that would retract the bladder and the deep pelvic contents to allow for visualization of the posterior column in the true pelvis.
6. Addition of a lateral window
If further exposure is required, make a curved incision beginning posterior to the gluteus medius pillar and extend towards the midline incision already made. This is performed from the side of the fracture.
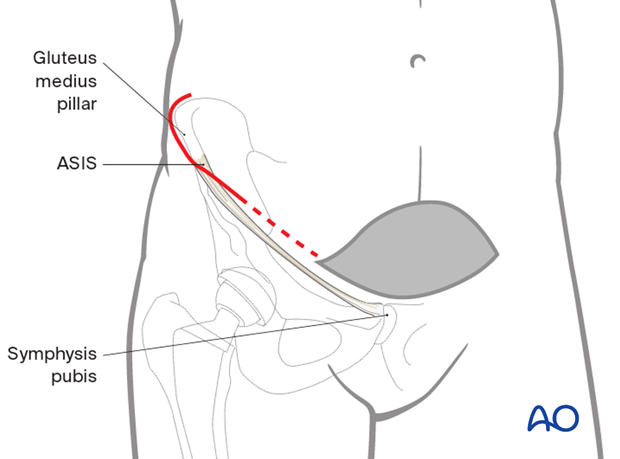
Exposure
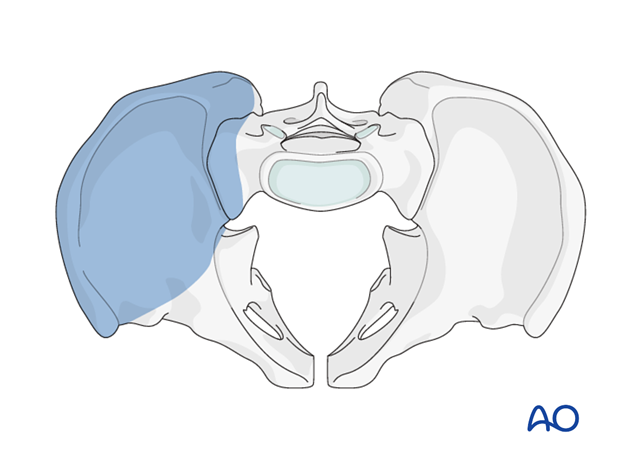
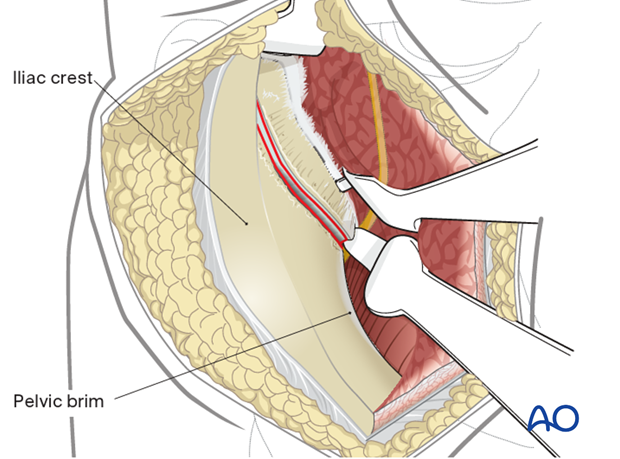
This anterior approach provides access to the iliac crest, the entire internal iliac fossa, and the most lateral sacral ala. This is limited by the L5 nerve root on the anterior aspect of the ala.
The exposure incorporates full visualization of the anterior aspect of the SI joint, if needed.
The approach completes exposure of the whole hemipelvis and overlaps centrally with the view from the Stoppa window.
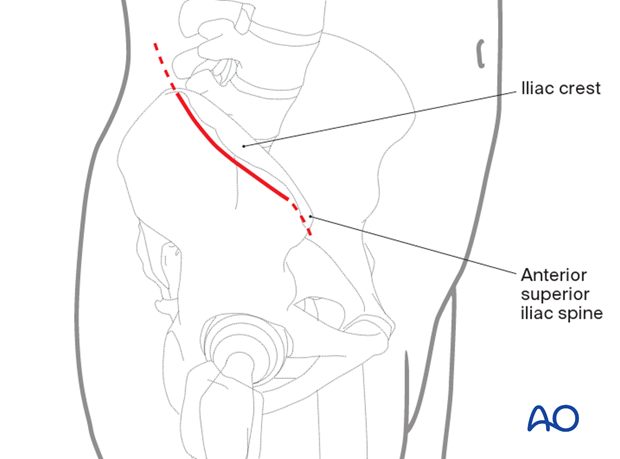
7. Skin incision
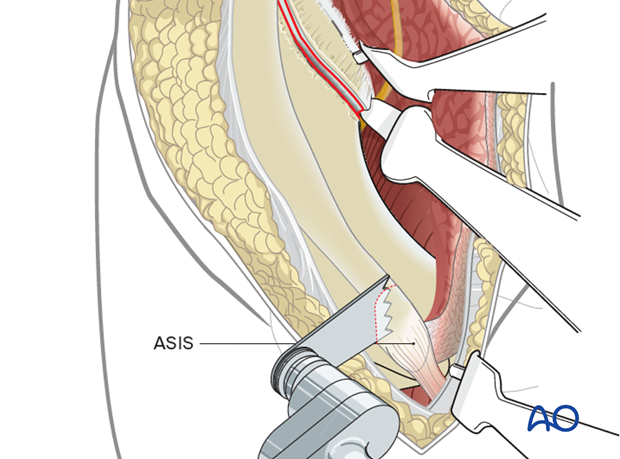
An incision is made along the iliac crest. Be aware of the lateral femoral cutaneous nerve in the region of the ASIS. The length of the incision is determined by the amount of area that needs to be accessed in the iliac fossa.
The incision can be extended intraoperatively depending on the necessary exposure.
For fractures involving the posterior aspect of the ilium, or the SI joint, the exposure needs to be extended posteriorly almost to the table.
8. Superficial surgical dissection
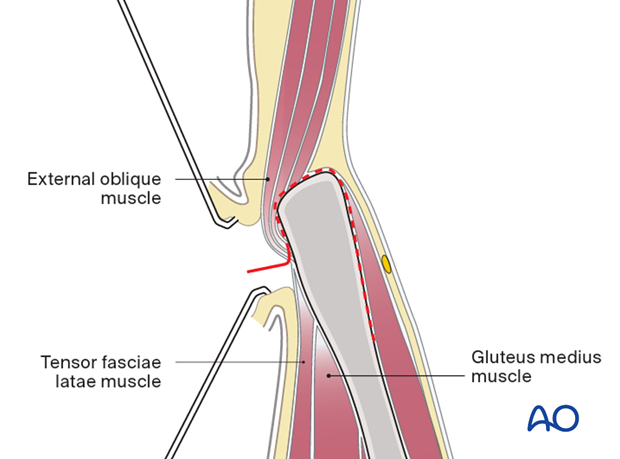
Divide the subcutaneous tissues in line with the skin incision in order to expose the fascia overlying the external oblique muscle.
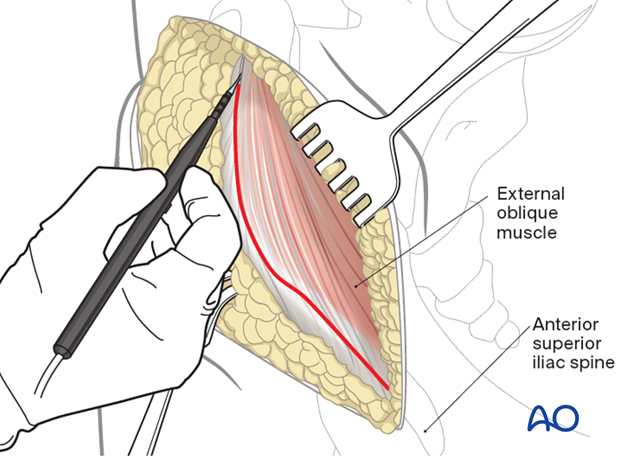
Identify the border between the gluteus muscles and external oblique muscles. Incise the muscular interval with electrocautery.
The external oblique muscle is subperiosteally elevated from the iliac crest.
With a small elevator, the iliac muscles are elevated using the same subperiosteal layer.
9. Deep dissection
When elevating the iliacus muscle, bleeding from nutrient vessels can occur and should be stopped with bone wax.
Continue with careful blunt dissection to the interior part of the SI joint medially to the pelvic ring.
Proceed anteromedially at the pelvic rim as far as to where the iliopectineal eminence begins.
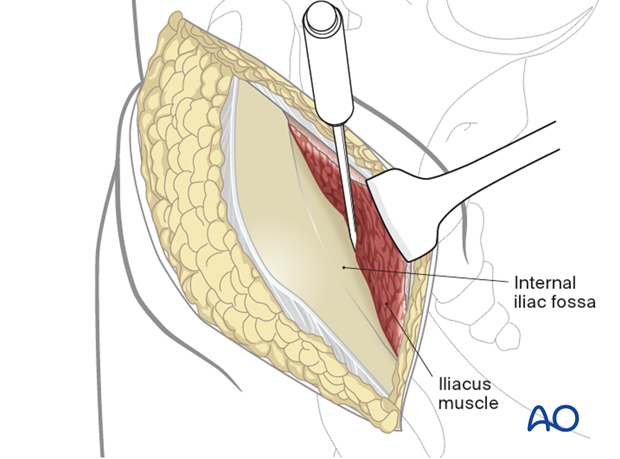
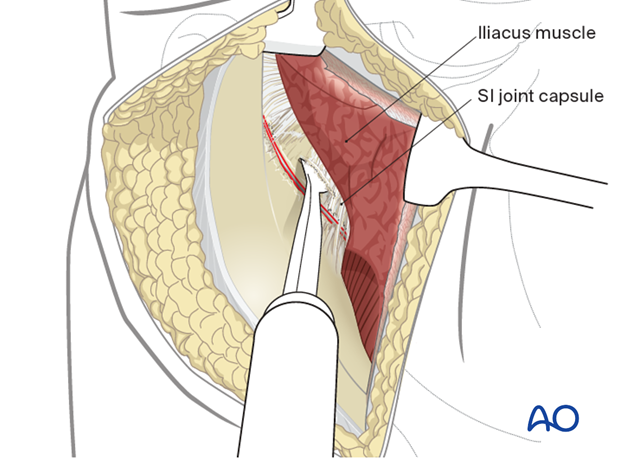
Continue the dissection with an instrument such as a Cobb elevator.
The SI joint capsule should be identified. Place a Hohmann retractor into the superior portion of the SI joint.
10. Expose the SI joint (if needed)
The dissection is carried further medially as far as the sacral ala, which visualizes the upper part of the anterior column. Move the Hohmann retractor medially carefully onto the sacral ala.
Note the L5 nerve root traversing this region.
Place a second Hohmann retractor more anteriorly on the sacral ala if required.
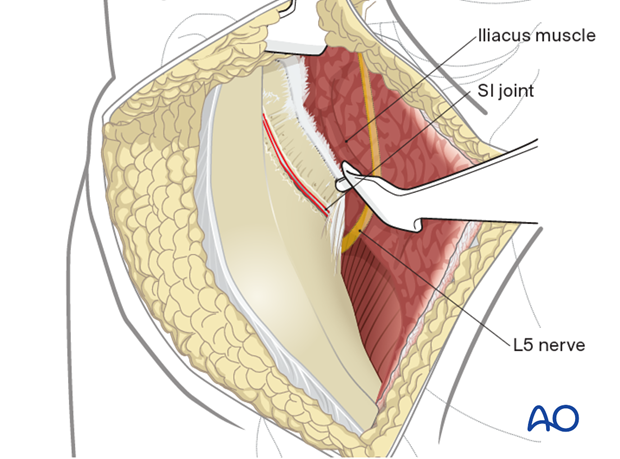
Place an additional Hohmann anterior to the SI joint for additional exposure. Take care when placing this anterior retractor as it may injure the superior gluteal artery and nerve as they exit the greater sciatic notch.
The anterior column as far as the SI joint is now exposed.
11. Wound Closure
The intrapelvic space may be drained although this is rarely required.
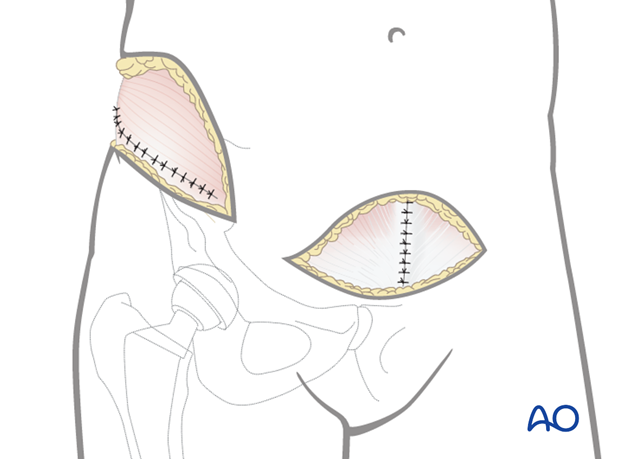
The midline incision in the rectus abdominis and superficial tissues are closed in layers taking care to protect the underlying bladder and peritoneum.
The lateral window is also closed in layers reconstructing the fascial layer preserved in the approach.
These may be performed simultaneously.
Considerations for periprosthetic fracture patients
A layered closure is preferred for periprosthetic fractures. A subfascial drain should be considered as blood loss can be significant and periprosthetic fracture patients are at high risk of requiring anticoagulation immediately postoperatively. A hematoma requiring evacuation must be avoided. The wound is closed in layered fashion according to the surgeon's preference.
12. Possible extensions
An osteotomy of the ASIS can be performed to improve the exposure and visualization.
