External fixation
1. General considerations
An external fixator may be used for the definitive management of tibial fractures in younger children due to the short healing time.
If an external fixator is used for initial, temporary stabilization, the pins should be placed so they do not interfere with later definitive fixation.
The versatility of a modular external fixator is an advantage in the management of children’s fractures and can accommodate age-specific variations in fracture biology and anatomy.
Provisional reduction is initially achieved with distraction.
Practical considerations are illustrated in detail in the basic technique for application of modular external fixator in children.
Specific considerations for the tibial shaft are given below.
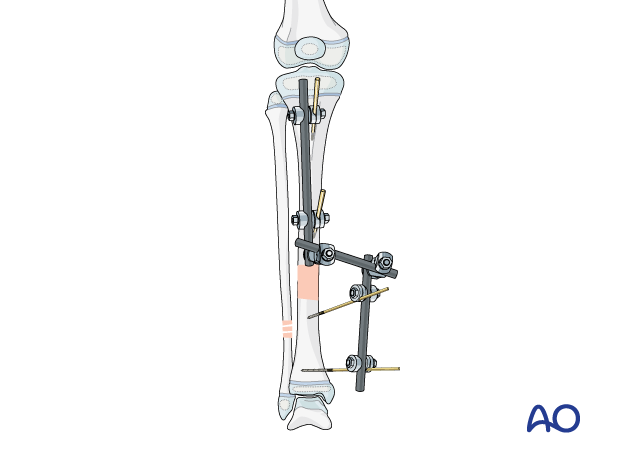
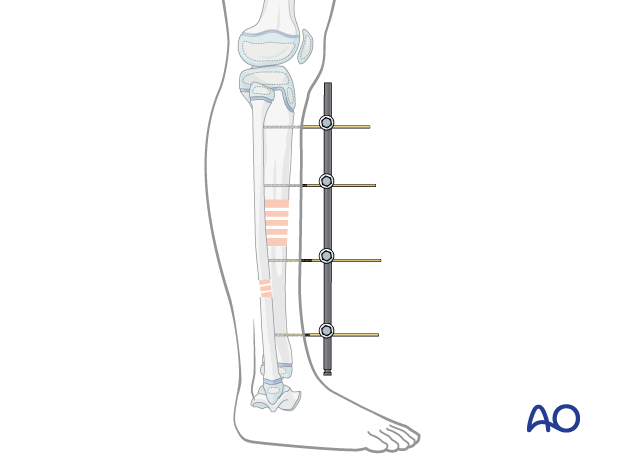
External fixation may be performed with a uniplanar construct if a modular system is not available.
A uniplanar fixator requires accurate fracture reduction during application, as a later realignment is not possible.
The construct consists of at least two pins in each main fracture fragment connected with one single rod.
The skin condition may prevent optimal pin placement.
A second rod may be added to increase the stiffness of the construct.
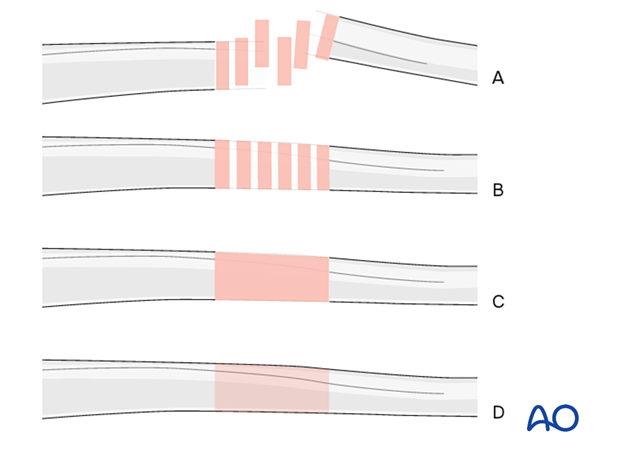
Throughout this section, generic fracture patterns are illustrated as:
- Unreduced
- Reduced
- Reduced and provisionally stabilized
- Definitively stabilized
Pin size in tibial fractures
External fixation is suitable for all ages, but the pin diameter must be appropriate to the size of the bone.
Pins with a thread diameter of 3.0–4.0 mm are suitable for the tibia and should typically be between ¼ and ⅓ of the external bone diameter.
2. Patient preparation
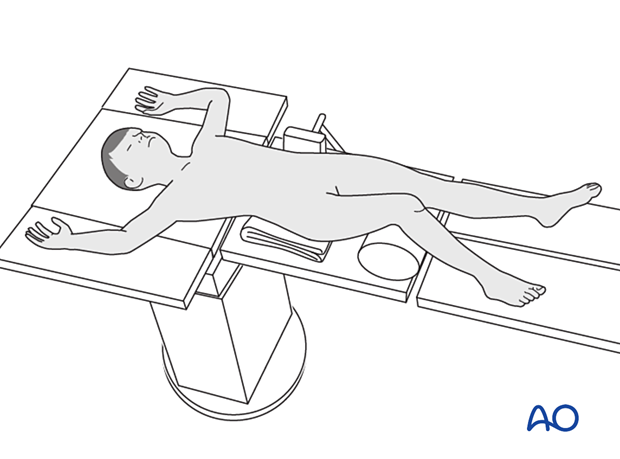
Place the patient in a supine position without traction on a radiolucent fracture table, with a bolster under the ipsilateral flank.
3. Pin insertion
Pins must avoid the physes and apophysis and follow safe zones to reduce the risk of damage to the neurovascular structures.
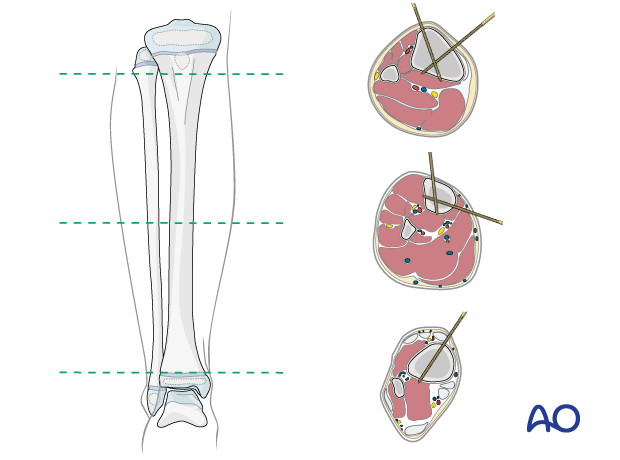
The anteromedial tibial surface is the recommended site for pin placement.
Drilling may be associated with excessive heat generation.
There is also a risk that the drill bit may slip medially or laterally, damaging the soft tissues.
A trajectory of 20°–60° relative to the sagittal plane for the proximal fragment and 30°–90° for the distal fragment is recommended.
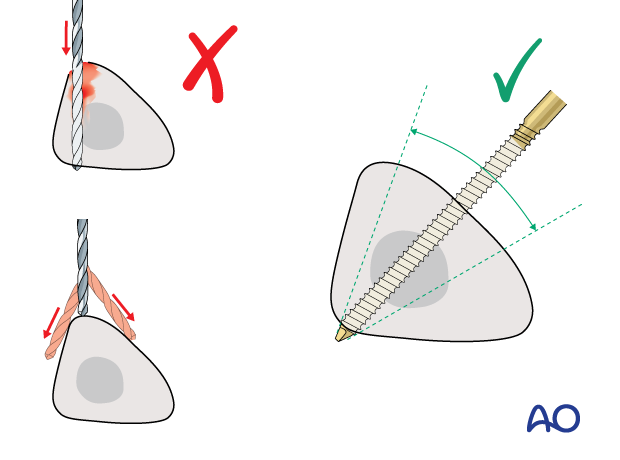
If plate osteosynthesis is planned as a later, definitive procedure, the pins may be placed more anteriorly.
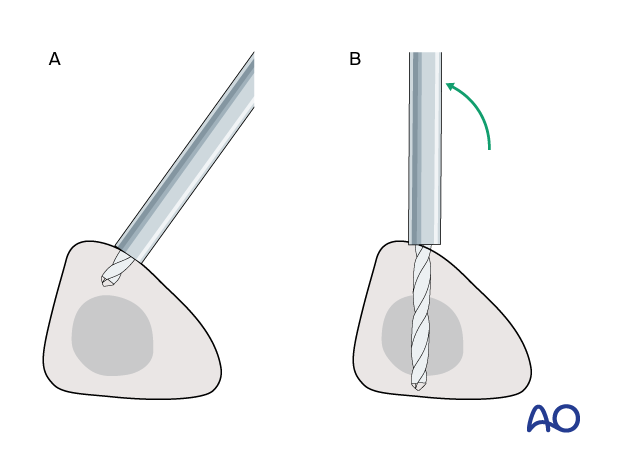
The drill bit is initially placed with the tip just medial to the anterior crest and with the drill bit perpendicular to the anteromedial surface (A).
As the drill bit starts to penetrate the surface, the drill is gradually moved until the drill bit is in the desired plane (B).
This should prevent the tip from sliding down the medial or lateral surface.
4. Fixator construction
Fixator assembly
Attach the appropriately sized rods to the proximal and distal pins and tighten the rod-to-pin clamps.
Loosely apply a connecting rod to the two partial frames.
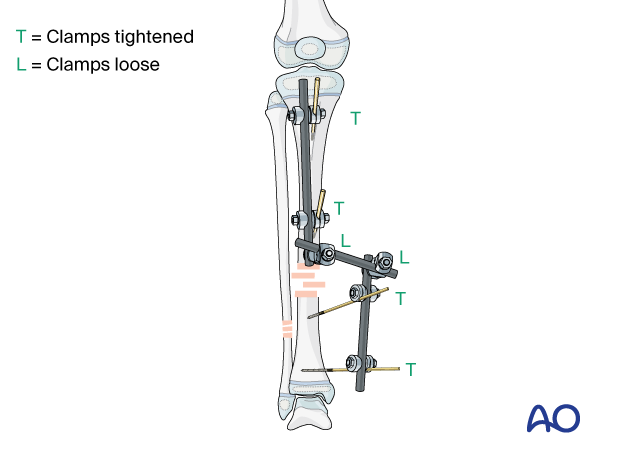
5. Reduction and fixation
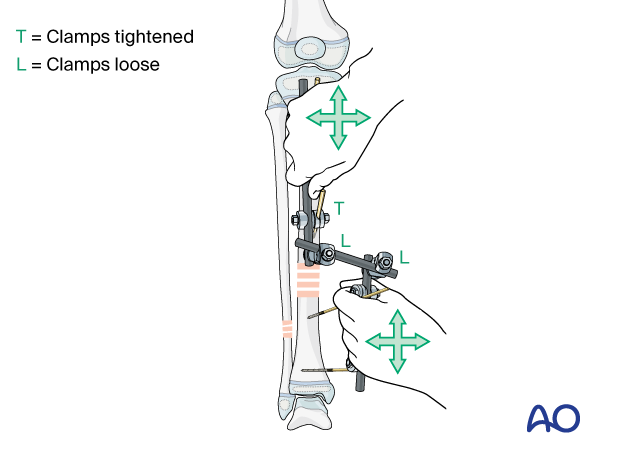
Reduction manipulating the partial frames
Using the two partial frames as handles, reduce the fracture to obtain angular and rotational alignment.
Tighten the rod-to-rod clamps.
Check pin position, bicortical placement, and fracture alignment under image intensification.
Correct angular and rotational alignment should be achieved but a residual translation can be accepted.
Anatomical reduction is not necessary, especially in multifragmentary fractures.
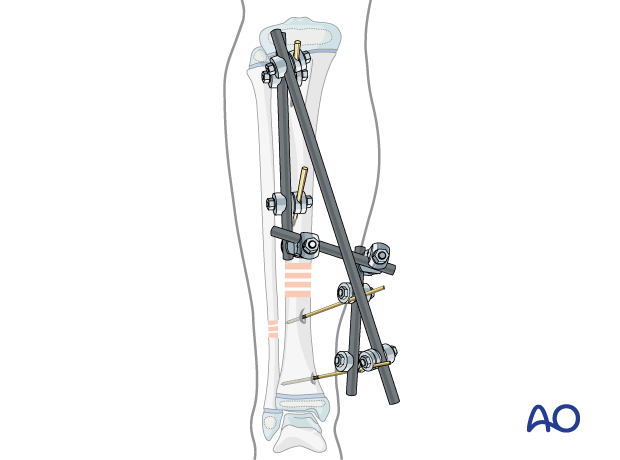
Additional rod
An additional rod may be applied to the construct to increase stiffness.
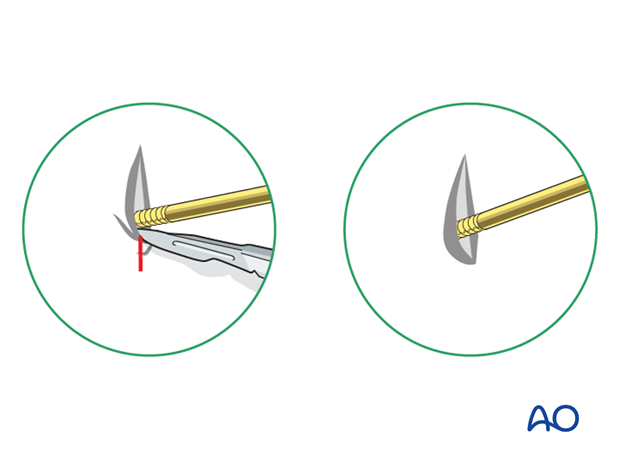
Pin sites
Check the skin at all pin sites and incise if tethered.
Dress the pin sites to prevent skin motion.
6. Aftercare
Pin-site care
Pin-care protocolThe following points are recommended:
- Pin-site care should continue until removal of the external fixator.
- The pin sites should be kept clean.
- Crusts or exudates should be removed.
- The pins may be cleaned with water, saline, a disinfectant solution, or alcohol. The frequency of cleaning varies from daily to weekly.
- Ointments or antibiotic solutions are not recommended for routine pin-site care.
- Pin sites do not need to be protected while showering or bathing with clean water but should be dried immediately.
Initial management is with oral anti-staphylococcal antibiotics.
In case of pin loosening or unresponsive pin site infection, the following steps should be taken:
- Remove all involved pins and place new pins in a healthy location.
- Debride the pin sites in the operating theater using curettage and irrigation.
- Take specimens for microbiological culture to guide appropriate antibiotic treatment.
Internal fixation following an infected external fixator pin has a higher risk of infection and should be avoided unless no reasonable alternative is available.
Pain control
Routine pain medication is prescribed for 3–5 days after injury if necessary.
Neurovascular examination
The patient should be examined frequently to exclude neurovascular compromise or evolving compartment syndrome.
Discharge care
Discharge follows local practice and is usually possible within 48 hours.
Mobilization in case of definitive external fixation
The patient should be encouraged to weight bear and move the hip, knee, and ankle within the limits of comfort.
Follow-up
The patient should be seen 5–7 days after surgery for a wound check.
Fixator removal
Fixator removal is determined by the age of the child and healing rate.
Look for mature callus bridging 3 or 4 cortices of the tibia before removing the fixator.
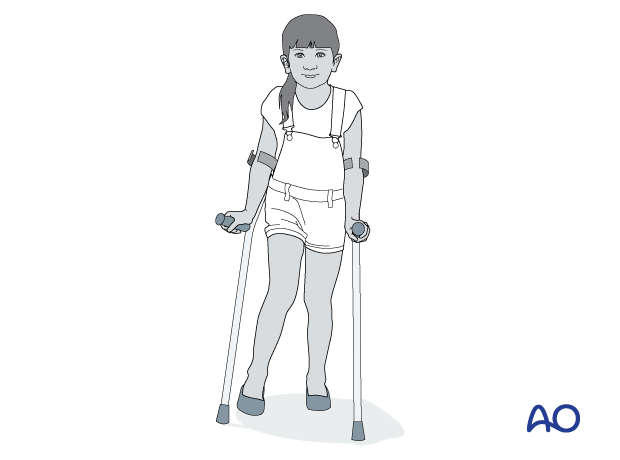
Refracture is a common complication, and partial weight-bearing with crutches is commonly recommended after fixator removal to allow further maturation of the callus.
