Elastic nailing
1. General considerations
This method describes fracture reduction and internal fixation with elastic nails (elastic stable intramedullary nailing; ESIN) in the skeletally immature patient.
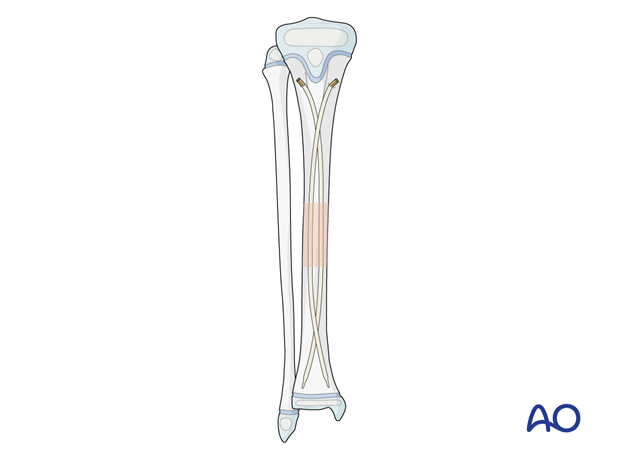
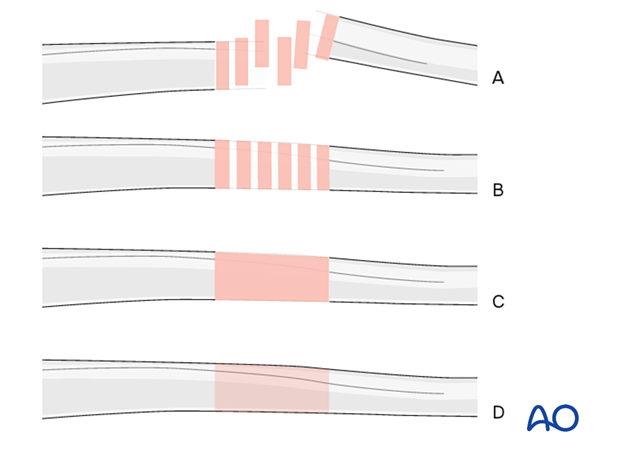
Throughout this section, generic fracture patterns are illustrated as:
- Unreduced
- Reduced
- Reduced and provisionally stabilized
- Definitively stabilized
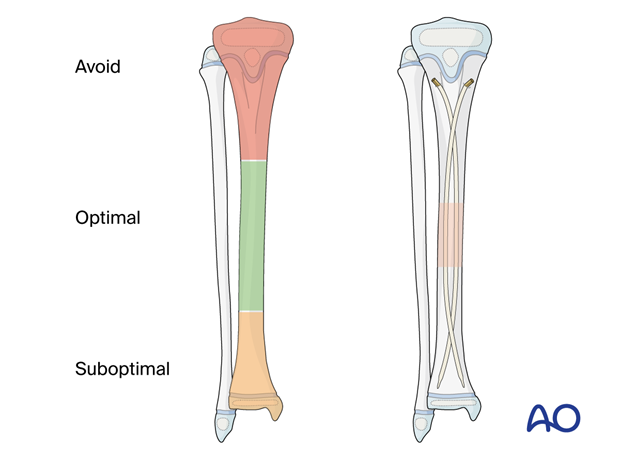
Principles of elastic nail insertion in the tibia
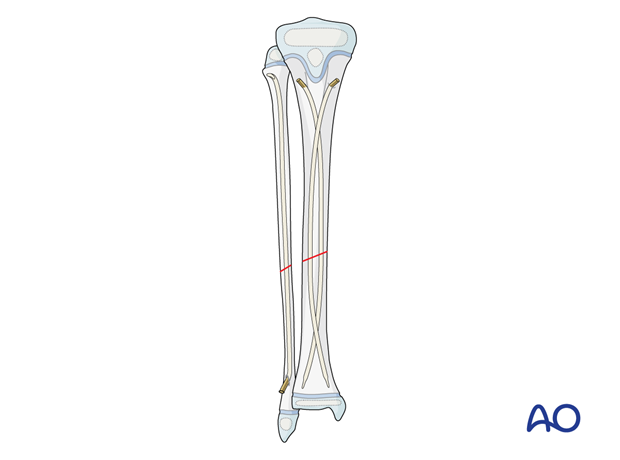
Stabilization of tibial fractures with elastic nailing is optimal in the middle third of the diaphysis with a three-point contact construct.
The two contoured nails can be positioned to have a long area of cortical contact across the fracture zone.
In the distal third of the shaft and the distal metaphysis, the ESIN technique is more challenging and may require additional cast immobilization.
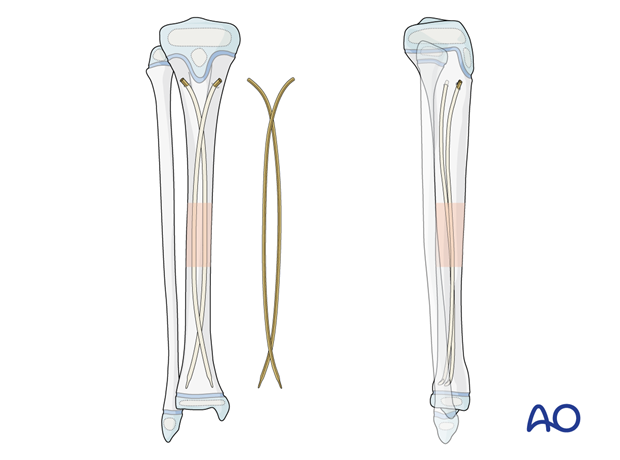
The following nail configuration should be achieved to produce optimum stability:
- The nails cross proximal and distal to the fracture zone.
- The nails do not cross at the level of the fracture.
- The nail tips are impacted in their respective condylar region.
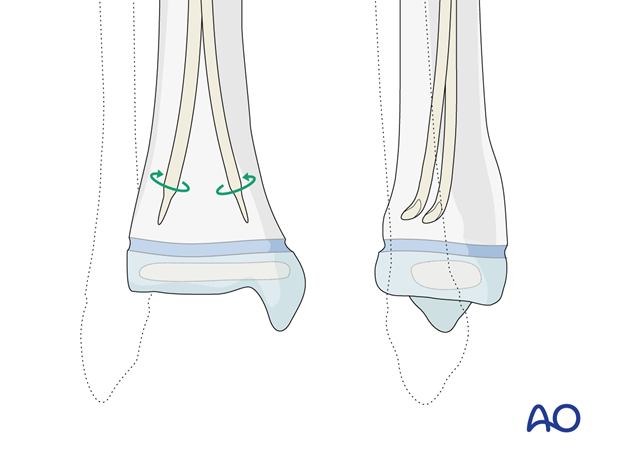
- The tips should be oriented dorsally to prevent sagittal deformity.
Associated fibular fracture
If sufficient stability can be achieved by fixation of the tibia, an associated fibular fracture does not require separate consideration.
In highly unstable fractures, eg, fractures at the same level, stabilization of the tibia with elastic nails may not be sufficient.
If there is persistent angular instability after fixation of the tibial fracture, internal fixation of the fibula with an intramedullary K-wire or elastic nail may be necessary.
In the distal third of the fibula, plating is an alternative.
2. Instruments and implants
Instrument set
- 2.0–4.0 mm elastic nails
- Awl or drill
- Inserter
- Hammer
- End caps and insertion device
- Impactor
- Extraction plier
- Nail cutter
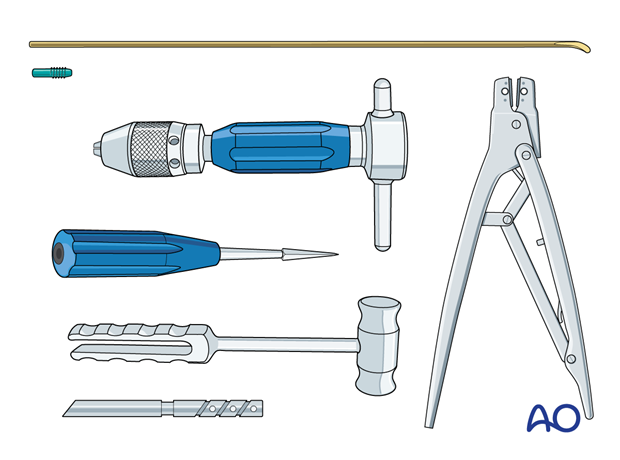
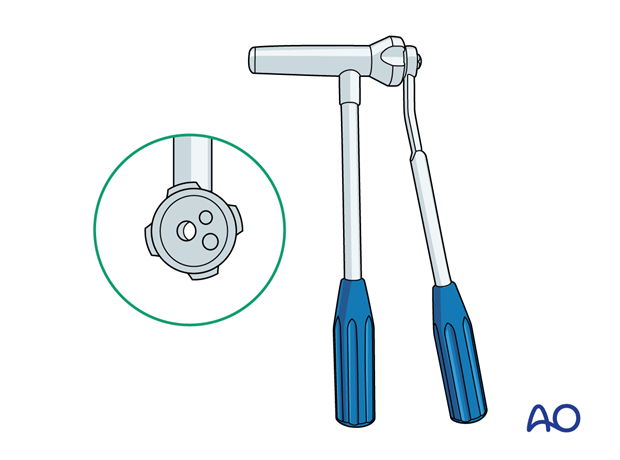
The end cutter is useful to avoid sharp ends and soft-tissue irritation.
Nail diameter
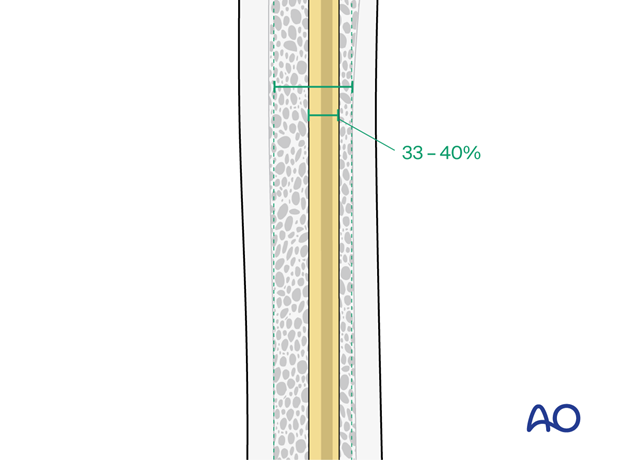
To estimate the optimal nail diameter, place the selected nail on the leg parallel to the bone and check with an image intensifier.
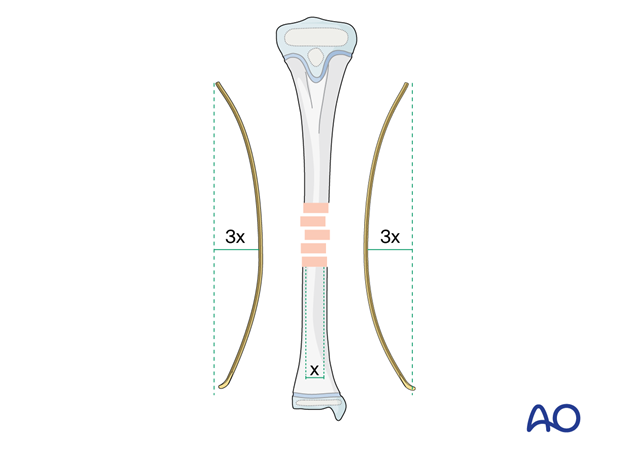
For optimal stability, the nail diameter should be approximately one-third of the narrowest part of the medullary canal.
Both nails should be the same diameter.
3. Patient preparation
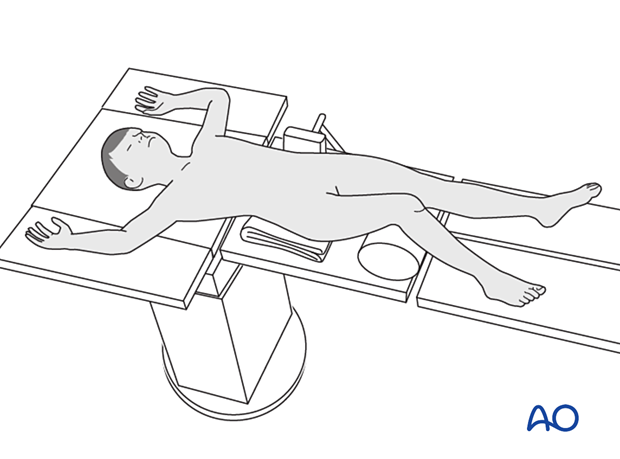
Place the patient in a supine position on a radiolucent table.
Put a bolster or roll underneath the knee.
4. Contouring
Precontour both nails with the apex at the level of the fracture site.
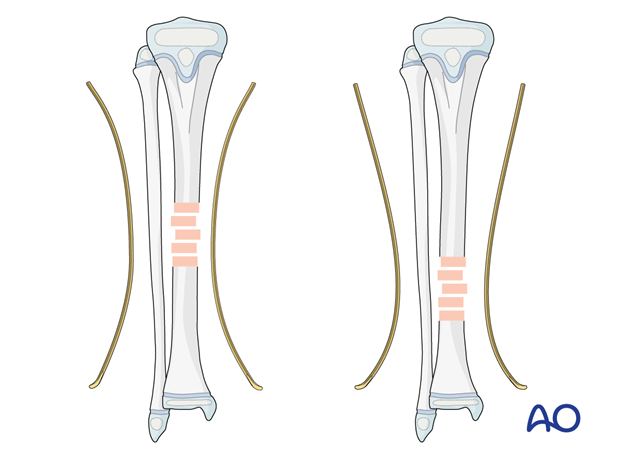
The curvature is dictated by the diameter of the bone as illustrated.
5. Approach
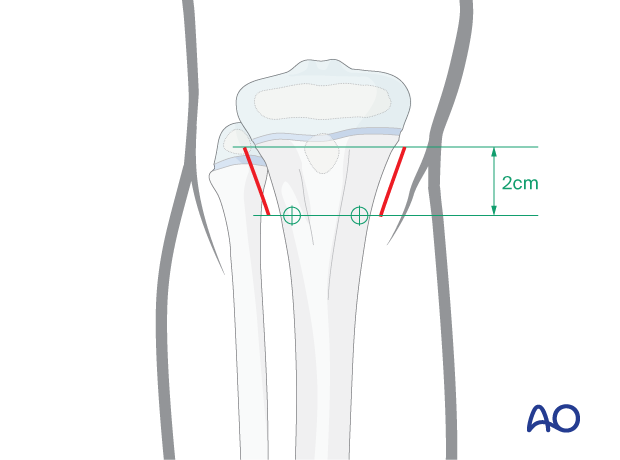
Make a skin incision on the medial and lateral side of the proximal tibia, starting at the entry points extending 2 cm proximally.
This allows sufficient space to advance the nails at an angle to the cortex.
The incisions must be extended sufficiently proximal from the entry points to avoid soft-tissue injury by nail insertion.
6. Opening the canal
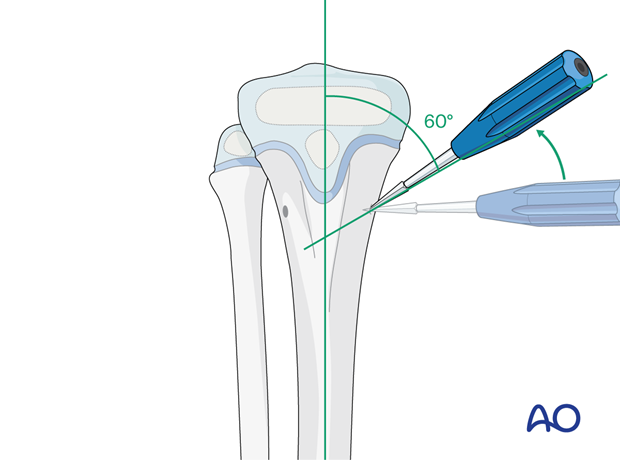
The entry points are 2 cm distal to physis, posterior to the midline in the sagittal plane, avoiding the cartilage of the apophysis and the proximal physis.
Avoid an entry point that is too dorsal as this risks injury to the peroneal nerve.
Place the drill or awl directly onto the bone and perforate the near cortex, under direct vision, perpendicular to the bone.
When the medullary canal is entered, angle the drill or awl handle 60° to the shaft axis.
This is less steep than in elastic nailing of other long bones, as the medullary canal of the proximal tibia has a wide trapezoidal-shaped medullary canal. This allows for early contact with the opposite cortex.
Avoid perforating the far cortex.
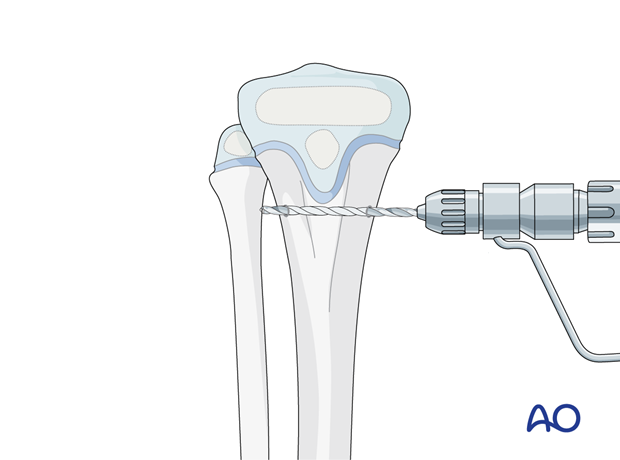
An alternative technique involves transverse drilling both cortices, parallel to the physis at the required level. This ensures that the entry points are at the same level. The entry points should be enlarged with an awl as described above.
7. Nail insertion
Insert the nail with the tip perpendicular to the shaft axis until the far cortex is felt. Rotate the nail up to 180° and advance it using the curved side of the tip.
If the tip is stuck in the far cortex and cannot be advanced, remove the nail and bend the tip to give a slightly more pronounced curvature.
A short working length (3–5 cm) between the entry point and the inserter improves control of the nail during insertion.
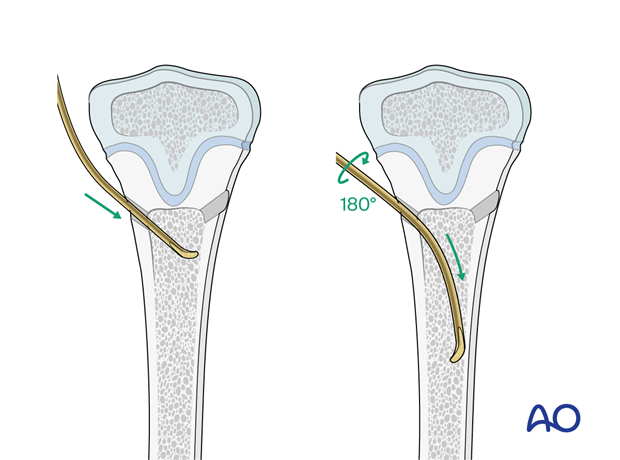
Advance the nail into the medullary canal proximal to the fracture site with gentle oscillating movements.
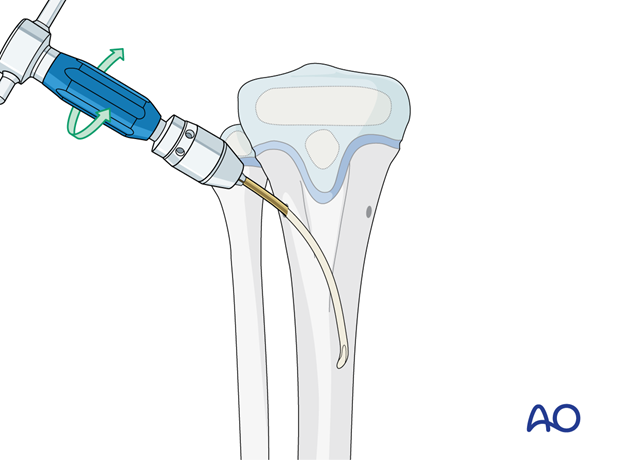
Insert the second nail into the other entry point in an identical manner.
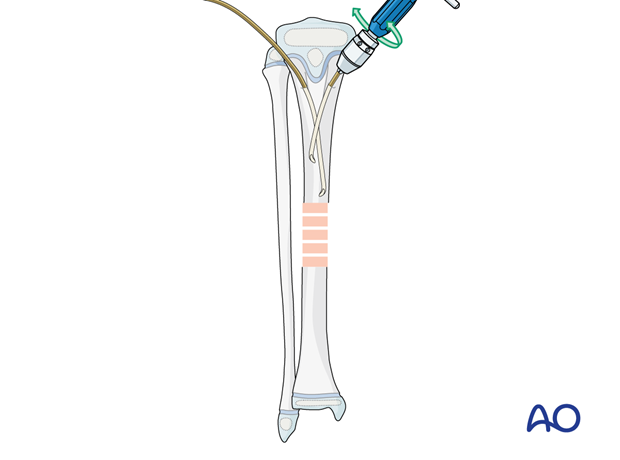
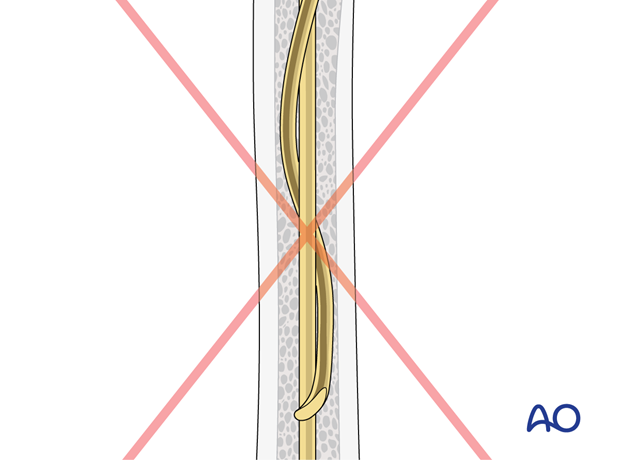
Ensure that the nails do not cross more than once to avoid twisting around each other in the medullary canal.
This “cork-screw effect” interferes with nail advancement and prevents an effective nail configuration, leading to instability.
To avoid this, do not rotate the nail more than 180° while inserting.
If this happens, reinsert the nails.
8. Reduction
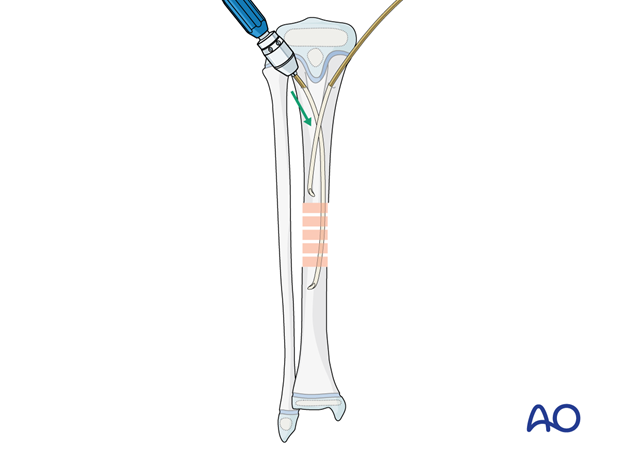
Achieve preliminary reduction with the nail that is in the best position to engage the distal fragment at the fracture site.
Advance the nail so that the tip enters the medullary canal of the distal fragment.
Rotate the tip to align and reduce the fracture.
Once satisfactory alignment has been achieved, advance the nail 1–2 cm across the fracture site into the distal part of the medullary cavity.
Confirm alignment with an image intensifier.
Adjust the rotation of the nail so that the tip points towards its entry point.
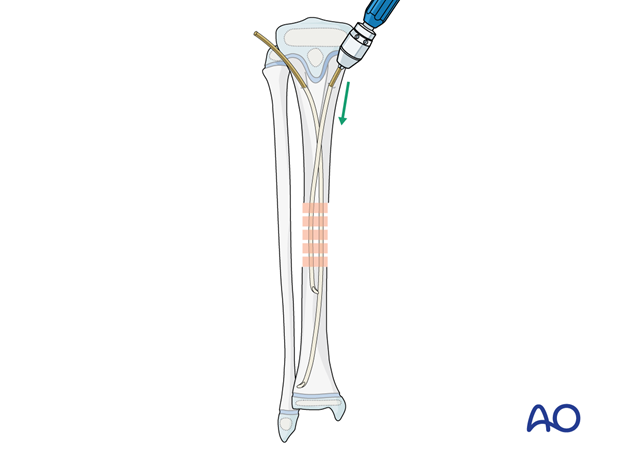
Advance the second nail, with an oscillating movement, past the fracture site into the distal fragment.
9. Advancing the nails into the distal metaphysis
Directing the nail tips
Advance the nails approximately 2 cm proximal to the distal physis and then orientate the nail tips dorsally to prevent apex anterior deformity of the tibial shaft.
Check the reduction with an image intensifier after this maneuver.
Nail cutting
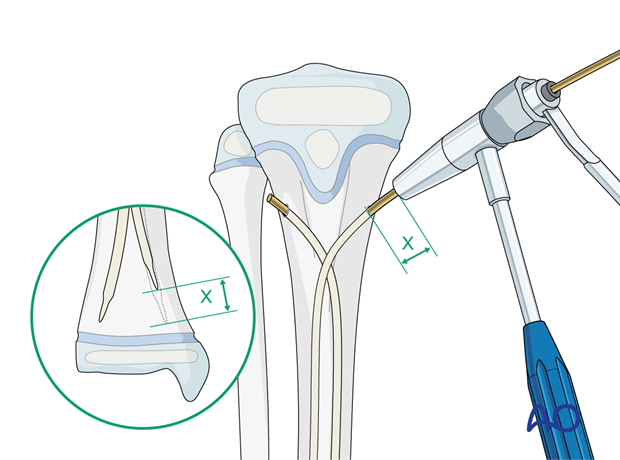
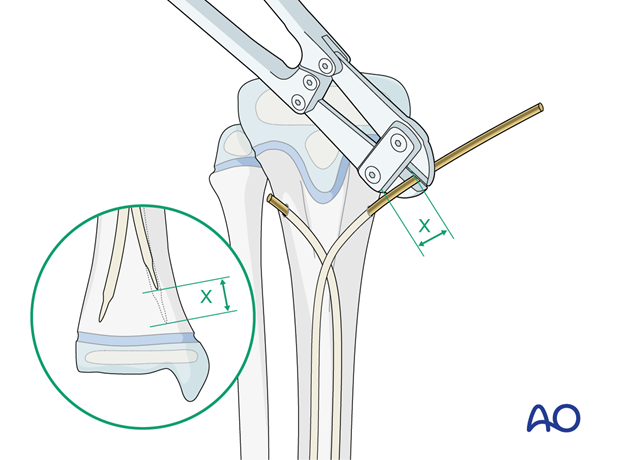
Withdraw the nail and cut it with the end cutter to allow approximately 1 cm to remain exposed in the final position.
The end cutter avoids sharp nail ends and soft-tissue irritation.
Alternatively, a bolt cutter may be used.
Final seating
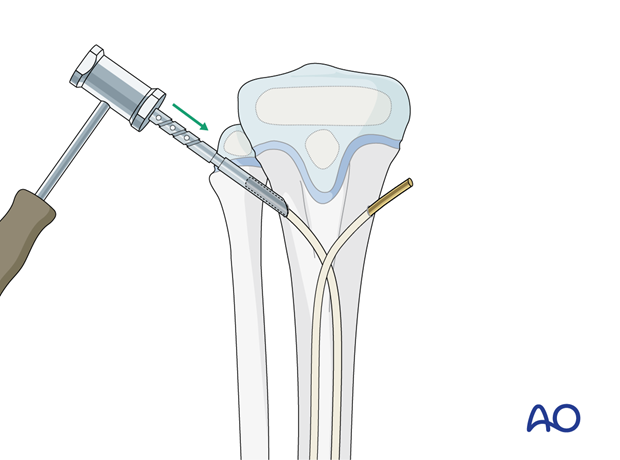
Advance the nails to their final position without perforating the physis.
Engage the nails into the cortex with soft hammer blows on the inserter or impactor.
The impactor ensures that the correct length of the nail remains outside the bone.
10. Final assessment
Compare leg length and rotation with the uninjured leg.
Confirm and document the final construct with an image intensifier in two planes.

11. Immobilization
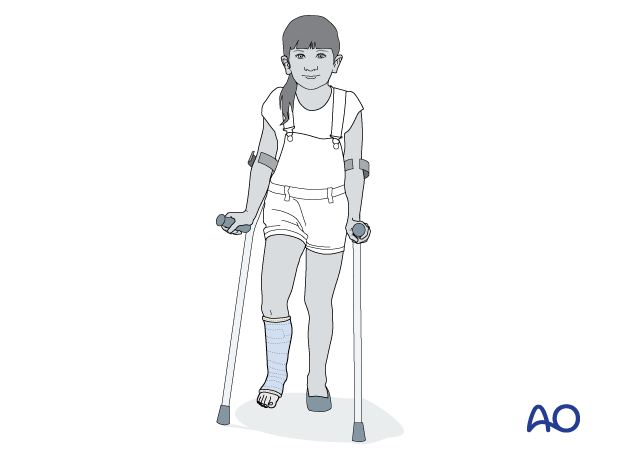
A molded below-knee cast or fixed ankle boot may be applied for 2–4 weeks if there is persistent instability.
12. Aftercare
Postoperative documentation
X-rays in two planes (AP and lateral) of the tibia with adjacent joints should be taken to confirm fracture reduction.
Immediate postoperative care
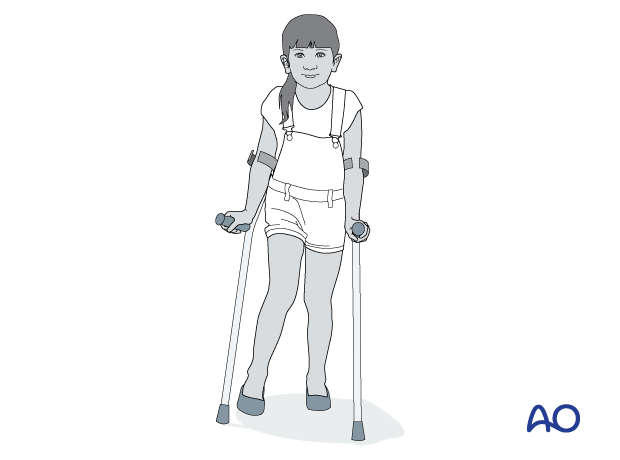
Toe-touch weight bearing is recommended for 2–6 weeks and depends on fracture stability.
Older children may be able to use crutches or a walker.
Younger children may require a period of mobilization in a wheelchair.
Neurovascular examination
The patient should be examined frequently to exclude neurovascular compromise or evolving compartment syndrome.
Follow-up
Clinical follow-up is undertaken to check wound healing.
A radiological follow-up for bone healing should be taken after about 4–6 weeks.
Mobilization
Graduated weight bearing is usually possible after early clinical and radiological signs of consolidation.
Patients are encouraged to start range-of-motion exercises. Physiotherapy supervision may be necessary in some cases but is not mandatory.
Sports and activities that involve running and jumping are not recommended until full recovery of local symptoms and function.
Implant removal
The nail ends may cause local soft-tissue irritation and is a relative indication for nail removal.
Nail removal should not be performed until there are radiological signs of canal remodeling and not before 6 months post injury.
Follow-up for growth disturbance
Leg length should be evaluated up to 2 years following injury due to the effect of growth stimulation.


