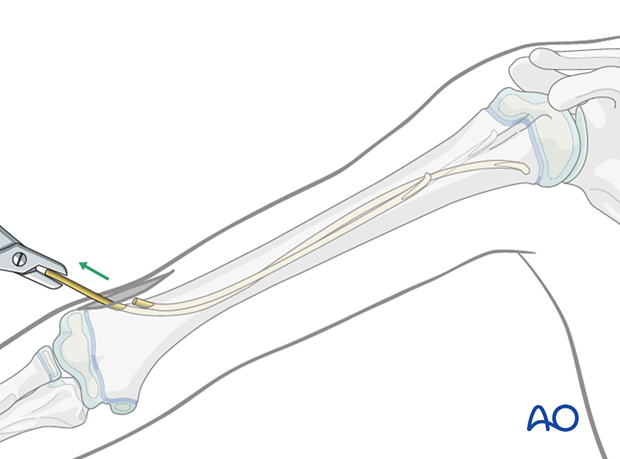
Retrograde elastic nailing (lateral insertion)
1. General considerations
This method describes fracture reduction and internal fixation with elastic stable intramedullary nails (ESIN) in the skeletally immature patient.
A monolateral, retrograde, intramedullary technique is described, in which both nails are inserted from the lateral aspect of the humerus at the level of the distal metaphysis.
Once both nails have been advanced into the proximal fragment, the degree of stabilization permits cast-free functional rehabilitation.
This method can be used in any age group.
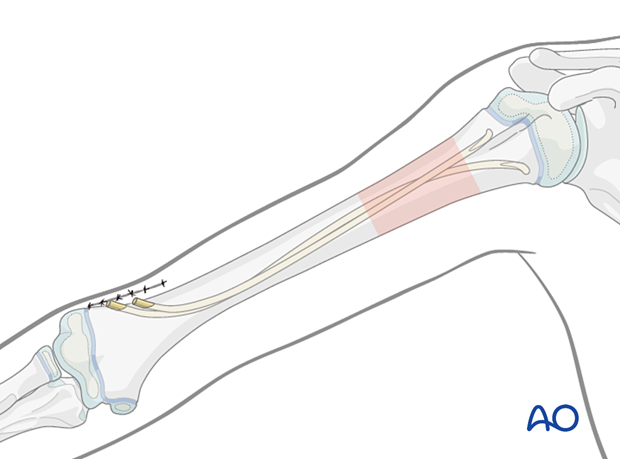
Throughout this section, generic fracture patterns are illustrated as:
- Unreduced (A)
- Reduced (B)
- Reduced and provisionally stabilized (C)
- Definitively stabilized (D)
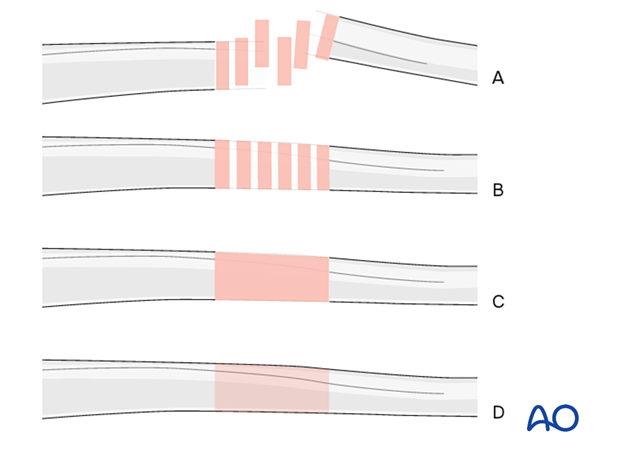
Principles of elastic nail insertion in the humerus
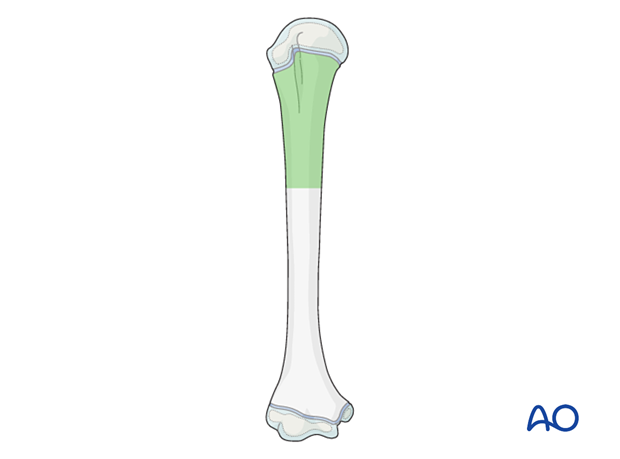
The retrograde lateral nail insertion is used for stabilization of proximal third shaft and proximal metaphyseal fractures.
Middle third fractures are best treated with medial and lateral retrograde nail insertion. This avoids valgus deformity caused by two lateral nails.
Distal third fractures are stabilized with antegrade lateral nail insertion.
2. Instruments and implants
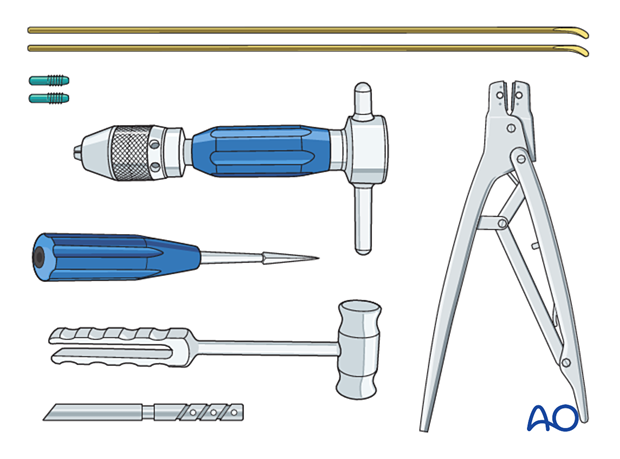
Instrument set
- 2.0–3.0 mm elastic nails
- Awl or drill
- Inserter
- Hammer
- End caps and insertion device
- Impactor
- Extraction plier
- Nail cutter
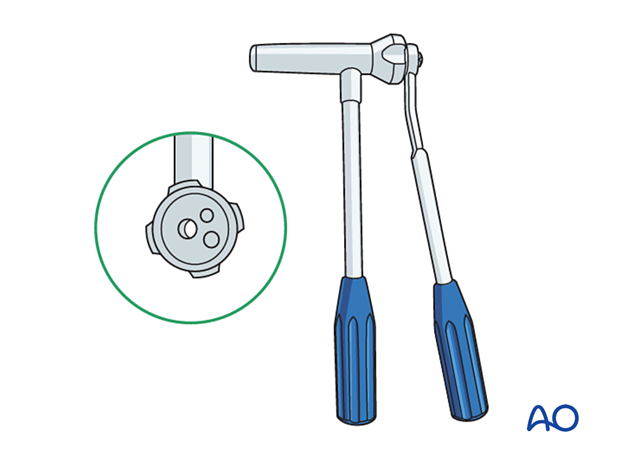
The end cutter is useful to avoid sharp ends and soft-tissue irritation.
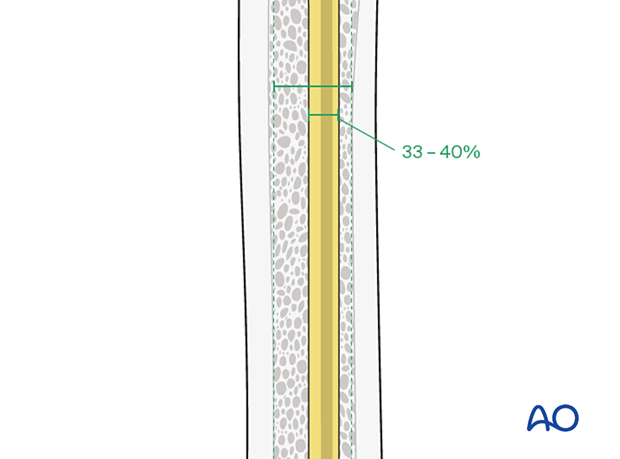
Nail diameter
To estimate the optimal nail diameter, place the selected nail on the arm, parallel to the bone and check with an image intensifier.
For optimal stability, the nail diameter should be approximately one-third of the narrowest part of the medullary canal.
Both nails should be the same diameter.
3. Patient preparation
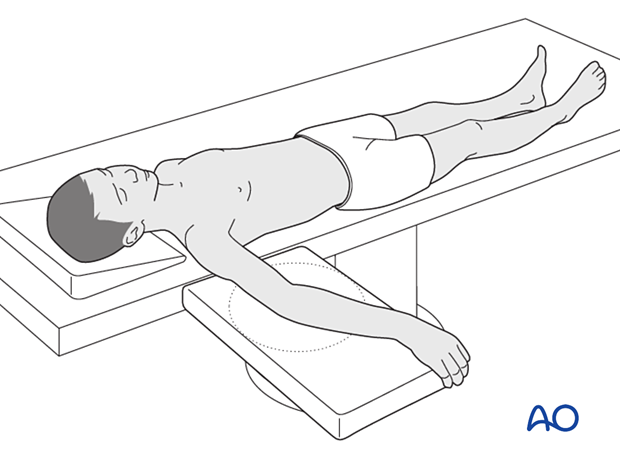
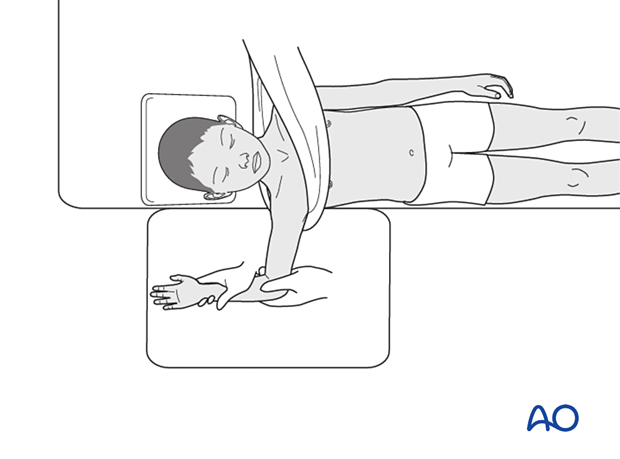
Place the patient in a supine position on a radiolucent table with the arm draped up to the shoulder.
Before starting the operation, the position of the image intensifier should be checked to ensure an unobstructed view during the operation.
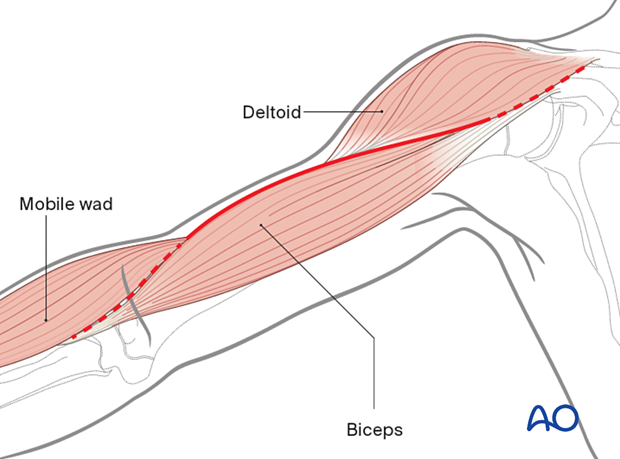
4. Approach for reduction
If closed reduction is not successful, an anterolateral approach can be used to access the fracture site.
5. Contouring
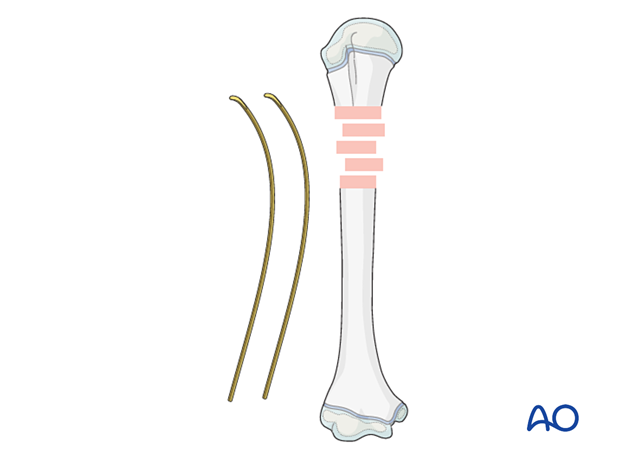
Precontour both nails with the apex at the level of the fracture site.
6. Approach for nail insertion
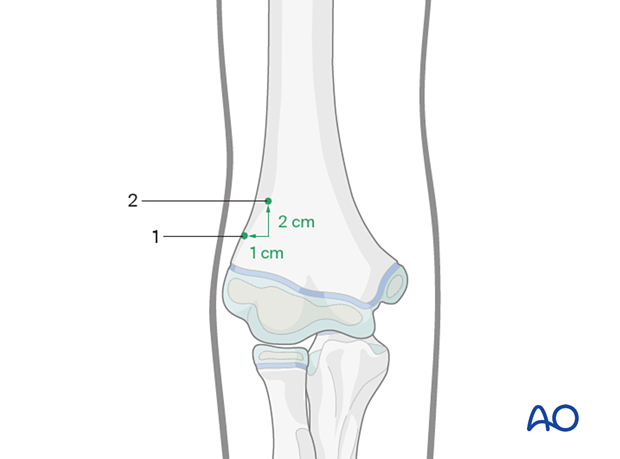
Planning of the entry points
The first entry point is located just proximal to the lateral epicondyle at the lateral aspect of the humerus. The second entry point is 2 cm proximal and 1 cm anterior to the first.
Skin incision
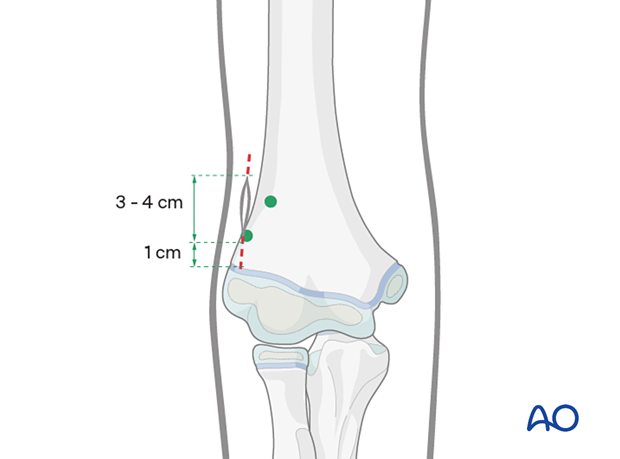
Begin the incision 1 cm above the palpable prominence of the lateral epicondyle and progress 3–4 cm proximally (cranially) up the lateral aspect of the humerus.
Approach to the bone
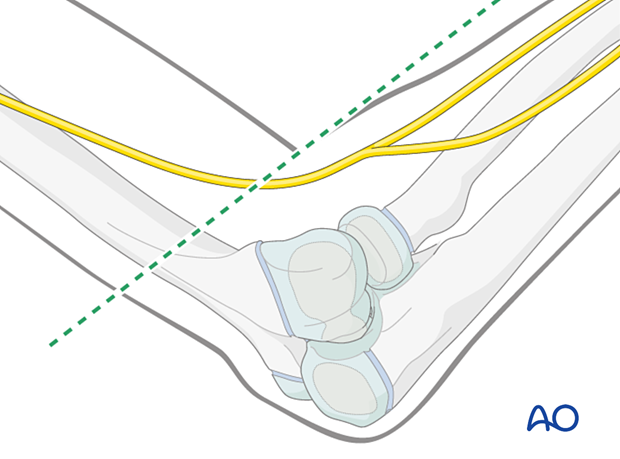
To avoid injury to the radial nerve, the entry points should be below the level of the anterior forearm when the elbow is 90° flexed.
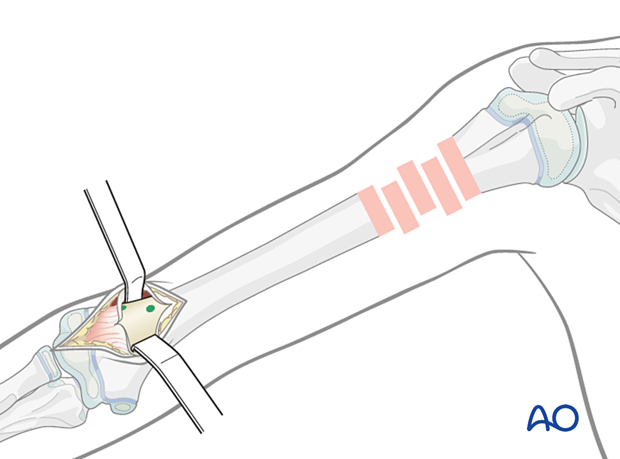
Divide the subcutaneous tissue by blunt dissection to the supracondylar ridge of the humerus.
Spread the subcutaneous tissue to expose the fascia. Bluntly dissect the fascia to expose the lateral supracondylar ridge of the distal humerus, taking care to remain on the anterior side of the intramuscular septum. Incision of the periosteum and subperiosteal preparation is necessary to avoid injuring the radial nerve.
7. Opening the canal
Perforate the bone with a drill, starting perpendicular to the bone surface to prevent the tip from slipping. Angulate the drill, while still running, to 45° to the humeral axis.
Without sufficient angulation, it is difficult to introduce the nails.
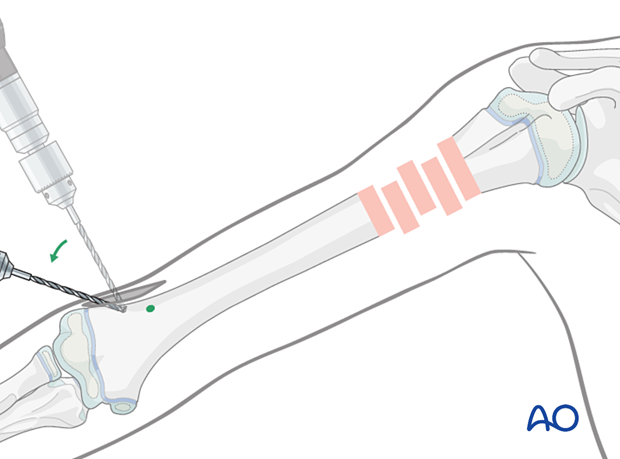
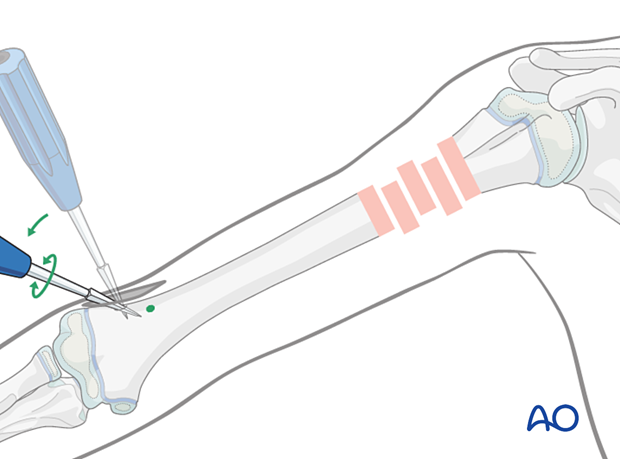
If an awl is used, place it at 90° to the lateral cortex and start advancing by controlled oscillation. Tapping the awl with a hammer may be helpful to create a small starter hole in the cortex.
Once the awl engages the lateral cortex, angulate to 45° to the shaft axis and progressively advance until it enters the medullary canal.
Create the second hole 1–2 cm proximal and approximately 1 cm anterior to the first insertion site in a similar manner.
8. Nail insertion
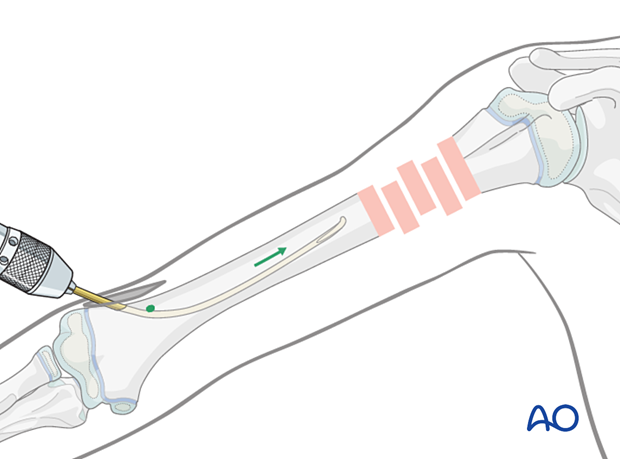
Inserting the first nail
With the nail fixed in the inserter, pass it into a hole and advance it manually to the diaphyseal region using an oscillating maneuver.
Orientate the nail tip towards the lateral cortex.
Inserting the second nail
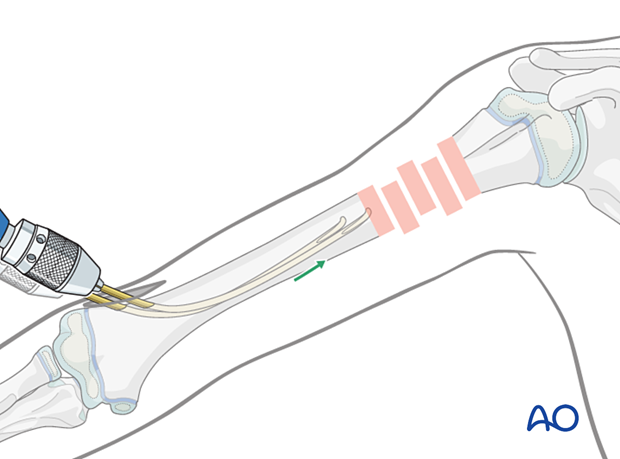
Insert the second nail into the other hole and advance it as far as the fracture.
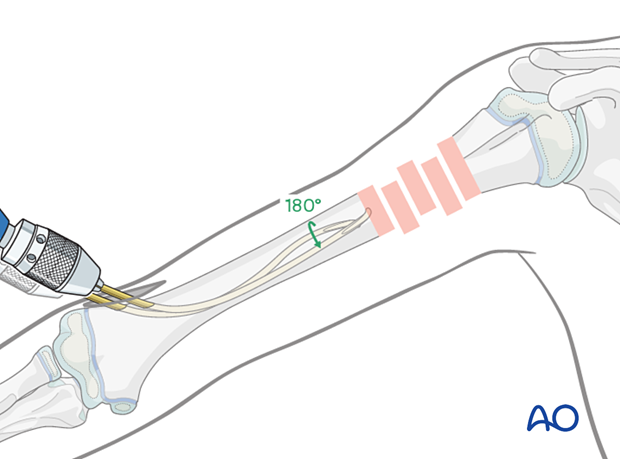
Rotate the nail 180° clockwise or counterclockwise, depending on the position of the first nail. The direction of rotation is chosen to avoid a spiral entanglement of the nails. The position should be verified with an image intensifier.
Fracture reduction
Closed reduction is achieved by traction, abduction, and external rotation. The shoulder may be held by a sling for countertraction.
If this is not successful, eg, due to interposed soft tissue (usually the biceps tendon), an open reduction is required.
Bend the distal part of the medially directed nail upwards towards the bone. This creates an S-shaped contour of the nail. The more it is bent, the more the tip is directed medially.
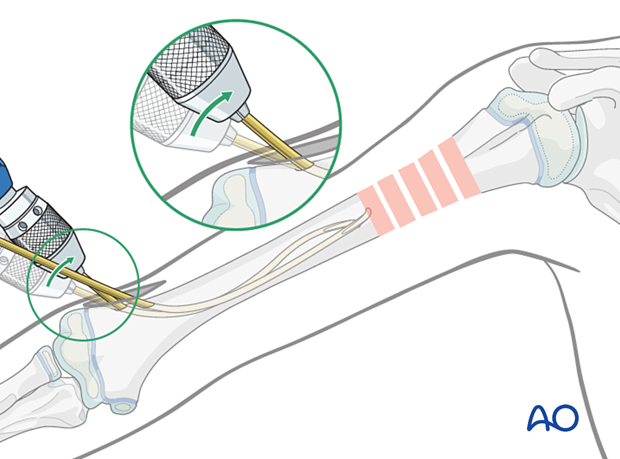
Advance the first nail across the fracture zone into the proximal fragment.
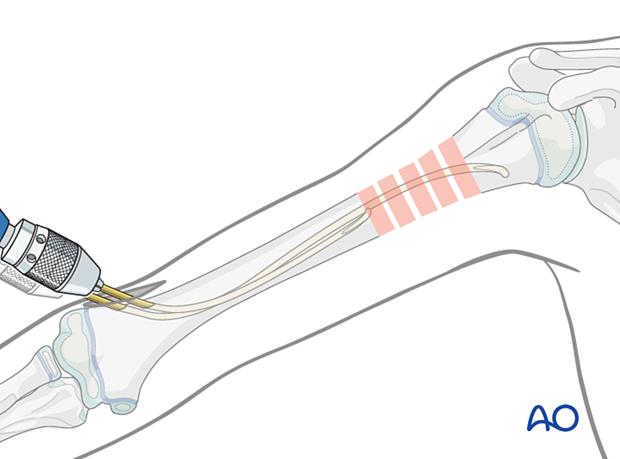
Advance the other nail across the fracture. Make sure the tips of the nails are inserted in a divergent direction for optimal stability.
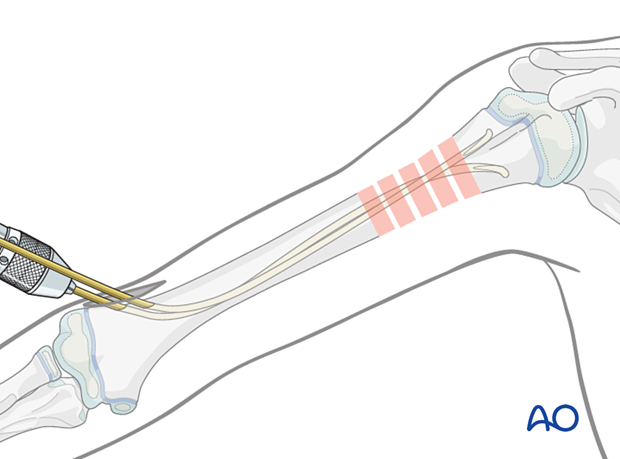
Final nail positioning
Advance both nails into the proximal metaphysis close to the physis. Make sure the tips of the nails are inserted in a divergent direction for optimal stability.
Rotate the nails slightly to achieve optimal spread of the nails at the fracture level, and reduction with good alignment.
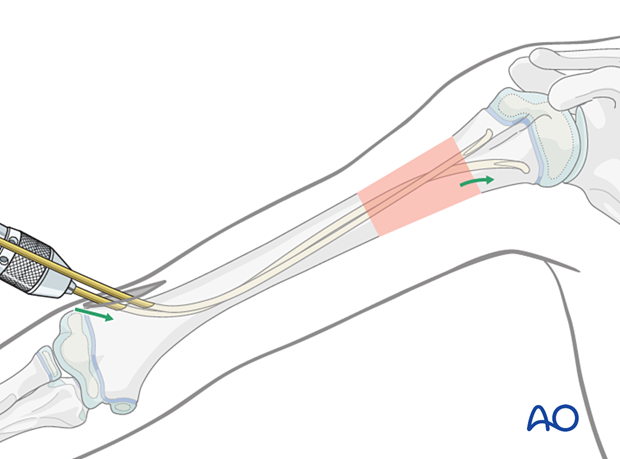
It may be sufficient to place the nail tips in the metaphysis.
If needed, the nails may be advanced across the physis with gentle hammer blows to achieve sufficient stability.
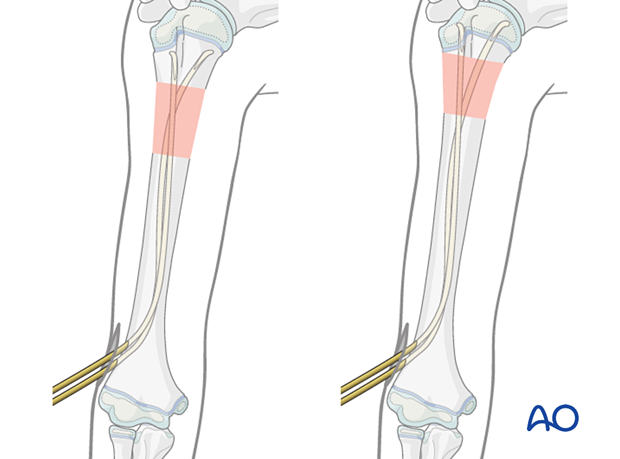
Cut both nails with the dedicated nail cutter to leave at least 1 cm outside the bone to facilitate removal.
Alternatively, the nails may be slightly withdrawn, cut and reinserted with the dedicated impactor.
Finally secure the nails into the bone of the metaphysis with gentle hammer blows.
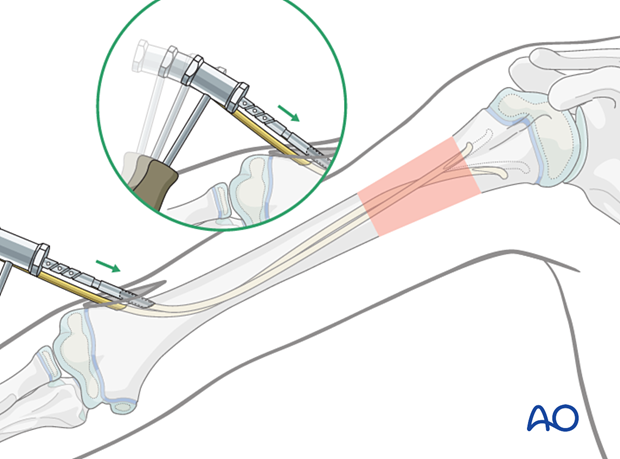
Final assessment
Confirm stability and alignment of the fracture with full range of arm motion using real time imaging. Ensure there is no shoulder joint penetration by the nails.
Wound closure
Close the skin and subcutaneous tissue in a standard manner.

9. Aftercare
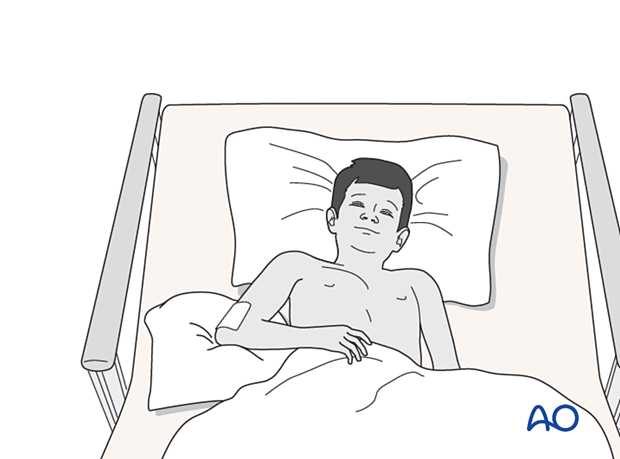
The arm should be elevated on pillows to reduce swelling and pain, whilst the child remains in bed.
No additional immobilization is required.
See also the additional material on postoperative infection.
Postoperative protocol
The arm may be placed in a sling until the patient is pain-free.
Early mobilization should be encouraged.
The first clinical and radiological follow-up is usually undertaken within 2 weeks.
Physiotherapy is not usually necessary.
Postoperative documentation of neural function
Nerve function, especially the radial nerve, should be documented pre- and postoperatively.
Nail removal
Nail removal may be performed after fracture consolidation usually 3–6 months postsurgery.
Nail removal can be performed as a day case, under general anesthesia.
For cosmetic reasons, it is best to resect the whole scar and perform a cosmetic wound closure.
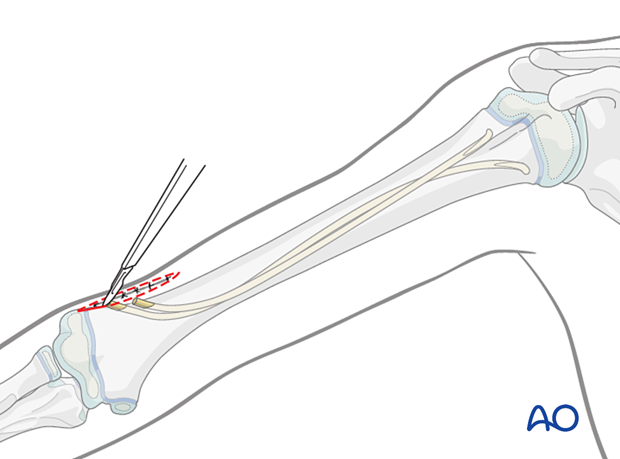
As the nails project from the bone, their ends can be easily palpated. In most cases a small bursa has formed. Once this bursa is opened, the end of each nail can be seen.
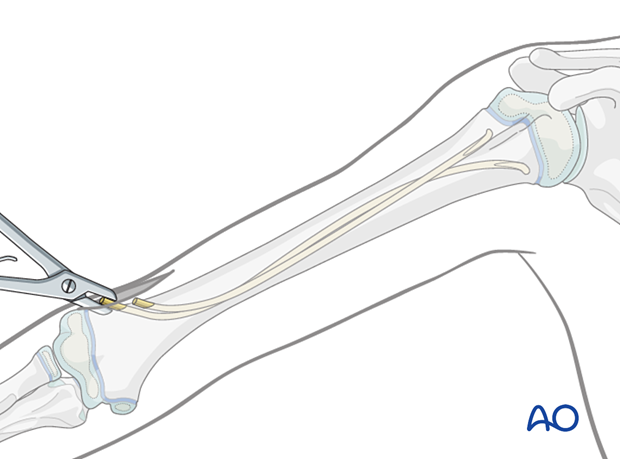
The nails can be removed with the extraction pliers, or similar clamp.
