ESIN (antegrade)
1. General considerations
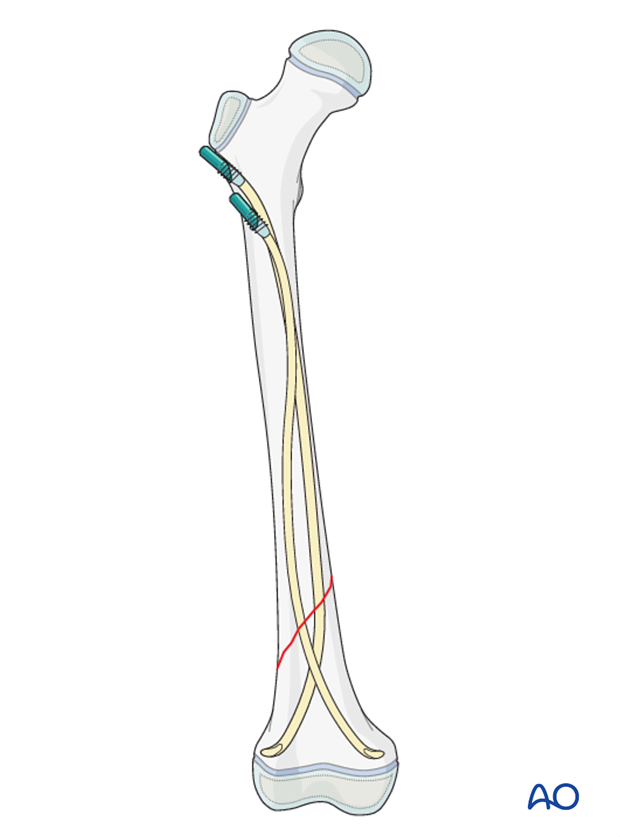
The ESIN method involves closed reduction and internal fixation with elastic nails.
It is difficult to treat shaft fractures of the distal third with retrograde nail insertion as the nail entry sites are too close to the fracture and the configuration of the nails does not produce sufficient stability.
Using an antegrade nail construct will provide sufficient stability in these fractures.
2. Instruments and implants
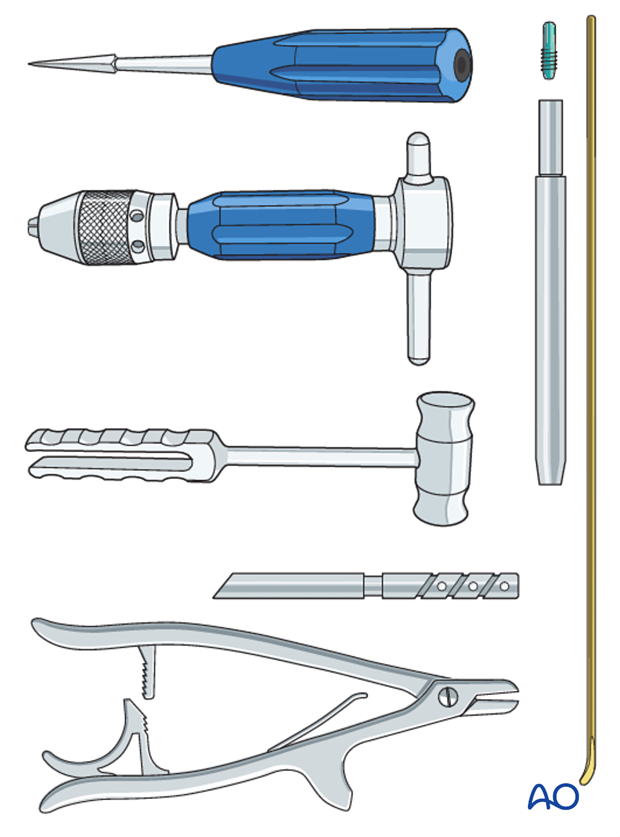
Instrument set for ESIN
- 2.5–4.0 mm elastic nails
- Awl or drill
- Inserter
- Hammer
- End caps and insertion device
- Impactor
- Extraction plier
- Nail cutter
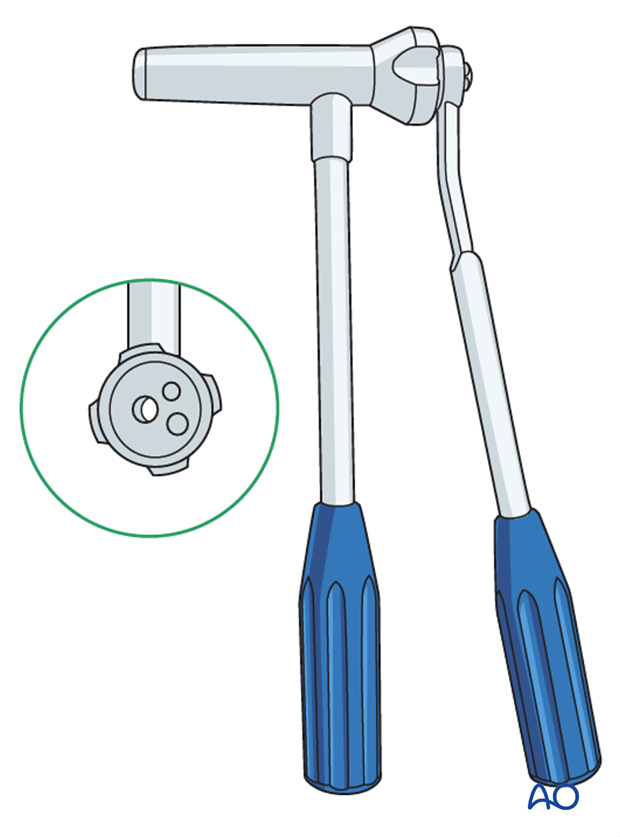
The end cutter is useful to avoid sharp ends and soft-tissue irritation.
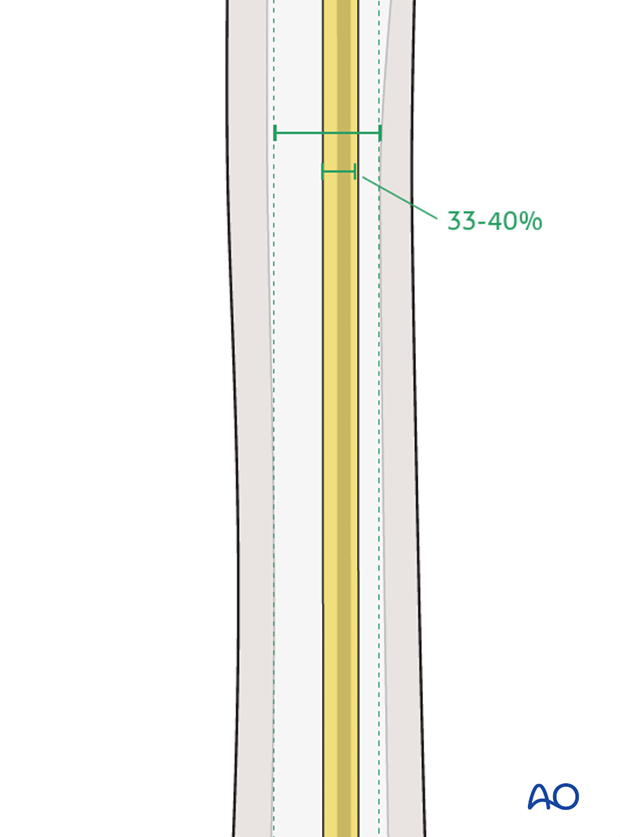
Nail diameter
For optimal stability, the nail diameter should be between 33% and 40% of the narrowest part (isthmus) of the medullary canal.
Both nails need to be of the same diameter.
For later precontouring mark the level of the fracture site on the nail.
3. Patient preparation and approach
Patient positioning
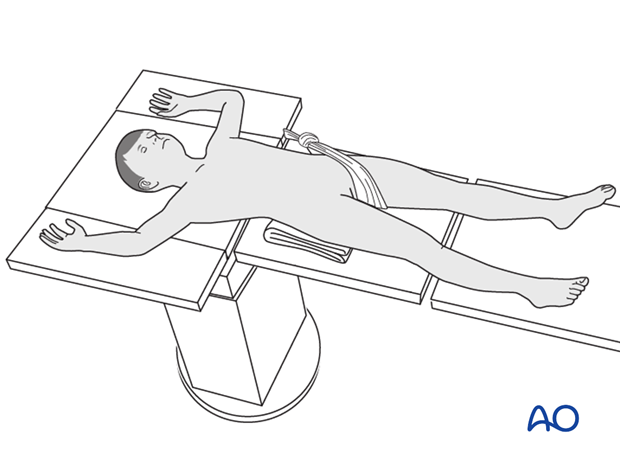
Place the patient in a supine position on a traction table or radiolucent fracture table.
The radiolucent fracture table has the advantage that the leg can be freely manipulated during the procedure. Muscle forces can be neutralized by flexing the knee with a support underneath.
When positioning the patient check the rotational alignment of the uninjured femur.
Approach
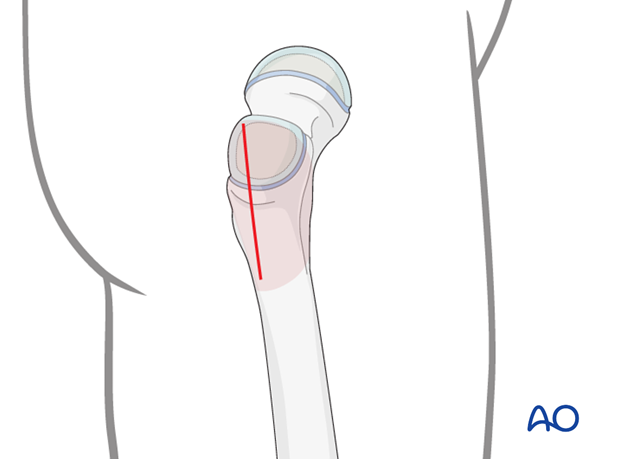
Expose the bone at the entry points.
4. Opening the canal
Position of entry points
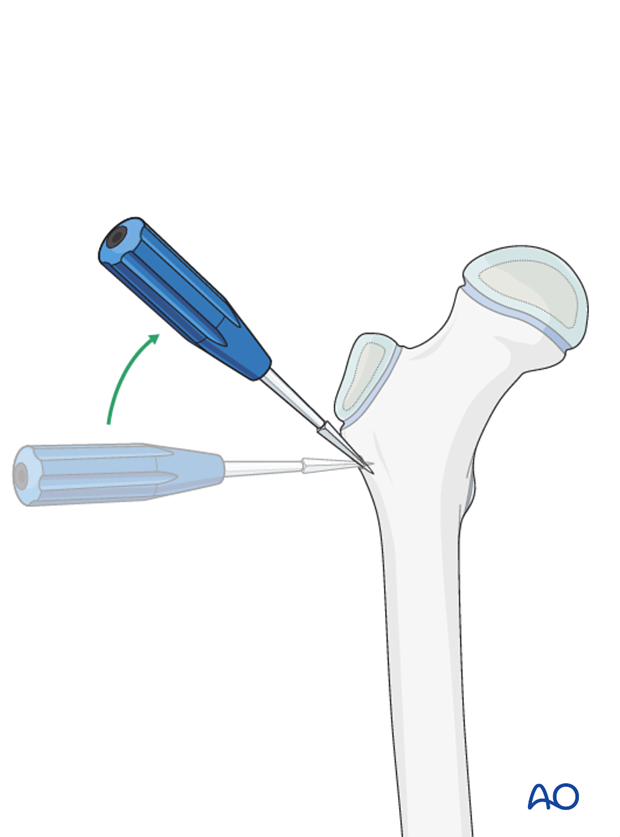
The usual entry points are 0.5–1 cm distal to the greater trochanteric growth plate.
Entry points should be at least 2 cm apart in the axial plane and at least 1 cm apart in the lateral plane. If they are too close, the cortex may split during the insertion of the nails.
There is a lower risk of iatrogenic fracture if both entry points are made in the metaphyseal bone proximal to the lesser trochanter. Alternatives include entry points in the lateral aspect of the greater trochanter.

Proximal entry point
Place the awl or drill directly onto the bone and perforate the near cortex, under direct vision, perpendicular to the bone.
Do not hammer the awl to avoid perforation of the far cortex.
When the medullary canal is entered, lower the awl or drill 45° to the shaft axis. Advance it with oscillating movements to produce an oblique canal.
Second entry point
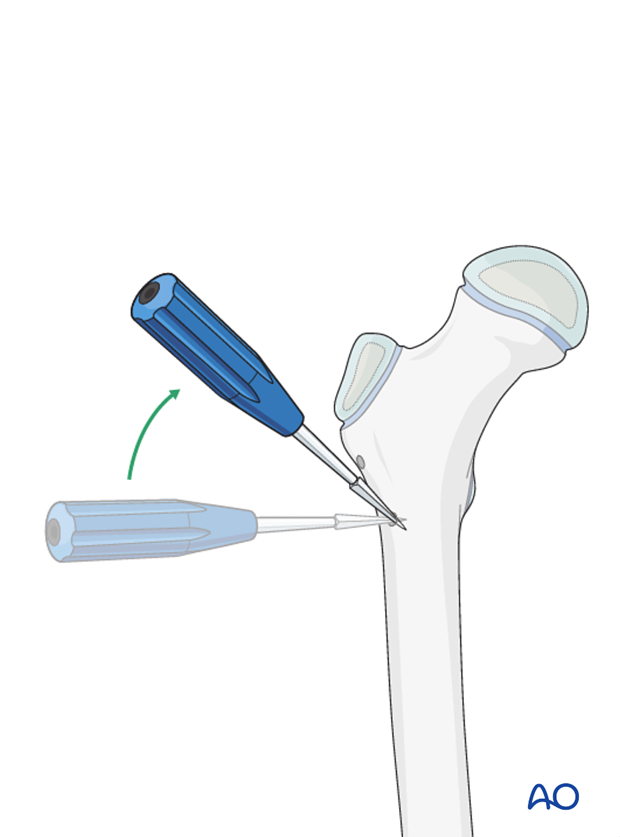
Enter the medullary canal at the distal entry point with an identical technique.
5. Nail insertion
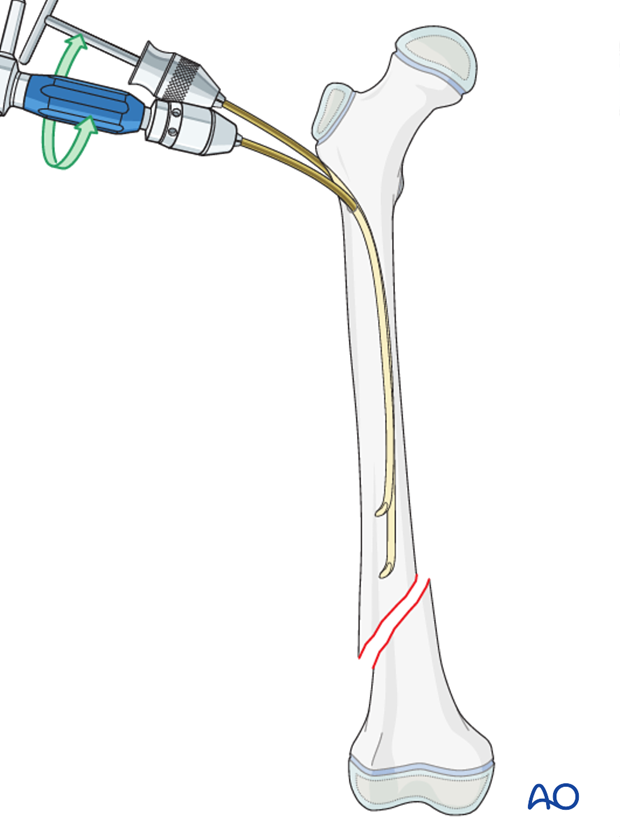
Decide whether the crossing point of the nails is to be proximal or distal to the fracture site.
Crossing the nails at the level of the fracture must be avoided.
Precontour both nails in the distal third with the apex at the predetermined level.
The maximum nail bend should be at the level of the fracture about three times the diameter of the medullary canal.
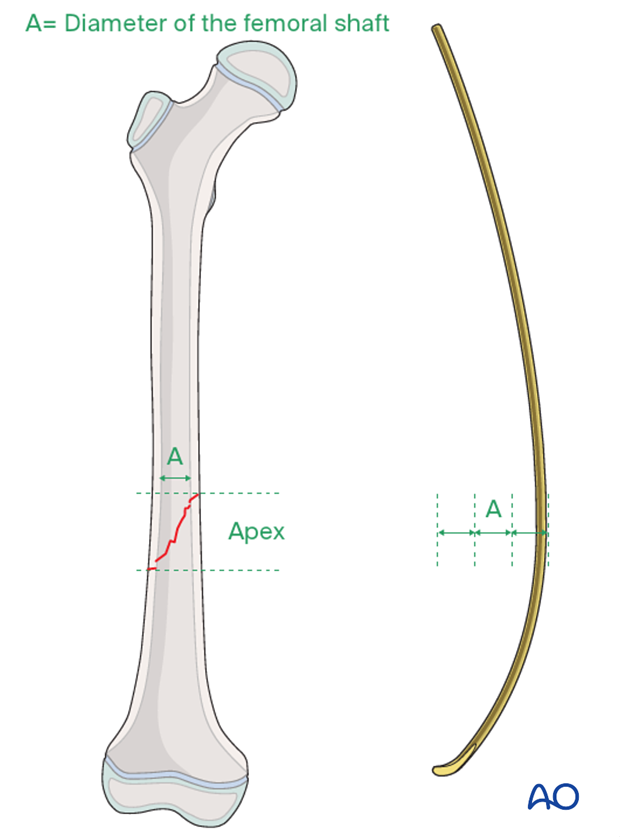
Insert the nail through the proximal entry point into the intramedullary canal and advance it towards the fracture site with an oscillating maneuver.
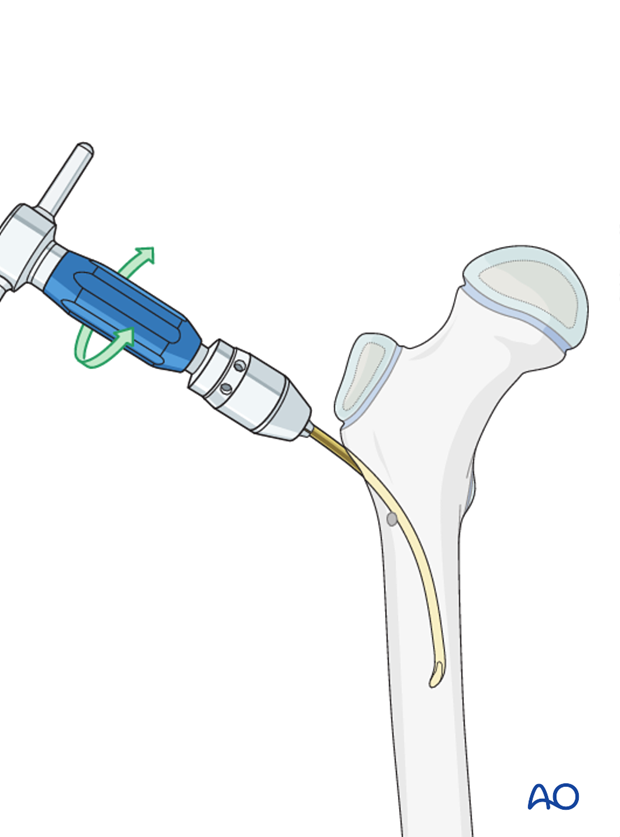
If the tip is stuck in the far cortex and cannot be advanced, remove the nail and bend the tip to give a slightly more pronounced curvature.
Insert the second nail into the distal entry point and advance it towards the fracture site.
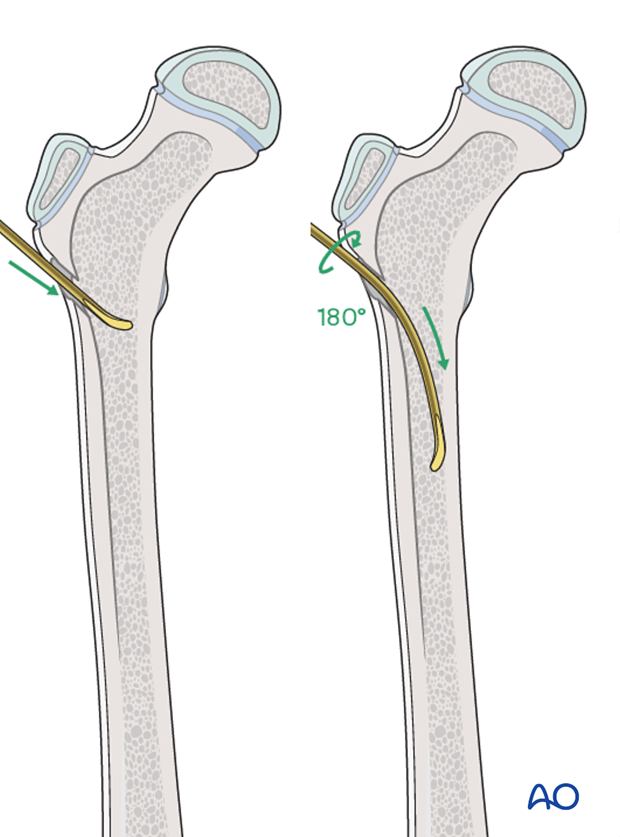
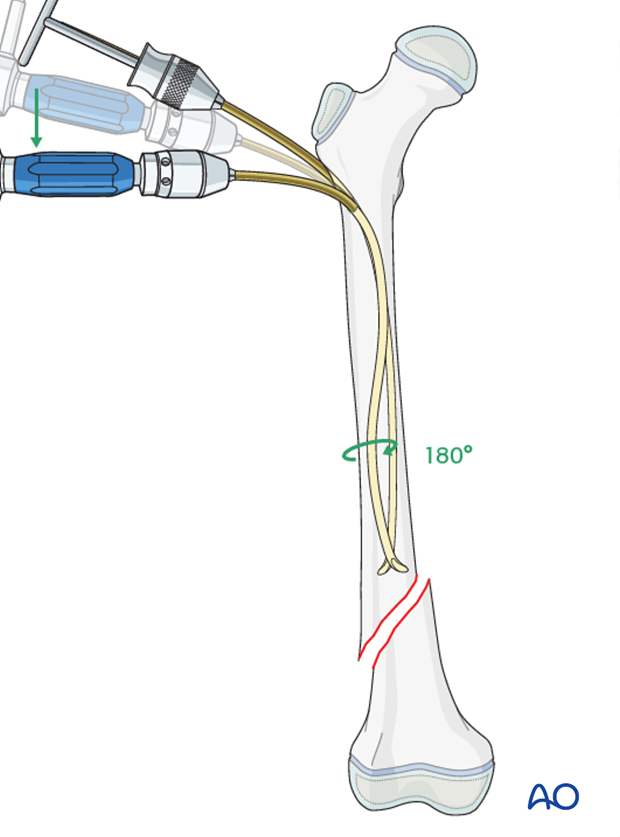
Once it has good contact with the opposite cortex, with the tip having advanced about two-thirds distally in the medullary canal, the contour of the nail is changed to an S-shape with the following maneuver:
- Rotate the nail 180°.
- Bend the proximal portion of the nail, which is outside the bone, in the opposite direction to the previous bend.
- Apply a constant bending force whilst inserting the nail.
This produces an S-shape, which will provide contact with the lateral cortex at the fracture site and with the medial cortex of the proximal third of the femoral shaft.
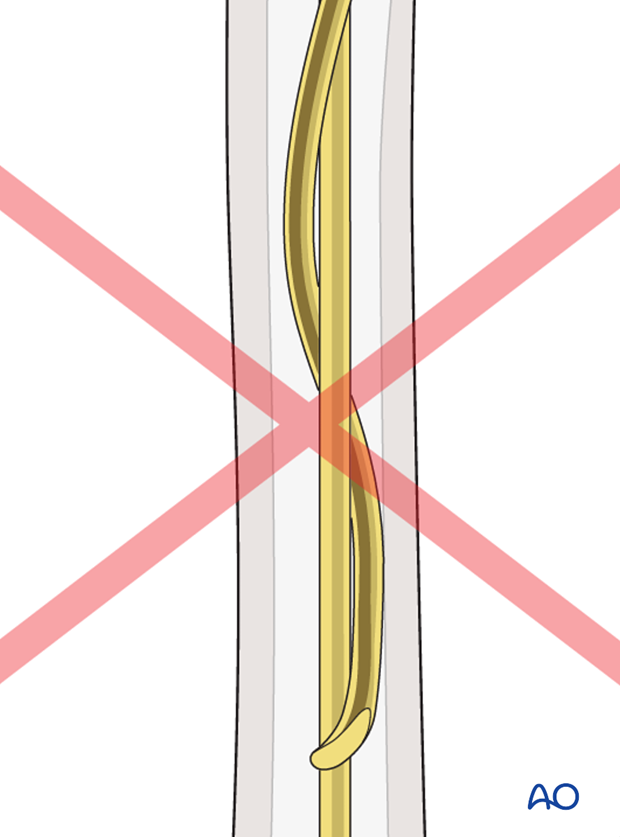
If this happens reinsert a new nail.
6. Distal fragment advancement
Reduce the fracture freehand, with a reduction tool or with a traction table.
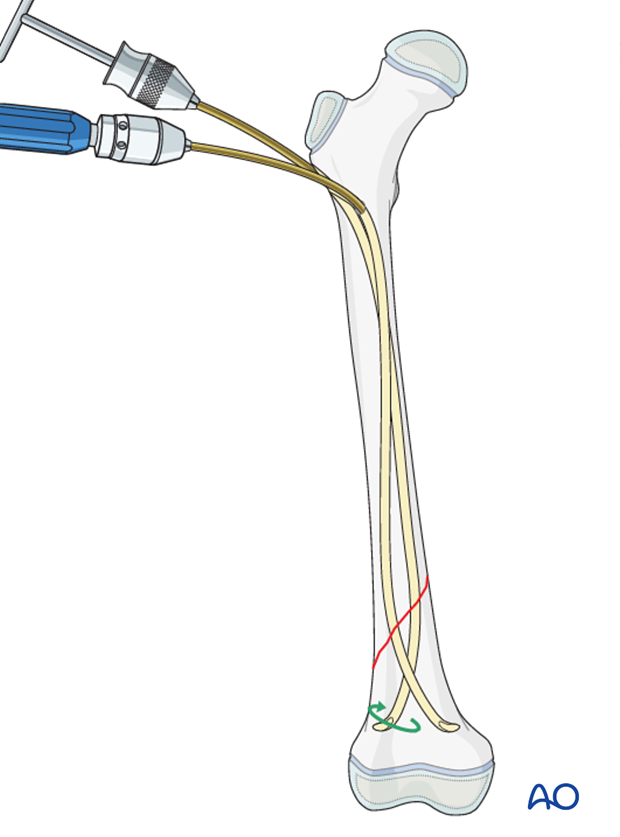
Advance both nail tips, with an oscillating maneuver, past the fracture site into the distal fragment.
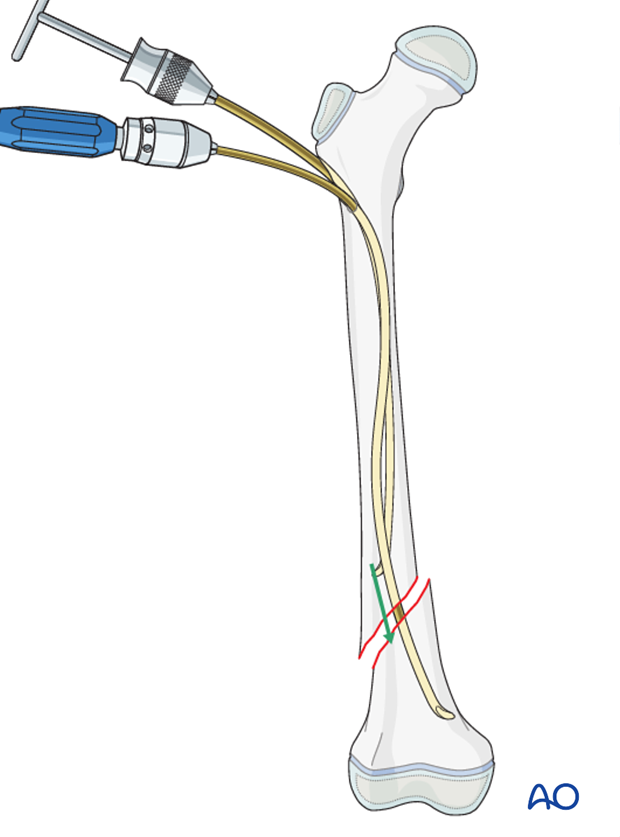
If it is difficult to advance either nail while it is positioned against the cortex, rotate the tip towards the center of the bone and advance it across the fracture.
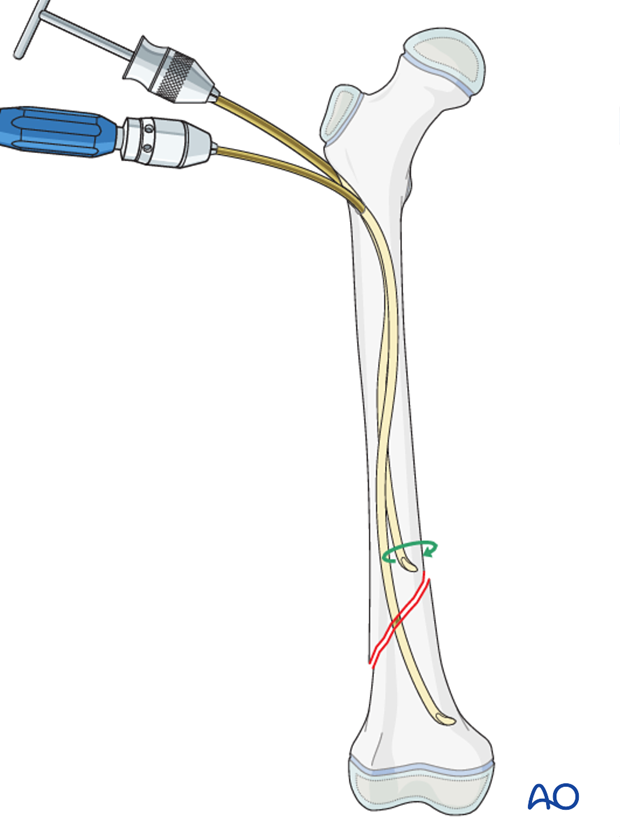
Once the nail has crossed the fracture, rotate the nail tip to return to the initial position.
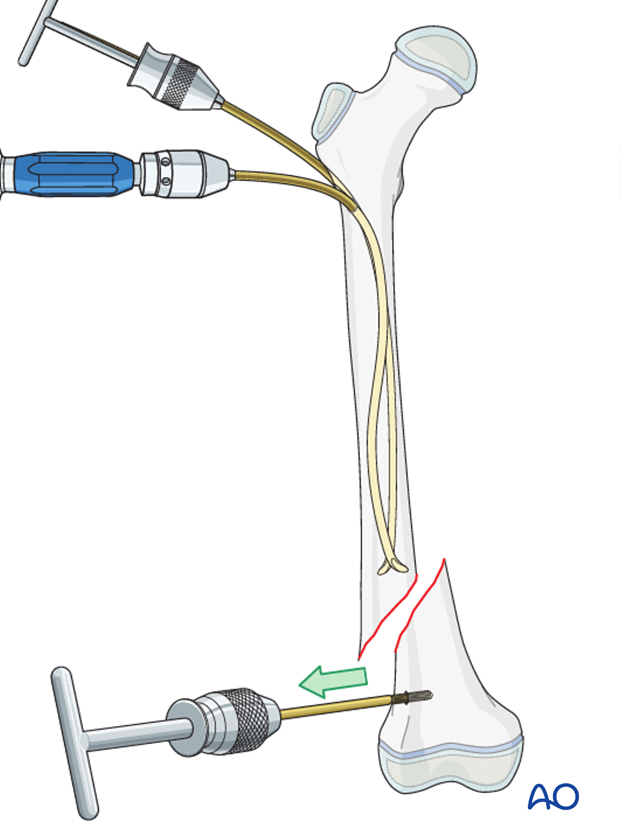
If this is unsuccessful use a bone hook or Steinmann pin through a small incision.
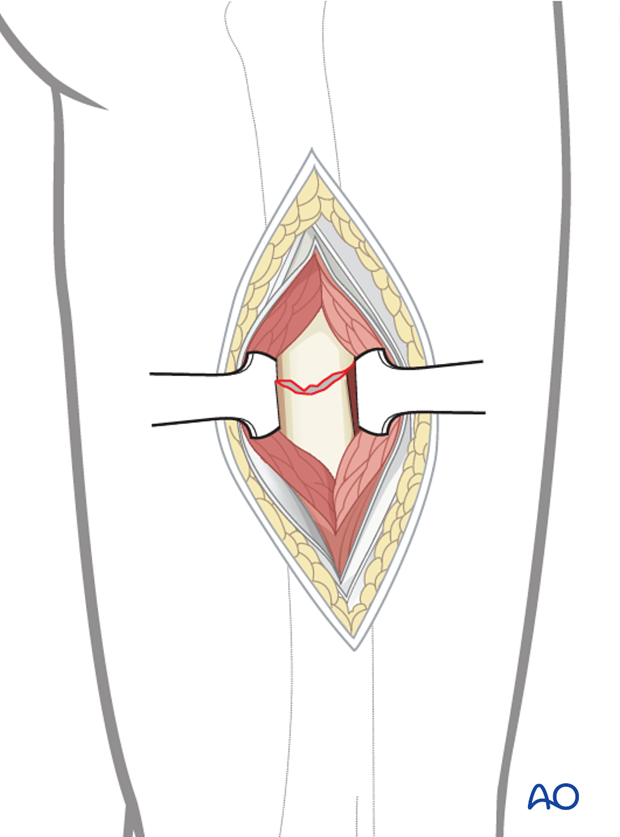
Open reduction (through a limited lateral approach) may be necessary if closed reduction cannot be achieved.
Assessment of rotational alignment
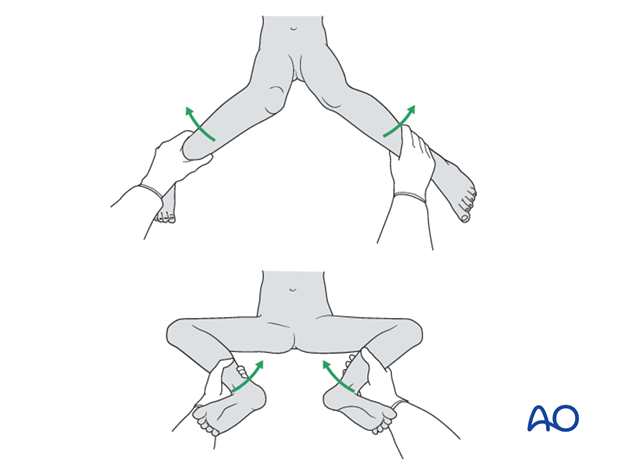
Confirm rotational alignment of the femur clinically and radiographically. This can be done by:
- Fluoroscopy of the fracture site (matching shaft diameters)
- Comparing internal and external rotation to the contralateral side (consider preparing and draping the uninjured side)
- Fluoroscopy of proximal femur (lesser trochanter profile)
For more detail see the additional material on assessment of rotation.
7. Final seating
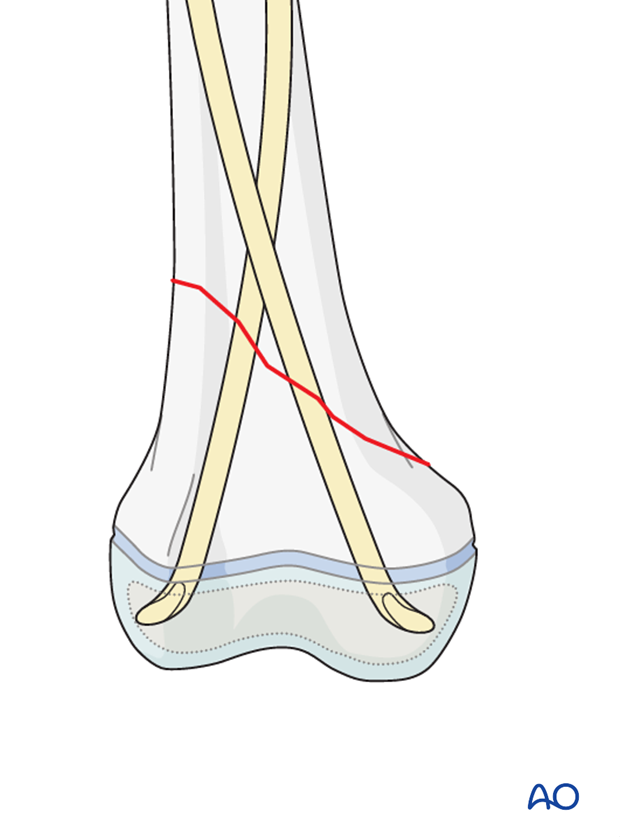
Advance the nails and impact them medially and laterally into their respective condylar regions.
Align the nail tips so that they diverge.
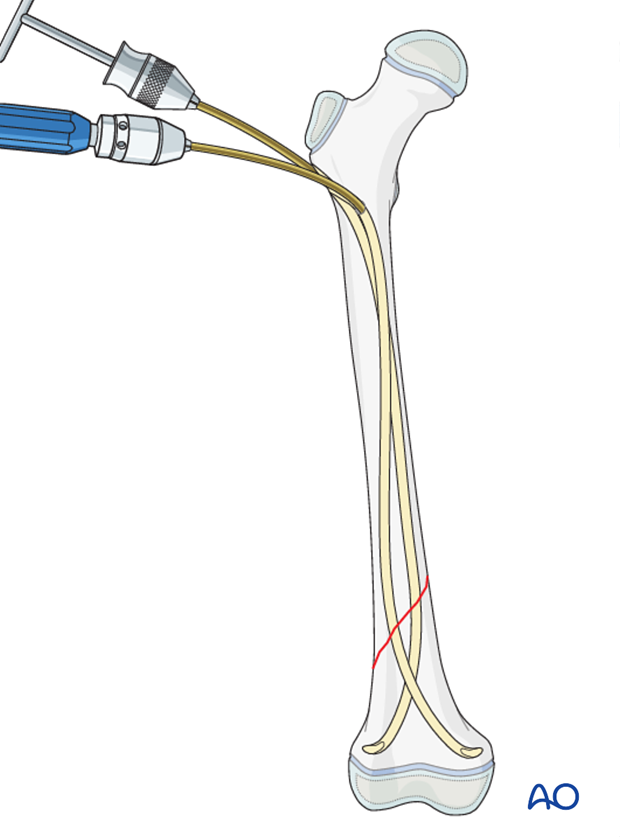
If more stability is necessary and/or the fracture is very distal, the physis can be perforated with the nails.
A single pass of a smooth nail across a growth plate is unlikely to produce a growth arrest.
8. Cutting the nails
Cut the nails with the dedicated nail cutter.
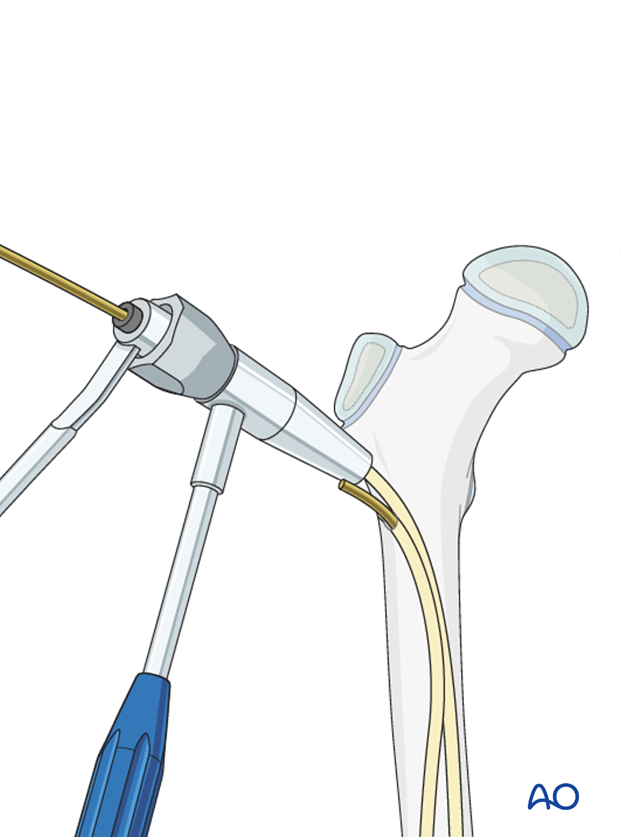
If this is not available, withdraw the nails far enough to apply the nail cutter.
Reinsert the nails so at least 1 cm of the nail remains outside the bone.
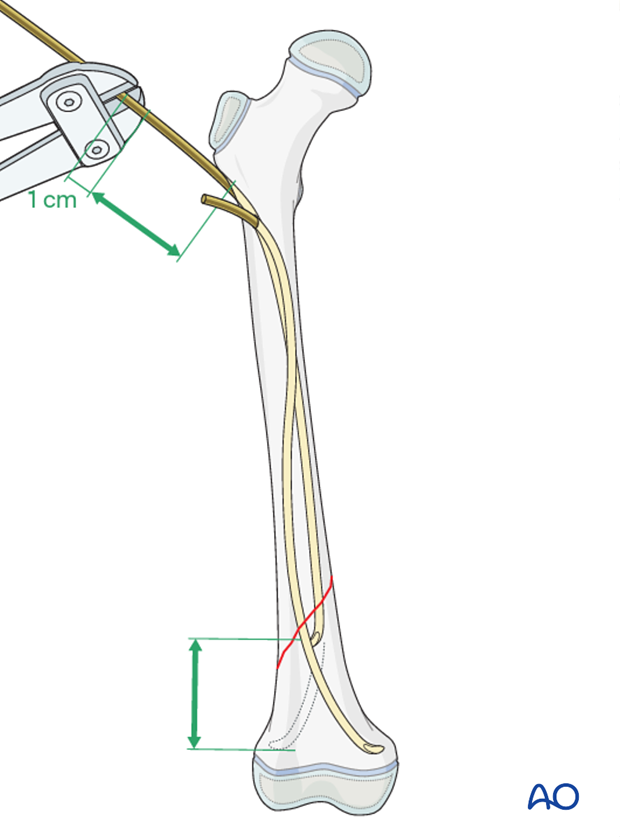
The ESIN impactor can be used to ensure that an appropriate length of the nail remains outside the bone to allow application of an end cap.
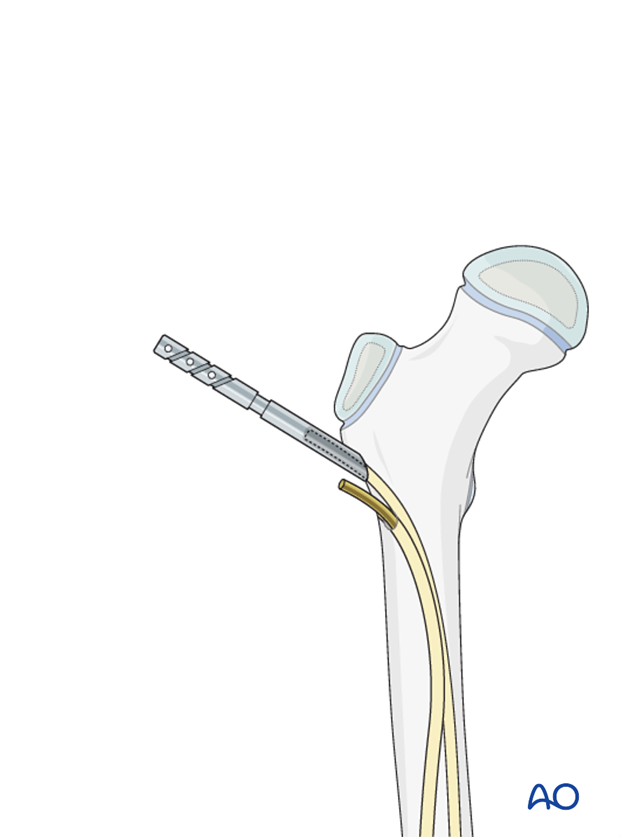
End caps
End caps can be used to increase axial stability.
They will also protect soft tissues.
Insert the end cap over the cut end of the nail and screw it into the metaphysis.
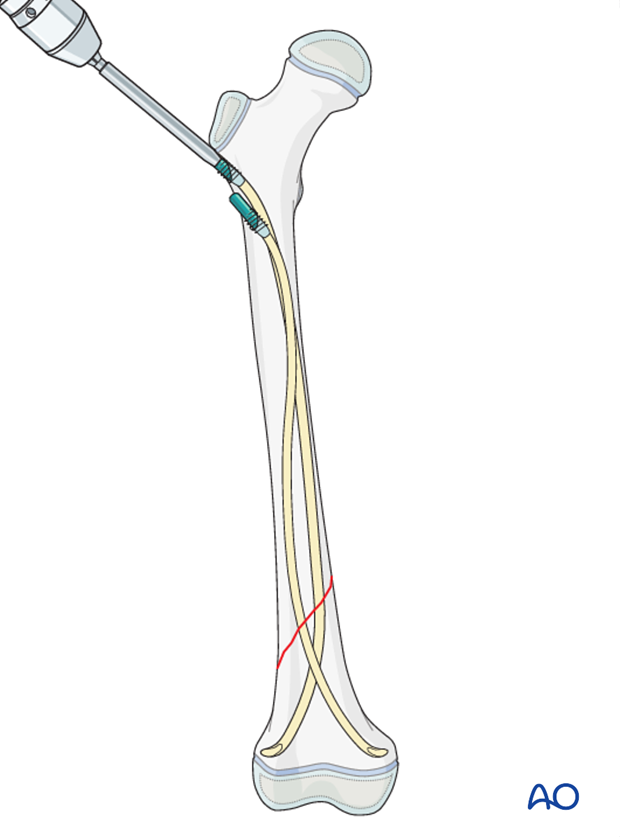
Confirm that the end cap is covering the nail and fixed to the bone with image intensification.

9. Final assessment
Check the range of internal and external rotation of the leg and compare with the contralateral limb.
Obtain final AP and lateral fluoroscopic views.
10. Aftercare
Immediate postoperative care
The patient should get out of bed and begin ambulation with crutches on the first postoperative day.
In most cases the postoperative protocol will be protected weight bearing for the first 4 weeks.

Analgesia
Routine pain medication is prescribed for 3–5 days postoperatively.
Neurovascular examination
The patient should be examined frequently, to exclude distal neurovascular compromise.
Compartment syndrome, although rare, should be considered in the presence of severe swelling, increasing pain, and changes to neurovascular signs.
Discharge care
Discharge from hospital follows local practice and is usually possible after 1–3 days.
Mobilization
The patient should ambulate with crutches and begin knee range-of-motion exercises.
Follow-up
Clinical and radiological follow-up is usually undertaken every 2–8 weeks until radiographic healing and restoration of function.
Clinical assessment of leg length and alignment is recommended at one-year.
Clinical assessment of leg length uses a tape measure from the ASIS to the medial malleolus.
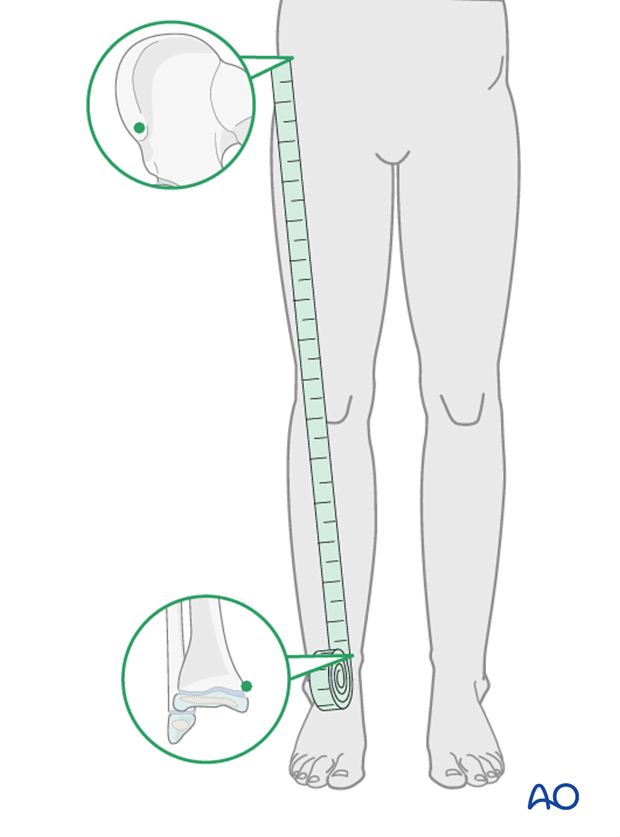
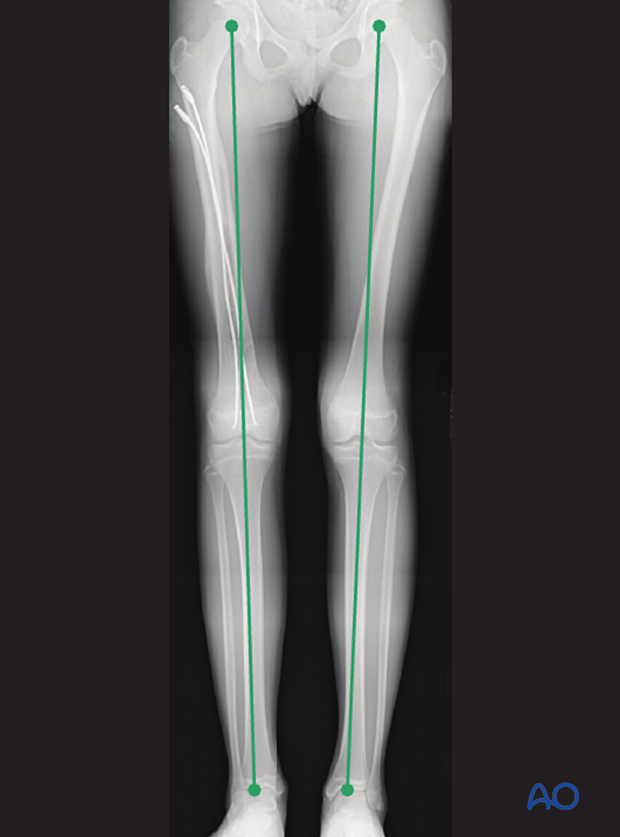
If there is any concern about leg-length discrepancy or malalignment, long-leg x-rays are recommended.
Leg length is measured from the femoral head to the ankle joint.
Implant removal
If the patient develops symptoms related to the implant, it can be removed once the fracture is completely healed, usually 6–12 months following injury.


