MIPO
1. General considerations
Minimally invasive osteosynthesis
Bridge plates inserted through a minimally invasive (MIO) approach leave the soft tissues intact over the fracture site. The incisions are made proximally and distally, and the plate is inserted through a submuscular tunnel. This normally requires monitoring under image intensification.
Bridge plating
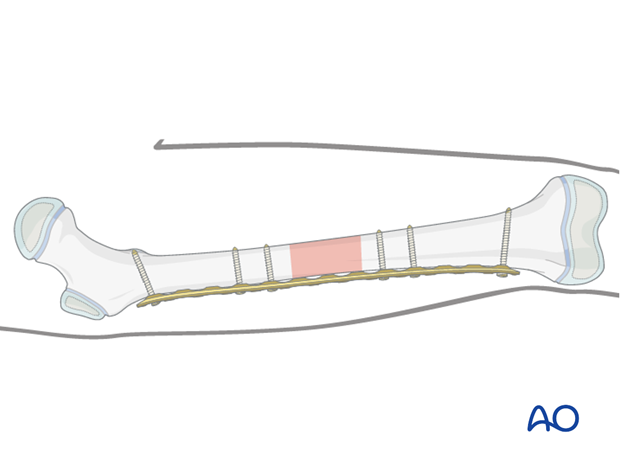
This technique uses the plate as an extramedullary splint, fixed to the two main fragments, leaving the intermediate fracture zone untouched. Anatomical reduction of intermediate fragments is not necessary. Furthermore, direct manipulation would risk disturbing their blood supply. If the soft-tissue attachments to these fragments are preserved, and the fragments are relatively well aligned, healing is enhanced.
Alignment of the main shaft fragments can be achieved indirectly with the use of traction and the support of indirect reduction tools, or with the implant.
Mechanical stability, provided by the bridging plate, is adequate for gentle functional rehabilitation and results in healing with abundant callus formation.
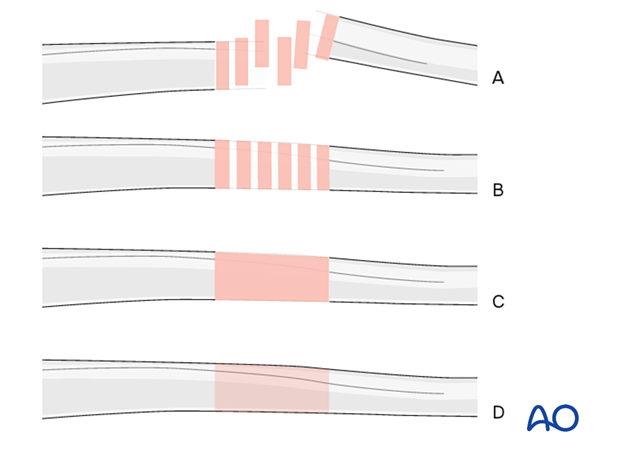
Throughout this section generic fracture patterns are illustrated as:
- Unreduced
- Reduced
- Reduced and provisionally stabilized
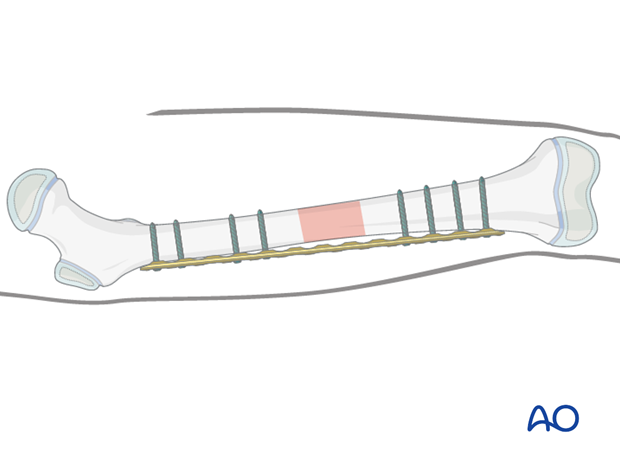
- Definitively stabilized
Reduction
It is important to restore axial alignment, length, and rotation.
Reduction can be performed with a fracture table, femoral distractor, external fixator, or with the implant.
The preferred method depends on the fracture and soft-tissue injury pattern, the chosen stabilization device, and the experience and skill of the surgeon.
2. Plate selection
Plate type
A small (3.5 mm) or large narrow (4.5 mm) plate is chosen.
A locking plate is a good option for fractures with a short end segment. The plate does not need to be contoured precisely to fit the bone, as it functions as an internal fixator. Attaching it to the bone does not alter fracture alignment, as locking screws do not pull the main bone fragments to the implant. If cortical screws are used contouring is important.
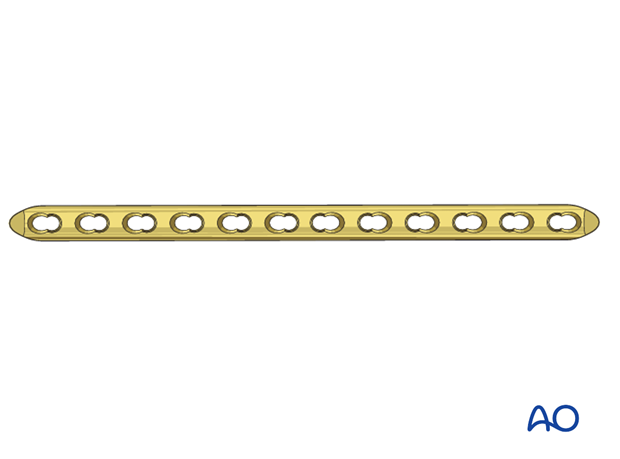
A radiograph of the contralateral femur can help to decide between a straight or a curved plate.
A plate with a beveled end may be easier to insert.
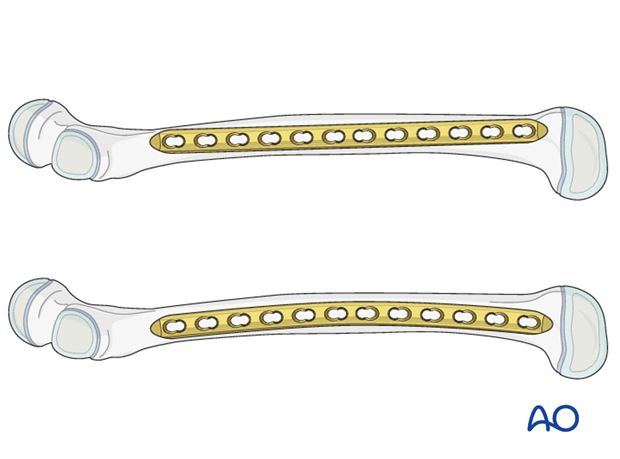
Plate length and number of screws
The plates for a bridging technique should be longer than for conventional “anatomical” fixation, to distribute the forces more widely, as well as to provide sufficient stability.
A minimum of two and up to four bicortical screws should be inserted into each fracture fragment.
Relative stability results from leaving plate holes empty over the fracture zone.
Up to half the screw holes need to be filled with screws and no screws are inserted into the fracture zone.

3. Patient preparation and approach
Patient positioning
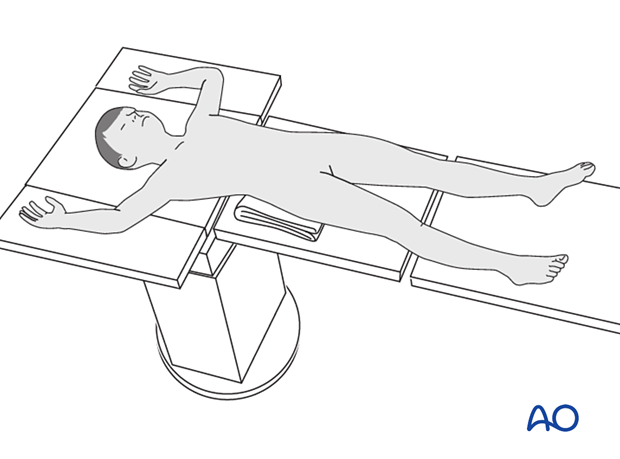
Place the patient in a supine position on a traction table or a translucent table with a bump under the ipsilateral flank.
Approach
For this procedure a MIO approach is used.
4. Preliminary reduction
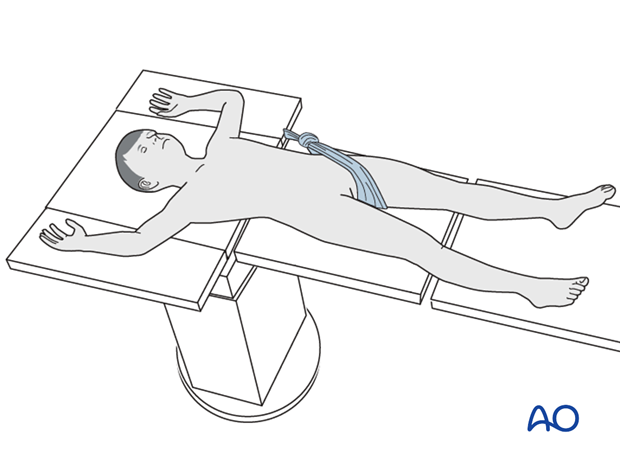
The use of a traction table can be beneficial in adolescents especially when operating without an assistant.
For younger children manual traction is often sufficient.
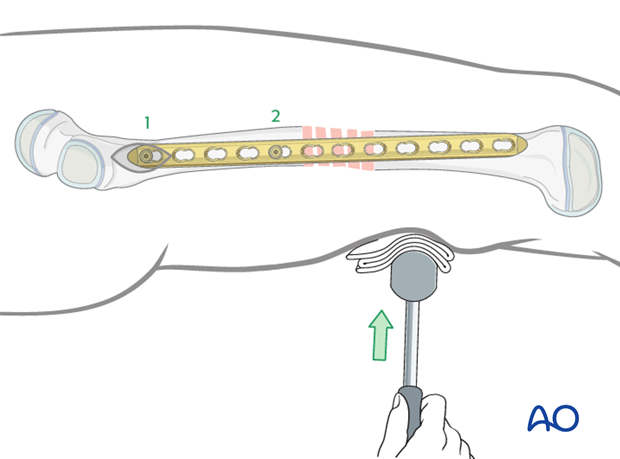
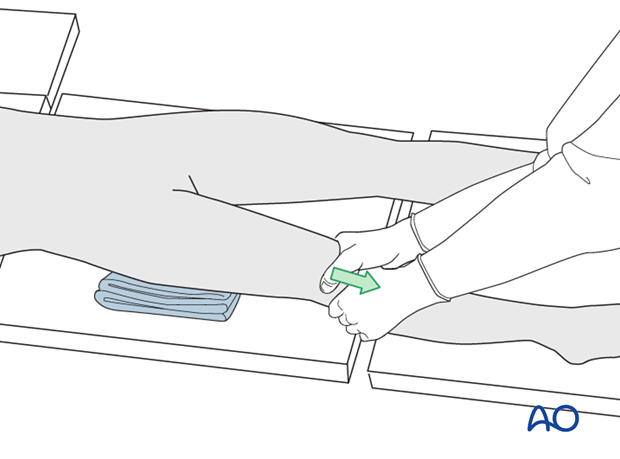
If a traction table is not used, folded linen bolsters under the fracture zone may facilitate reduction.
5. Contouring and insertion of the plate
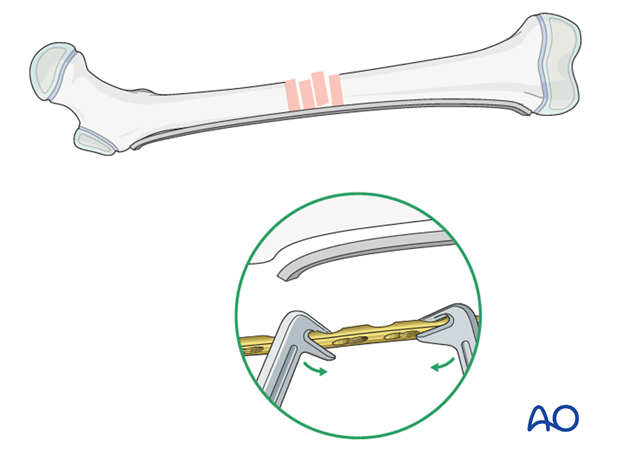
Contouring the plate
Contouring the plate over the fracture zone is not normally required.
It is necessary to contour the ends of a conventional plate used with cortical screws to address the shape of the proximal and distal femur.
A locking plate used as an internal fixator does not have to be contoured but slight contouring may be necessary to avoid soft-tissue irritation.
Direction of plate insertion
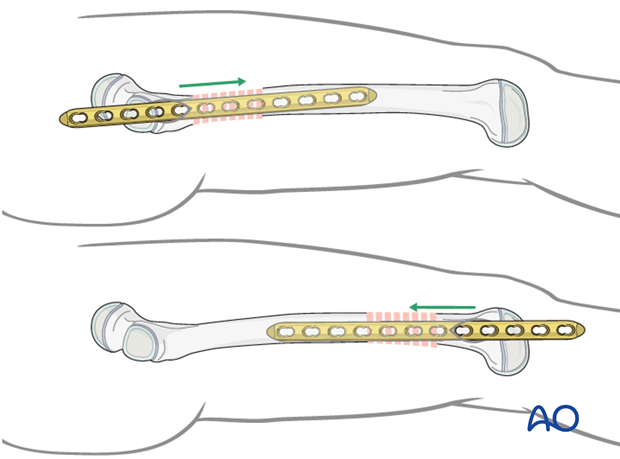
Insert the plate from the proximal end, if the fracture is located more proximally, or from the distal end, if the fracture is located more distally.
Preparation of the plate tunnel
Options for preparation of the plate path along the distal main fragment include:
- Insert the tip of the plate and slide it extraperiosteally along the distal main fragment.
- Insert a long pair of scissors, spread them, and then pull backwards.
- Insert a periosteal elevator and slide it extraperiosteally along the distal main fragment.
- Use the MIO instruments.
6. Reduction and fixation
Principle
Further adjustment is often needed after the preliminary reduction to achieve optimal alignment. In such cases, the final reduction will be achieved using the implant and further multistep reduction techniques.

Plate fixation to first main fragment
The order of screw insertion depends on the direction of plate insertion. In the following example, the procedure for a plate inserted through a proximal approach is shown.
Place the plate on the lateral aspect of the femur and the check the position with image intensification.
Insert the first cortical screw into the most proximal plate hole.
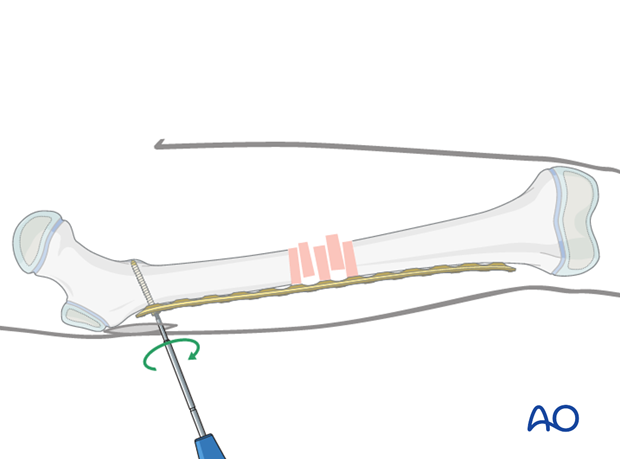
The position of the second screw will determine the lateral alignment of the plate on the proximal fragment.
Use a K-wire or Schanz screw to push the proximal fragment into position and achieve the correct alignment between the plate and the bone.
Alternatively, this can be achieved directly through a second incision, using a periosteal elevator.
Insert the second cortical screw.
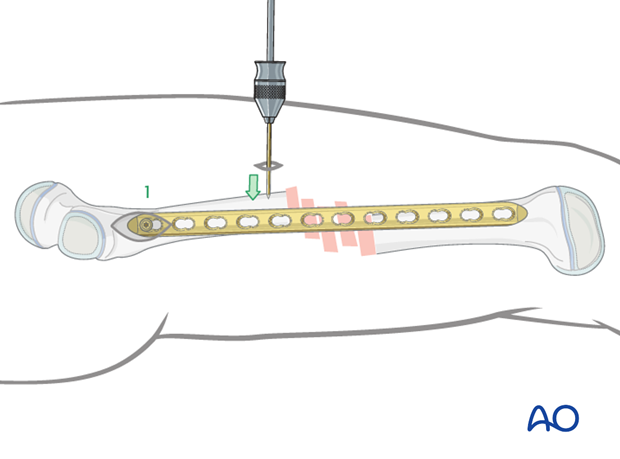
Indirect reduction
Manual traction is often sufficient to align the distal femur to the plate.
A bump placed under the fracture site helps with sagittal fracture alignment.
K-wires can be used for provisional fixation of the plate.

Assessment of rotational alignment
Confirm rotational alignment of the femur clinically and radiographically before fixing the second fragment. This can be done by:
- Fluoroscopy of the fracture site (matching shaft diameters)
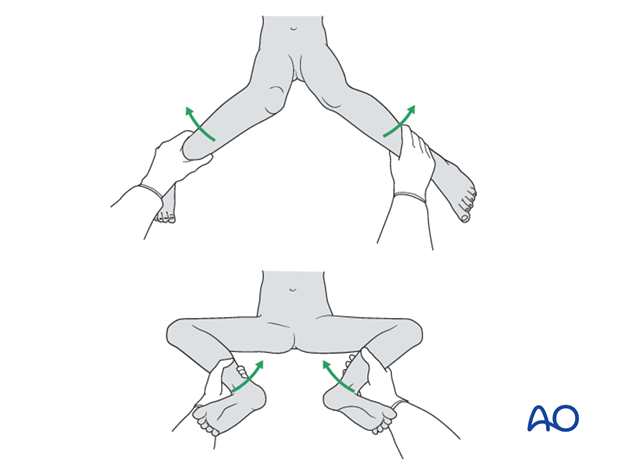
- Comparing internal and external rotation to the contralateral side (consider preparing and draping the uninjured side as well)
- Fluoroscopy of proximal femur (lesser trochanter profile)
For more detail see the additional material on assessment of rotation.
Plate fixation to second main fragment
Insertion of the third screwInsert the third screw through the most distal plate hole into the second main fragment.
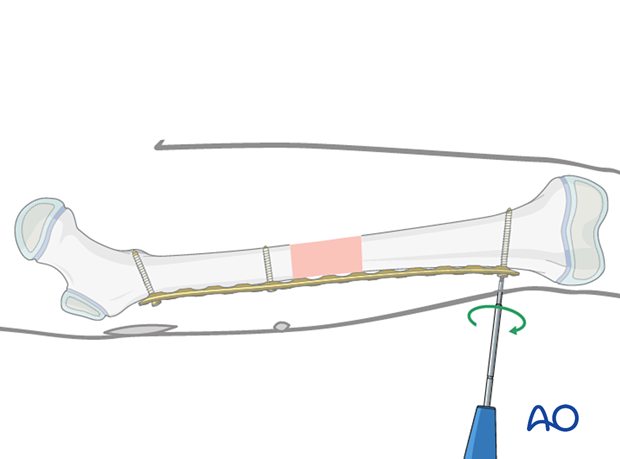
If the distal fragment requires adjustment to obtain the correct lateral position, the following reduction techniques may be helpful before inserting of the fourth screw:
- Placement of a linen bolster under the distal fragment
- Using a periosteal elevator, inserted through a small additional incision to push the fragment into the correct position
- Using a percutaneous K-wire or Schanz screw
Insert the fourth cortical screw.
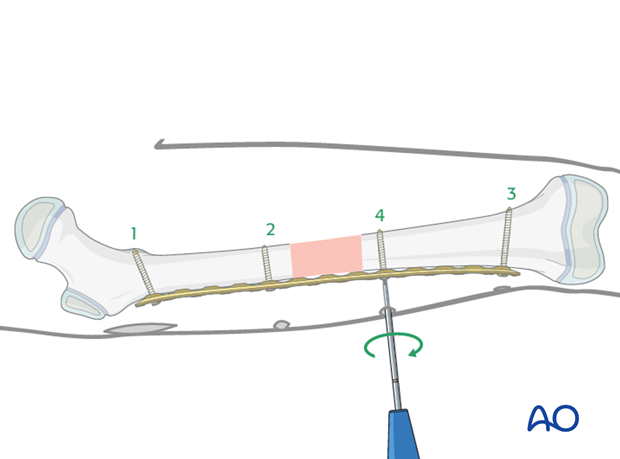
Final screw insertion
At least two bicortical screws must be inserted into each main fragment.
For older or heavier children at least three screws is recommended for each main fragment.

7. Alternative: internal fixator - locking plate system
Preliminary fixation
A plate used as an internal fixator has the advantage that optimal reduction can be achieved even if the plate is not correctly precontoured.
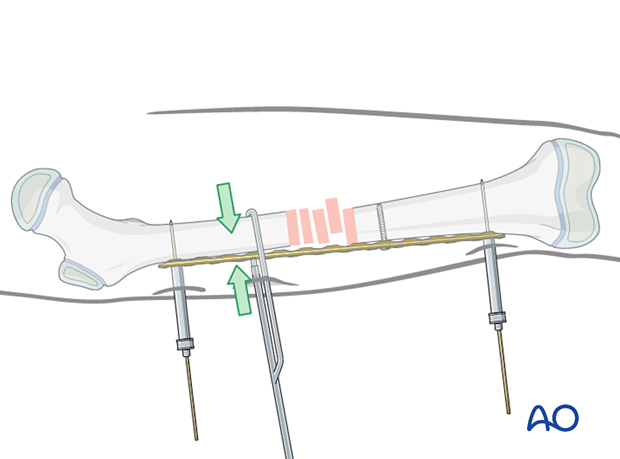
Temporarily attach the plate to the bone using K-wires applied through proximal and distal positioning holes, or through the most peripheral screw holes using locking towers with appropriate sleeves.
Insert two conventional screws proximal and distal to the fracture zone.
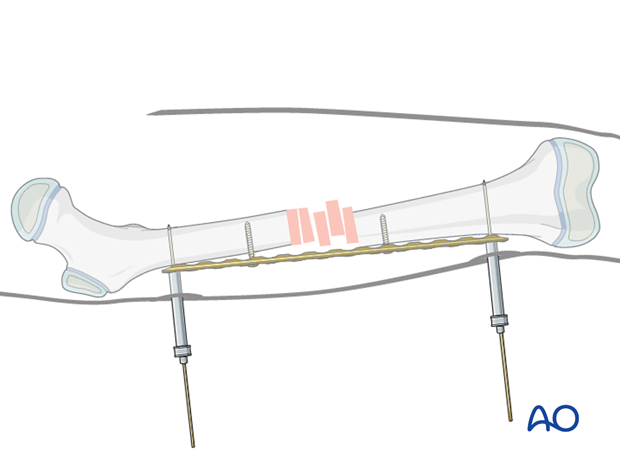
Reduction
Alignment is achieved by tightening the two conventional screws.
There is a gap between the bone and the implant which is to be anticipated and ignored.
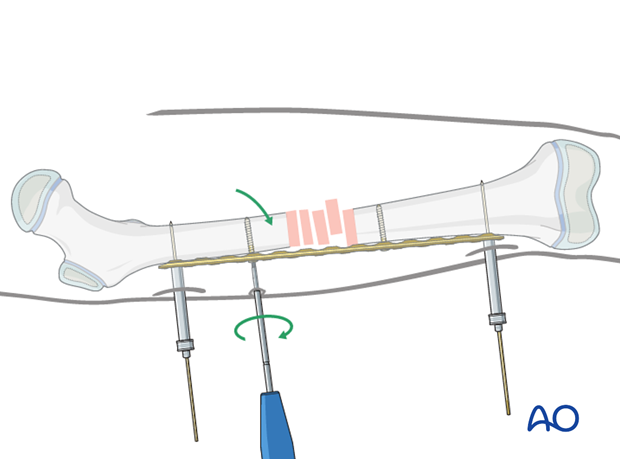
In cases where reduction is difficult a bone holding clamp can be used via a small incision.
Final screw fixation
The final reduction is achieved by inserting locking head screws according to the preoperative plan with optional removal of the conventional reduction screws.
8. Final assessment
Check the range of internal and external rotation of the leg and compare with the contralateral limb.
Obtain final AP and lateral fluoroscopic views.
9. Aftercare
Immediate postoperative care
The patient should get out of bed and begin ambulation with crutches on the first postoperative day.
In most cases partial weight bearing is permitted until preliminary callus is present at 4–6 weeks.

Analgesia
Routine pain medication is prescribed for 3–5 days postoperatively.
Neurovascular examination
The patient should be examined frequently, to exclude distal neurovascular compromise.
Compartment syndrome, although rare, should be considered in the presence of severe swelling, increasing pain, and changes to neurovascular signs.
Discharge care
Discharge from hospital follows local practice and is usually possible after 1–3 days.
Mobilization
The patient should ambulate with crutches and begin knee range-of-motion exercises.
Follow-up
The patient is usually reviewed 2 weeks after surgery for clinical and radiographic assessment, and wound check.
Clinical assessment of leg length and alignment is recommended at one-year.
Clinical assessment of leg length uses a tape measure from the ASIS to the medial malleolus.
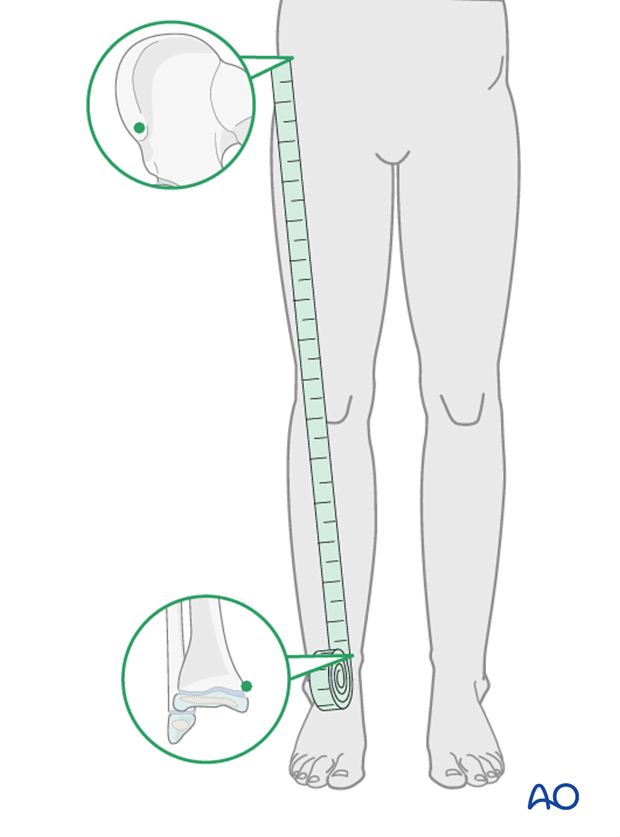
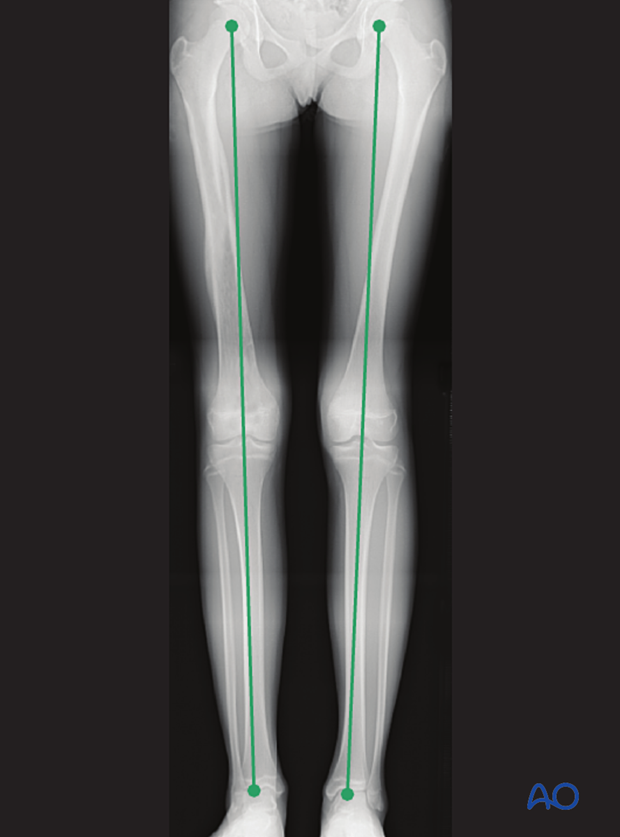
If there is any concern about leg length discrepancy or malalignment, long-leg x-rays are recommended.
Leg length is measured from the femoral head to the ankle joint.
Implant removal
If the patient develops symptoms related to the implant, it can be removed once the fracture is completely healed, usually 6–12 months following injury.


