Syndesmotic stabilization
1. General considerations
Introduction
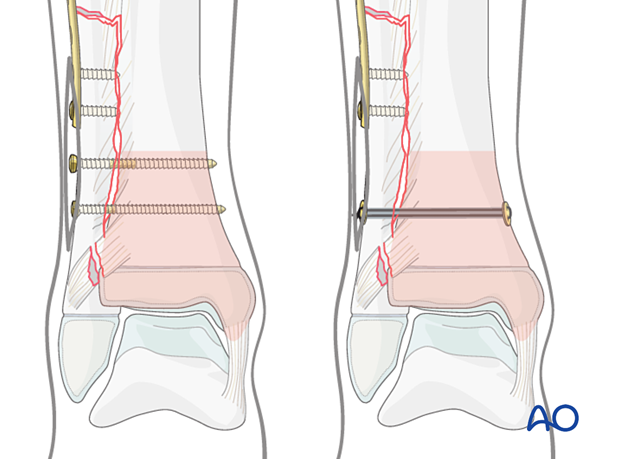
If the syndesmosis is disrupted, the anatomical relationship between the fibula and tibia must be maintained while the ligaments heal.
The syndesmosis may be stabilized with screw transfixation or suture-button (suspensory) fixation. The latter should be used with caution in length unstable fibular fractures.
Ensure that insertion does not damage the distal tibial physis.
The syndesmotic screws are typically removed after 2–3 months to avoid breakage.
Associated high fibular fractures
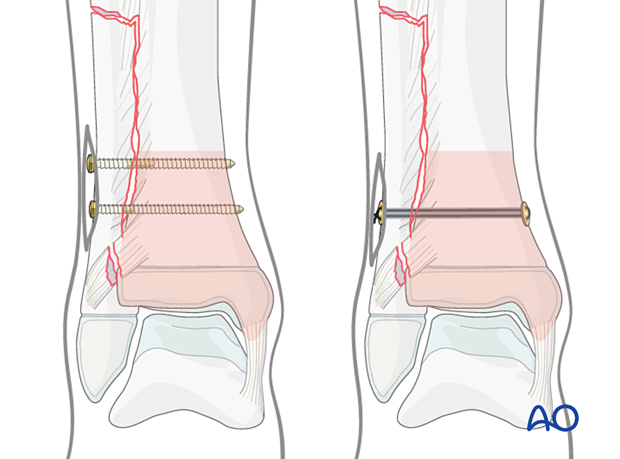
A fracture of the middle or proximal third of the fibular shaft may be part of a more complex injury and is often underestimated.
High fibular fractures may be associated with instability of the syndesmotic complex.
Restoration of length, axis, and rotation of the fibula at the level of the ankle joint is of primary concern.
The proximal fibular fracture is usually indirectly reduced and rarely requires separate fixation to increase the overall stability.
After transfixation of the syndesmosis, ankle joint stability should be assessed.
2. Instruments and implants
Screw transfixation
A 3.5 mm fully threaded screw (ideally self-tapping) may be used as a syndesmotic positioning screw.
The following equipment is needed:
- Drill
- Image intensifier
Suspensory fixation
Although insertion of a suture and button can be performed with standard instrumentation, specialized implant inserters are available and facilitate minimally invasive placement of sutures (refer to the manufacturer’s technical guide).
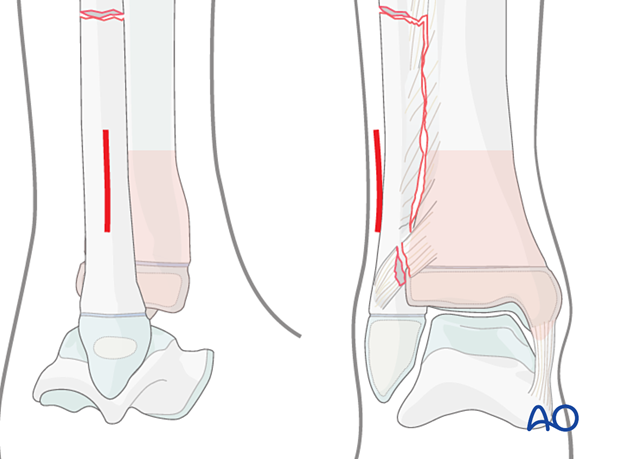
3. Skin incision
Use an image intensifier to determine the correct level.
Incise the skin slightly posterior and lateral to the fibula, proximal to the tibial physis at the level of the planned suture or screw insertion.
4. Reduction
Restoring length, axis, and rotation of the fibula
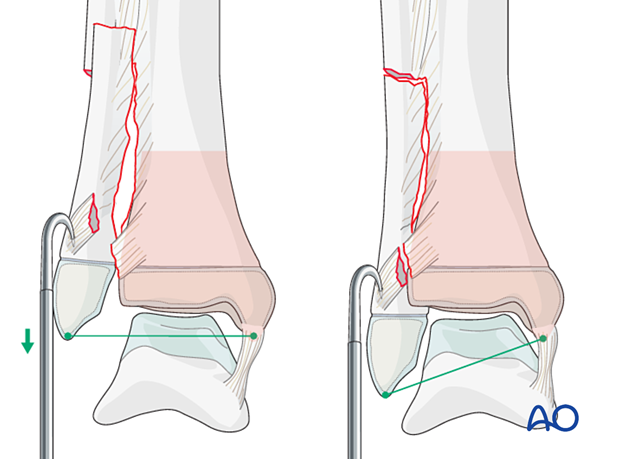
A small bone hook may be inserted above the fibular physis to pull the lateral malleolus distally until perfect reduction of the distal tibiofibular joint is achieved.
If the fibula/talus does not reduce anatomically, there may be entrapment of the deltoid (medial collateral) ligament which must be removed through a medial approach.
Use an image intensifier to check rotation, length, and anteroposterior translation of the fibula.
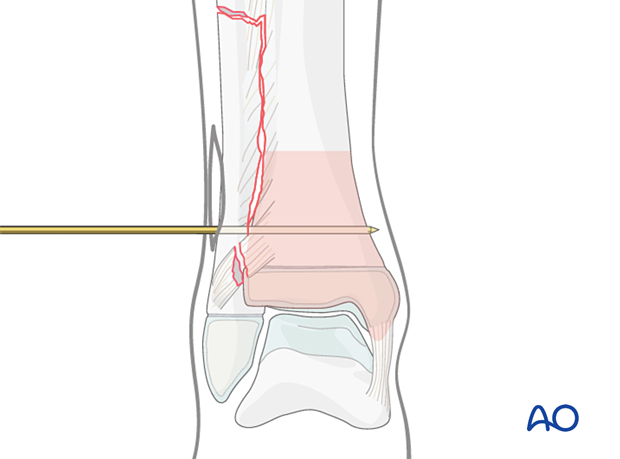
Preliminary fixation with a K-wire
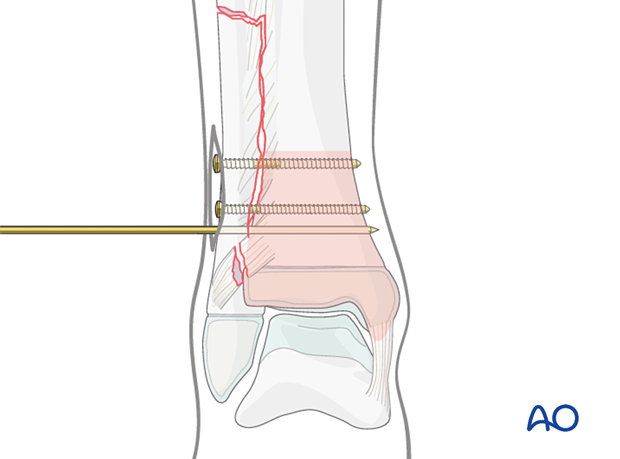
Stabilize the reduction with a 2.0 mm K-wire, inserted from the lateral side, distal to the planned distal screw and proximal to the tibial physis.
The ankle joint should be in the neutral position during this maneuver.
Confirm reduction with an image intensifier in both planes.
The reduction must be anatomical and should be confirmed by comparison with images of the uninjured ankle.
5. Drilling
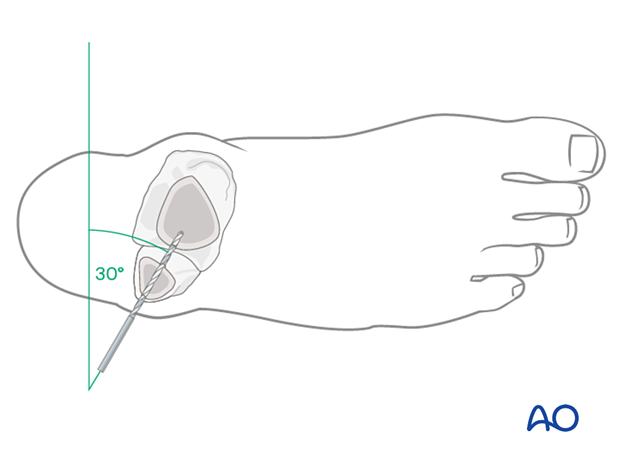
With the ankle joint in the neutral position, drill a hole through the fibula and tibia, just proximal to the inferior tibiofibular joint, parallel to the tibial physis and …
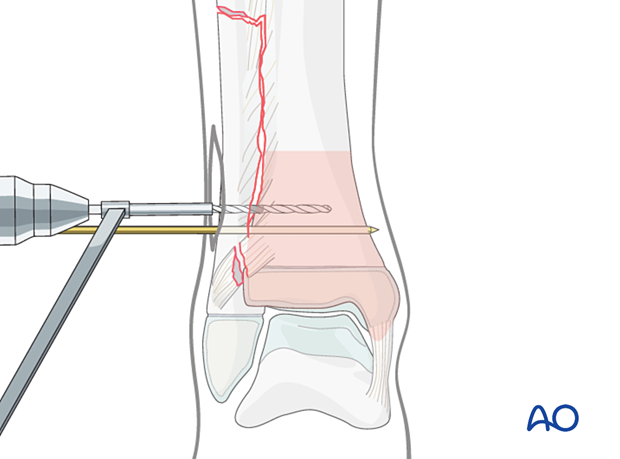
… 30° from posterior to anterior.
For screw fixation, a 2.5 mm drill may be used.
For the suspensiory fixation, the diameter of the drill depends on the system used.
6. Screw fixation
Screw insertion
Use a depth gauge to determine the length of the screw.
As this screw is not intended to act as a compression lag screw, the thread must be tapped in both fibula and tibia.
If non-self-tapping screws are to be used, tap the thread and insert a 3.5 mm cortex screw.
The foot should be in neutral position during insertion of the positioning screw.
Confirm reduction with an image intensifier in both planes.
The reduction must be anatomical and should be confirmed by comparison with images of the uninjured ankle.
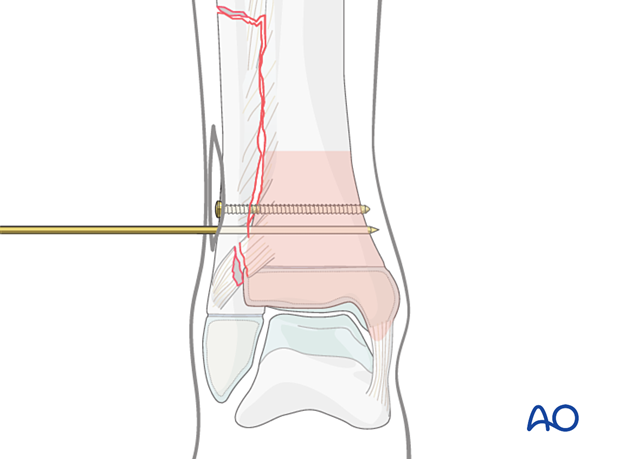
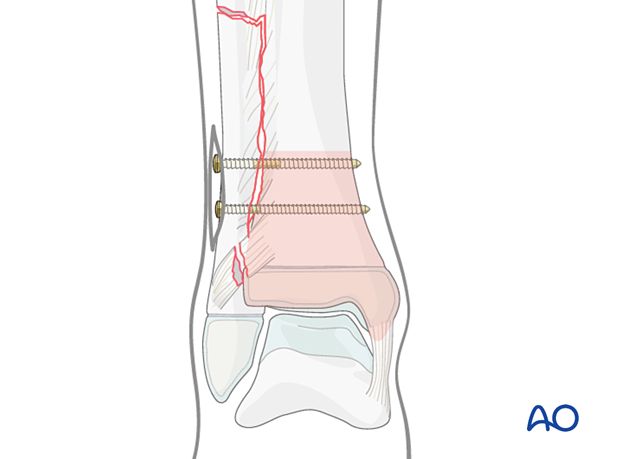
Two small fragment screws can be used to stabilize the syndesmosis, especially in high fibular fractures, such as the Maisonneuve injury.
Prepare and insert the second positioning screw as described above, parallel to and 1.5–2 cm proximal to the first screw.
Once satisfactory reduction and screw placement have been confirmed, remove the K-wire-wire.
Final construct
Confirm the position of the screw and the distal tibiofibular joint with an image intensifier.
7. Suspensory fixation
Suture insertion
Insert the suture with the corresponding inserter until the tip is clear off the far tibial cortex.
Some systems have the button preloaded on the inserter. If a button needs to be added, make a separate medial incision to place the button and pass the sutures.
Pass the sutures back to the fibula if not using a preloaded system.
Before tensioning the suture confirm reduction with an image intensifier in both planes. The reduction must be anatomical and should be confirmed by comparison with images of the uninjured ankle.
In an unstable syndesmotic injury, especially in high fibular fractures, such as the Maisonneuve injury, a second suspensory fixation suture may be added proximally.
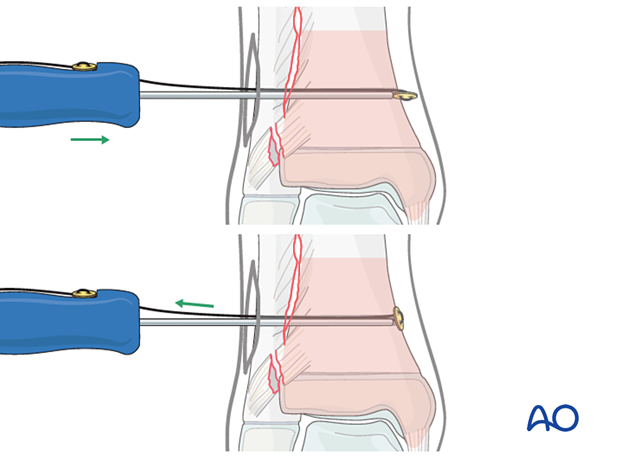
Tension and fix the sutures to the lateral fibular cortex with a separate button or plate.
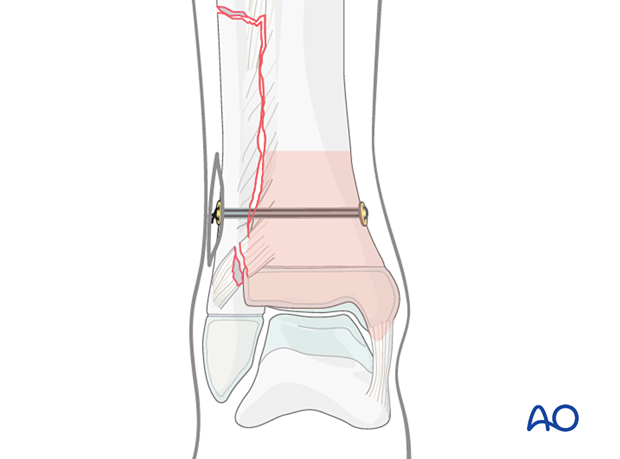
8. Treatment of associated high fibular fractures
A high fibular fracture requires direct fixation if the degree of displacement compromises the soft tissues.
The fracture may be fixed with standard techniques for long-bone fracture management, eg, 1/3 tubular plate or 3.5 LCP.
