Uniplanar external fixator
1. Note on illustrations
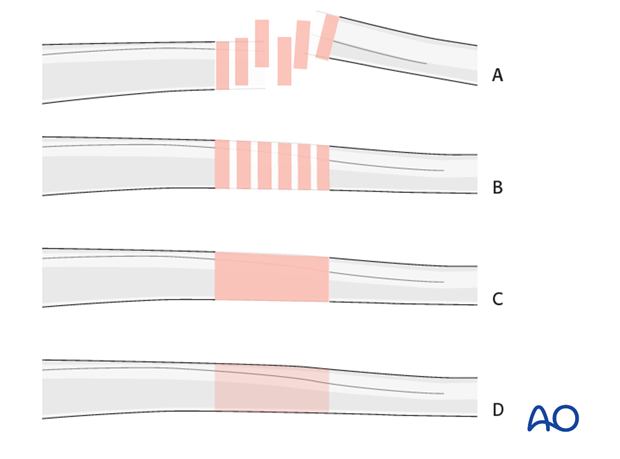
Throughout this treatment option illustrations of generic fracture patterns are shown, as four different types:
A) Unreduced fracture
B) Reduced fracture
C) Fracture reduced and fixed provisionally
D) Fracture fixed definitively
2. Principles of uniplanar external fixation
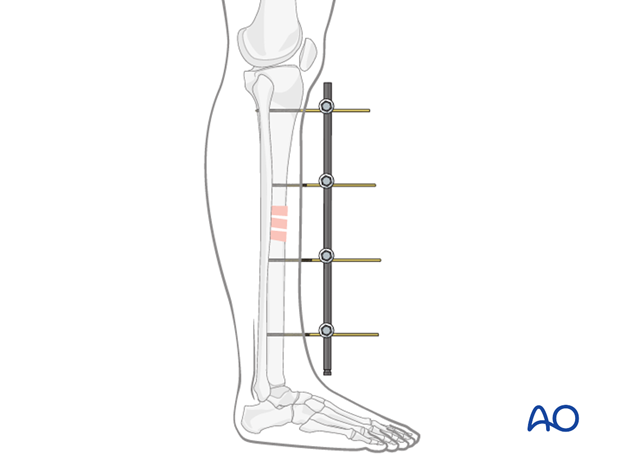
The frame of a uniplanar external fixator consists of at least two pins in each main fracture fragment connected with one single rod. A second rod may be added to increase stiffness of the frame.
Details of external fixation are described in the basic technique for application of modular external fixator.
Specific considerations for the uniplanar external fixator in the tibial shaft are given below.
Teaching video
AO teaching video: Uniplanar double-rod frame
3. Patient preparation
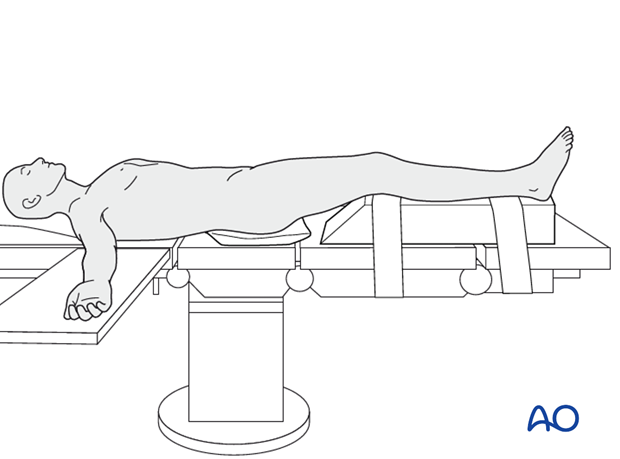
This procedure is normally performed with the patient in a supine position.
4. Safe zones for pin placement
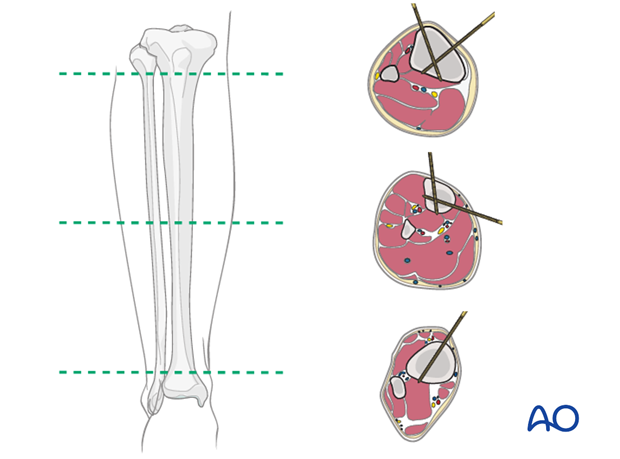
For safe pin placement make use of the safe zones and be familiar with the anatomy of the lower leg.
Pearl
The pin in the distal tibia should be placed far away from the extensor tendons on the medial side.
5. Reduction (tibial shaft)
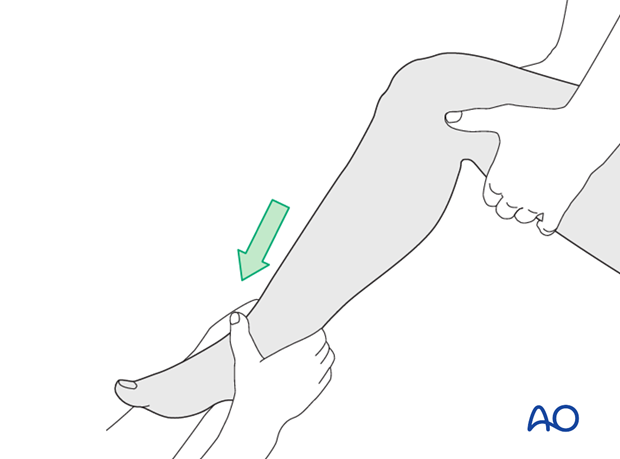
Apply manual longitudinal traction to leg and maintain reduction.
6. Pin insertion (tibial shaft)
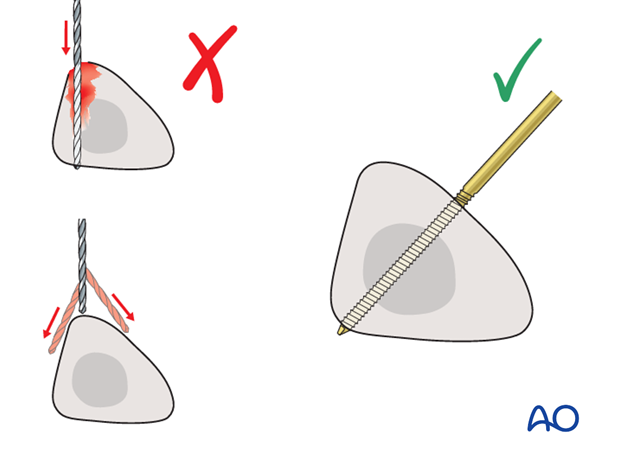
Drilling a hole in the thick tibial crest may be associated with excessive heat generation and there is a risk the drill bit may slip medially or laterally damaging the soft tissues. As the anteromedial tibial wall provides adequate thickness for the placement of pins, this trajectory is preferable. A trajectory angle (relative to the sagittal plane) of 20-60° for the proximal fragment and of 30-90° for the distal fragment is recommended.
7. Frame construction / fixation (tibial shaft)
Pin insertion and frame assembly
Insert a pin into each main fragment in one plane.
Connect the pins with one rod to which 4 clamps have been added.
At this point, some correction to the reduction is still possible.
Tighten the clamps.
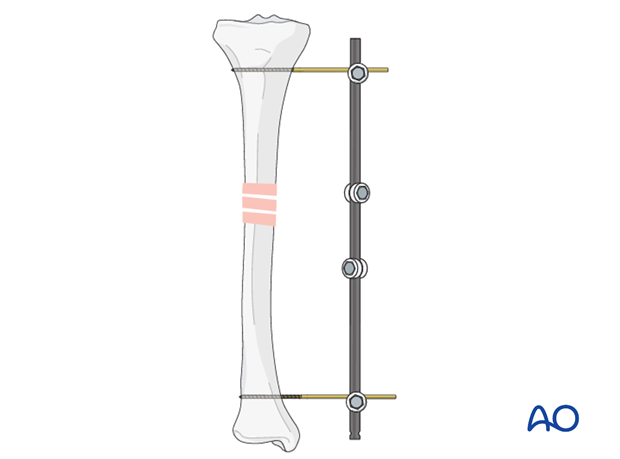
On both sides of the fracture, add an additional pin close to the fracture zone using the rod-to-pin clamps as guides.
Tighten the clamps.
Subsequent correction of the reduction is now impossible.
Additional rod
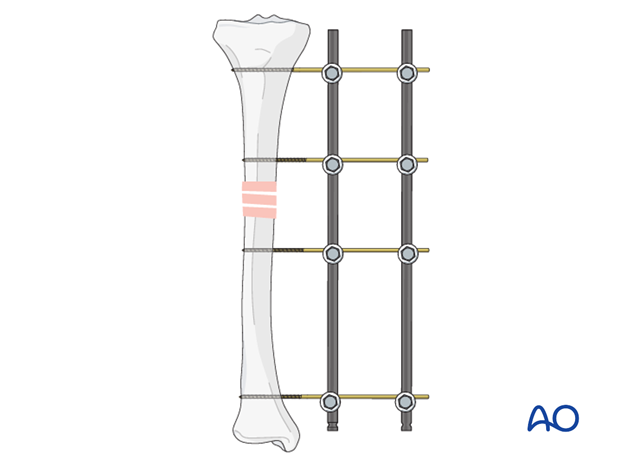
If stability is not sufficient, an additional rod can be added. The stiffness of the construct is increased if the rods are closer to the bone, and the further apart from each other the rods are placed.
Pearl: Prevent plantar flexion contracture
In patients with severe soft-tissue involvement, it may be helpful to add a pin in the foot (one of the tarsal or metatarsal bones) to maintain the ankle at a 90° angle. Thereby a plantar flexion contracture can be prevented.
The pin may be inserted in either the navicular bone, in one of the cuneiforms, in the first metatarsal base, or in the first and fifth metatarsal base, and connected to the tibial external fixator. Care should be taken to insert the pin bicortically and to avoid the intra-articular spaces.
8. Aftercare following external fixation
Pin-site care
Proper pin insertion
To prevent postoperative complications, pin-insertion technique is more important than any pin-care protocol:
- Correct placement of pins (see safe zones) avoiding ligaments and tendons, eg tibia anterior
- Correct insertion of pins (eg trajectory, depth) avoiding heat necrosis
- Extending skin incisions to release soft-tissue tension around the pin insertion (see inspection and treatment of skin incisions)
Pin-site care
Various aftercare protocols to prevent pin tract infection have been established by experts worldwide. Therefore no standard protocol for pin-site care can be stated here. Nevertheless, the following points are recommended:
- The aftercare should follow the same protocol until removal of the external fixator.
- The pin-insertion sites should be kept clean. Any crusts or exudates should be removed. The pins may be cleaned with saline and/or disinfectant solution/alcohol. The frequency of cleaning depends on the circumstances and varies from daily to weekly but should be done in moderation.
- No ointments or antibiotic solutions are recommended for routine pin-site care.
- Dressings are not usually necessary once wound drainage has ceased.
- Pin-insertion sites need not be protected for showering or bathing with clean water.
- The patient or the carer should learn and apply the cleaning routine.
Pin loosening or pin tract infection
In case of pin/wire loosening or pin tract infection, the following steps need to be taken:
- Remove all involved pins and place new pins in a healthy location.
- Debride the pin sites in the operating theater, using curettage and irrigation.
- Take specimens for a microbiological study to guide appropriate antibiotic treatment if necessary.
Before changing to a definitive internal fixation an infected pin tract needs to heal. Otherwise infection will result.
Mobilization
Unless there are other injuries or complications, mobilization may be performed on day 1. Static quadriceps exercises with passive range of motion of the knee should be encouraged. Early active range of motion of knee and ankle is encouraged.
The goal of early active and passive range of motion is to achieve a full range of motion within the first 4-6 weeks. Maximum stability is achieved at the time of surgery. A delay beyond a few days to allow swelling to subside is illogical and harmful.
Weight bearing
If external fixation is considered as the definitive device, weight bearing should be encouraged early. The timing and how much weight may be taken through the fracture will be influenced by:
- Patient factors
- Fracture configuration
- Stability of the fixator construct
As soon as callus formation is visible and once there are no clinical signs of instability, the patient can start to bear full weight. After removal of the external fixator, it may be prudent to protect the leg temporarily in a splint or brace.
Follow up
See patient 7-10 days after surgery for a wound check. X-rays are taken to check the reduction.
The patient should be seen every 4-6 weeks in follow-up with examination and x-rays until union is secure, and range of motion and strength have returned.
Inspection of external fixators every two weeks is optional.
