Plate fixation
1. Principles
Introduction
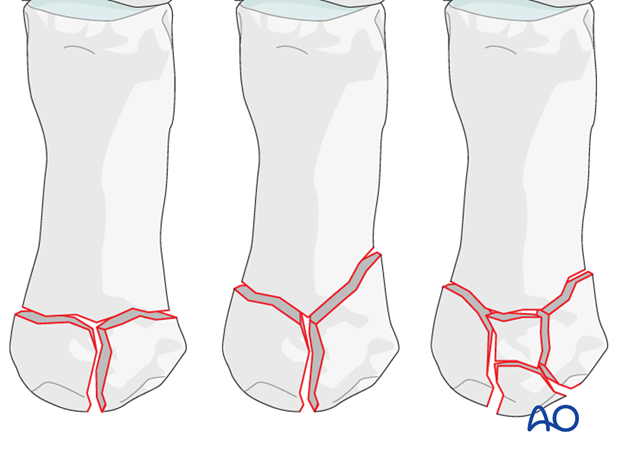
Rolando’s fracture is a 3-part intraarticular fracture of the base of the thumb metacarpal. These T- or Y-shaped fracture patterns can occur either in the frontal or in the sagittal plane.
The mechanism is axial overload along the first metacarpal causing compression of the joint surface.
Today the term “Rolando’s fracture” is often misused to describe multifragmentary intraarticular fractures of the thumb metacarpal base.
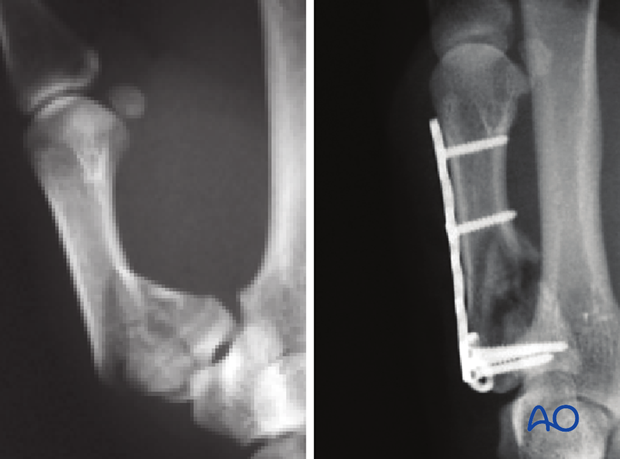
Metaphyseal and articular comminution are often more marked than apparent on the x-rays. The full extent of the comminution is often seen only after distraction of the fracture, as demonstrated in the images.
A preoperative CT scan or traction x-rays are advisable.
Open anatomical reduction and internal fixation is the treatment of choice for these fractures.
Choice of approach
For Y- or T-shaped patterns in the frontal plane, a straight dorsal approach is preferred.
For a Y- or T-shaped fracture pattern in the sagittal plane, the radiopalmar approach is the preferred choice.
2. Reduction
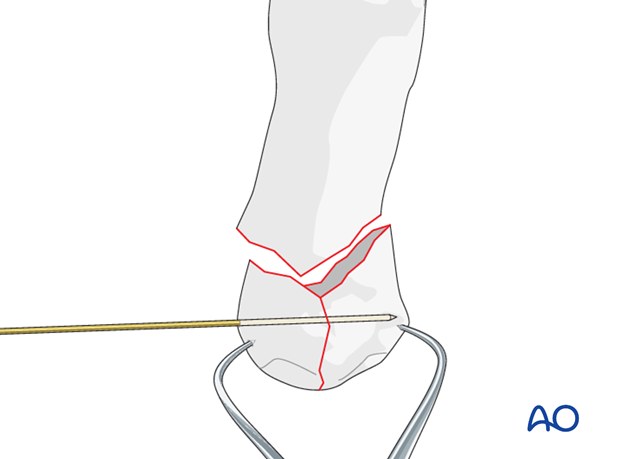
Preliminarily fix the articular fragments of the base of the thumb with a pointed reduction forceps.
Confirm accurate reduction under direct vision and using image intensification.
A preliminary K-wire may be inserted perpendicularly to the vertical fracture plane to stabilize the construct additionally. The K-wire can be useful when the reduction forceps will have to be removed for correct plate placement.
Apply traction
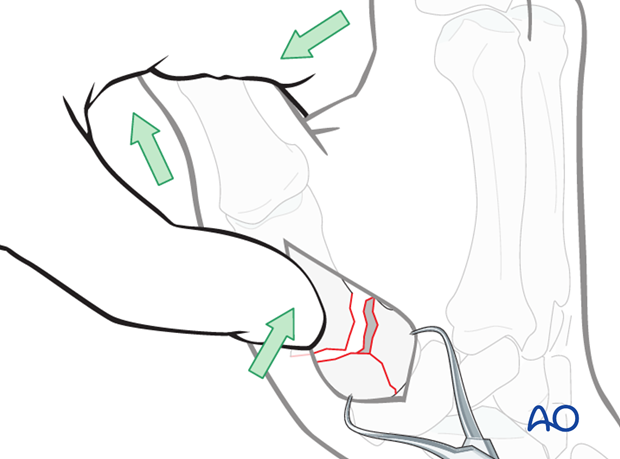
After stabilization of the articular fragments with a forceps, reduction of the diaphyseal fragment to the articular fragments can be performed with axial traction on the thumb and simultaneous pressure on the dorsal aspect of the diaphysis near the fracture.
Preliminary fixation of diaphysis
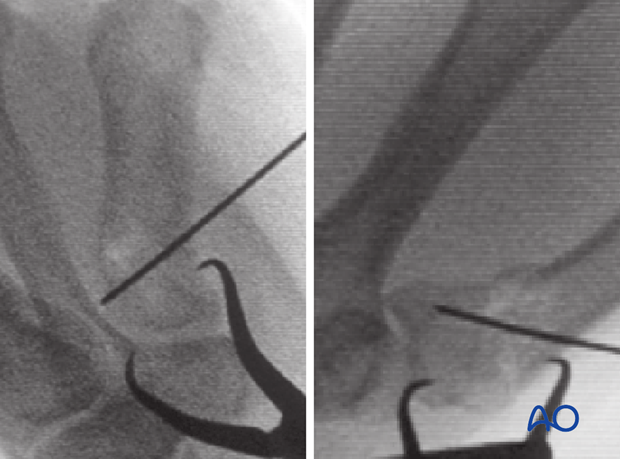
The diaphysis is preliminarily fixed to the base with a K-wire.
Confirm articular congruency and anatomical reduction using image intensification. A limited capsulotomy will permit visual inspection of the joint surface.
3. Plate preparation
Plate selection
A T-shaped plate is best suited for these fractures.
A 2.0 mm locking compression plate (LCP) is the implant of choice in cases of additional metaphyseal comminution.
If a conventional non-locking plate is used, additional bone graft from the distal radius may be necessary.
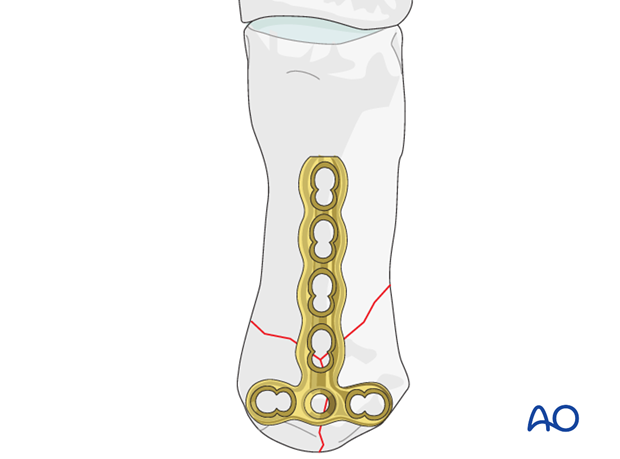
Plate length
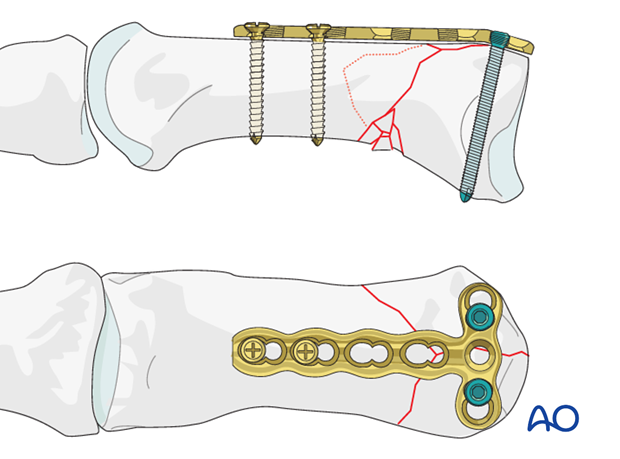
Cut the 2.0 mm LCP to length so that 2 screws can be fixed in the distal diaphyseal fragment.
Contouring of the plate
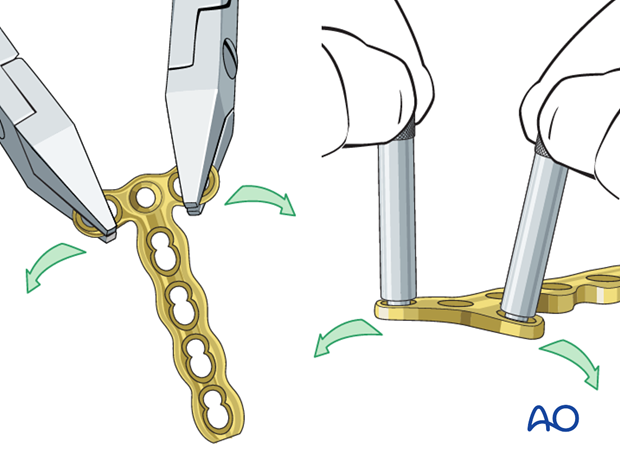
The plate has to be adapted accurately to the contour of the proximal fragment. Use bending pliers to contour the plate. Be careful to bend in between the holes by positioning the pliers over the plate holes. The bend should never go through a hole as this may damage the locking mechanism.
Alternatively, insert the threaded bolt into the plate holes to bend the plate in order to avoid deforming the threaded hole.
Adding a slight bend
In order to prevent the screw from penetrating the joint, a slight bend is necessary. Be careful not to overaccentuate this bend as there is a comminution zone on the opposite cortex which does not withstand compression.
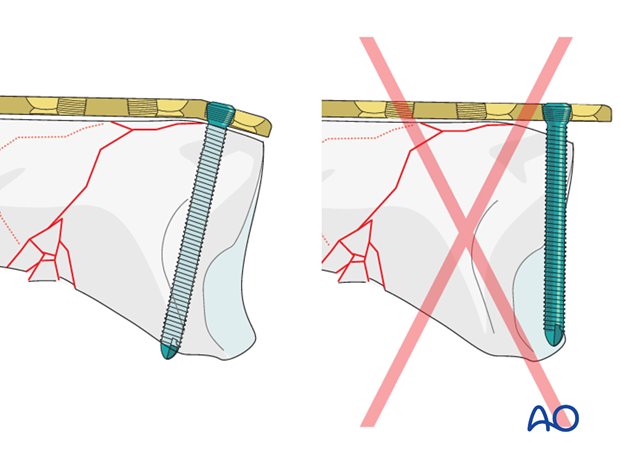
4. Plate fixation
Apply the contoured plate onto the dorsal surface of the metacarpal with a threaded drill guide in the central hole of the transverse section of the plate. Drill a K-wire through the guide into the metacarpal base, avoiding any wire placement within the fracture plane. Depending on the fracture configuration, an alternative plate hole may need to be used.
Check the wire position under image intensification to be sure that the joint has not been penetrated.
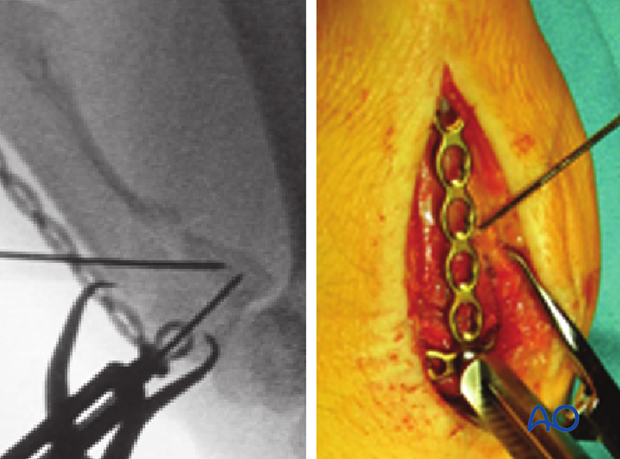
Insert a first locking head screw into the metacarpal base.
Remove the K-wire and drill guide.
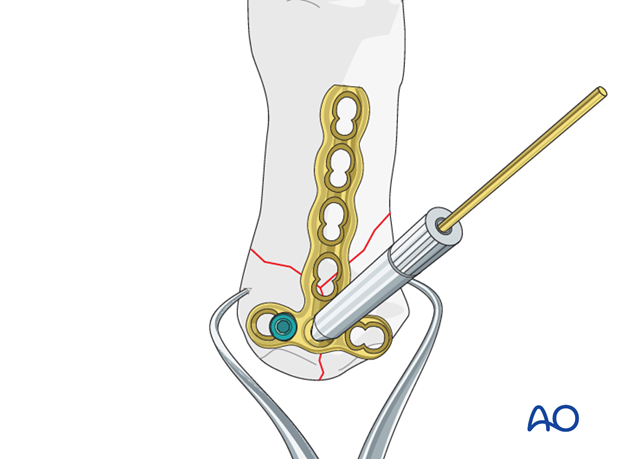
a) Align the plate along the shaft.
b) Insert a second locking head screw into the other articular fragment.
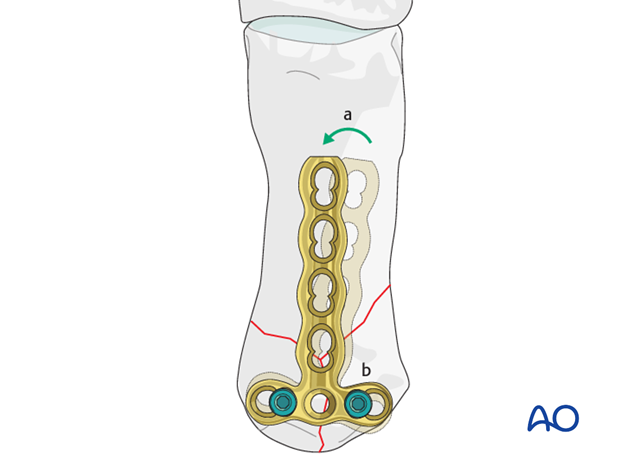
Insert distal screws
Insert a screw through the most distal plate hole. This screw may be a standard screw, as it engages in thick cortical bone. A locking screw, using a threaded drill guide when drilling, may be inserted in osteoporotic bone or when otherwise indicated.
The second distal screw is inserted using the same technique.
Option
Fixation with a middle screw in the base is usually not necessary, but may give additional purchase when required and when it will not conflict with the fracture line.
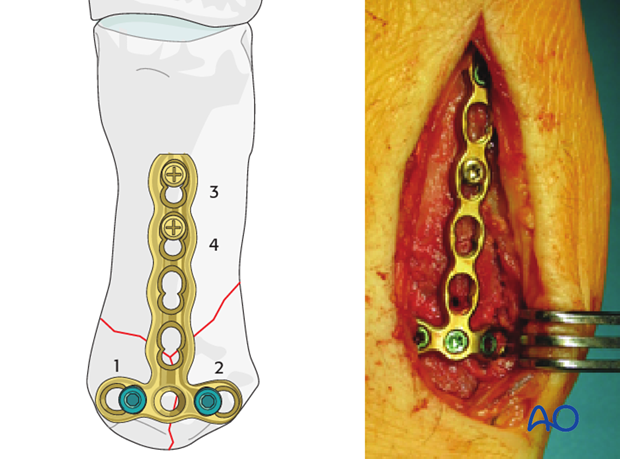
At the end of the procedure, confirm screw position, alignment of the metacarpal and reduction of the articular surface.
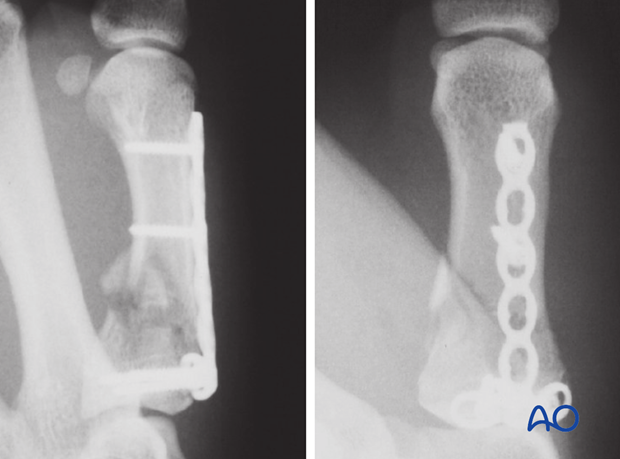
5. Aftertreatment
Splintage
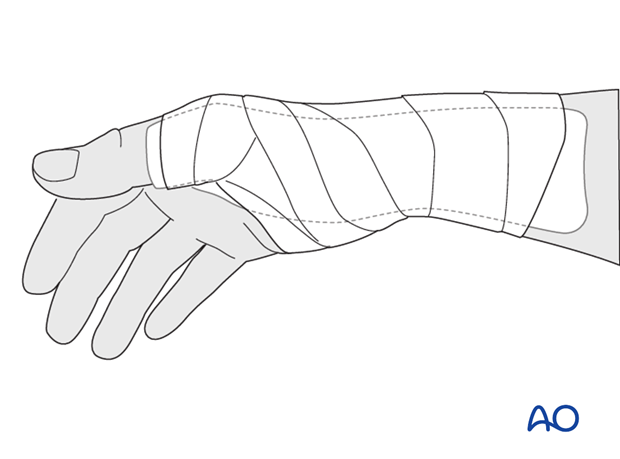
Immediately postoperatively, a temporary plaster splint is applied which immobilizes the first MCP joint as well as the wrist. When the pain and swelling have reduced, a custom thermoplastic splint is applied for a period of time depending on patient comfort and fracture stability.The implants may need to be removed in cases of soft-tissue irritation.
In case of joint stiffness, or tendon adhesions’ restricting finger movement, tenolysis or arthrolysis become necessary. In these circumstances, take the opportunity to remove the implants.
Functional exercises
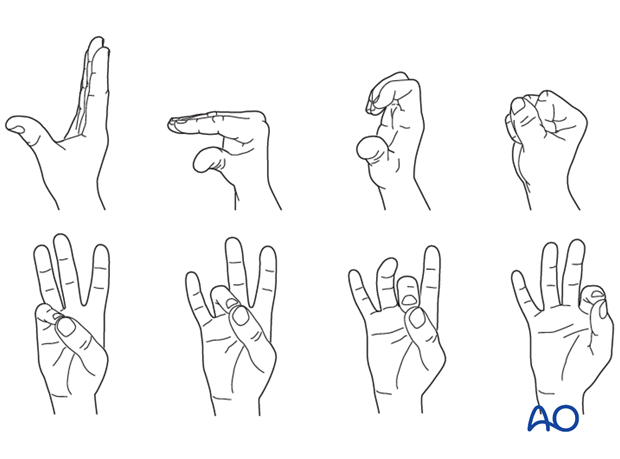
In compliant patients with stable fixation, the splint can be removed under the supervision of a physical therapist, and early active motion exercises started after a few days.
Implant removal
The implants may need to be removed in cases of soft-tissue irritation.
In case of joint stiffness, or tendon adhesions’ restricting finger movement, tenolysis or arthrolysis become necessary. In these circumstances, take the opportunity to remove the implants.


