Lag screw fixation
1. Introduction
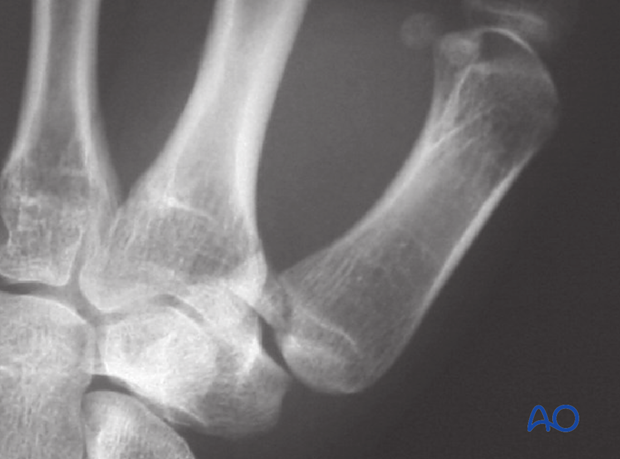
Bennett’s injury is a fracture subluxation. The causative mechanism is axial overload along the first metacarpal with simultaneous flexion. The palmar oblique ligament holds the palmar marginal fragment in its anatomical position.
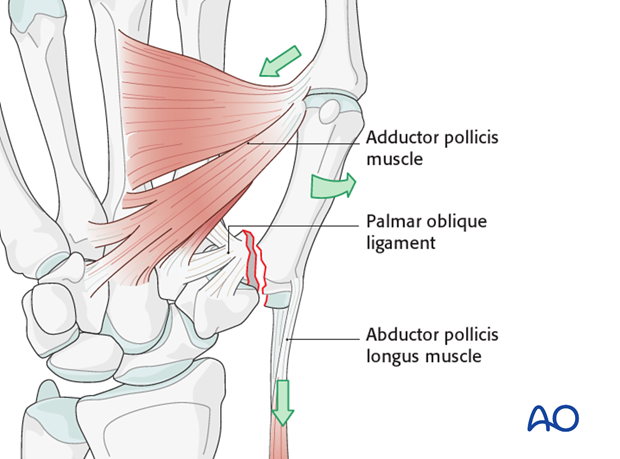
The distal part of the first metacarpal is adducted and supinated by adductor pollicis. The metacarpal as a whole is also displaced proximally by the abductor pollicis longus muscle.
The treatment goals are to reposition the first metacarpal in the carpo-metacarpal joint, and to restore the articular surface.
Treatment options
Depending on the size of the palmar marginal fragment, two treatment options are available:
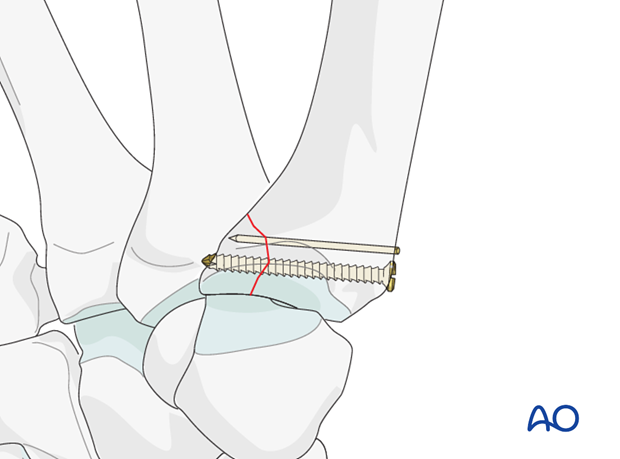
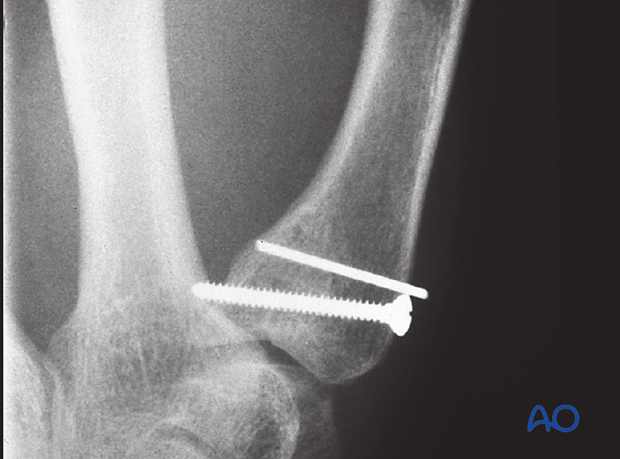
1) Screw and K-wire
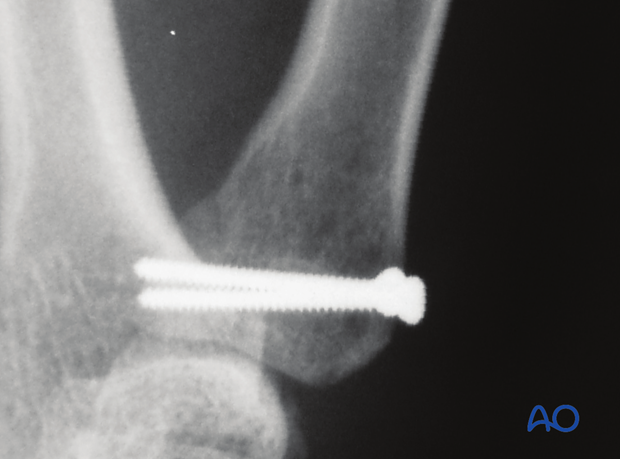
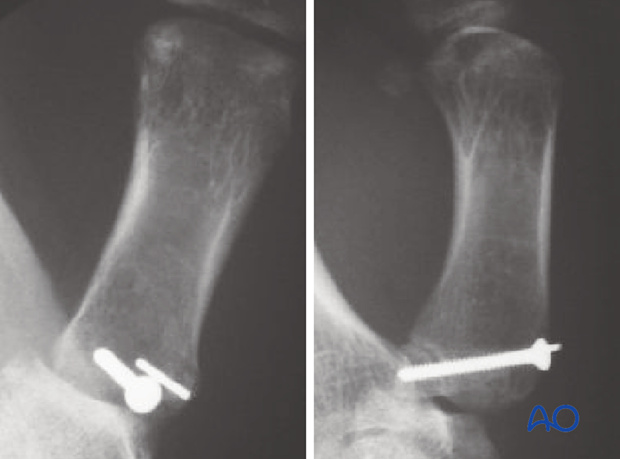
If the palmar marginal fragment comprises less than one third of the articular surface, one screw and a K-wire are used.
2) Two screws
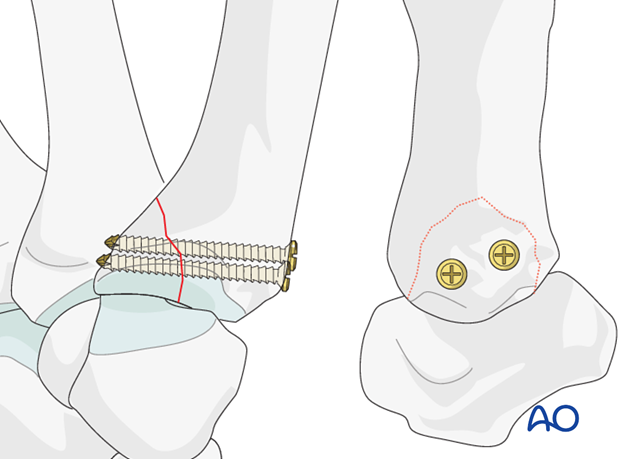
If the fragment comprises more than one third of the articular surface, two screws are used.
Teaching video
AO teaching video: Metacarpal I, base—Bennett fracture—Fixation with 2.0 mm lag screws
2. Approach
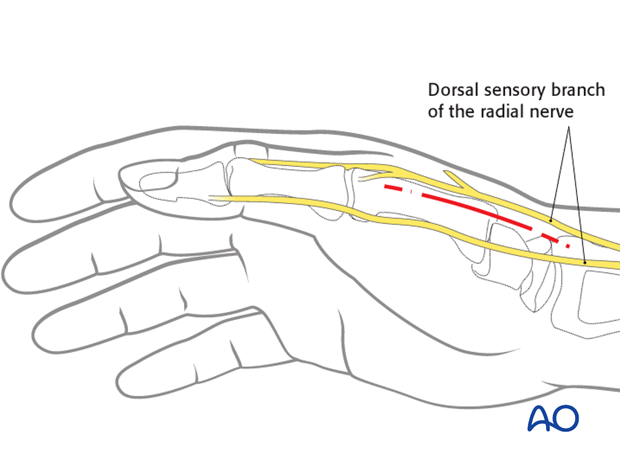
For this procedure a radiopalmar approach to the base of the thumb is normally used.
3. Small fragment: reduction
Inspection of the joint
To determine the exact geometry of the fracture and correct placement of the screws, it may be helpful to open the fracture plane by exerting traction and supination on the thumb.
The fracture surfaces must be irrigated for better visualization.
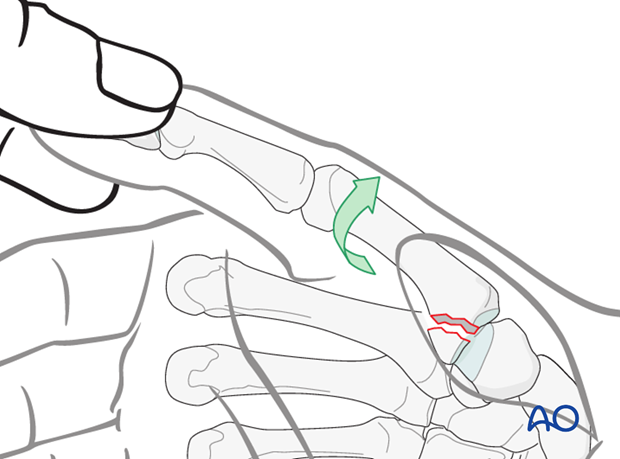
Reduce the fracture by pronation of the metacarpal and hold the reduction with a pointed reduction forceps.
Under direct vision, check that the joint surface is anatomically reduced, and adjust as necessary.
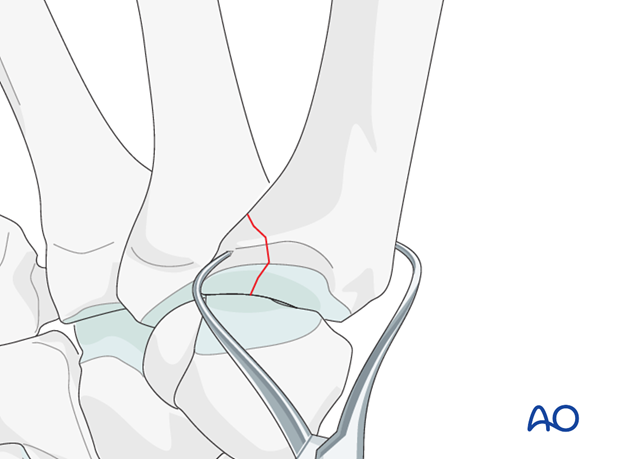
K-wire
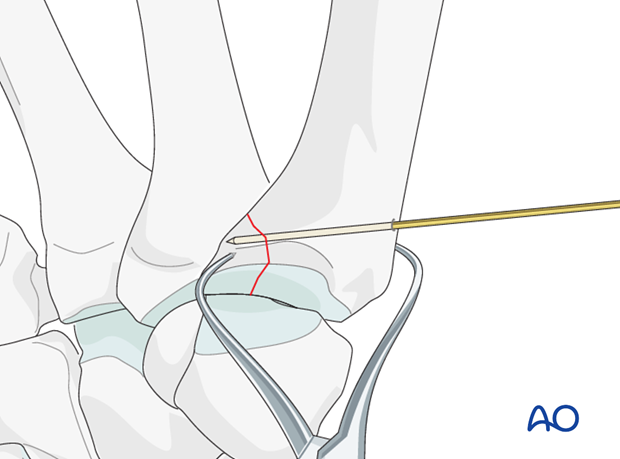
The fracture is stabilized with a 1.2 mm – 1.4 mm K-wire.
Check the reduction and the position of the K-wire using image intensification.
4. Small fragment: internal fixation
Drilling for the lag screw
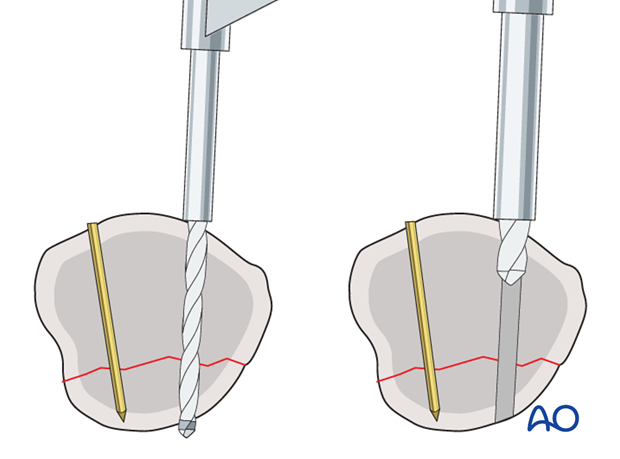
Drill a thread hole through both fragments, using 1.5 mm drill. If a non-selftapping screw is used, tapping is necessary at this stage.
Then use the larger 2.0 mm drill bit to overdrill the near fragment, creating the glide hole.
It is sufficient to overdrill only the first few millimeters of the near fragment. If the glide hole extends into the palmar marginal fragment, compression will not be achieved.
With smaller marginal fragments, it may be necessary to use a 1.5 mm screw (1.1 mm thread hole; 1.5 mm glide hole).
Insertion of the lag screw
Insert the lag screw and carefully tighten it.
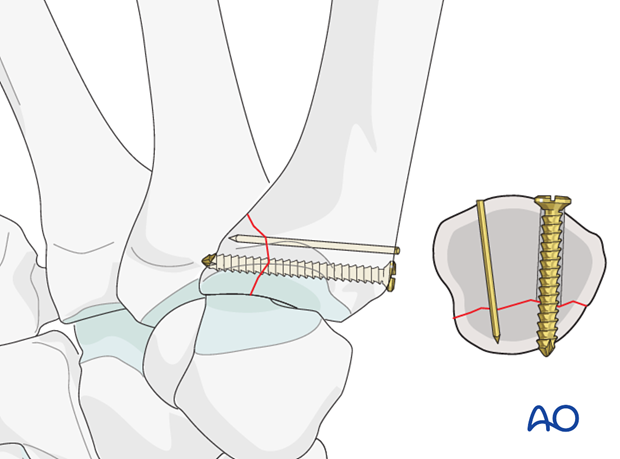
Confirm position and stability using image intensification.
Also assess the stability of the fixation under direct vision.
The K-wire is now cut off below the skin, just above the cortex. Bending of the K-wire risks producing fragment displacement.
5. Large fragment: open reduction
Inside-out glide holes
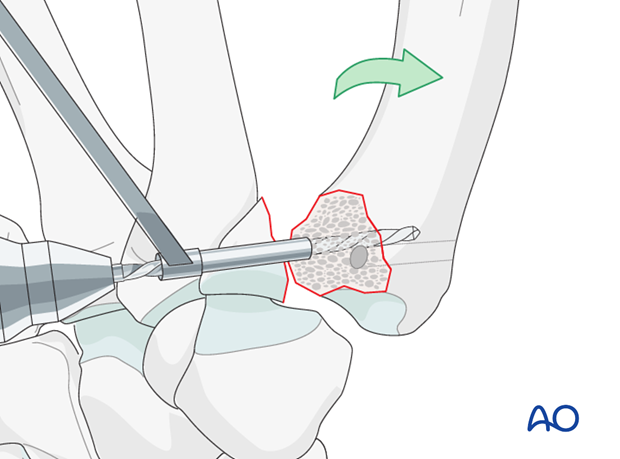
In case of a large palmar marginal fragment, two screws are used.
Before reduction, supinate the metacarpal and drill two glide holes outwards from the fracture surface for more accurate positioning of the lag screws, perpendicular to the fracture plane, and evenly placed in the marginal fragment.
Reduce the fracture
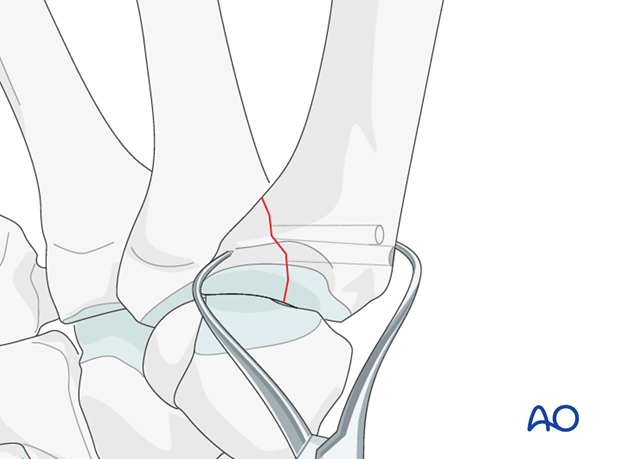
After drilling the glide holes, reduce the fracture by pronation of the metacarpal, and secure with pointed reduction forceps.
Check the articular reduction under direct vision and using image intensification.
6. Large fragment: internal fixation
Drill thread holes
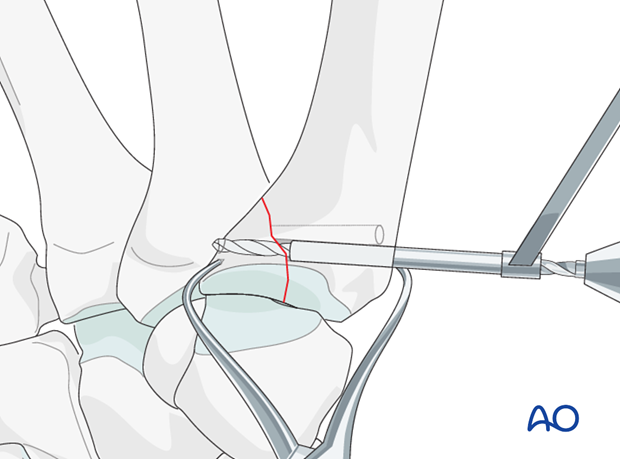
Drill thread holes with a 1.5 mm drill bit through a drill sleeve inserted into the previously drilled glide holes.
Insert screws
Insert two 2.0 mm self-tapping lag screws and alternately tighten them. Remove the reduction forceps.
Confirm position and stability using image intensification. Also assess the stability of the fixation under direct vision.

7. Aftertreatment
Splintage
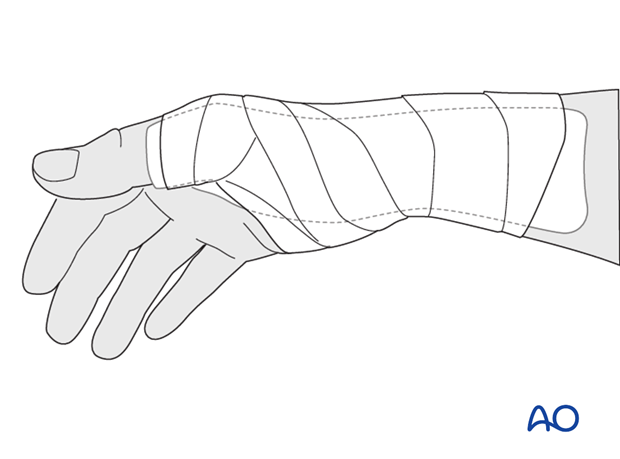
Immediately postoperatively, a temporary plaster splint is applied which immobilizes the first MCP joint as well as the wrist. When the pain and swelling have reduced, a custom thermoplastic splint is applied for 4 weeks.
Functional exercises
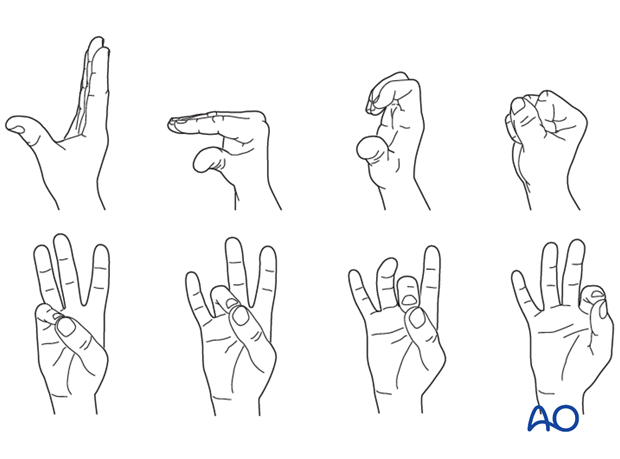
In compliant patients with stable fixation, the splint can be removed under the supervision of a physical therapist, and early active motion exercises started after a few days.
Implant removal
If a K-wire was used, it may need to be removed in case of soft-tissue irritation or wire migration.


