ORIF - Pubic symphysis plate
1. Introduction
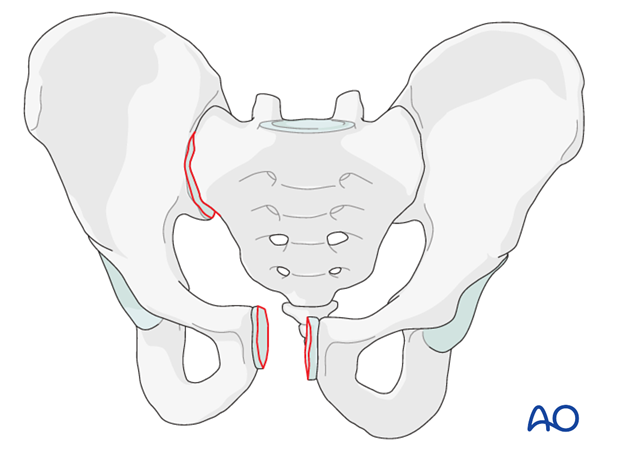
ORIF of pubic symphysis disruption is performed in cases of unstable pelvic ring injuries.
The procedure requires exposure of the pubic symphysis to allow for reduction and stabilization using plates and screws. For this procedure, the standard approach to the pubis symphysis is used.
Most anterior injuries have associated posterior injuries. In some cases, reduction and stabilization of the symphysis is sufficient to reduce and stabilize the posterior injury. However, some posterior injuries are severe enough so that their fixation might be required as well.
2. Patient positioning
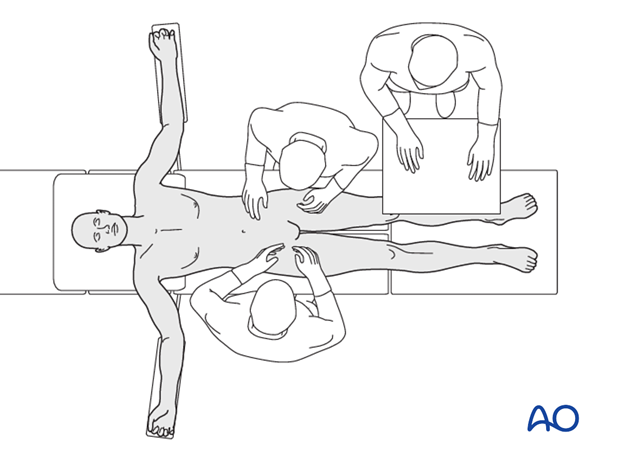
Place the patient in the supine position on a radiolucent table.
A urinary catheter should be inserted prior to beginning the procedure.
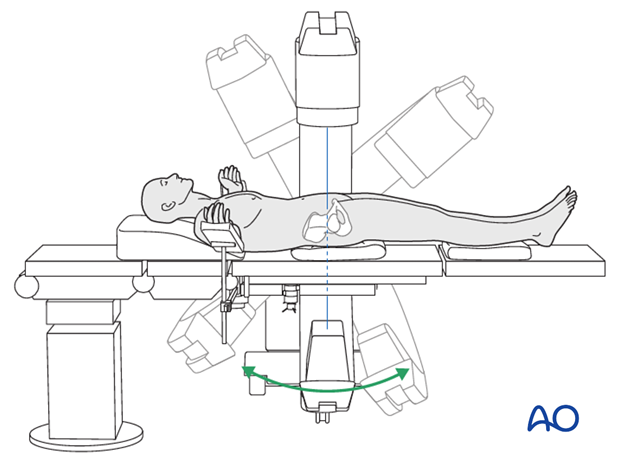
Prior to starting the procedure fluoroscopic AP, inlet and outlet x-rays should be obtained to ensure adequate visualization.
3. Reduction
Order of reduction
Prior to beginning this procedure, it is important to analyze the radiographs and the CT-scan to determine the amount of posterior pelvic ring displacement.
If there is no vertical displacement (B-type injuries), and it is possible to reduce the entire pelvis with reduction of the symphysis, then anterior reduction should usually be first.

If there is vertical displacement (C-type injuries) or if anterior reduction fails to achieve posterior reduction, then posterior reduction should be performed first.
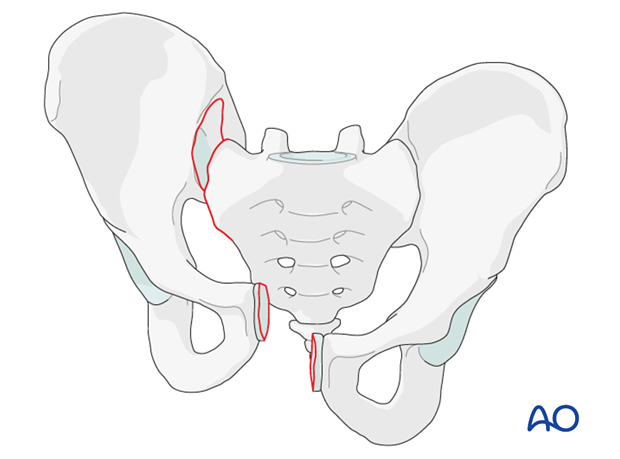
Use of a Farabeuf clamp for reduction
Introduce one 4.5 mm cortex screw into each pubic body on the opposing sides of the disrupted symphysis.
Apply the jaws of a Farabeuf clamp over the heads of these screws.
Manipulation of the clamp allows reduction in multiple planes and compression. Manual compression from both sides will aid reduction.
Anterior reduction should be confirmed by direct visualization and palpation. It is also important to ensure that posterior reduction is satisfactory.
Image intensification is used to assess the reduction and external rotation displacement. Subsequent reduction is best judged in an inlet radiograph.
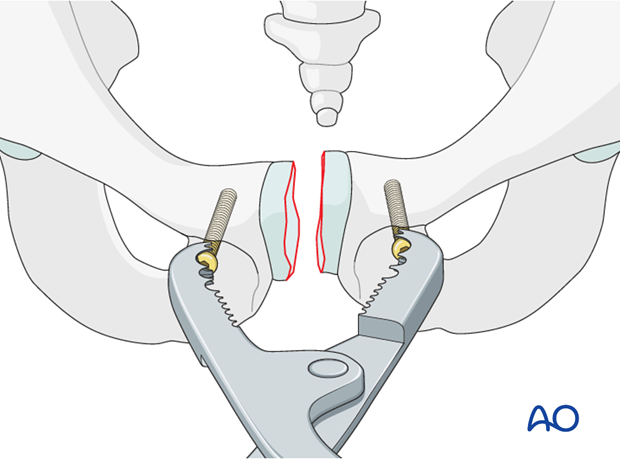
Rotation of the clamp is utilized to correct superior or inferior displacement of either hemipelvis.

The Jungbluth clamp may allow for better rotational control than the Farabeuf clamp.
The Jungbluth clamp requires greater exposure and might interfere with plate fixation.
Care is necessary to avoid bladder injury during insertion of screws for this clamp.
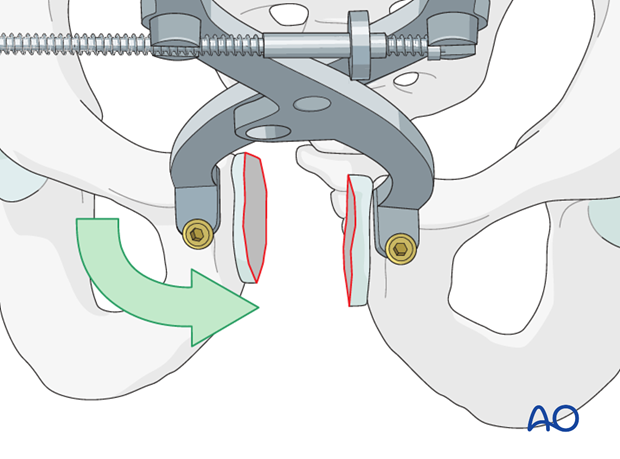
Use of pointed reduction forceps as an alternative device
Place the reduction forceps tips either laterally to the pubic tubercles or onto the edges of the obturator foramina. To prevent slipping, predrilling the cortex may be necessary in case of hard bone.
Manual assistance, while the clamp is tightened, will help achieve reduction.
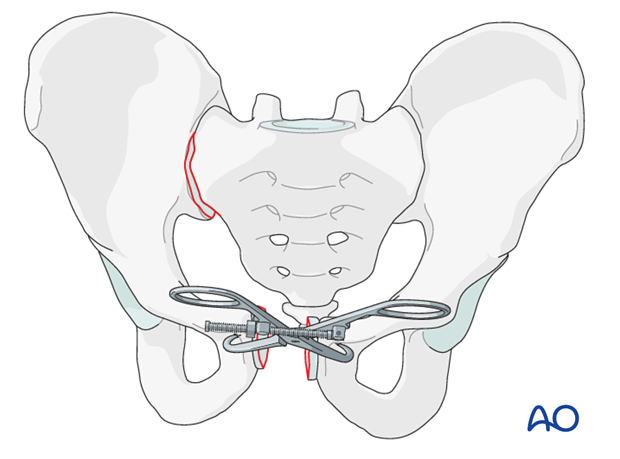
Pearl: rotational reduction
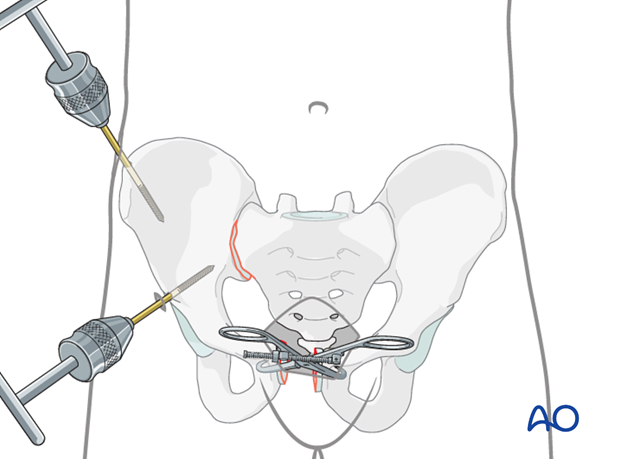
If indicated to correct rotational malalignment, use a Schanz screw additionally. This is inserted into the iliac crest as a joy stick.
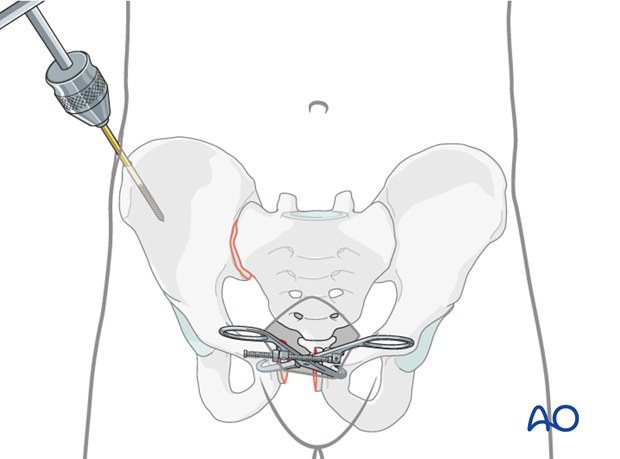
The Schanz screw can also be placed in the supraacetabular region.
4. Application of the plate
Plate selection
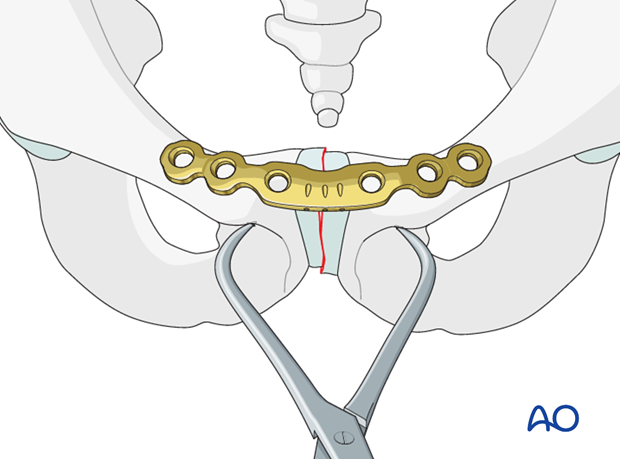
After reduction is achieved and held provisionally with a clamp, the symphysis is fixed with a plate. Various types and sizes of plates have been utilized.
If available, a curved 3.5 mm, 4- or 6-hole pelvic plate should be used. Place it "on top" of the symphysis so that there are two or three holes on each side to control the rotation.
Although angular stable plates can be used, placing the screws at different angles may be more important.
Alternative
Alternatively, a 4.5 mm dynamic compression (DC) plate can be used.
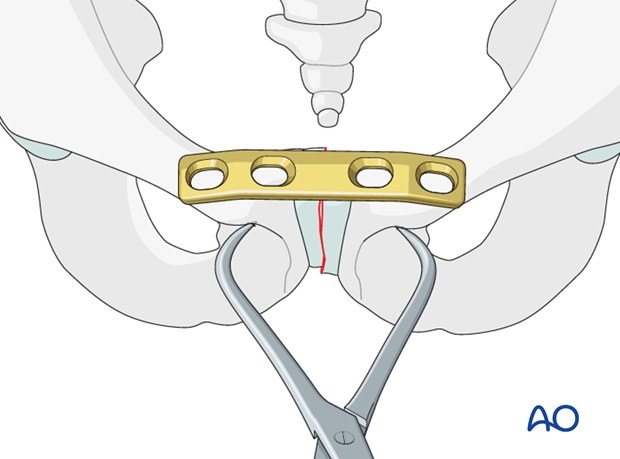
Plate positioning
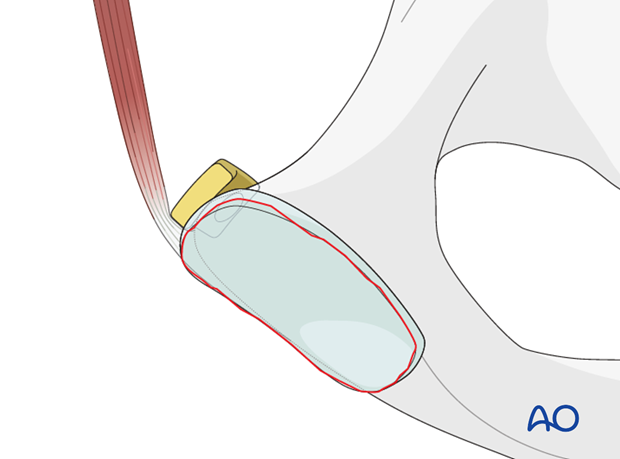
Position the plate posterior to the muscle attachments.
Protect the bladder during fixation of the symphysis.
Contouring the plate for optimal fit
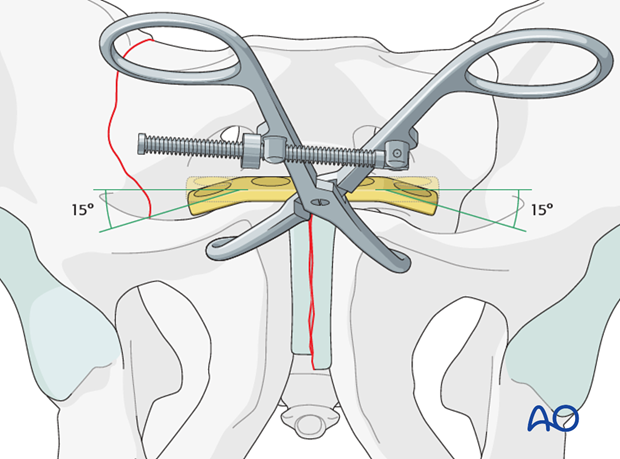
If a 4.5 mm DC plate is used, it may be necessary to contour both ends of the plate by creating approximately 15° angles for optimal screw direction.
Drilling the first medial hole
After reduction, the contoured plate is mounted on one pubic ramus.
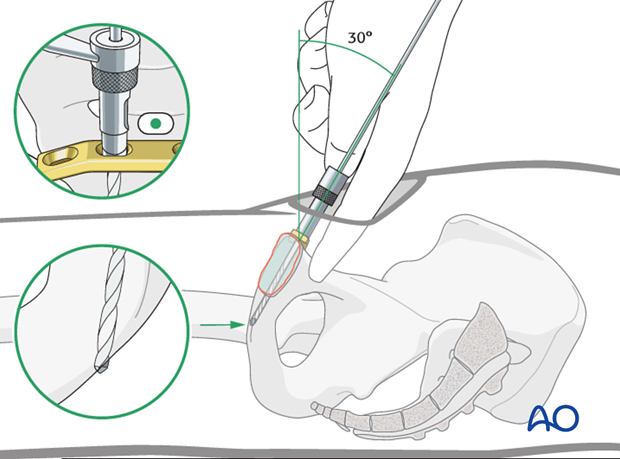
Use the appropriate size drill bit with a drill sleeve.
To achieve the longest screw length in the plate, the drill should be oriented from proximal posterior to distal anterior. The posterior surface of the pubis is palpated to facilitate this trajectory. The drill should be run until it perforates the far or distal cortex.
The first drill hole may be made with the plate in position (as shown) or prior to placing the plate. Drilling the hole without the plate may allow better visualization and palpation of bony landmarks.
Measuring screw length
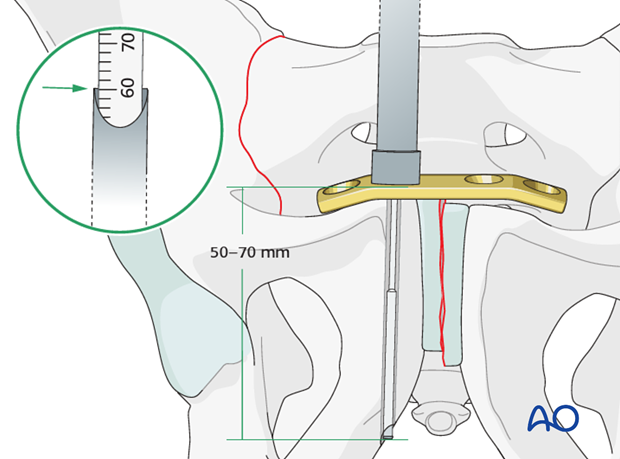
It is important to use long screws. The screw direction and exit site can be determined with a depth gauge during measurement.
Drilling the second medial hole
In eccentric position, drill the medial hole in the contralateral pubic ramus.
Eccentric drilling allows for compression across the pubic symphysis.
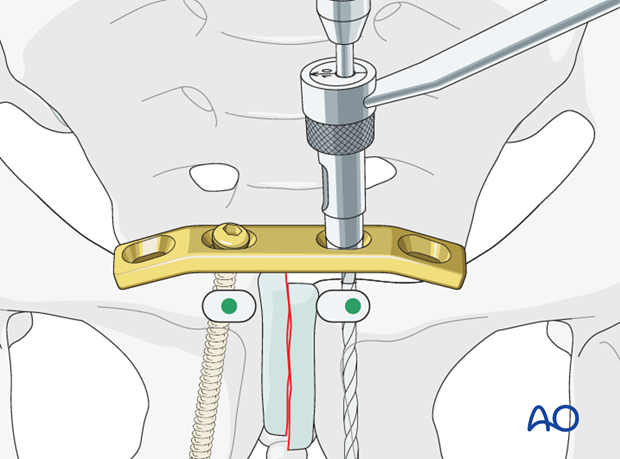
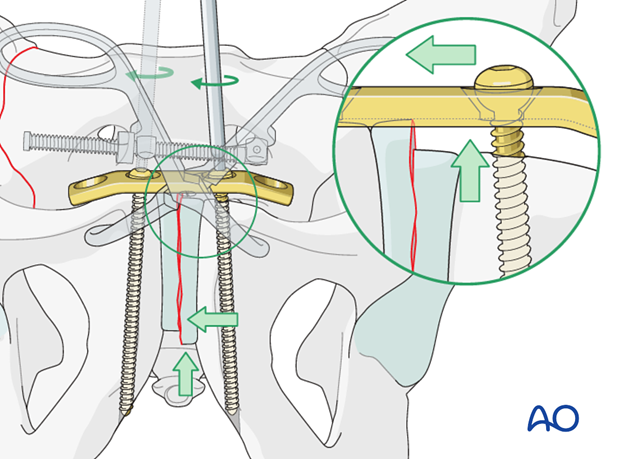
Fixation of the pubic ramus
If there is residual superior or inferior displacement, the plate may be utilized with manual assistance to correct this (as illustrated in the inset).
The screws are tightened in alternation until final fixation is achieved.
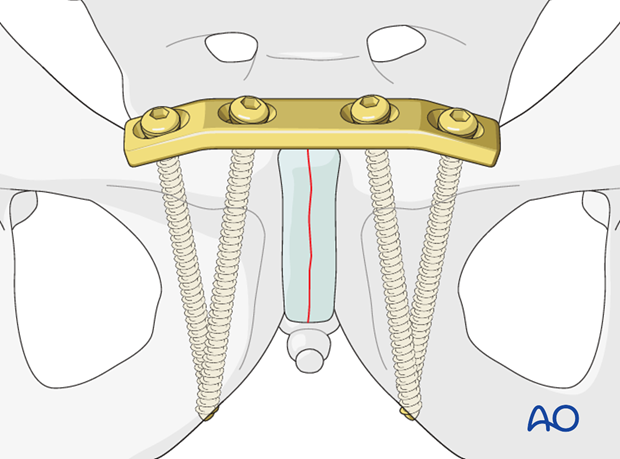
Insert the lateral screws
In order to improve fixation the surgeon should attempt to maximize the screw length. This can be achieved by placing the screws at different angles when utilizing a 4-hole 4.5 mm DC plate.
Choose a slightly convergent direction for the lateral screws.
Aim the drill bit towards the tip of the medial screw on each side for direction.
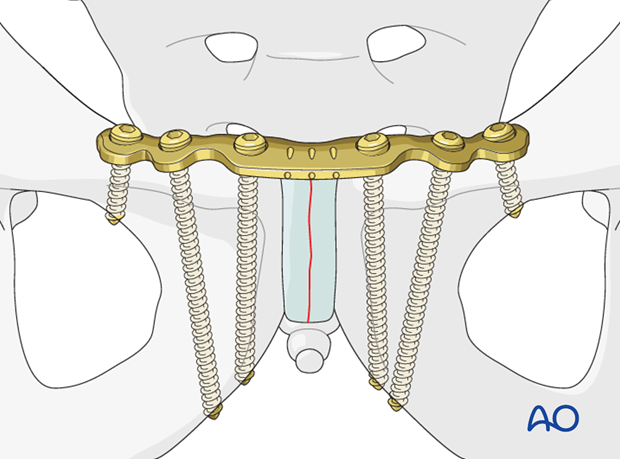
When utilizing a 6-hole 3.5 mm pelvic or reconstruction plate, screw length can be maximized by slightly diverging the medial screws and placing an additional bicortical screw in the superior pubic ramus.
Once all screws are placed, final tightening of all screws should be performed.
Note
Locking screws are advantageous in case of osteoporotic bone stock.
5. X-rays
Intraoperative image intensification
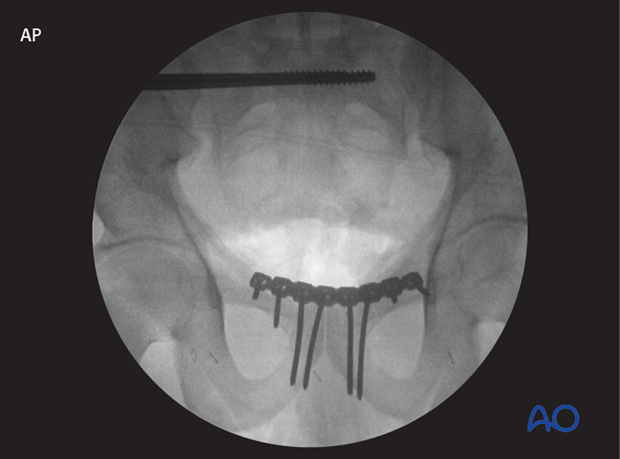
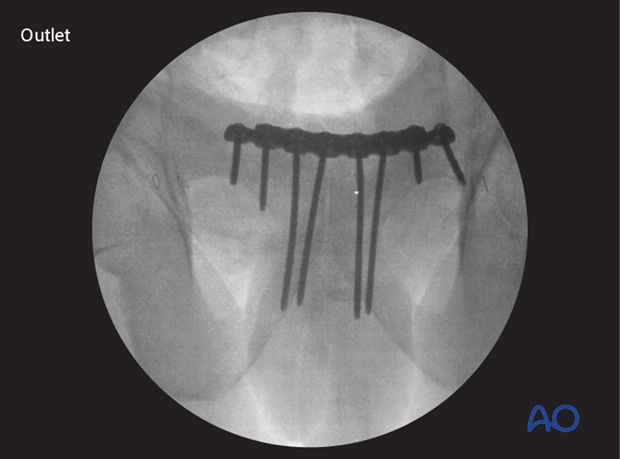
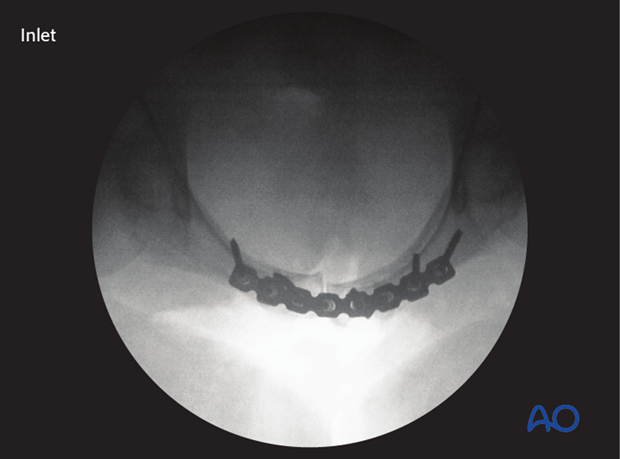
Intraoperative X-rays should be obtained in the following views to confirm reduction and plate position.
AP view
Outlet view.
Inlet view.
Postoperative X-rays
After completion of internal fixation, confirm the final reduction and hardware position intraoperatively by AP, inlet and outlet radiographic imaging.

6. Aftercare following open reduction and fixation
Postoperative blood test
After pelvic surgery, routine hemoglobin and electrolyte check out should be performed the first day after surgery and corrected if necessary.
Bowel function and food
After extensile approaches in the anterior pelvis, the bowel function may be temporarily compromised. This temporary paralytic ileus generally does not need specific treatment beyond withholding food and drink until bowel function recovers.
Analgesics
Adequate analgesia is important. Non pharmacologic pain management should be considered as well (eg. local cooling and psychological support).
Anticoagulation
Prophylaxis for deep vein thrombosis (DVT) and pulmonary embolus is routine unless contraindicated. The optimal duration of DVT prophylaxis in this setting remains unproven, but in general it should be continued until the patient can actively walk (typically 4-6 weeks).
Drains
Dressings should be removed and wounds checked after 48h, with wound care according to surgeon's preference.
Wound dressing
Dressings should be removed and wounds checked after 48h, with wound care according to surgeon's preference.
Physiotherapy
The following guidelines regarding physiotherapy must be adapted to the individual patient and injury.
It is important that the surgeon decide how much mechanical loading is appropriate for each patient's pelvic ring fixation. This must be communicated to physical therapy and nursing staff.
For all patients, proper respiratory physiotherapy can help to prevent pulmonary complications and is highly recommended.
Upper extremity and bed mobility exercises should begin as soon as possible, with protection against pelvic loading as necessary.
Mobilization can usually begin the day after surgery unless significant instability is present.
Generally, the patient can start to sit the first day after surgery and begin passive and active assisted exercises.
For unilateral injuries, gait training with a walking frame or crutches can begin as soon as the patient is able to stand with limited weight bearing on the unstable side.
In unstable unilateral pelvic injuries, weight bearing on the injured side should be limited to "touch down" (weight of leg). Assistance with leg lifting in transfers may be necessary.
Progressive weight bearing can begin according to anticipated healing. Significant weight bearing is usually possible by 6 week but use of crutches may need to be continued for three months. It should remembered that pelvic fractures usually heal within 6-8 weeks, but that primarily ligamentous injuries may need longer protection (3-4 months).
Fracture healing and pelvic alignment are monitored by regular X-rays every 4-6 weeks until healing is complete.
Bilateral unstable pelvic fractures
Extra precautions are necessary for patients with bilaterally unstable pelvic fractures. Physiotherapy of the torso and upper extremity should begin as soon as possible. This enables these patients to become independent in transfer from bed to chair. For the first few weeks, wheelchair ambulation may be necessary. After 3-4 weeks walking exercises in a swimming pool are started.
After 6 weeks, if pain allows, the patient can start walking with a three point gait, with less weight bearing on the more unstable side.
Full weight bearing is possible after complete healing of the bony or ligamentous legions, typically not before 12 weeks.
