External fixation
1. Note on illustrations
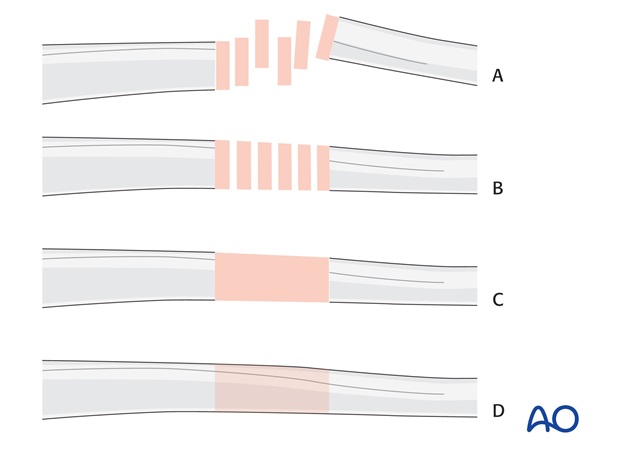
Throughout this treatment option illustrations of generic fracture patterns are shown, as four different types:
A) Unreduced fracture
B) Reduced fracture
C) Fracture reduced and fixed provisionally
D) Fracture fixed definitively
2. Principles of joint-bridging modular external fixation
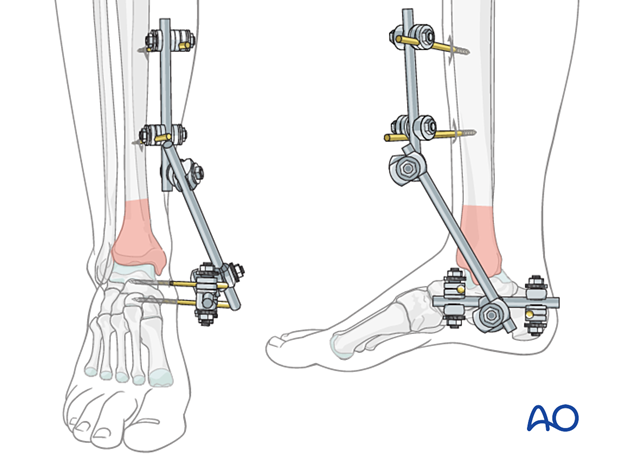
The modular external fixator is optimal for temporary use. It is rapidly applied without need for intraoperative x-rays and can be adjusted later.
The joint-bridging modular external fixator for fractures of the malleoli consists of two partial frames, one along the tibia and one medial on the calcaneus or calcaneus and talus.
Details of external fixation are described in the basic technique for application of modular external fixator.
Specific considerations for joint-bridging modular external fixation, the distal tibia and the foot are given below.
3. Patient preparation
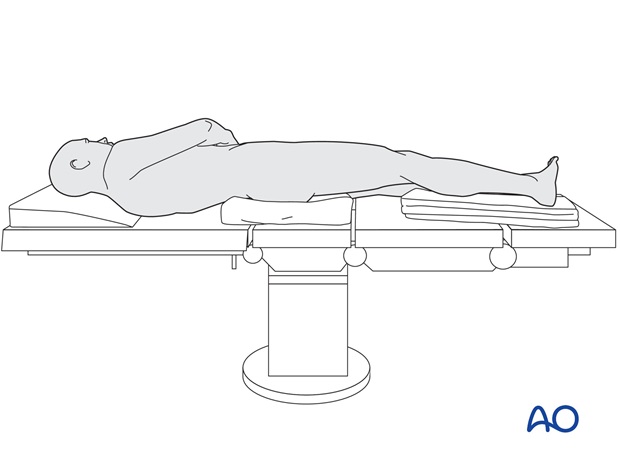
This procedure is normally performed with the patient in a supine position.
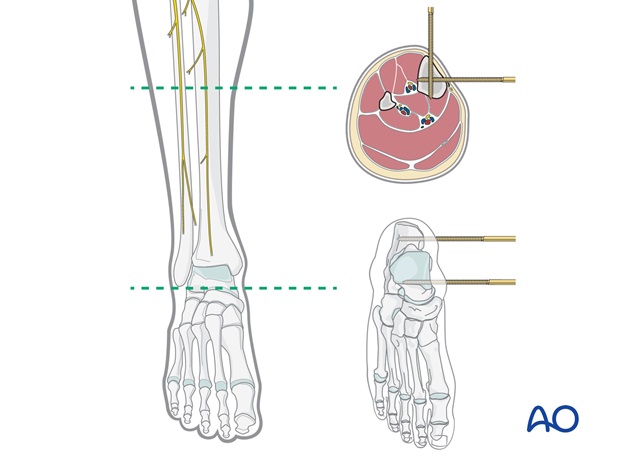
4. Safe zones for pin placement
Inserting percutaneous instrumentation such as pins or transfixion wires through safe zones reduces the risk of damage to neurovascular structures.
For safe pin placement make use of the safe zones and be familiar with the anatomy of the lower leg and the foot.
5. Pin insertion (tibia and foot)
Choice of tibial pin placement
Drilling a hole in the thick tibial crest may be associated with excessive heat generation and there is a risk the drill bit may slip medially or laterally damaging the soft tissues. As the anteromedial tibial wall provides adequate thickness for the placement of pins, this trajectory is preferable. A trajectory angle (relative to the sagittal plane) of 20-60° for the proximal fragment and of 30-90° for the distal fragment is recommended.
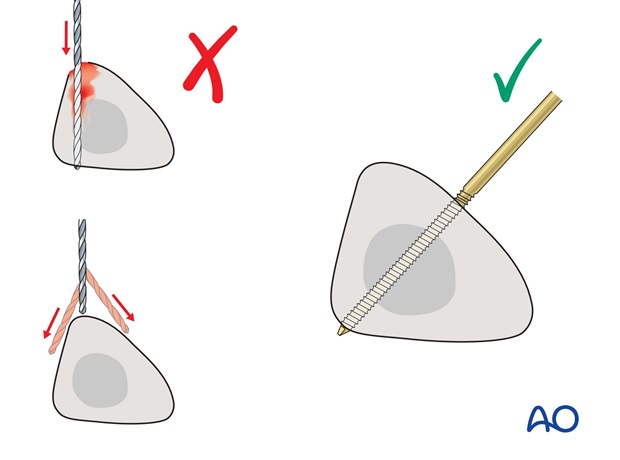
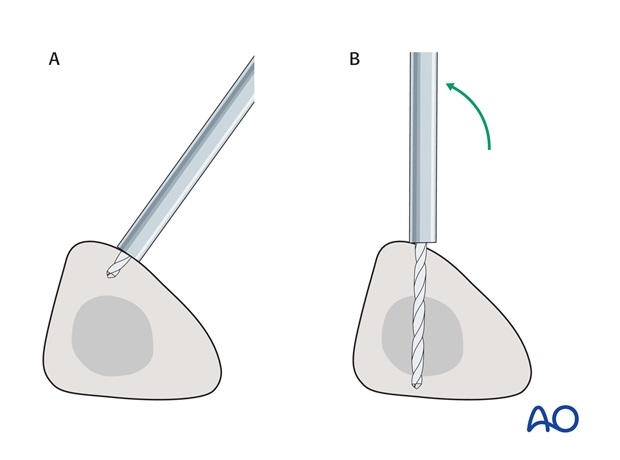
Alternatively, to avoid the frame catching on the opposite leg, the pins may be placed more anteriorly. The drill bit is started with the tip just medial to the anterior crest, and with the drill bit perpendicular to the anteromedial surface (A). As the drill bit starts to penetrate the surface, the drill is gradually moved more anteriorly until the drill bit is in the desired plane (B). This should prevent the tip from sliding down the medial or lateral surface.
Pin placement in the foot
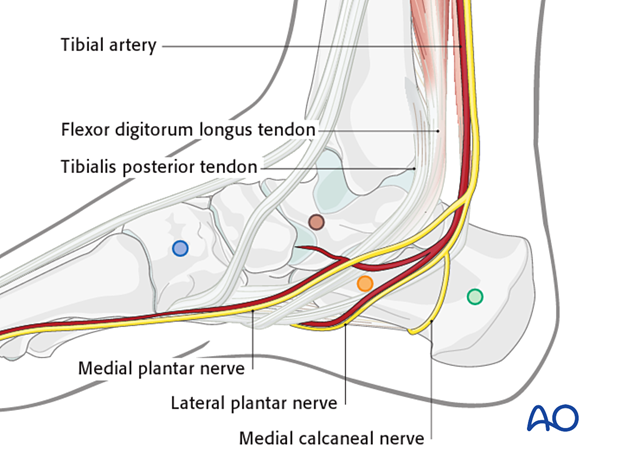
For the construction of the partial frame of the foot the following three options are used most frequently:
- one pin in the calcaneus (green circle) and one in the talus (brown circle)
- two pins in the calcaneus (green and orange circle)
- one pin in the calcaneus (green circle) and one in the medial cuneiform (blue circle)
6. Frame construction / reduction and fixation (ankle)
Reduction
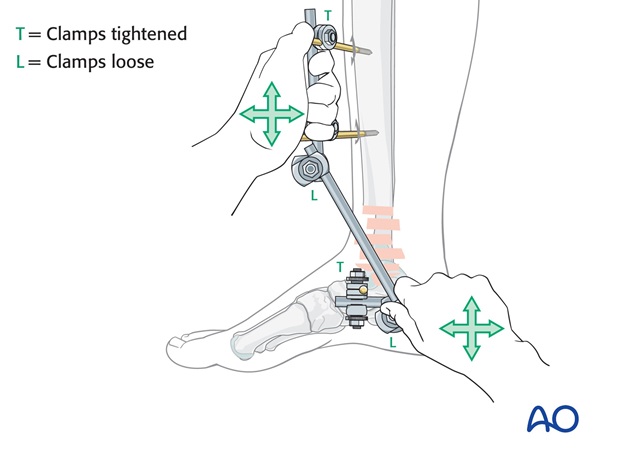
Reduce the fracture by manipulating the partial frame of the foot and ligamentotaxis. After checking correct reduction with image intensification, fix the reduced position by tightening all clamps.
7. Aftercare following external fixation
Ankle joint
External fixation of distal tibial fractures is often extended to include the foot, to avoid an equino-varus deformity. Otherwise consider a splint to support the foot and ankle.
Pin-site care
Proper pin insertion
To prevent postoperative complications, pin-insertion technique is more important than any pin-care protocol:
- Correct placement of pins (see safe zones) avoiding ligaments and tendons, eg tibia anterior
- Correct insertion of pins (eg trajectory, depth) avoiding heat necrosis
- Extending skin incisions to release soft-tissue tension around the pin insertion (see inspection and treatment of skin incisions)
Pin-site care
Various aftercare protocols to prevent pin tract infection have been established by experts worldwide. Therefore no standard protocol for pin-site care can be stated here. Nevertheless, the following points are recommended:
- The aftercare should follow the same protocol until removal of the external fixator.
- The pin-insertion sites should be kept clean. Any crusts or exudates should be removed. The pins may be cleaned with saline and/or disinfectant solution/alcohol. The frequency of cleaning depends on the circumstances and varies from daily to weekly but should be done in moderation.
- No ointments or antibiotic solutions are recommended for routine pin-site care.
- Dressings are not usually necessary once wound drainage has ceased.
- Pin-insertion sites need not be protected for showering or bathing with clean water.
- The patient or the carer should learn and apply the cleaning routine.
Pin loosening or pin tract infection
In case of pin/wire loosening or pin tract infection, the following steps need to be taken:
- Remove all involved pins and place new pins in a healthy location.
- Debride the pin sites in the operating theater, using curettage and irrigation.
- Take specimens for a microbiological study to guide appropriate antibiotic treatment if necessary.
Before changing to a definitive internal fixation an infected pin tract needs to heal. Otherwise infection will result.
Weight bearing
The timing and how much weight may be taken through the fracture will be influenced by:
- Patient factors
- Fracture configuration
- Stability of the fixator construct
Follow up
See patient 7-10 days after surgery for a wound check. X-rays are taken to check the reduction.
Once the fracture is deemed to be sufficiently stable for the external fixator to be removed, the surgeon may choose to apply a cast or functional brace before leaving the ankle completely unsupported.
At 3 months, if there are symptoms of lateral instability, either inversion stress x-rays or MRI can be used to investigate lateral ligament integrity.
