Lag screw fixation of volar plate
1. Principles
Classification of avulsion fractures of the volar plate
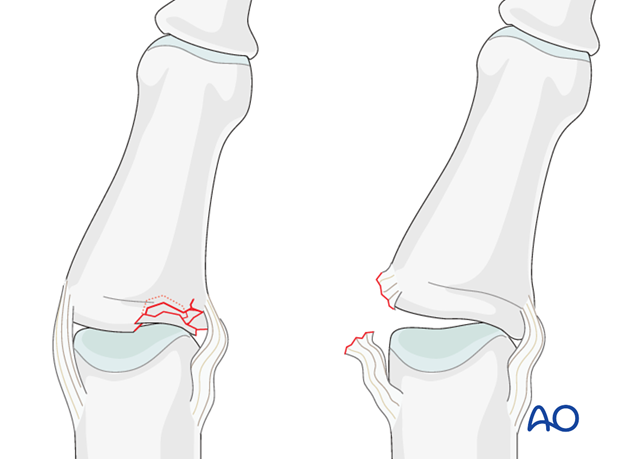
Avulsion fractures of the volar plate are very common injuries, often resulting from sporting injuries and usually involving the middle and ring fingers. Several classification systems for them have been proposed. The Eaton classification is very useful for practical purposes. This classification is based on the premise that successful treatment must be based on the stability of the fracture, which in turn depends on
- size of the fragment
- degree of impaction,
- presence of one or both collateral ligament ruptures
- direction of the dislocation (hyperextension, lateral dislocation, flexion).
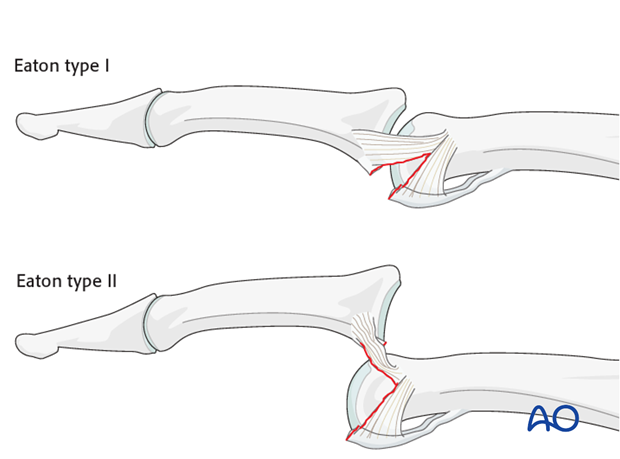
Eaton type I (hyperextension)
These are hyperextension injuries, with an avulsion of the volar plate and a longitudinal split in the collateral ligaments.
Eaton type II (dorsal dislocation)
Complete dorsal dislocation of the PIP joint and avulsion of the volar plate. The base of the middle phalanx rests dorsally on the condyles of the proximal phalanx, with no contact between the articular surfaces.
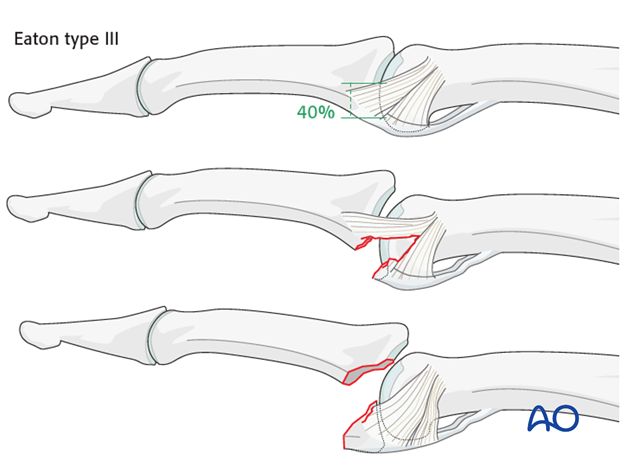
Eaton type III (fracture dislocation)
A fracture dislocation with a small fragment measuring less than 40% of the palmar arc will remain stable when reduced.
If a larger part (>40%) of the palmar articular segment is involved, ligamentous support will not suffice for a stable reduction.
Stability of fracture dislocations (Eaton type III)
Stability of the reduction depends on the size of the avulsed fragment and the amount of ligament remaining attached to the middle phalanx.
If less than 40% of the articular segment is avulsed, the fracture is displaced dorsally, with the dorsal portion of the collateral ligament remaining attached to the middle phalanx. This helps to keep the reduction stable.
However, if more than 40% of the articular segment has avulsed, only very little or no ligament will remain attached to the base of the middle phalanx, rendering the reduction unstable.
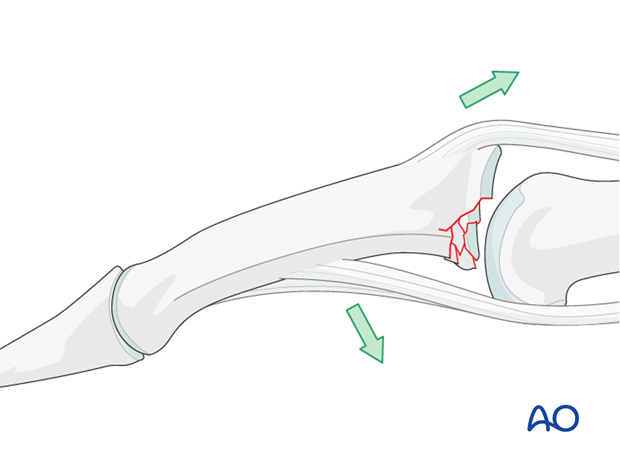
Mechanism of the injury
These digital hyperextension injuries are commonly caused by sporting accidents.
Typically, hyperextension of the proximal interphalangeal (PIP) joint causes an avulsion fracture of the volar plate.
Often, in addition to hyperextension, there is axial load on the middle phalanx, causing compression forces across the PIP joint and leading to an additional impaction fracture.

Deforming forces
In the presence of palmar instability of the PIP joint, muscle forces (flexor digitorum superficialis and the central extensor slip) lead to palmar tilting and dorsal subluxation, depending on the degree of the impaction.
Recognizing subluxation
Diagnosis is based on
- the clinical history and mechanism of injury
- the clinical examination of the patient
- the x-rays
AP and true lateral x-rays are necessary for diagnosis. Be careful to avoid overlap of other fingers in the x-rays.
An AP view will help to detect impaction fractures.
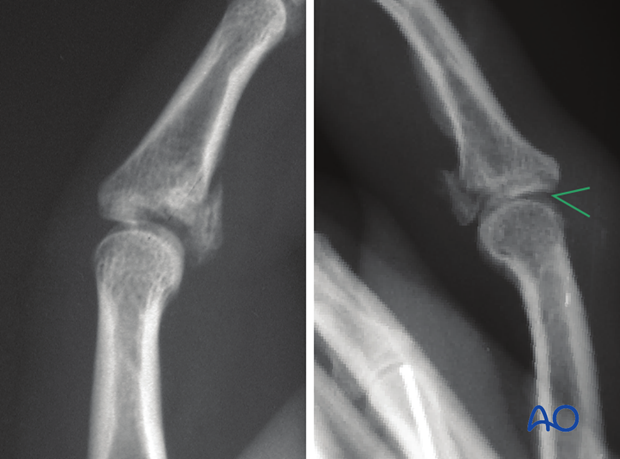
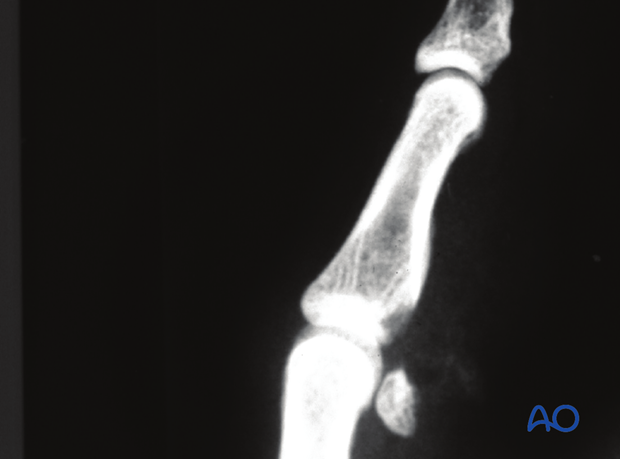
Often, a subluxation is not easily recognized in the lateral view. Look for the characteristic “V” sign of diverging joint surfaces, which indicates this injury.
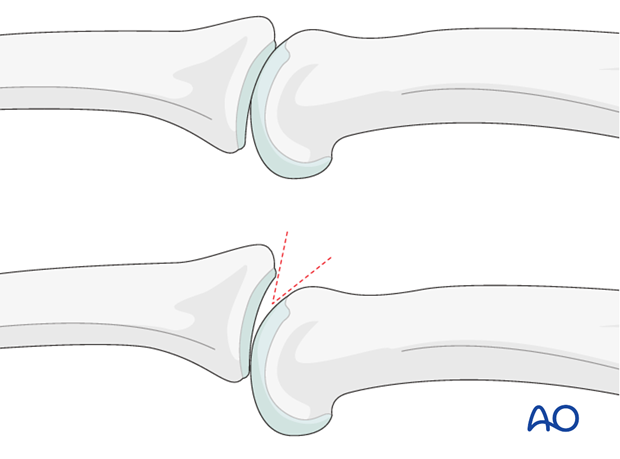
In the lateral view, the proximal and middle phalanges should be collinear. Any break in the dorsal line is a clear indication of subluxation.
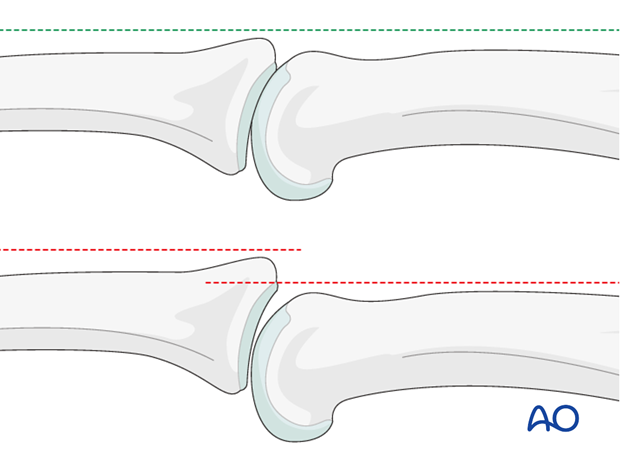
Check for impaction injuries
Impaction is possible both in the sagittal and the coronal planes. Check both true AP and lateral views.
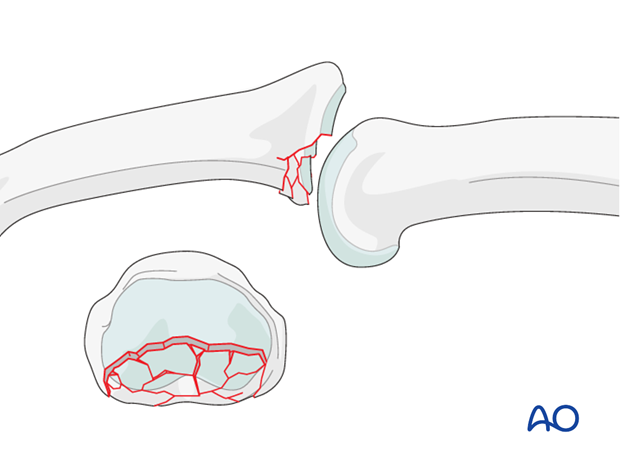
Malalignment in the coronal plane may be a sign of impaction.
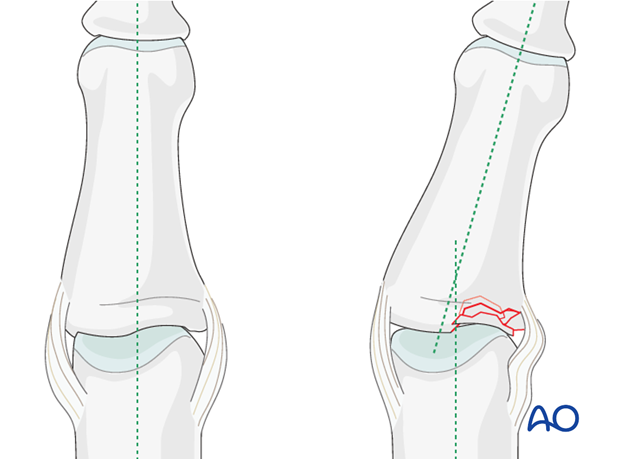
Use gentle passive lateral stress to detect instability. If instability is present, this may indicate an impaction fracture, or, rarely, avulsion of a collateral ligament.
Indication for nonoperative treatment
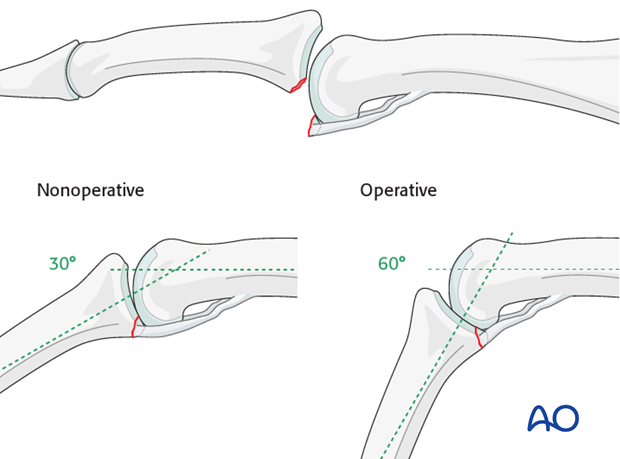
Ask the patient to flex the finger using image intensification.
If reduction of the avulsion fracture is achieved with less than 30 degree flexion, nonoperative treatment is indicated.
However, if it takes 60 degrees or more of flexion, operative treatment is indicated.
Reduction of the fragment requiring between 30 degrees and 60 degrees of flexion constitutes a relative indication for surgery.
Reduction will not be achieved if tissues are interposed between the fracture fragments. This, too, is an indication for surgical treatment.
Passive lateral movement of the finger under image intensification will help the assessment of lateral stability.
Indication for operative treatment with a lag screw
There are two main indications for surgery of avulsion fractures of the base of the middle phalanx:
- Irreducible fragment (interposed tissues)
- Avulsed fragment >40% of joint surface
2. Approach
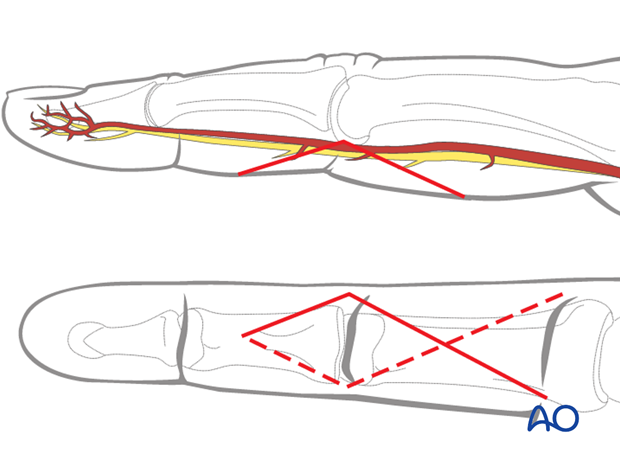
For this procedure a palmar approach to the PIP joint is normally used.
3. Reduction
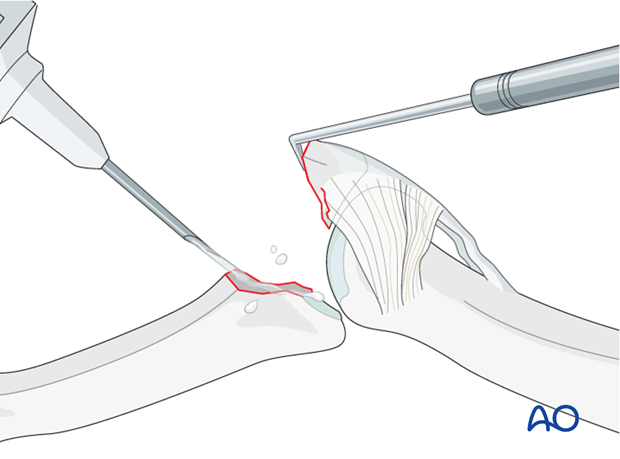
Visualize the joint
Hyperextend the middle phalanx to gain maximal visualization of the joint.
Use a syringe to clean out blood clots with a jet of Ringer lactate.
Assess fracture geometry, look for comminution or impaction, which would contraindicate the use of a lag screw, and determine the ideal position for the gliding hole (perpendicular to the fracture plane, and in the center of the fragment).
Often, comminution is not apparent from the x-rays, and can only be detected under direct vision.
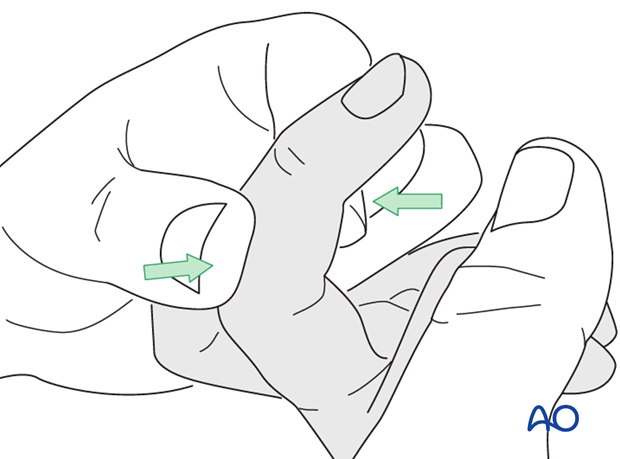
Indirect reduction
Reduction can often be achieved by flexing the middle phalanx at the PIP joint and applying pressure as illustrated.
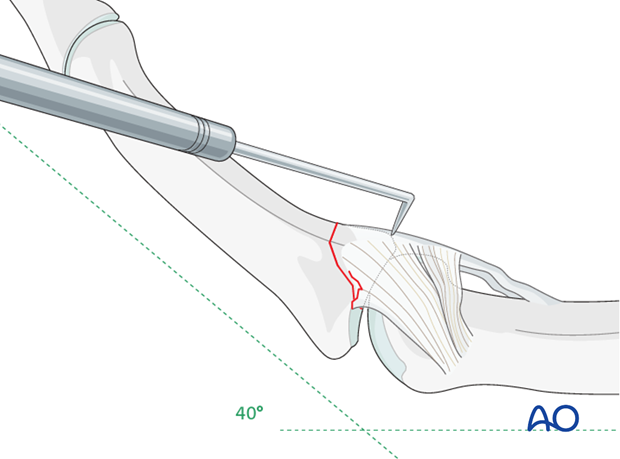
Direct reduction
Gently use a dental pick to reduce the fracture accurately.
Check reduction using image intensification.
Note
Anatomical reduction is important to prevent chronic instability, or secondary degenerative joint disease.
4. Choosing screw size
Screw diameter
The maximal permitted diameter of the screw head is one third of the diameter of the avulsed fragment.
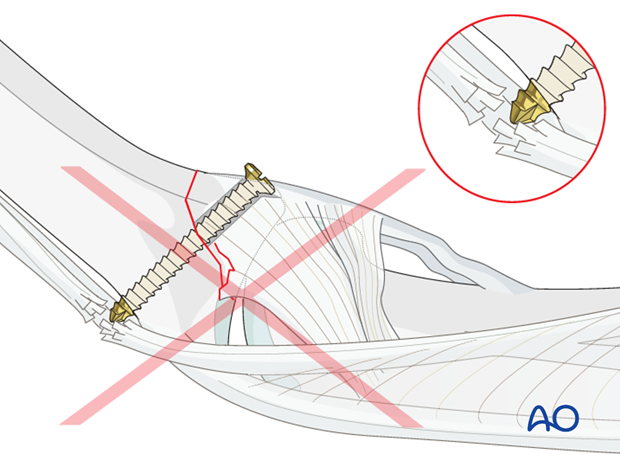
Screw length needs to be sufficient for the screw just to penetrate the opposite cortex.
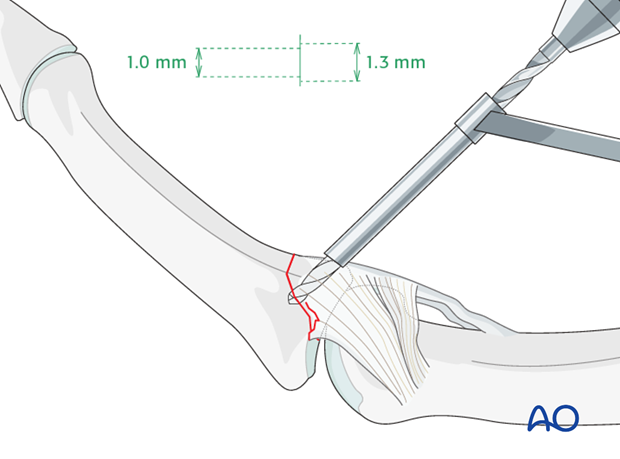
Most commonly, a 1.3 mm screw is used. 1.0 mm or 1.5 mm screws can also be used, depending on the fragment size.
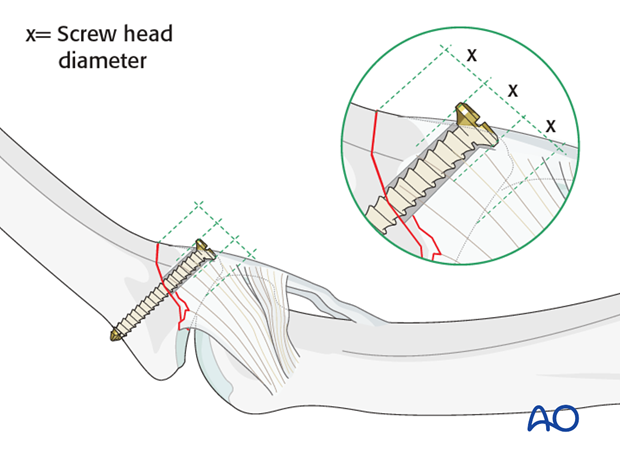
Pitfall: Too long a screw irritates extensor tendon
If too long a screw is chosen, the protruding end may damage the extensor tendon.
5. Drilling
Drill a gliding hole
Maintaining the reduction with pressure from a drill guide, drill a gliding hole using a 1.3 mm drill bit for a 1.3 mm screw.
Alternative: Inside-out gliding hole in large fragments
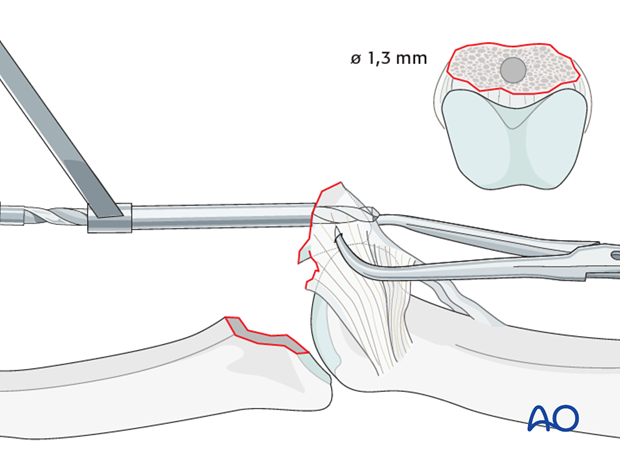
Keeping the PIP joint hyperextended, drill an inside-out gliding hole through center of the fracture surface of the avulsed fragment. It is essential to prevent rotation of the small fragment by steadying it, using a pointed reduction forceps.
The advantage of this technique is that it allows perfect positioning of the gliding hole (perpendicular to the fracture plane and in the center of the fragment).
Drill thread hole
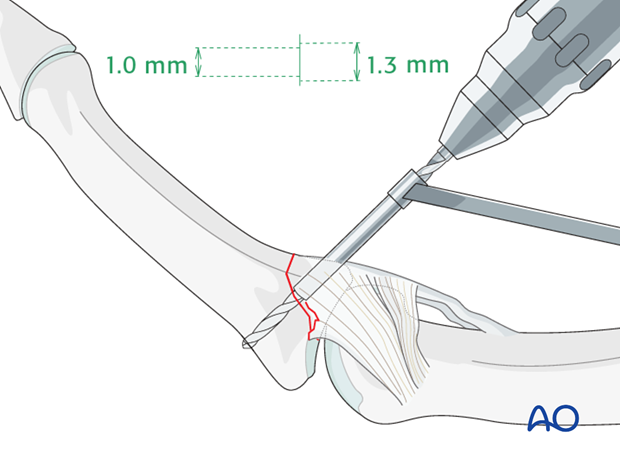
Insert a drill sleeve into the gliding hole.
Now use a corresponding drill bit to drill a threaded hole into the opposite fragment, just penetrating the far (trans) cortex.
Use a depth gauge to measure the appropriate screw length.
6. Fixation
Screw insertion
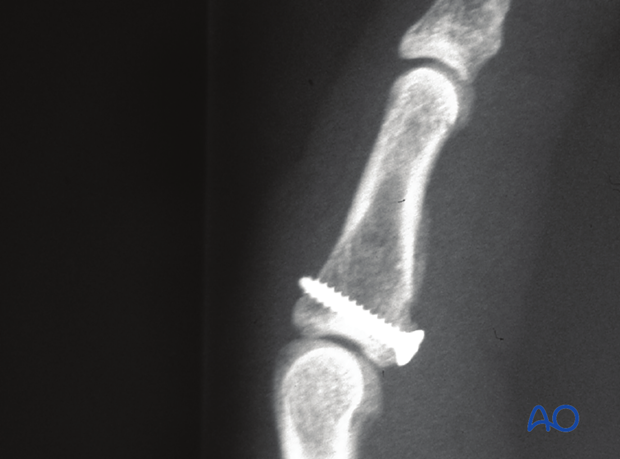
Insert the lag screw and tighten it. The screw should just penetrate the opposite cortex.
Check joint congruity using image intensification. Reduction must be anatomical.
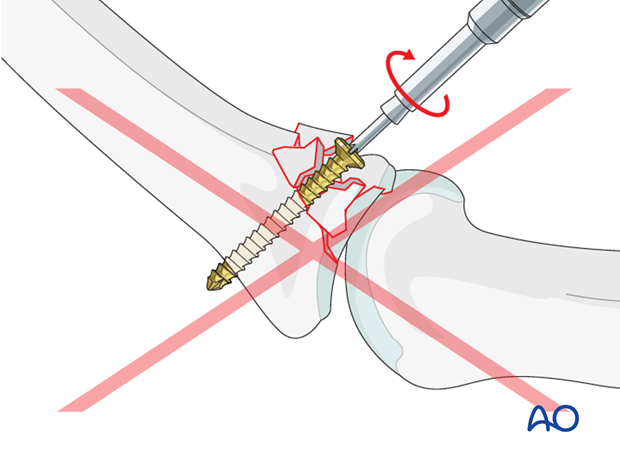
Pitfall: Overtightening the screw
Be careful not to overtighten the screw as this may result in comminution of the fragment.
Large fragments: use two screws
In large fragments, two screws can be used.
This is a very demanding technique that carries the risk of fracturing the fragment. However, it has the advantages that it offers rotational control, and that the flexor tendons do not have to be retracted so forcefully.
The screws are inserted from either side of the flexor tendons, using similar techniques, as described for the single lag screw.
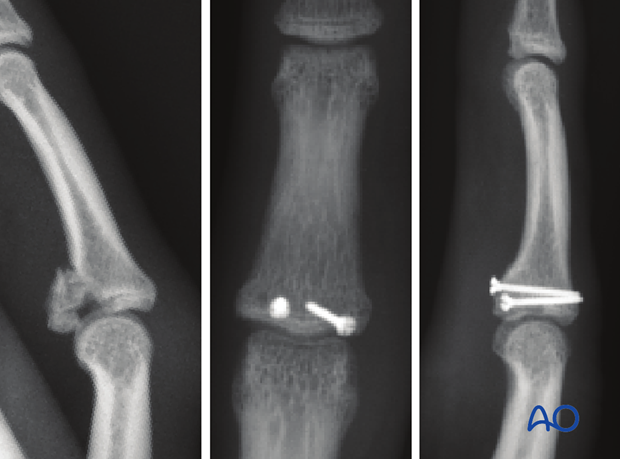
The screws are inserted from either side of the flexor tendons, using similar techniques, as described for the single lag screw.
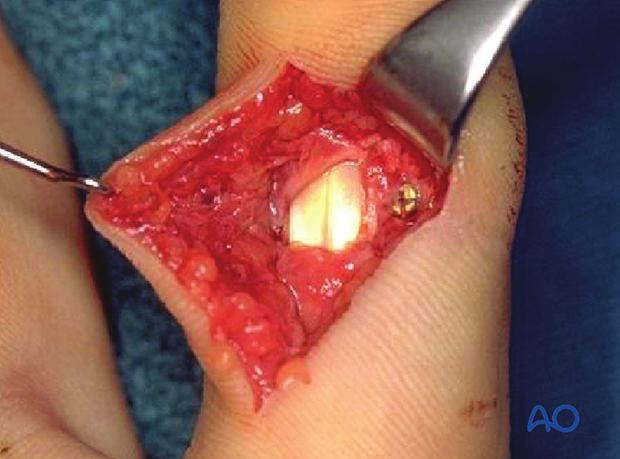
Pulley repair
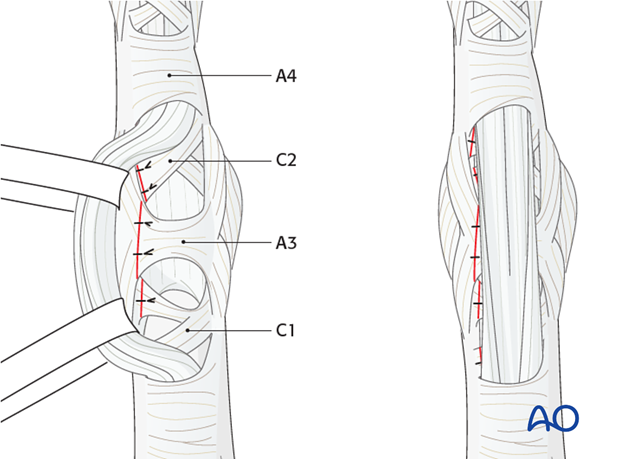
The flap of the C1, A3, and C2 pulleys is passed beneath the flexor tendons, and sutured to the opposite side, using 5.0 monofilament nonresorbable sutures, in order to reinforce the volar plate.
7. Aftertreatment
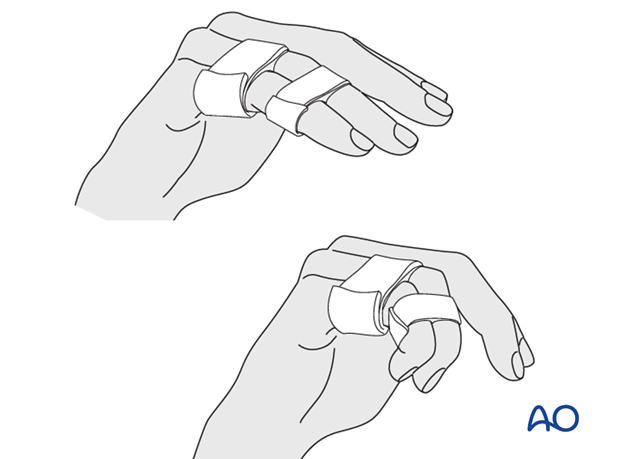
Postoperatively, protect the digit with buddy strapping to the adjacent digit to neutralize lateral forces on the finger.
A dorsal thermoplastic night splint, with the PIP joint in full extension, is used to avoid flexion contraction.
Follow up
Review the patient 5 days and 10 days after surgery.
Functional exercises
The patient can begin active motion (flexion and extension) immediately after surgery.
Heavy manual load, whether domestic, occupational, or sporting, should be avoided for 3 months following operation.
Implant removal
Rarely, the implants may need to be removed in cases of soft-tissue irritation.
In case of joint stiffness, or tendon adhesion’s restricting finger movement, tenolysis, or arthrolysis become necessary. In these circumstances, take the opportunity to remove the implants.


