Hemi-hamate arthroplasty with bone graft
1. Principles
Classification of avulsion fractures of the volar plate
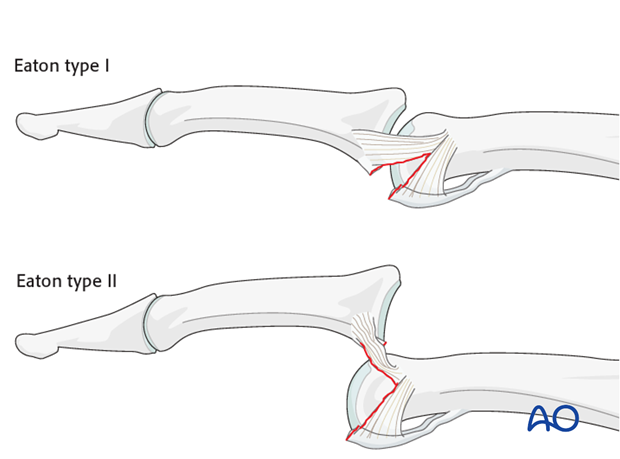
Avulsion fractures of the volar plate are very common injuries, often resulting from sporting injuries and usually involving the middle and ring fingers. Several classification systems for them have been proposed. The Eaton classification is very useful for practical purposes. This classification is based on the premise that successful treatment must be based on the stability of the fracture, which in turn depends on
- size of the fragment
- degree of impaction,
- presence of one or both collateral ligament ruptures
- direction of the dislocation (hyperextension, lateral dislocation, flexion).
Eaton type I (hyperextension)
These are hyperextension injuries, with an avulsion of the volar plate and a longitudinal split in the collateral ligaments.
Eaton type II (dorsal dislocation)
Complete dorsal dislocation of the PIP joint and avulsion of the volar plate. The base of the middle phalanx rests dorsally on the condyles of the proximal phalanx, with no contact between the articular surfaces.
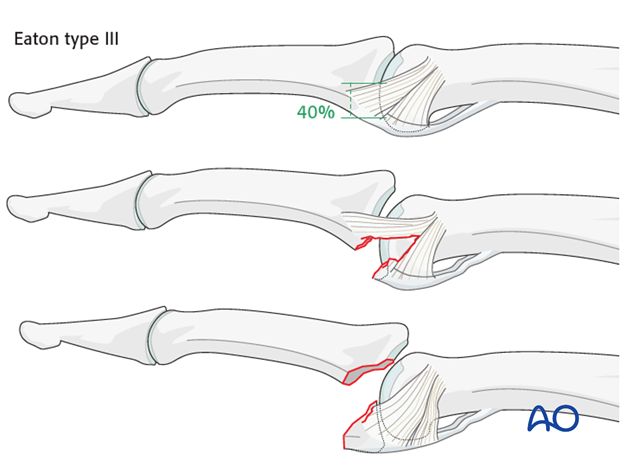
Eaton type III (fracture dislocation)
A fracture dislocation with a small fragment measuring less than 40% of the palmar arc will remain stable when reduced.
If a larger part (>40%) of the palmar articular segment is involved, ligamentous support will not suffice for a stable reduction.
Stability of fracture dislocations (Eaton type III)
Stability of the reduction depends on the size of the avulsed fragment and the amount of ligament remaining attached to the middle phalanx.
If less than 40% of the articular segment is avulsed, the fracture is displaced dorsally, with the dorsal portion of the collateral ligament remaining attached to the middle phalanx. This helps to keep the reduction stable.
However, if more than 40% of the articular segment has avulsed, only very little or no ligament will remain attached to the base of the middle phalanx, rendering the reduction unstable.
Mechanism of the injury
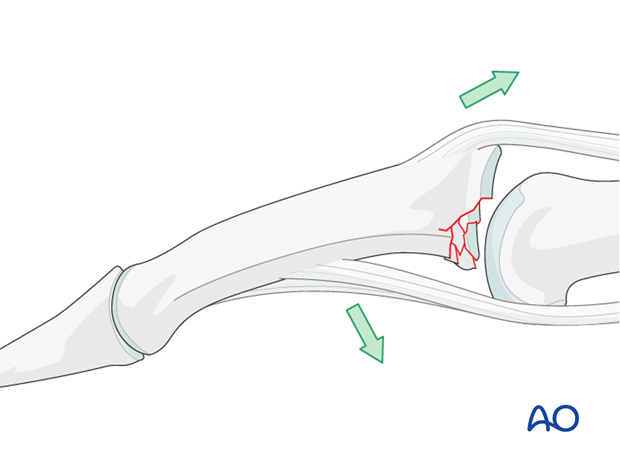
These injuries are commonly caused by sporting accidents.
Typically, hyperextension of the finger causes an avulsion fracture of the volar plate.
Often, in addition to hyperextension, pressure is applied to the fingertips, causing longitudinal compression forces on the middle phalanx towards the proximal phalanx and leading to an additional impaction fracture.

Deforming forces
The flexor digitorum superficialis (FDS) exerts a palmar pull on the middle phalanx around a pivotal point determined by the junction of intact cartilage and the fracture, which leads to subluxation and dorsal tilting, depending on the degree of the impaction.
Recognizing subluxation
Diagnosis is based on:
- the clinical history of the trauma and mechanism of the injury
- the clinical examination of the patient
- the x-rays
AP and lateral x-rays are necessary for diagnosis. Be careful to avoid interposition of other fingers in the x-rays.
An AP view will help to recognize impaction fractures.
Often, a subluxation is not apparent on the lateral view. Look for the characteristic “V” sign of diverging joint surfaces, which indicates this injury.
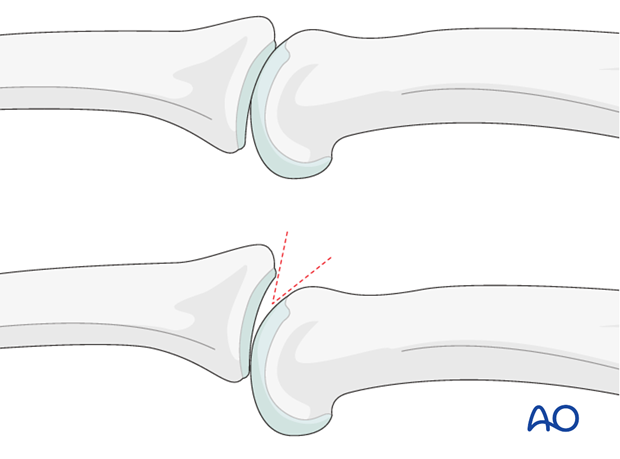
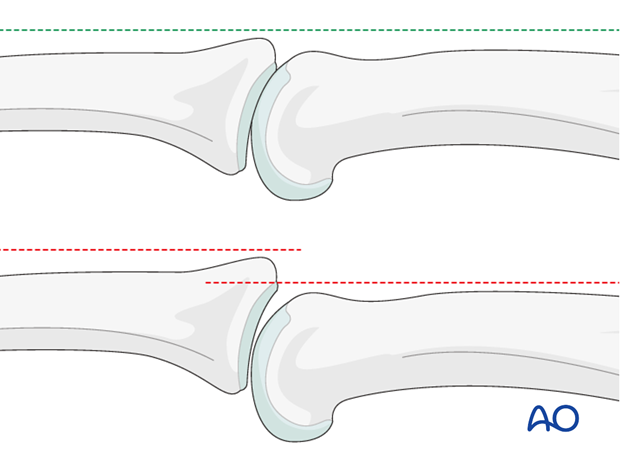
In the lateral view, the proximal and middle phalanges should be collinear. Any axial malalignment is a clear indication of subluxation.
2. Indications
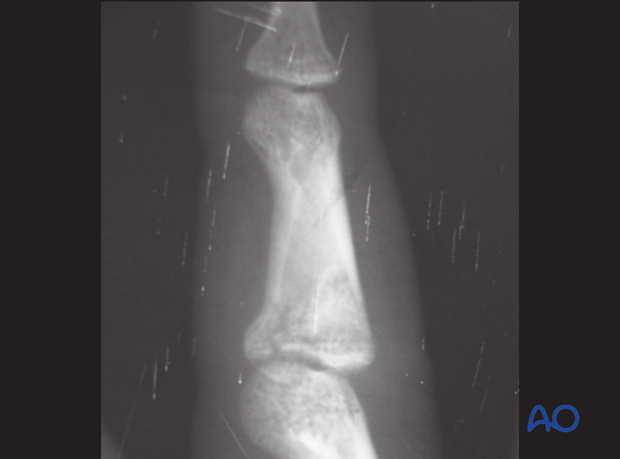
Check for impaction injuries
Impaction may occur either in the sagittal or the coronal plane. Check for both under true AP and lateral views.
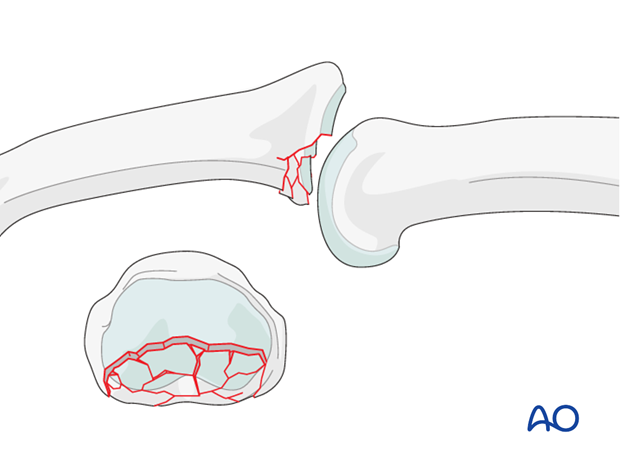
Impaction can occur in several areas, either involving the volar ring, up to 50% of the palmar joint aspect, or the central section of the joint. The latter injury is the ideal indication for the following procedure.
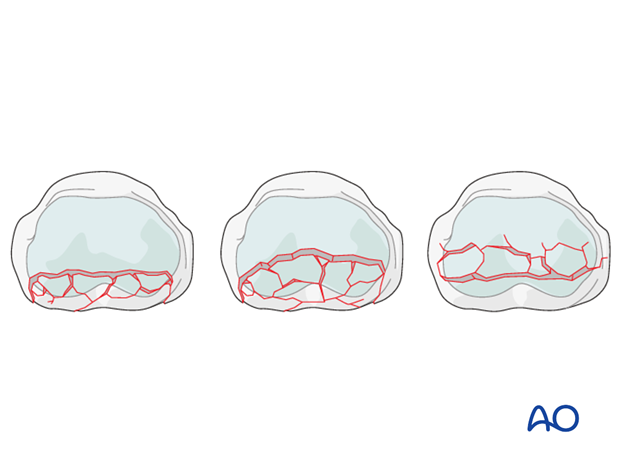
Extensive comminution and impaction - bone graft reconstruction
Extensive comminution with impaction of the subchondral metaphysis is a typical indication for bone graft reconstruction.
If more than 60% of the articular cartilage is comminuted and impacted, bone graft reconstruction of the articular surface remains the only therapeutic option.
Alternative indication: failure of volar plate arthroplasty
Another indication for bone graft reconstruction is as a salvage procedure after the failure of volar plate arthroplasty.
3. Visualization
Visualize the joint
For these injuries, the shotgun extension to the palmar approach is used to gain maximal access to the joint.
In order to gain a better view of the fracture, use a syringe to clear out blood clot with a jet of Ringer lactate.
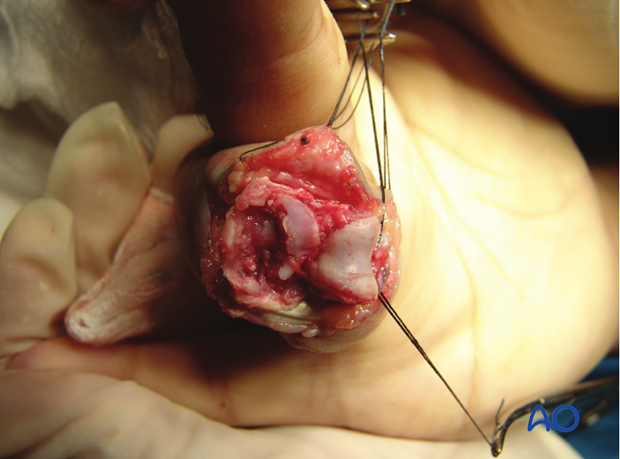
Often the degree of comminution is not apparent from the x-rays, and can only be determined under direct vision.

Evaluate the fracture
The image shows a fracture with clearly more than 60% of the articular segment damaged. The only remaining articular cartilage is in the dorsal aspect. Bone grafting and reconstruction is the only option.
4. Preparation
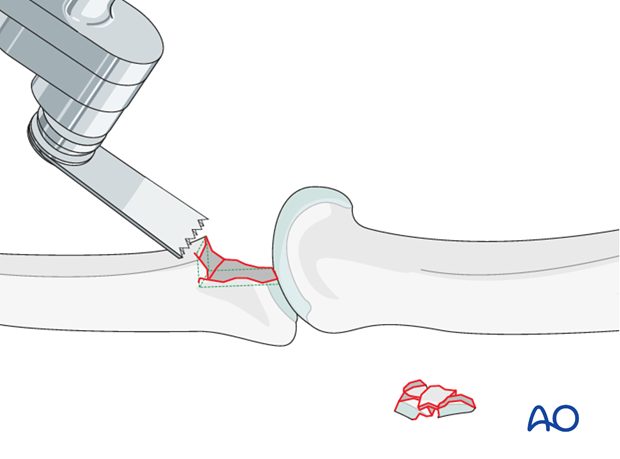
Removal of fragments
Remove all comminuted and impacted fragments. Then use a rongeur, a scalpel and an oscillating saw to create a “box” which is shaped to receive the bone graft.
Measuring the “box”
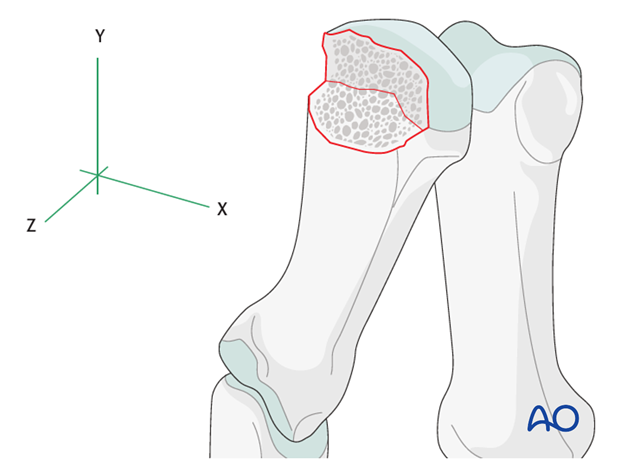
The “box” now has to be very carefully measured in all dimensions.
5. Preparing the bone graft
Preparing for bone graft from the hamate
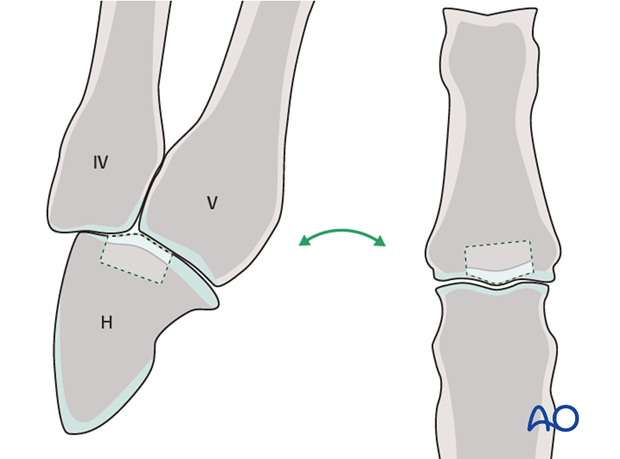
Bone graft will be harvested from the hamate. The distal articular surface of the hamate resembles very closely the form of the base of the middle phalanx.
Approach
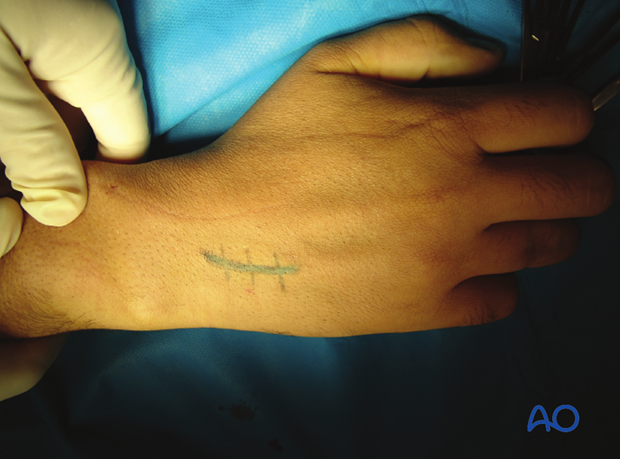
A longitudinal incision of approximately 2 cm is made at the junction of the bases of the 4th and 5th metacarpal, extending proximally.
Make a blunt dissection. The dorsal veins and the sensory dorsal branch of the ulnar nerve must be protected and separated.
The extensor digiti communis (EDC) and extensor digiti minimi (EDM) tendons are separated. The EDC is retracted to the radial side, and the EDM to the ulnar side.
The capsule is now visible. Make a longitudinal capsulotomy.
Preparing the hamate
Mark the exact dimensions of the defect on the exposed hamate.
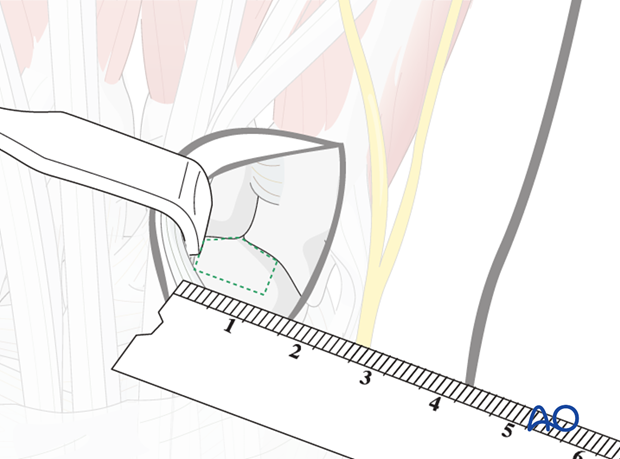
Be very precise with the measurements.
Harvesting from the hamate
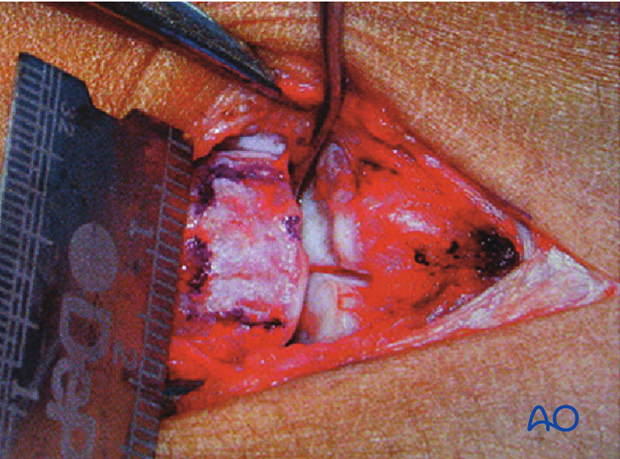
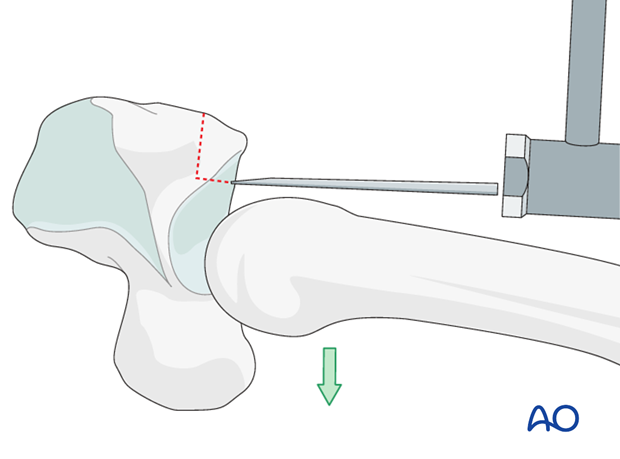
Cut the osteocartilagineous graft from the hamate. Use a fine oscillating saw for the vertical and horizontal cuts.
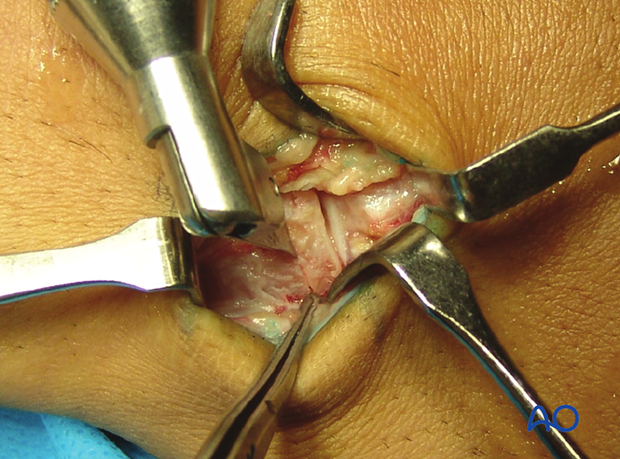
In order to free the graft fragment from the hamate, dislocate the metacarpals palmarly, and use a chisel as a lever to complete the procedure.
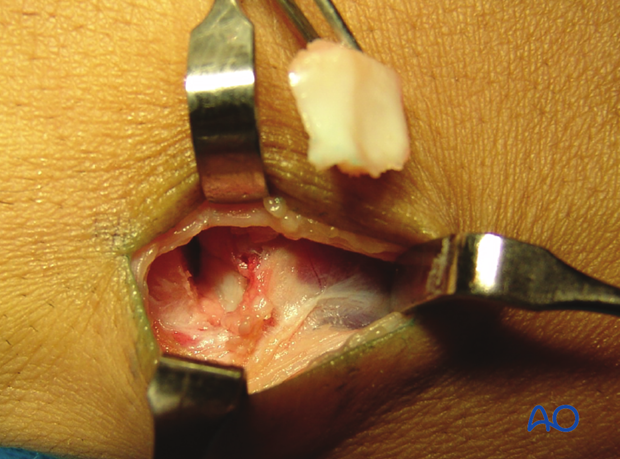
Remove the osteocartilaginous graft.
Adjust bone graft to the defect
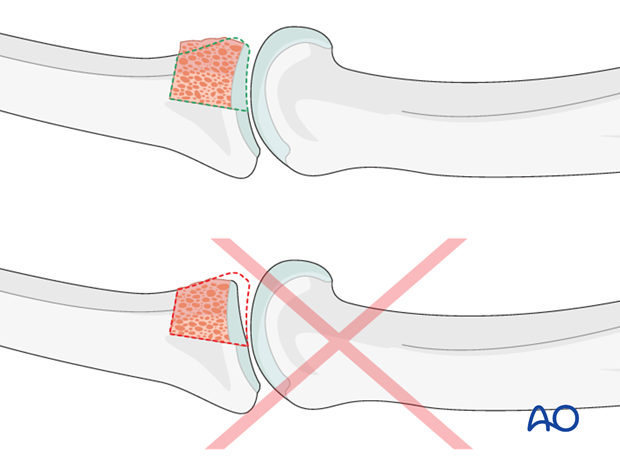
Use a small rongeur to adjust further both the receiving box and the graft so that they match perfectly.
First reconstruct the articular surface to a perfect fit. The rest of the graft can be trimmed after this important step.
6. Reconstruction of the articular plate
Insert bone graft
Insert the perfectly modelled bone graft to reconstruct the articular surface. Ensure that the articular cartilages of the hamate graft and of the phalangeal head match and create a congruous joint.
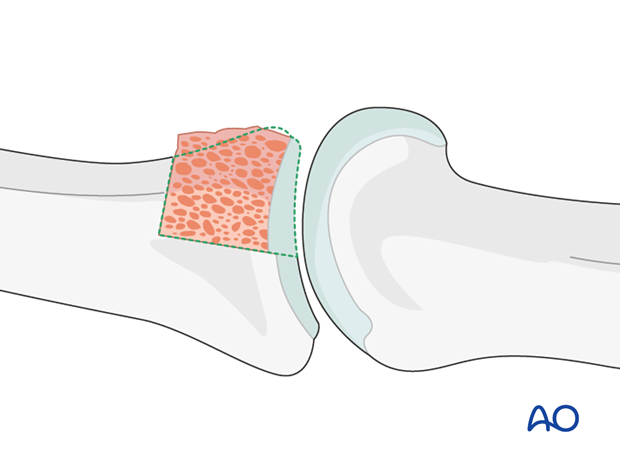
Check the joint congruency
Reduce the joint to check for congruency. If the joint has been reconstructed anatomically correctly, it will be stable throughout the full range of motion.
Confirm using image intensification.
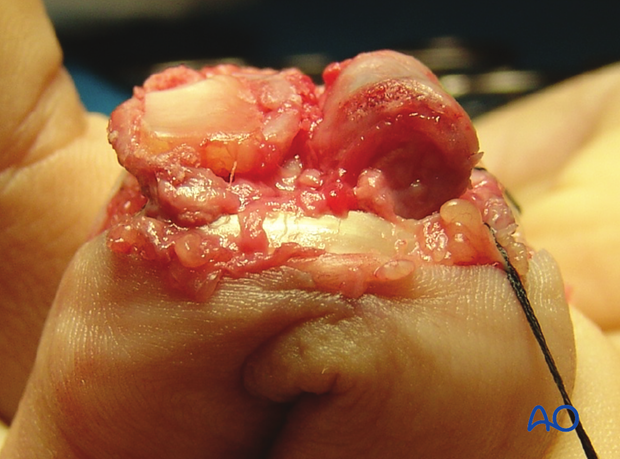
7. Lag screw fixation
Drill for first screw
Two screws will be inserted.
First drill a 1.0 mm gliding hole from palmar to dorsal through the graft. Insert a drill guide. Drill the thread hole in the dorsal aspect of the middle phalanx, using a 0.8 mm drill through the drill guide.
Use a depth gauge tomeasure accurately for screw length.
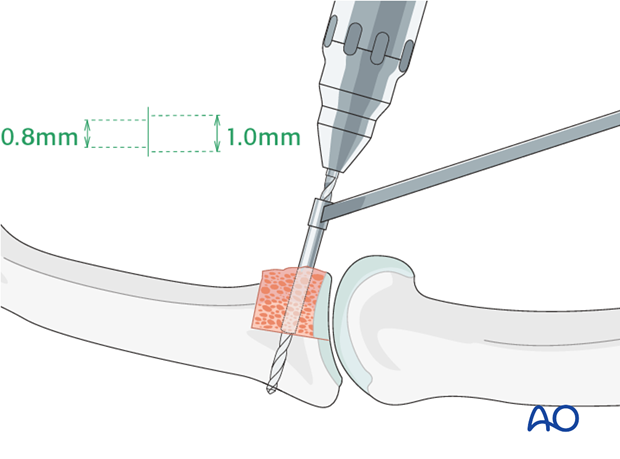
Insert first screw
Insert the first 1.0 mm self-tapping screw, but do not tighten it yet.

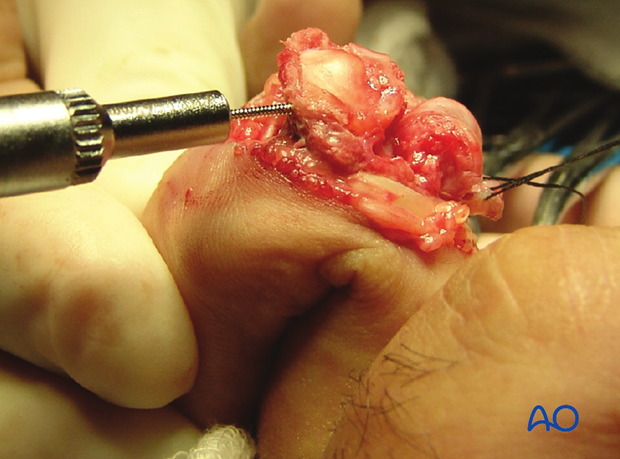
Insert second screw
Repeat the drilling procedure for the second screw and insert the second screw.
Tighten the two screws alternately.
8. Reattachment of the volar plate
Importance of the volar plate
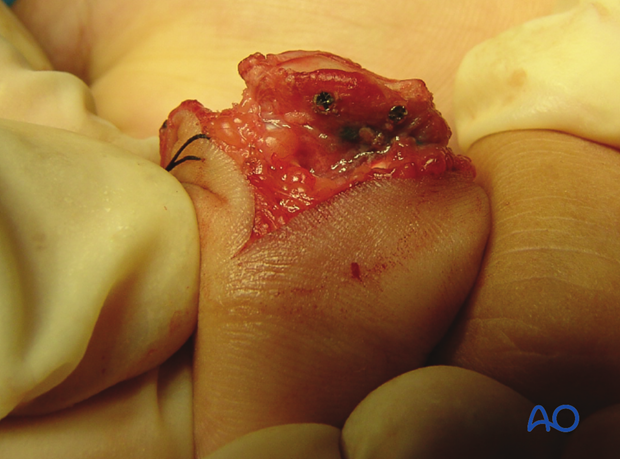
After lag screw fixation, the volar plate must be reattached. Hyperextension deformity is a potential complication after this procedure, and can be prevented by reattachment of the volar plate.
Reattachment of the volar plate
Suture the volar plate to the A4 pulley and the remaining pieces of the collateral ligament on both sides of the base of the middle phalanx, using a 4.0 monofilament nonresorbable suture.

Pulley repair
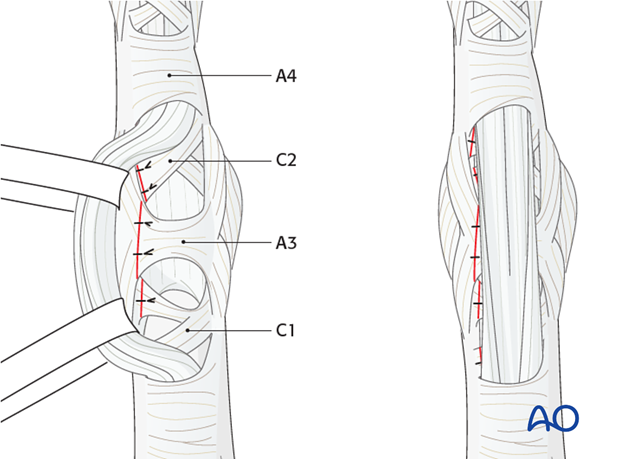
The flap of the C1, A3, and C2 pulleys is passed beneath the flexor tendons, and sutured to the opposite side, using 5.0 monofilament nonresorbable sutures, in order to reinforce the volar plate.
9. Aftertreatment
DIP joint movement is encouraged immediately to avoid extensor tendon adhesion.
Functional exercises
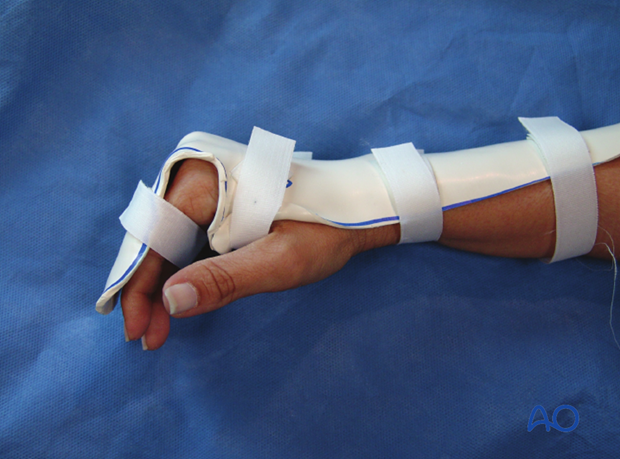
Active and passive flexion of the PIP joint is initiated by using a dorsal extension block splint at 30 degrees.
After 4 weeks, the splint is removed, and unrestricted active extension is permitted.
Dynamic extension splinting
If after 5 weeks active extension is not full, dynamic extension splinting is recommended.
During the whole process, the hand therapist should closely monitor the rehabilitation.
The recovery process after such injuries is slow. Reassure the patient to expect 6-8 months for full recovery.
