Lag-screw fixation
1. General considerations
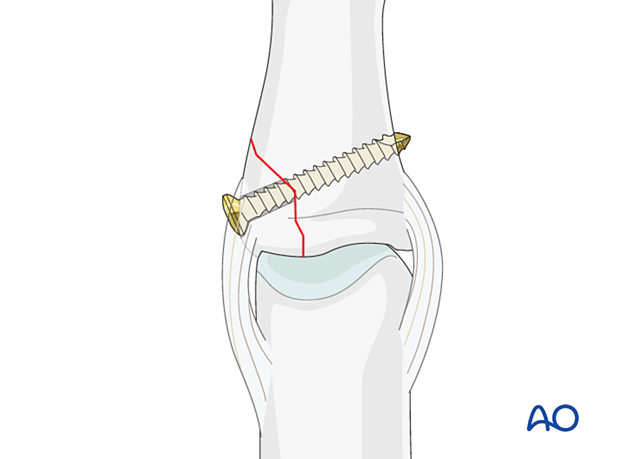
Partial articular (shearing) fractures require anatomical reduction. Noncomminuted fractures may be fixed with lag screws.
The reduction can be assisted with arthroscopy if skill and equipment are available.
The joint may collapse if there is impaction or comminution while the lag screw is tightened. In this case, plate fixation should be considered for chondral support.
Preserving vascularization
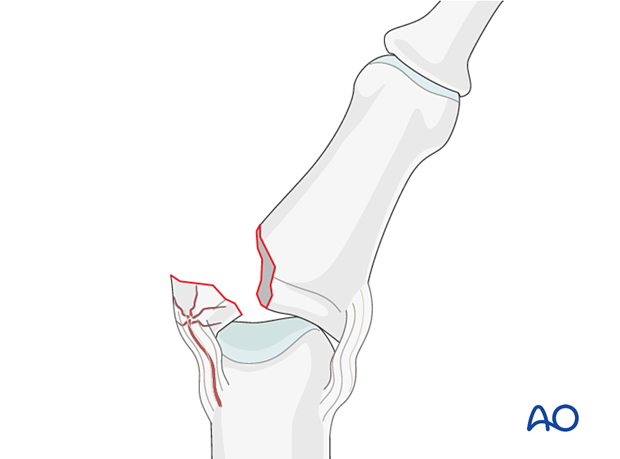
The risks of screw fixation include the additional dissection and potential resulting devascularization, which can jeopardize fracture healing.
Percutaneous vs open reduction and fixation
Percutaneous reduction and fixation may be performed.
The advantages are:
- Shorter operation time
- Less soft-tissue damage
- Faster mobilization
This treatment option needs some skills and experience and a special reduction forceps to avoid impingement of swollen soft tissue (atraumatic technique).
If a percutaneous reduction is not achievable, the treatment can be changed to an open surgery.
2. Patient preparation
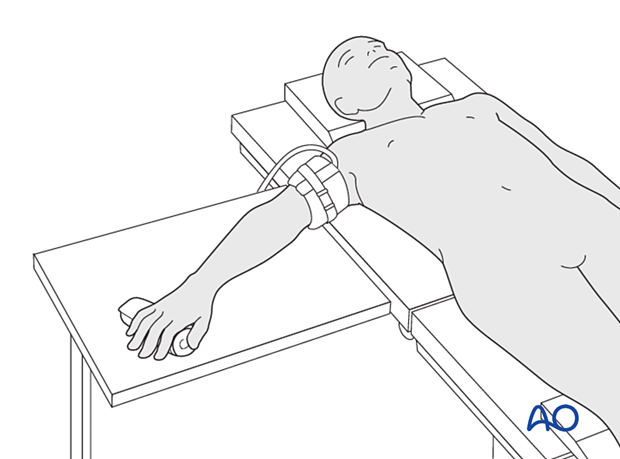
Place the patient supine with the arm on a radiolucent hand table.
3. Approach
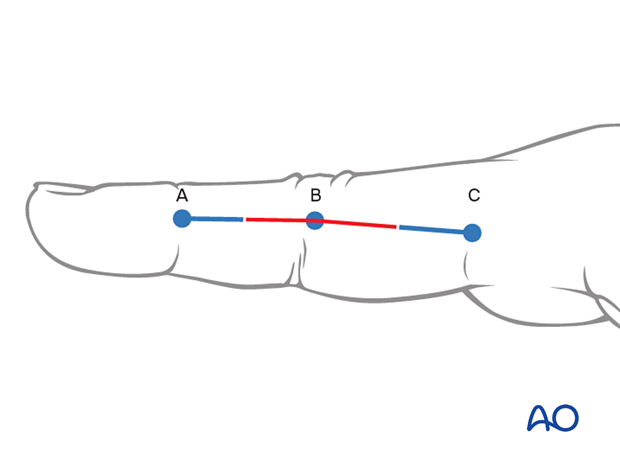
For this procedure a midaxial approach to the proximal interphalangeal joint is normally used.
4. Reduction of dislocation
Closed reduction
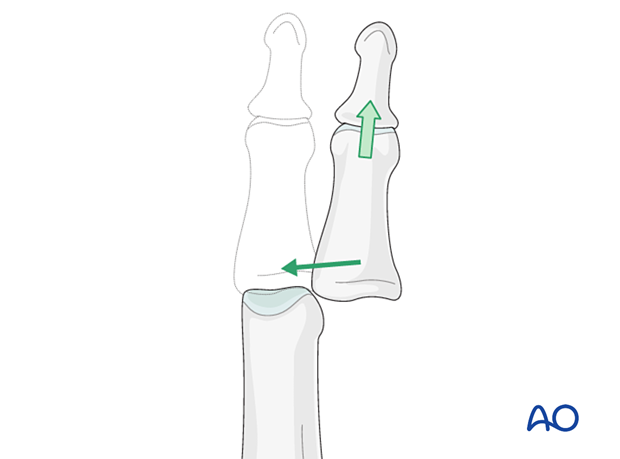
Collateral ligament avulsion may be associated with a lateral dislocation of the PIP joint.
This can be reduced by traction with gentle laterally applied pressure on the middle phalanx to reduce the joint. This keeps the palmar structures in tension and reduced the risk of soft-tissue interposition.
Stability evaluation
Confirm reduction with an image intensifier and check the joint stability by varus/valgus stress test. This should show congruent movement compared with the adjacent joints.

Open reduction
If congruent reduction can not be achieved, often due to interposed soft tissue, an open reduction is necessary.
Remove the obstructing soft tissues or fragments, reduce the joint and confirm congruity and stability of the joint.
Repair the joint capsule.
5. Fracture reduction
Indirect reduction
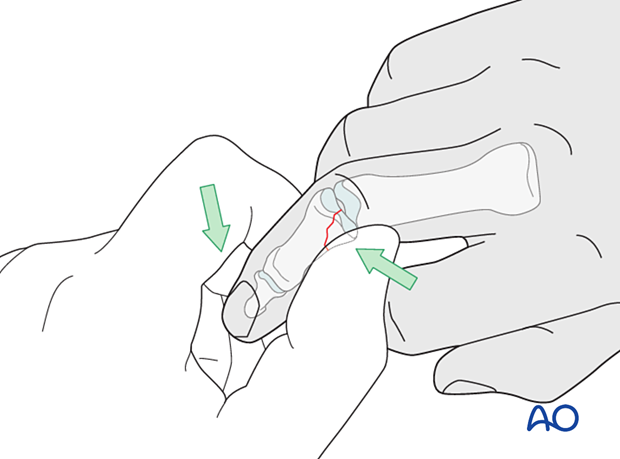
Reduction is achieved by pulling the finger laterally, in the direction opposite to the forces that created the fracture, and into PIP flexion, as necessary, to approximate the fragment. The avulsed fragment is pushed into place by the surgeon’s thumb.
Open reduction
In displaced fractures, open reduction is often necessary.
Laterally deviate the phalanx in the opposite direction to gain maximal visualization of the joint (open book).
Evaluate the fracture geometry.
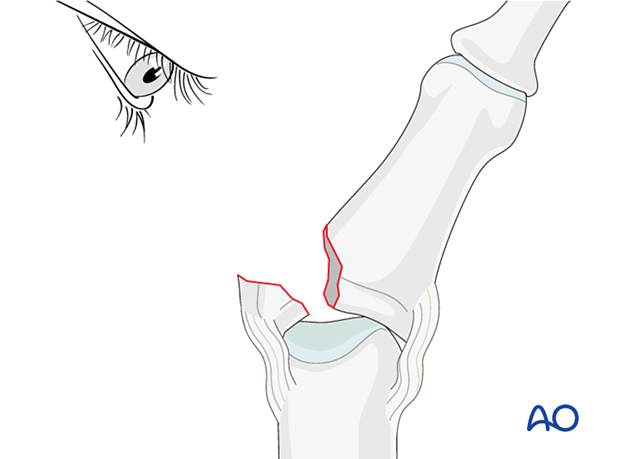
Use small pointed reduction forceps to gently reduce the fracture from palmar to dorsal and from proximal to distal. Application of excessive force can result in fragmentation.
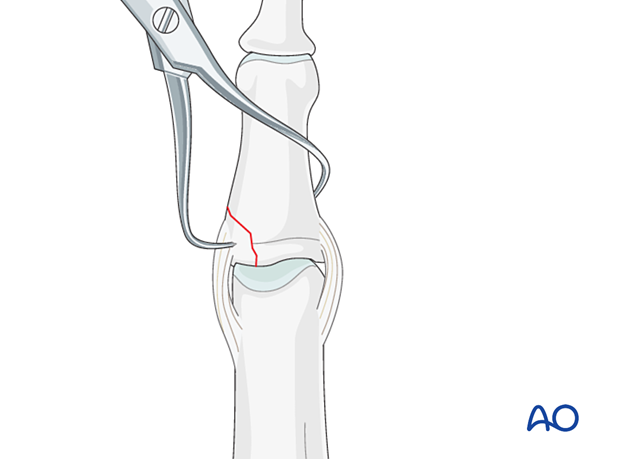
Preliminary K-wire fixation
Preliminarily fix the fragment by inserting a K-wire. Be careful to place it in such a way that it will not conflict with later screw placement.
If a cannulated screw is planned, insert the guide wire to hold the reduction.
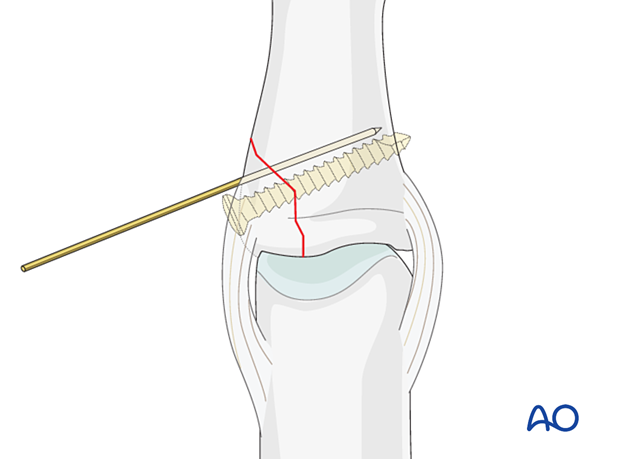
6. Fixation
Insert the lag screw perpendicularly to the fracture plane.

Choosing screw size
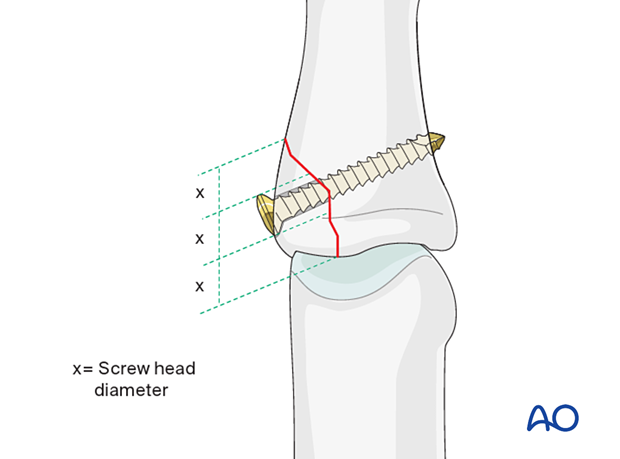
The maximal permitted diameter of the screw head is one third of the diameter of the avulsed fragment.
Screw length needs to be adequate for the screw to penetrate and purchase in the opposite cortex.
Most commonly, a 1.0 mm, or 1.3 mm screw is used. The use of a 1.0 mm screw will be illustrated.
Alternative: inside-out gliding hole in large fragments
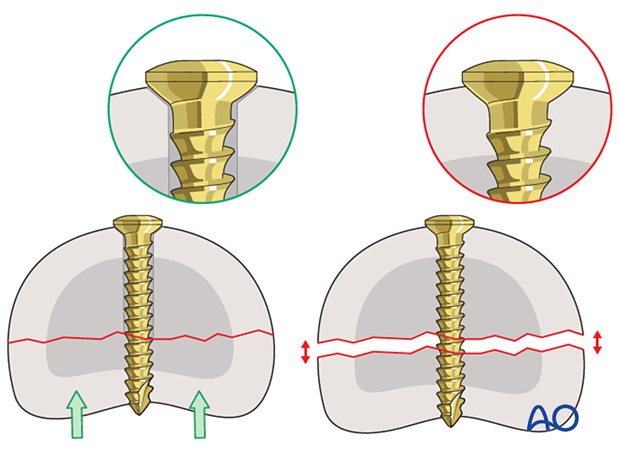
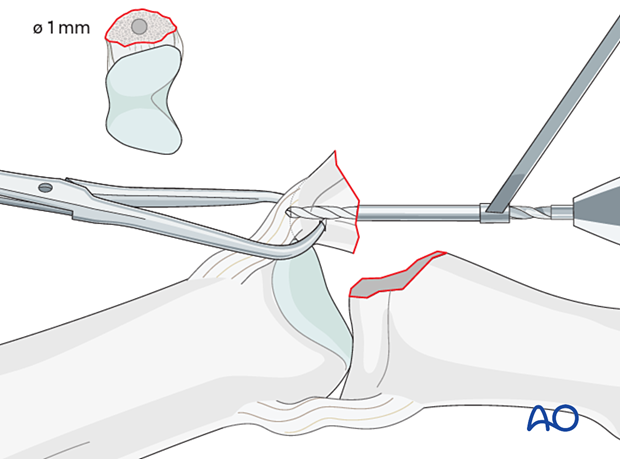
Keeping the PIP joint deviated laterally, drill an inside-out gliding hole through center of the fracture surface of the avulsed fragment. It is essential to prevent rotation of the small fragment by steadying it, using pointed reduction forceps.
The advantage of this technique is that it allows perfect positioning of the gliding hole (perpendicular to the fracture plane and in the center of the fragment).
Option: additional wire loop
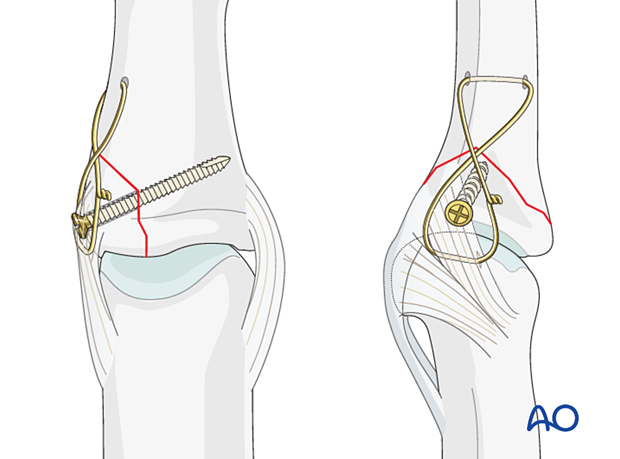
In cases where the avulsed fragment is so small that the screw length is not sufficient to reach the far cortex, the fixation can be strengthened by adding a figure-of-eight wire loop, passing beneath the ligament insertion into the fragment.
The wire loop is also a good choice if the achieved compression is not sufficient for other reasons.
7. Joint transfixation with K-wire
A joint transfixation may help to protect the fixation.
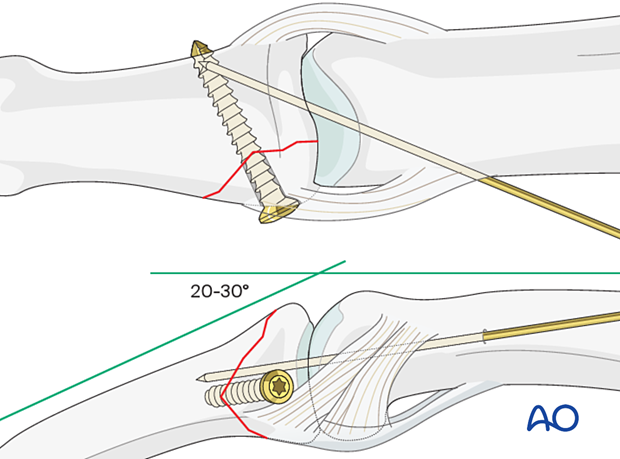
In case of any joint instability, insert a K-wire across the PIP joint obliquely, with the PIP joint in 20°–30° of flexion.
Leave the end of the K-wire outside of the skin to facilitate later removal.
The K-wire can be removed after 4 weeks.
The fixation should be protected with a splint to reduce the risk of wire breakage.
8. Final assessment
Check joint congruity using image intensification. Reduction must be anatomical.
9. Aftercare
Postoperative phases
The aftercare can be divided into four phases of healing:
- Inflammatory phase (week 1–3)
- Early repair phase (week 4–6)
- Late repair and early tissue remodeling phase (week 7–12)
- Remodeling and reintegration phase (week 13 onwards)
Full details on each phase can be found here.
Postoperatively
The hand is immobilized with a dorsal splint for 3–4 weeks depending on the stability of fixation. This should permit movement of the unaffected fingers. The arm should be actively elevated to help reduce the swelling.
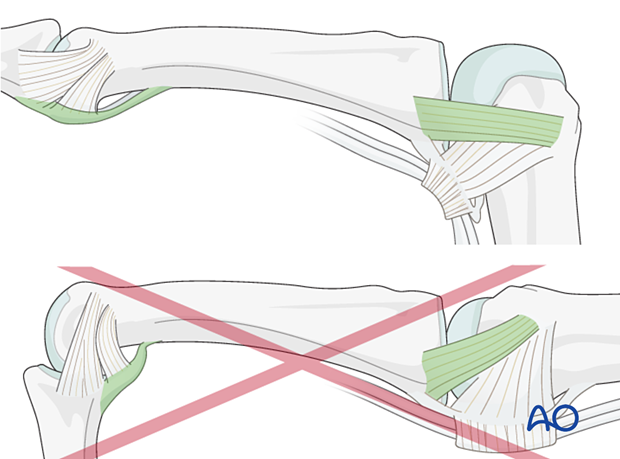
The hand should be immobilized in an intrinsic plus (Edinburgh) position:
- Neutral wrist position or up to 15° extension
- MCP joint in 90° flexion
- PIP joint in extension
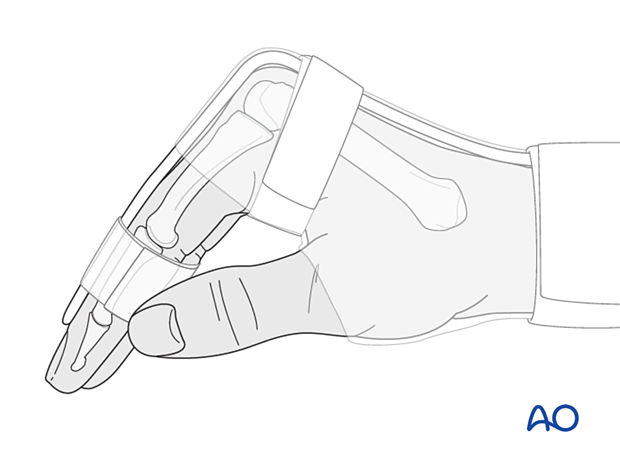
The MCP joint is splinted in flexion to maintain its collateral ligaments at maximal length to avoid contractures.
The PIP joint is splinted in extension to maintain the length of the volar plate.
Follow-up
The patient is reviewed frequently to ensure progression of hand mobilization.
In the middle phalanx, the fracture line can be visible in the x-ray for up to 6 months. Clinical evaluation (level of pain) is the most important indicator of fracture healing and consolidation.
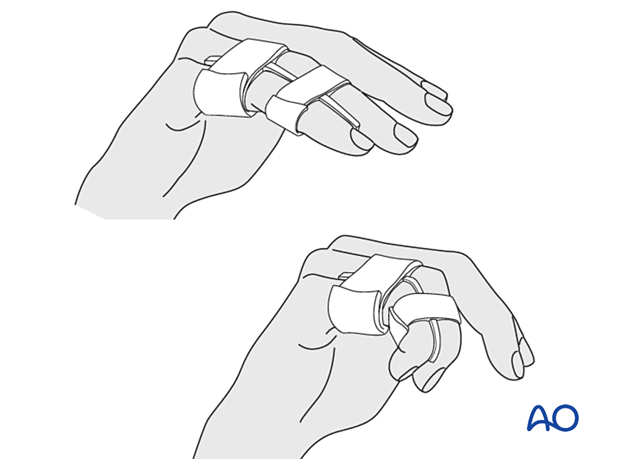
Remove the splint and K-wire after 4 weeks and protect the finger with buddy strapping to a neighboring finger to neutralize lateral forces on the finger.
Mobilization
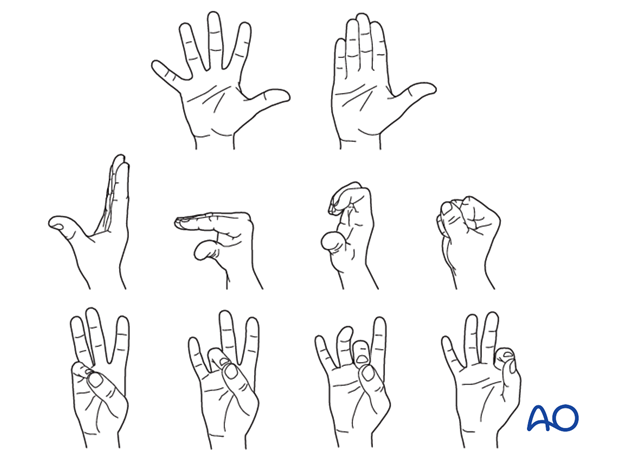
If the fixation is stable enough, the patient is encouraged to take off the splint 2–3 times daily, and to commence with gentle active exercises, provided no transarticular K-wire has been used or has already been removed.
After 4 weeks, the splint (and any K-wire) is removed, and unrestricted active flexion and extension are permitted.
Implant removal
The implants may need to be removed in cases of soft-tissue irritation.
In case of joint stiffness or tendon adhesion restricting finger movement, arthrolysis or tenolysis may become necessary. In these circumstances, the implants can be removed at the same time.
