Suture fixation
1. General considerations
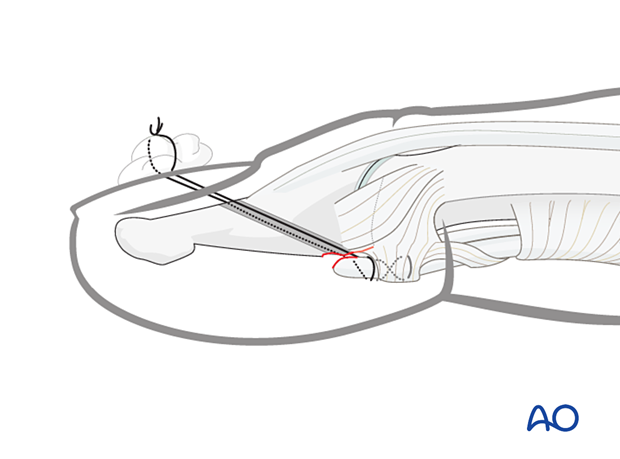
A palmar tendon avulsion with or without a small bony fragment may be fixed with a pull-out suture. Alternatively, suture anchors may be used.
2. Patient preparation
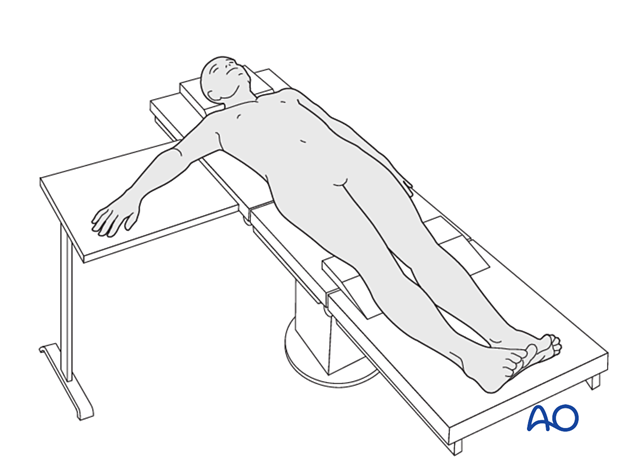
This procedure is usually performed with the patient in a supine position with the arm on a radiolucent side table.
3. Approach
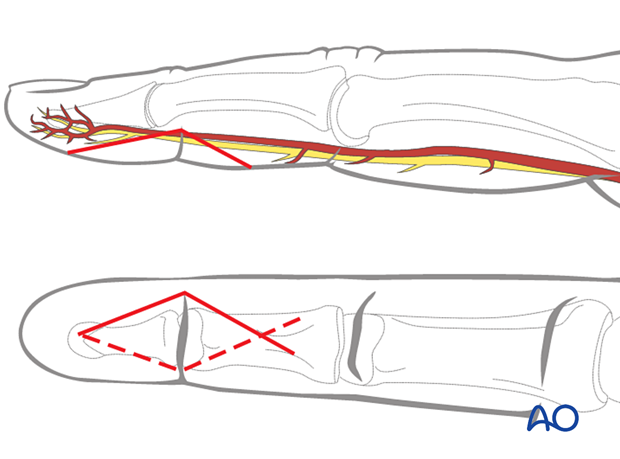
For this procedure, a palmar approach to the DIP joint is typically used.
4. Reduction
Visualization of the joint
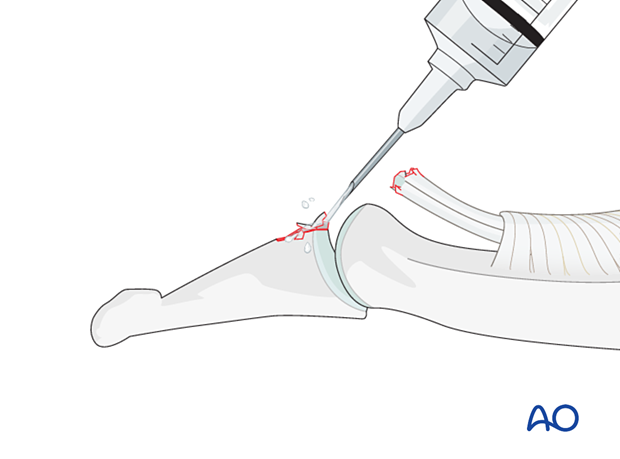
Hyperextend the distal phalanx to gain maximal visualization of the joint.
Use a syringe to clear blood clots with a jet of sterile irrigation solution.
Assess fracture geometry and look for comminution or impaction.
Often, comminution is not apparent from the x-rays and can only be determined under direct vision.
Repositioning the tendon
If the tendon has retracted to the PIP joint, the zigzag incision has to be extended to the PIP joint.
Use a small flexible catheter or similar tool to retract the tendon.
Use a 4.0 suture to hold the end of the FDP in the Mansson fashion and pass these through a suture loop. The tendon will be repositioned with a distal pull with the suture loop.
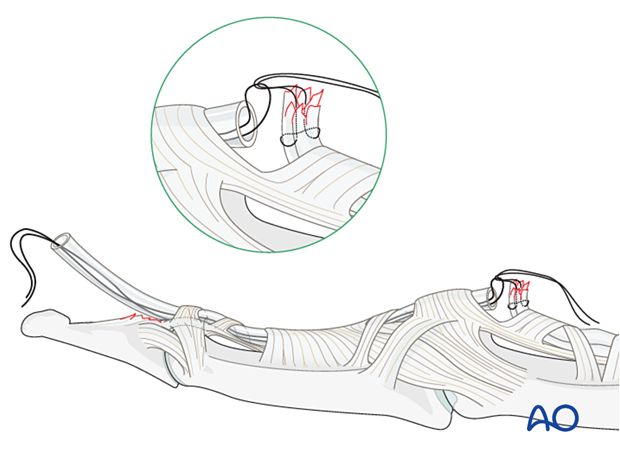
Alternatively, the FDP can be sutured to the tube. By pulling it, the tendon will be repositioned.
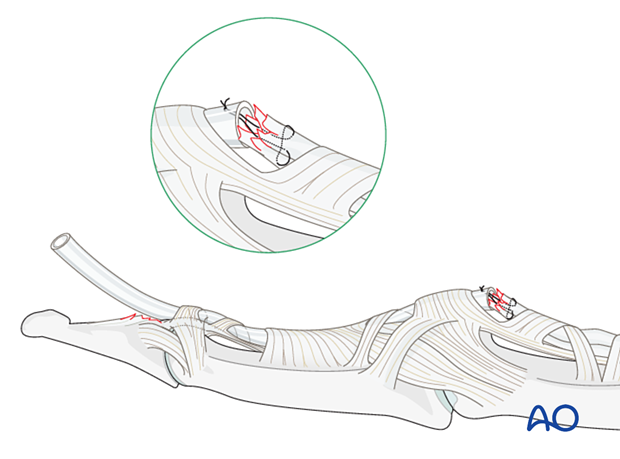
5. Suture fixation
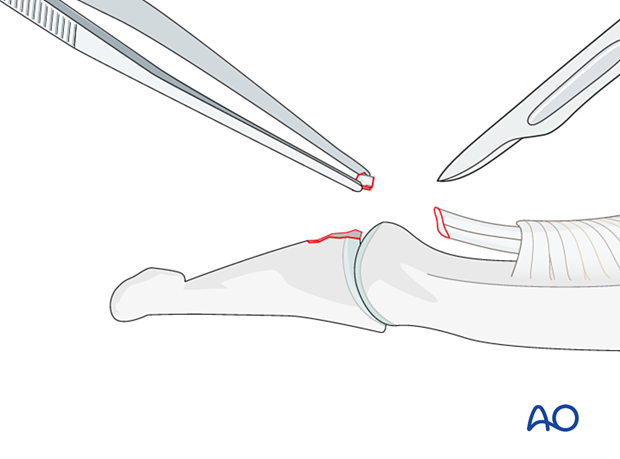
Resection of fragments
If there is comminution present, excise the comminuted bony fragments. This is also true if a flake is so small that it does not contribute to any form of reattachment.
Drilling
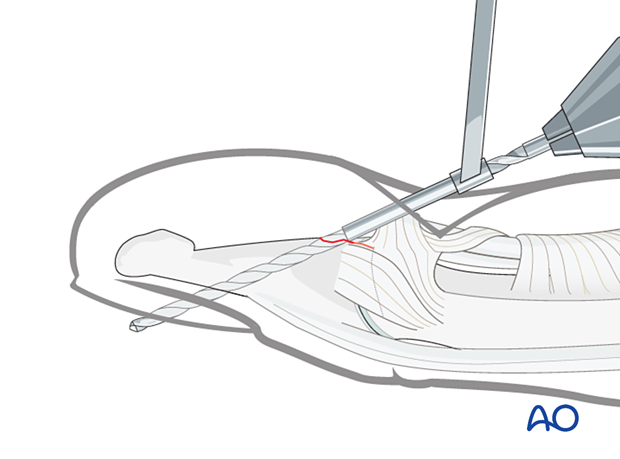
It is mandatory to use a drill guide to protect the soft tissues. Use a pillow under the hand to protect the tip of the drill bit.
Drill two parallel 1.3 mm holes aimed obliquely from proximal to distal and palmar to dorsal, exiting through the nail but avoiding the lunula (germinal matrix).
Insertion of sutures
Use 3.0 multifilament nonabsorbable sutures with double-mounted straight needles.
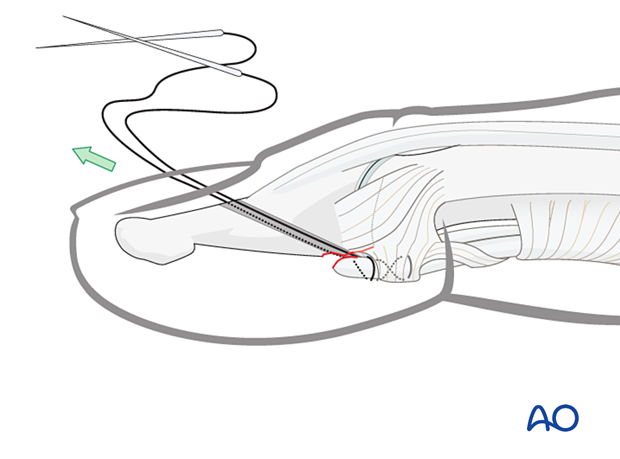
Interweave a suture through the detached distal end of the tendon and insert the two ends of the suture into the drill holes–both needles exit dorsally through the nail.

Reduction of the tendon
Gently approximate the tendon to the fracture surface by pulling the sutures in a dorsal direction.
Confirm the position under direct vision.
Tightening the sutures
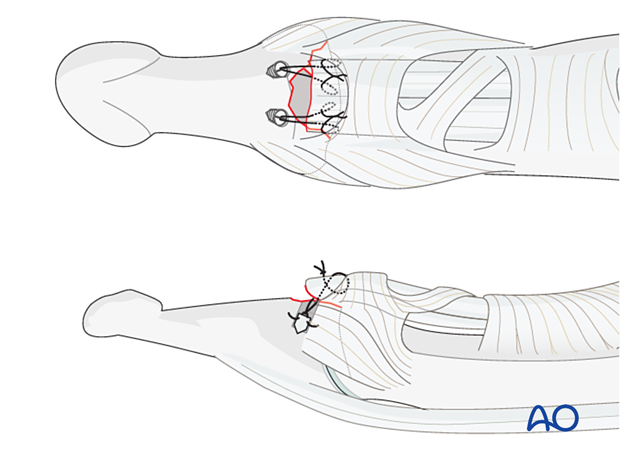
Tighten the suture over the nail, anchoring it around a cotton piece, which also protects the nail from excessive pressure.

6. Alternative fixation: suture anchors
Alternatively to the described method, two suture anchors can be used.
This option has the advantage of sparing the nail bed and nail from injury and is a less time-consuming procedure.
Fixation of the anchors within the cancellous bone of the proximal phalanx should be tested before passing the sutures through the bone fragment to tie them ventrally.
7. Immobilization
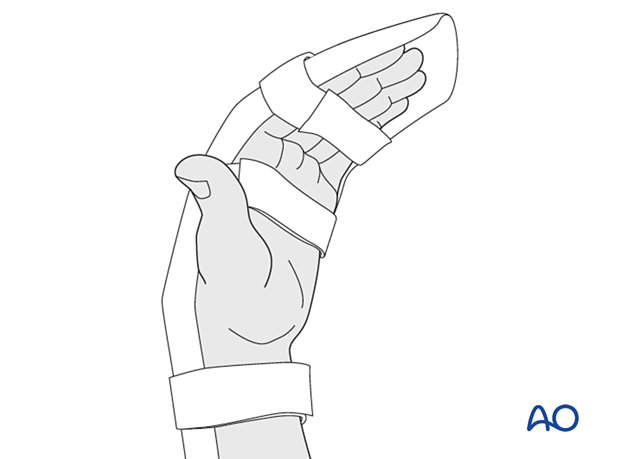
Apply a resting splint holding the wrist in 30° of flexion, the MCP joint in 70°–90° flexion, and the PIP joint in extension for 3 weeks.
8. Aftercare
Postoperative phases
The aftercare can be divided into four phases of healing:
- Inflammatory phase (week 1–3)
- Early repair phase (week 4–6)
- Late repair and early tissue remodeling phase (week 7–12)
- Remodeling and reintegration phase (week 13 onwards)
Full details on each phase can be found here.
Management of swelling
The arm should be actively elevated to help reduce any swelling.
Follow-up
A wound check is performed 3–5 days after surgery. Dressings are changed to avoid the tourniquet effect of dried exudate or bleeding within the dressings.
Sutures may be removed after 10 days. X-rays are taken 3 and 6 weeks after surgery to confirm fracture alignment and healing, respectively.
Functional exercises
The fixation will be vulnerable for the first 3 weeks.
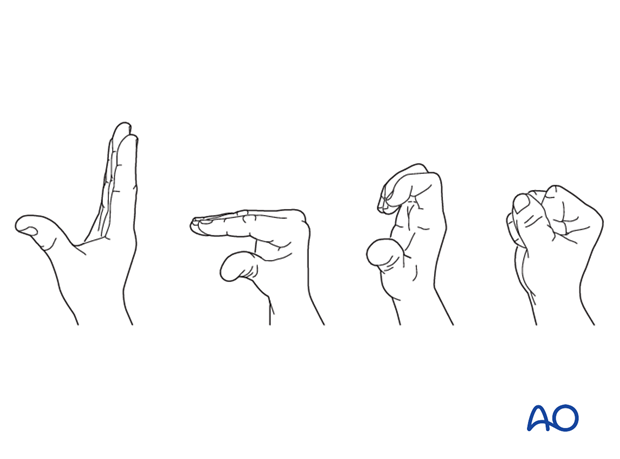
After that, the splint can be removed and replaced with buddy strapping to facilitate active motion exercises.
Hand therapy is recommended to prevent soft-tissue atrophy and joint contracture (typically extension of MCP joint and flexion of PIP joint), which leads to a poor outcome, and subsequent treatment is difficult.
Suture removal
The pull-out suture may be removed after 8 weeks.


