ORIF - Bridge plating (DSC)
1. Principles
Note on illustrations
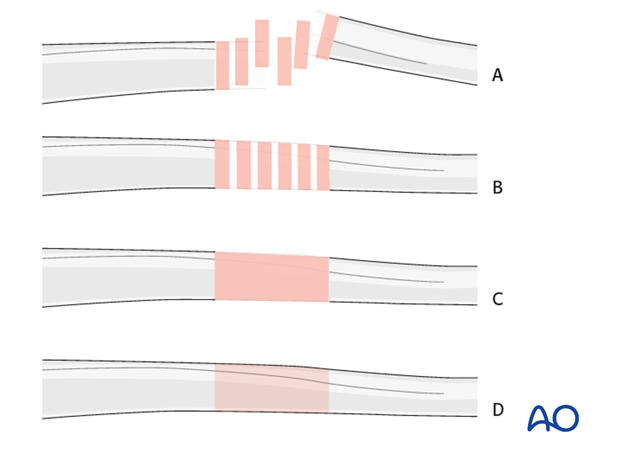
Throughout this treatment option illustrations of generic fracture patterns are shown, as four different types:
A) Unreduced fracture
B) Reduced fracture
C) Fracture reduced and fixed provisionally
D) Fracture fixed definitively
Bridge Plating
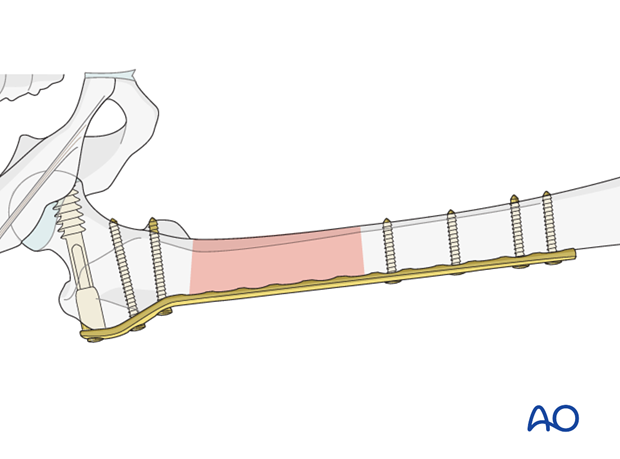
Bridge plating uses the plate as an extramedullary splint, fixed to the two main fragments, leaving the intermediate fracture zone untouched. Anatomical reduction of intermediate fragments is not necessary. Furthermore, their direct manipulation would risk disturbing their blood supply. If the soft tissue attachments are preserved, and the fragments are relatively well aligned, healing is enhanced.
Alignment of the main shaft fragments can be achieved indirectly with the use of traction and the support of indirect reduction tools, or indirectly via the implant.
Mechanical stability, provided by the bridging plate, is adequate for gentle functional rehabilitation and results in satisfactory indirect healing (callus formation). Occasionally, a larger wedge fragment needs to be approximated to the main fragments with a lag screw.
The DCS implants can be placed with locking or non-locking screws, but locking screws should only be used where osteoporotic bone is present.
Reduction
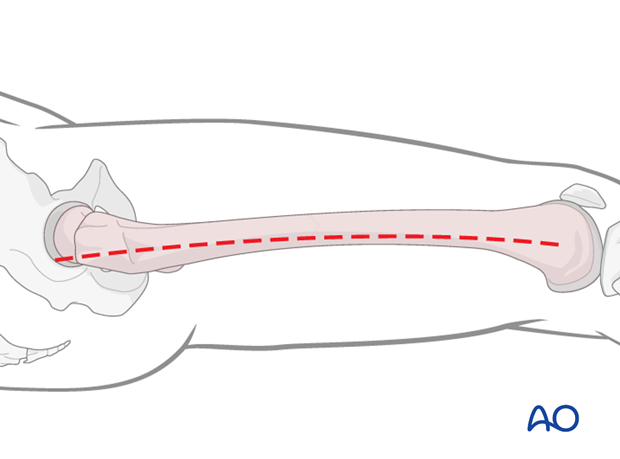
It is important to restore axial alignment, length, and rotation.
Reduction can be performed with a single reduction tool (eg, large distractor) or by combining several steps (for example fracture table +/- external fixator, cerclage wiring, +/- reduction via the implant, etc.) to achieve the final reduction.
The preferred method depends on the fracture and soft-tissue patterns, the chosen fixation device, and the experience and skills of the surgeon.
If a large fragment has separated from the fracture and impaled the adjacent muscle, direct reduction may be required through a separate limited approach.
2. Patient preparation
The patient may be placed in one of the following positions:
3. Approach
For this procedure a lateral approach is used.
4. Preliminary reduction
General considerations
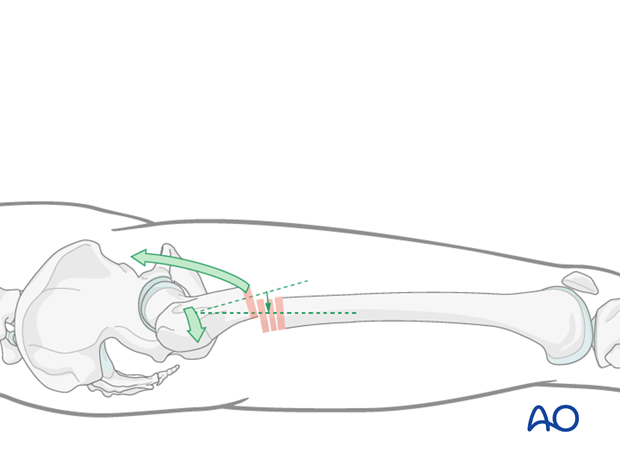
Subtrochanteric fractures present a particular problem in terms of fracture reduction and alignment. Due to the strong pull of the iliopsoas muscle, the proximal fragment is flexed and externally rotated and therefore difficult to control.
Preliminary reduction should be undertaken before the plate is applied. Once the plate is attached to the proximal fragment the definitive reduction with respect to length, rotation and axis can then be achieved.
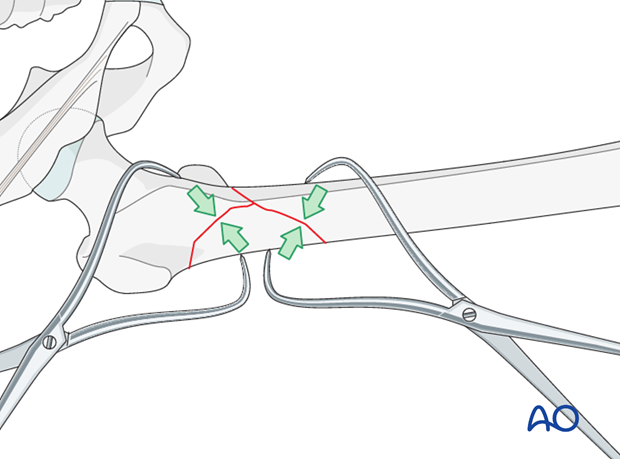
Use of reduction clamps
Reduction clamps are often required to achieve proper alignment. Pointed reduction forceps may be used, but may not provide enough force.
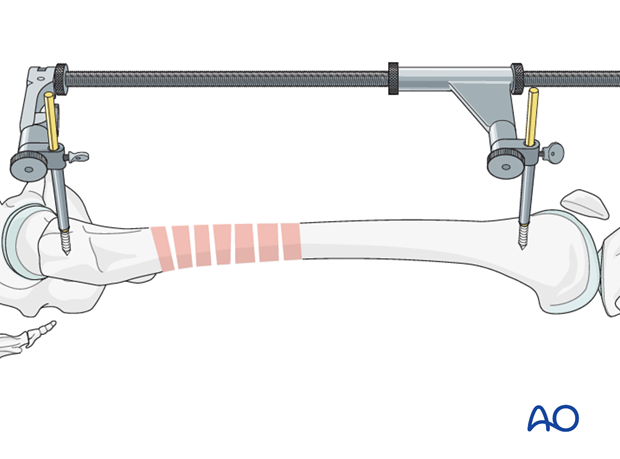
Use of large distractor
After the placement of two pins - one in the greater trochanter and the second one in the shaft - the large distractor is attached.
Attention has to be paid so that the pins do not conflict with the later plate position.
The preliminary reduction is held by tightening the clamps of the large distractor.
Teaching video
AO teaching video: Application of the large distractor
5. Preoperative planning
Plate length and number of screws
Depending on the extent of the zone of fracture comminution and the underlying bone stock (osteoporosis), the appropriate plate length is chosen. Sufficient bicortical screws (a minimum of three up to six) should be inserted into each fracture fragment. Relative stability results from leaving plate holes empty over the fracture zone.

6. Plate fixation to proximal fragment
Guide-wire placement
As a first step, a guide wire for the dynamic screw is placed proximally.
Therefore, the aiming device is lined up parallel to the femoral neck in the axial view and, in the AP view, the guide wire should be aimed at the lower portion of the femoral head.
The wire is advanced to just short of the subchondral bone of the femoral head. Its position is checked fluoroscopically, and adjusted, if necessary.
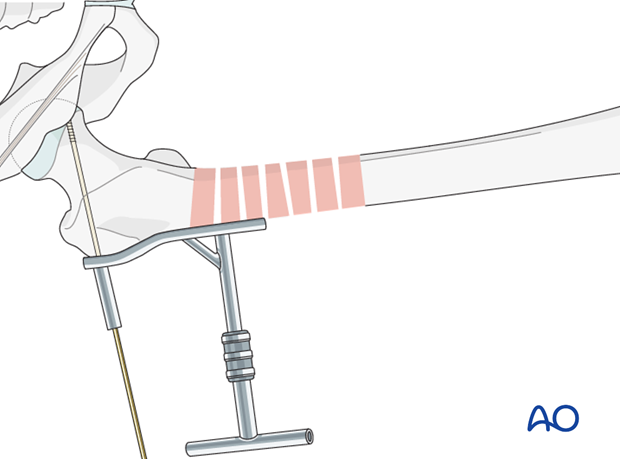
Drilling
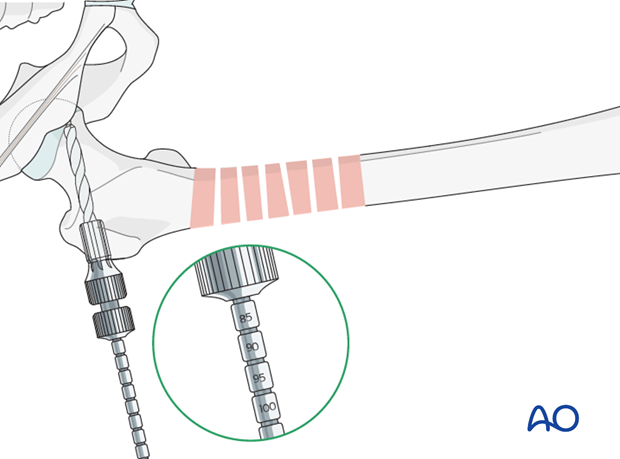
After indirectly determining the screw length by using the measuring device over the protruding guide wire, drilling is performed over the guide wire with a triple reamer that has been set to the measured screw length.
Condylar screw insertion
The condylar screw is inserted to its final position over the guide wire. The T-handle is lined up parallel to the femoral shaft to ensure correct plate alignment.
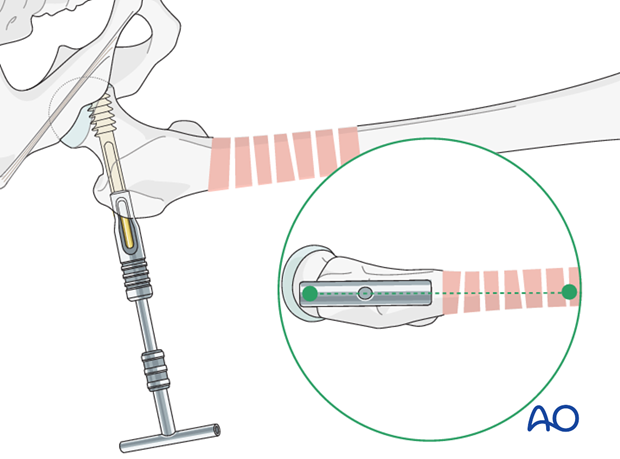
Plate and screw combination
Next, the plate barrel is slid over the condylar screw shank.
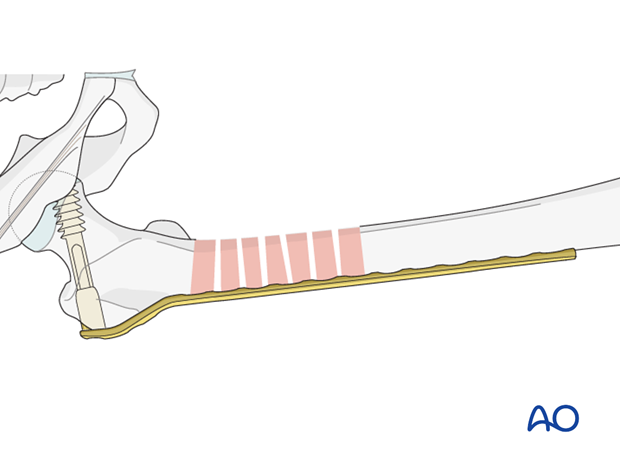
Plate fixation with cortical screw
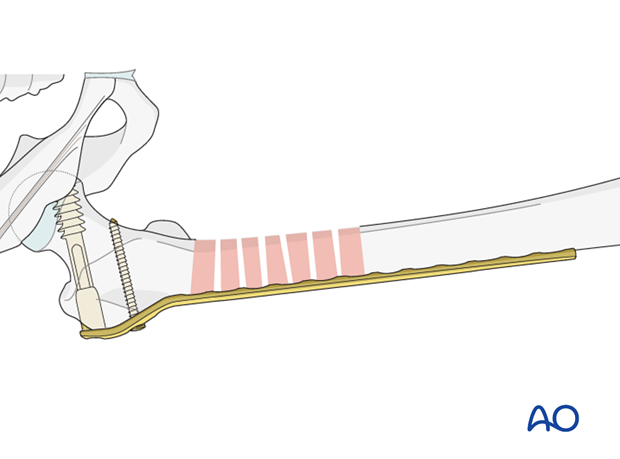
After checking the correct plate position, a cortical screw is inserted into the proximal plate hole, in order to secure the plate in the proximal fragment.
7. Plate fixation to distal fragment
Verification of reduction
Under image intensifier control, the preliminary reduction is again checked in respect to axial alignment and length and, to a degree the rotation (in more complex fractures the clinical judgment of the rotation becomes more important while the radiological findings in that respect is challenging to interpret).
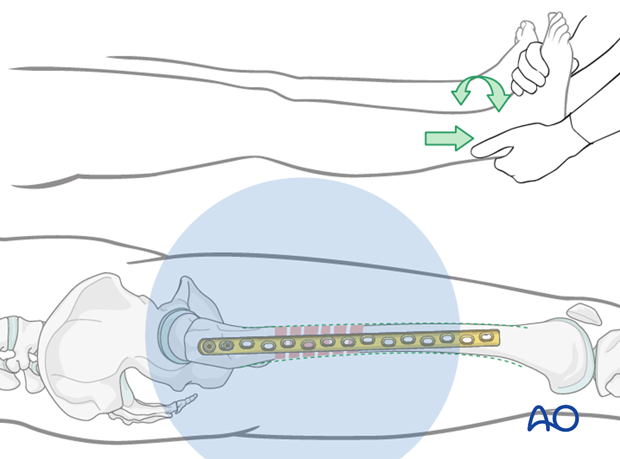
Insertion of first screw into distal fragment
With the help of two blunt Hohmann retractors placed ventrally and dorsally around the femoral shaft, the lateral position of the plate can be controlled.
If the reduction is found to be adequate, the first cortical screw in the distal fragment is inserted, without being fully tightened. This still allows for the plate position to be fine tuned.
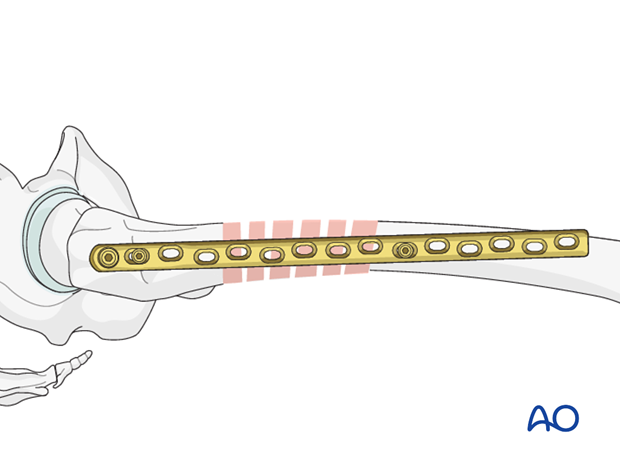
Pearl: Final reduction
If the lateral position prior to the placement of the second screw is inadequate, the use of sterile bolsters can be helpful.
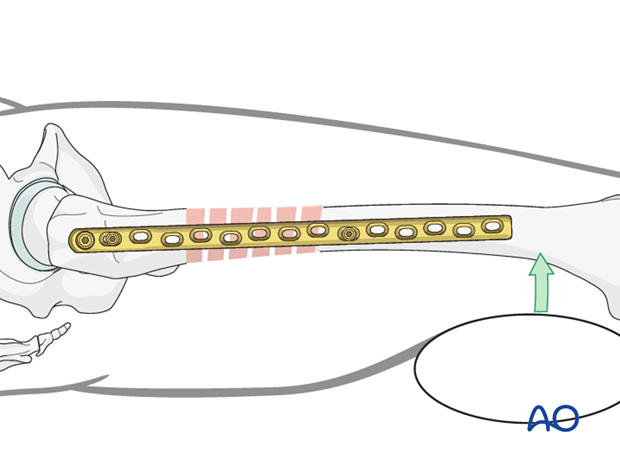
Insertion of second screw into distal fragment
The lateral plate position can be confirmed by palpation.
Once the most distal screw is inserted, the earlier screw is fully tightened.
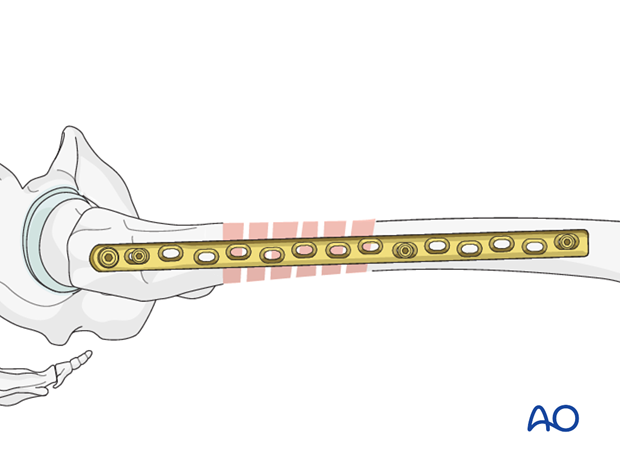
8. Additional screw placement
According to preoperative planning, additional screws are inserted into the proximal and distal fragments.

9. Aftercare
Compartment syndrome and nerve injury
Close monitoring of the femoral muscle compartments should be carried out especially during the first 48 hours, in order to rule out compartment syndrome.
Postoperative assessment
In all cases in which radiological control has not been used during the procedure, a check x-ray to determine the correct placement of the implant and fracture reduction should be taken within 24 hours.
Functional treatment
Unless there are other injuries or complications, mobilization may be started on postoperative day 1. Static quadriceps exercises with passive range of motion of the knee should be encouraged. If a continuous passive motion device is used, this must be discontinued at regular intervals for the essential static muscle exercises. Afterwards special emphasis should be placed on active knee and hip movement.
Weight bearing
Full weight bearing may be performed with crutches or a walker.
Follow-up
Wound healing should be assessed regularly within the first two weeks. Subsequently a 6 and 12 week clinical and radiological follow-up is usually made. A longer period may be required if the fracture healing is delayed.
Implant removal
Implant removal is not mandatory and should be discussed with the patient, if there are implant-related symptoms after consolidated fracture healing.
