ORIF - Compression plating (DCS)
1. Principles
Compression plate
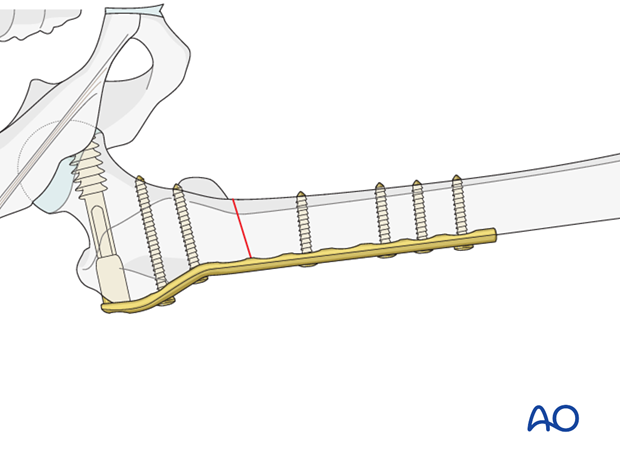
Compression plating provides fixation with absolute stability for two-part fracture patterns, where the bone fragments can be compressed. Compression plating alone is typically used for simple fracture patterns with low obliquity, where there is insufficient room for a lag screw. Where the obliquity will permit, the addition of a lag screw, across the fracture and through the plate, enhances stability.
Compression plating can only be applied in an open procedure.
The objective of compression plating is to produce absolute stability, abolishing all interfragmentary motion.
Dynamic compression principle
Compression of the fracture is usually produced by eccentric screw placement at one or more of the dynamic compression plate holes.
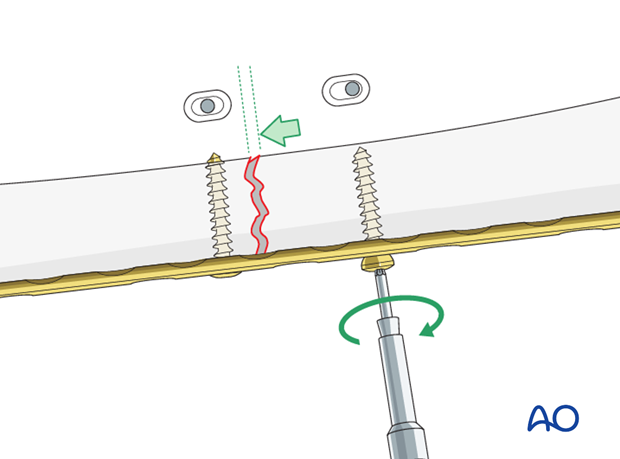
The screw head slides down the inclined plate hole as it is tightened, the head forcing the plate to move along the bone, thereby compressing the fracture.
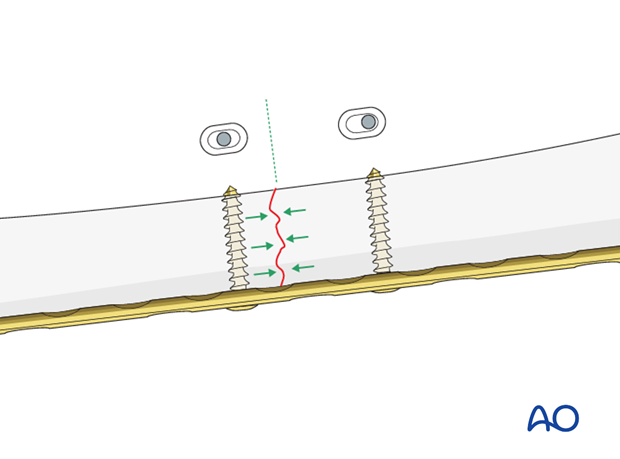
Plate position on the femur/tension band principle
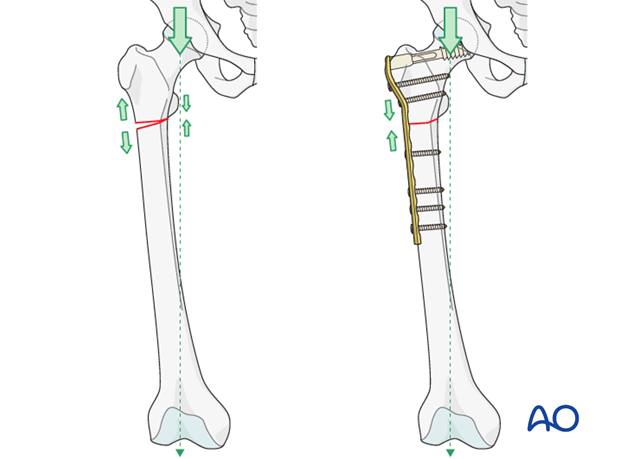
As a general rule the plate should be positioned on the lateral aspect of the femur.
A plate acts as a dynamic tension band when applied to the tension side of the bone and when a cortical contact is present on the opposite side to the plate.
With vertical load, the curved femur creates a tensile force laterally and a compressive force medially.
A plate positioned on the side of the tensile force resists it at the fracture site, provided there is stable cortical contact opposite to the plate.
Further information on the tension band principle can be found here.
Reduction
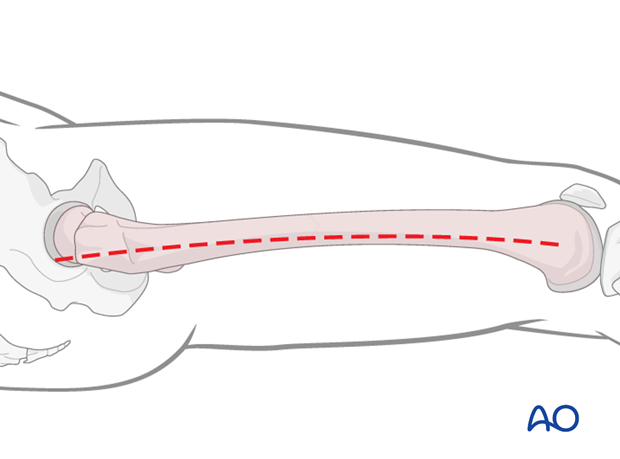
It is important to restore axial alignment, length, and rotation. That means that, in a simple fracture, a direct reduction of the main fragments is required.
Reduction can be performed with direct reduction tools.
2. Patient preparation
The patient may be placed in one of the following positions:
3. Approach
For this procedure a lateral approach is used.
4. Reduction
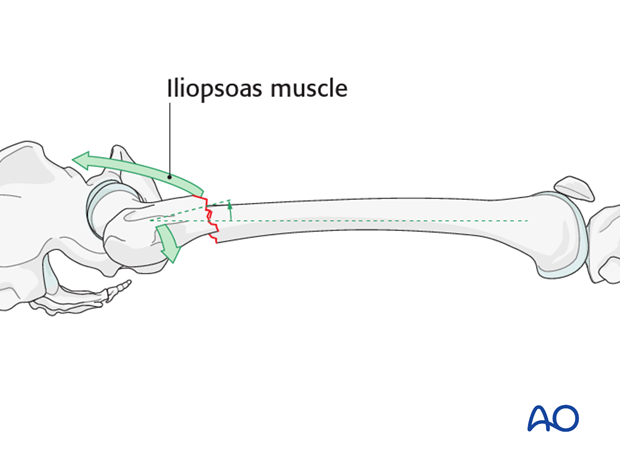
Subtrochanteric fractures present a particular problem in terms of fracture reduction and alignment. Due to the strong iliopsoas muscle pull, the proximal fragment is flexed and externally rotated and therefore difficult to control.
In an open plating technique a preliminary reduction can be undertaken to facilitate the final reduction.
Often joysticks are useful to derotate the proximal fragment.
5. Plate fixation to proximal fragment
Guide wire insertion
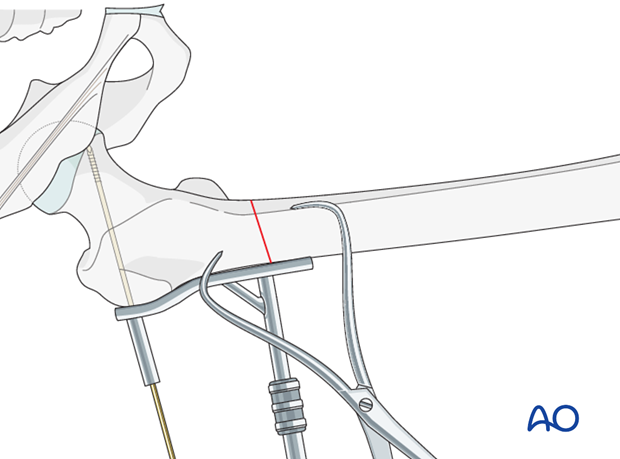
As a first step a guide wire for the condylar screw is inserted proximally.
Therefore, the aiming device is lined up parallel to the femoral neck in both the axial and the AP views, the guide wire should be aimed at the lower portion to the femoral head.
The wire is advanced to just short of the subchondral bone of the femoral head. Its position is checked fluoroscopically in two planes, and adjusted, if necessary.
Reaming
After indirectly determining the screw length by using the measuring device over the protruding guide wire, reaming is performed over the guide wire with a triple reamer that has been set to the measured screw length.
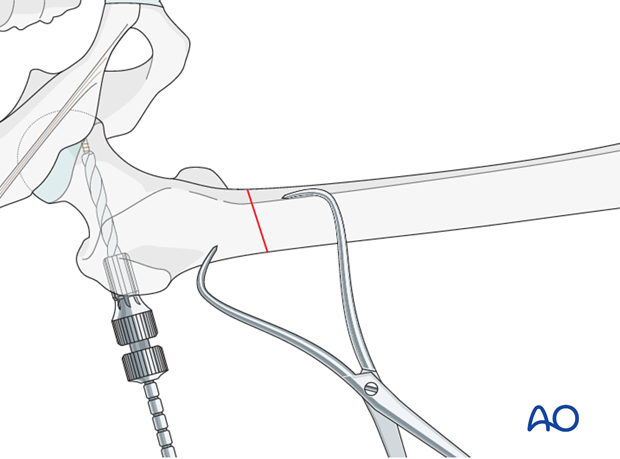
Condylar screw insertion
The condylar screw is inserted to its final position over the guide wire. The T-handle is lined up parallel to the femoral shaft in order to ensure correct plate alignment.
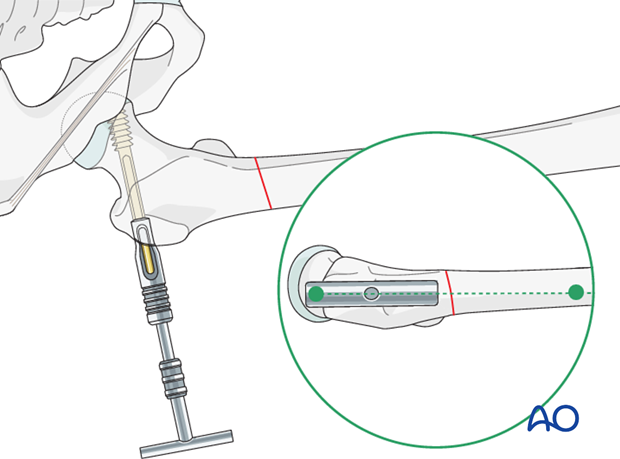
Plate and screw combination
Next, the plate barrel is slid over the condylar screw shank.
In transverse fractures, where a supplementary lag screw can not be used, the plate should be prebent slightly, so that, when the load screw in the distal fragment is tightened, the medial cortex is compressed first. This avoids gapping of the medial cortex, which would otherwise occur and result in cyclical motion, leading to excessive strain in the healing tissues, delayed union and fatigue failure of the plate.
In order to determine the exact point of prebending, fit the plate barrel partially over the screw shank, note the appropriate level, then remove the plate to prebend it.
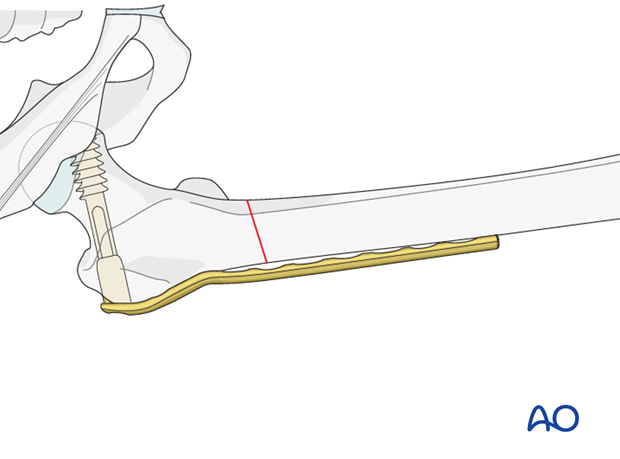
Plate fixation with cortical screw
After checking the correct plate position, a cortical screw is inserted into the proximal plate hole, in order to secure the plate in the proximal fragment.
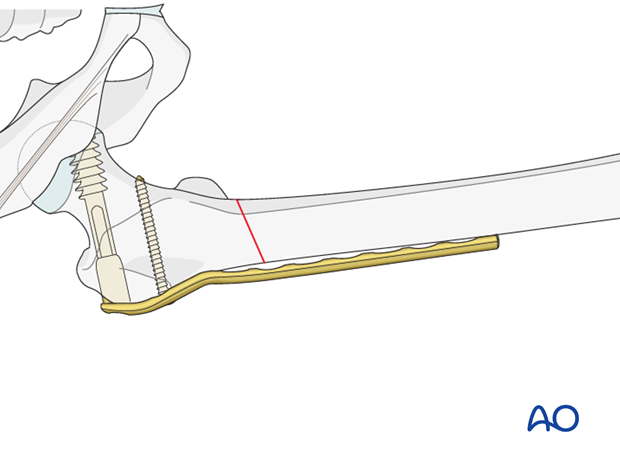
6. Plate fixation to distal fragment
Insertion of first screw into distal fragment
If the overall reduction is found to be satisfactory, the first cortical screw is placed in the distal fragment near the fracture. The screw is placed eccentrically.
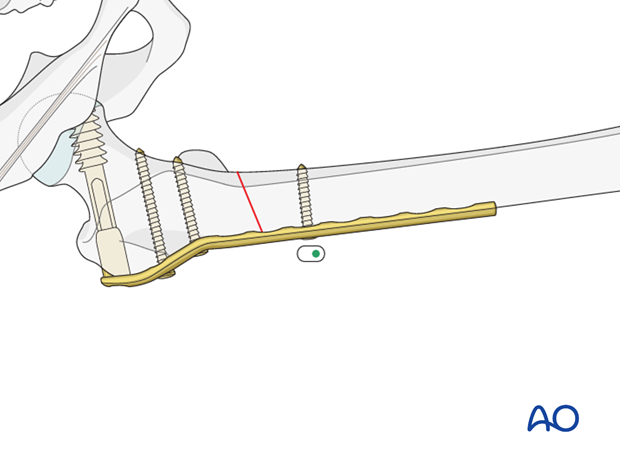
In cases of nonunion, the articulated tension device is helpful in producing compression.
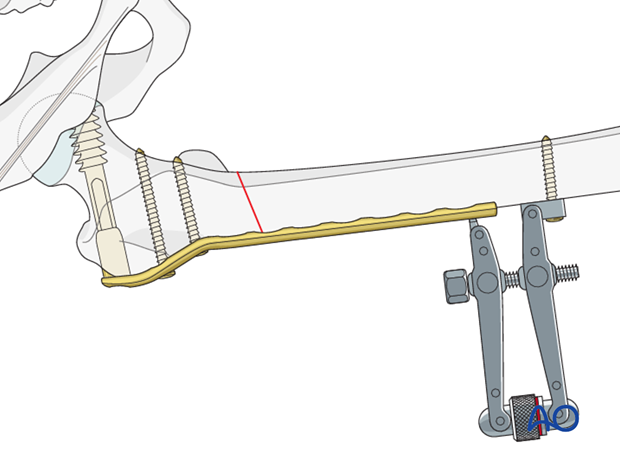
To improve the compression further, the first screw in the distal fragment can be placed eccentrically.
The tension device is dismantled after two additional neutral screws are placed in the distal fragment.
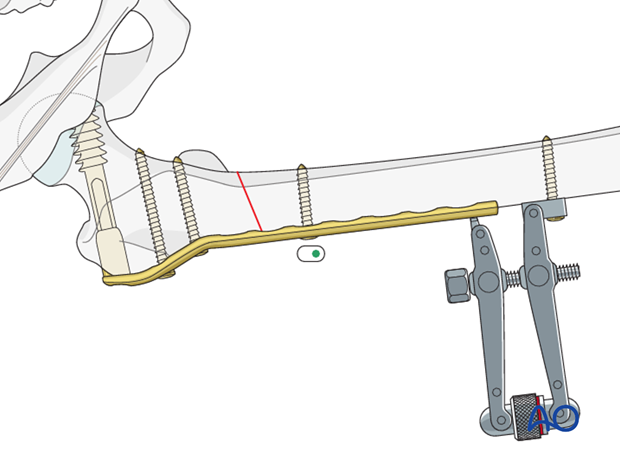
Insertion of additional screws into the distal fragment
According to the preoperative planning, additional screws are placed in the proximal and distal fragments.

7. Aftercare
Compartment syndrome and nerve injury
Close monitoring of the femoral muscle compartments should be carried out especially during the first 48 hours, in order to rule out compartment syndrome.
Postoperative assessment
In all cases in which radiological control has not been used during the procedure, a check x-ray to determine the correct placement of the implant and fracture reduction should be taken within 24 hours.
Functional treatment
Unless there are other injuries or complications, mobilization may be started on postoperative day 1. Static quadriceps exercises with passive range of motion of the knee should be encouraged. If a continuous passive motion device is used, this must be discontinued at regular intervals for the essential static muscle exercises. Afterwards special emphasis should be placed on active knee and hip movement.
Weight bearing
Full weight bearing may be performed with crutches or a walker.
Follow-up
Wound healing should be assessed regularly within the first two weeks. Subsequently a 6 and 12 week clinical and radiological follow-up is usually made. A longer period may be required if the fracture healing is delayed.
Implant removal
Implant removal is not mandatory and should be discussed with the patient, if there are implant-related symptoms after consolidated fracture healing.
