External fixation
1. General considerations
Principles of modular external fixation
The modular external fixator is used for temporary fixation. It may be rapidly applied with or without image intensification and can be adjusted later.
Details of external fixation are described in the basic technique for the application of a modular external fixator.
Specific consideration for the distal humerus is given below.
Note on illustrations
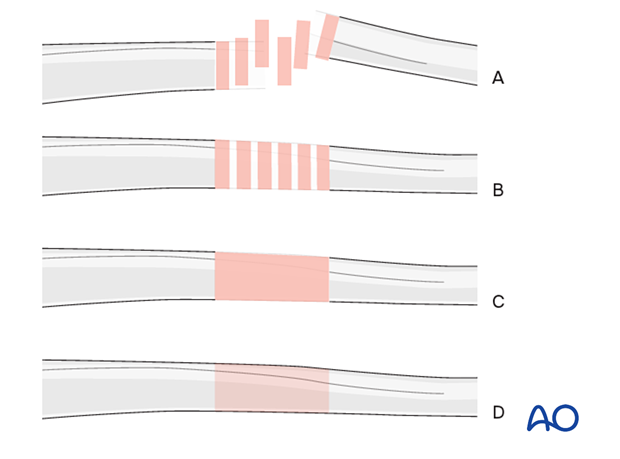
Throughout this section, generic fracture patterns are illustrated as:
A) Unreduced
B) Reduced
C) Reduced and provisionally stabilized
D) Definitively stabilized
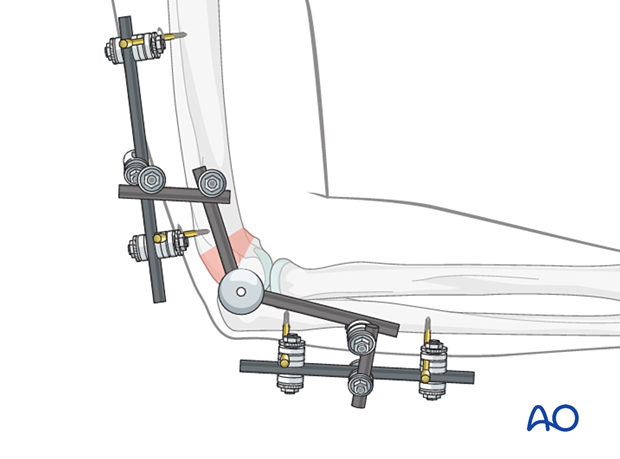
Option: hinged external fixator
A hinged external fixator is rarely indicated as the distal humeral segment is not stable enough to support motion. In rare instances, it may be used for combined distal humerus and proximal ulnar articular injuries.
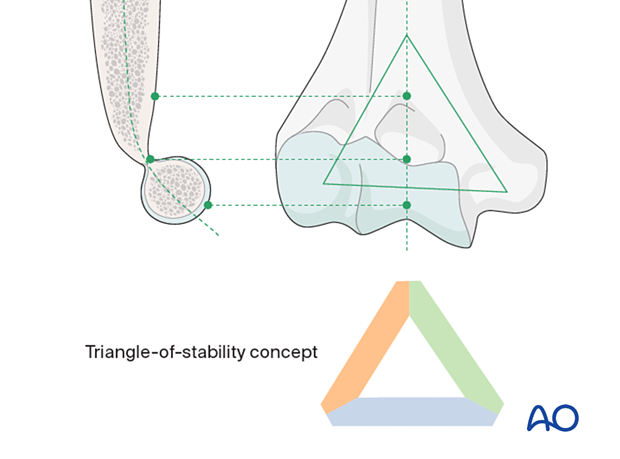
Triangle-of-stability concept
The mechanical properties of the distal humerus are based on a triangle of stability, comprising the medial and lateral columns and the articular block (see also the anatomical concepts).
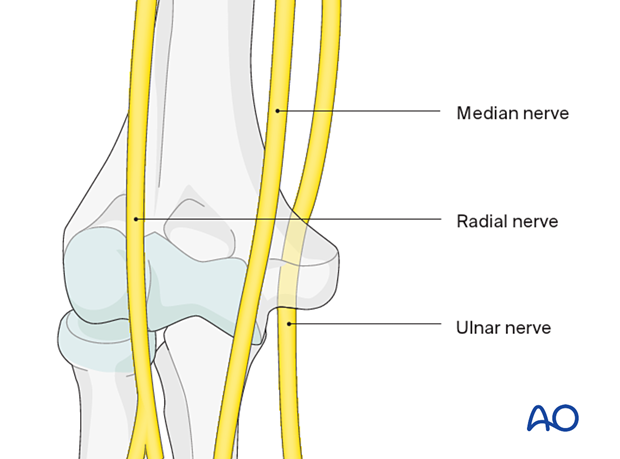
Nerves around the distal third of the humerus
Nerves on both sides of the distal humerus run very close to the bone, especially the ulnar nerve, which perforates the medial intermuscular septum runs and then in its sulcus behind the medial epicondyle. It can be directly compressed in distal humeral fractures. The radial nerve perforates the lateral intermuscular septum as it follows the spiral groove on the humerus to run anteriorly and distally. At the level of the radial head, it divides into its deep and superficial branches.
See also the additional material on neurological protection and handling.
2. Patient preparation and approach
Patient positioning
This procedure is usually performed with the patient in a supine or lateral position. Fluoroscopic guidance is recommended.

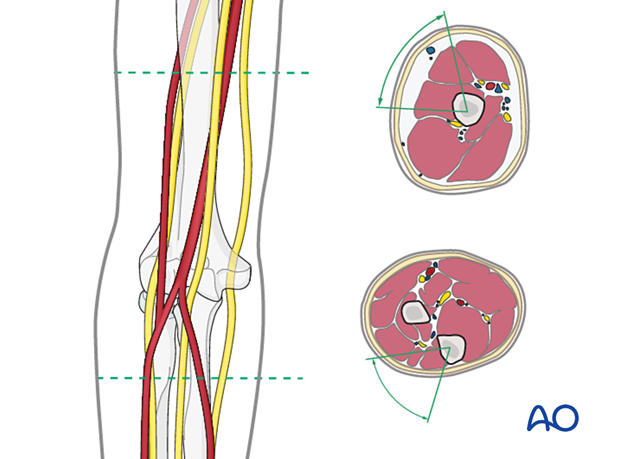
Approaches for safe pin placement
For safe pin placement, use the safe zones and be familiar with the anatomy of the nerves in relation to the humerus and proximal forearm.
Particular note is made of the course of the radial nerve on the lateral aspect of the humerus.
3. Pin positioning
Optimal frame construction
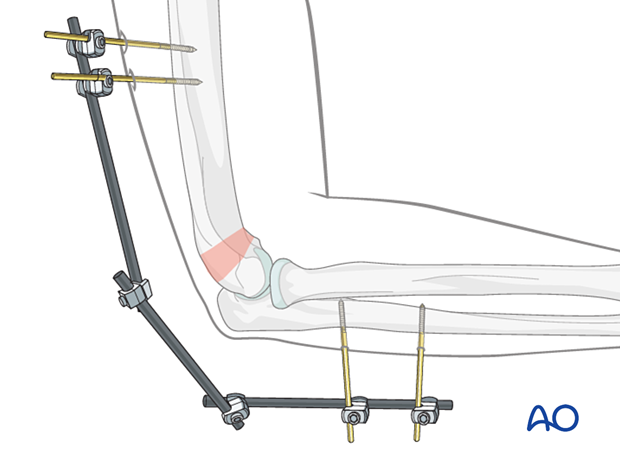
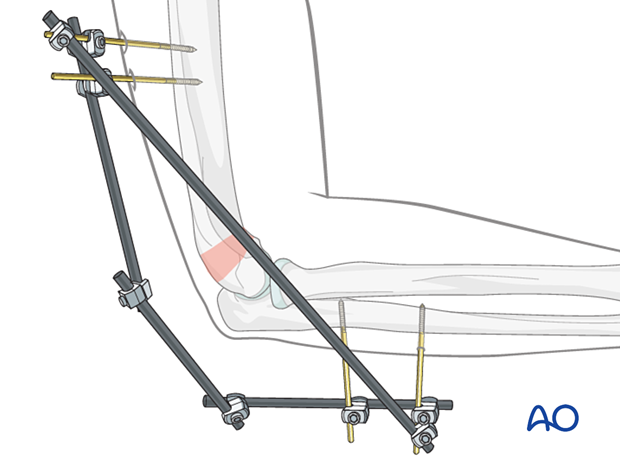
For temporary stabilization with an external fixator, the pins should be outside the planned internal fixation zone (see illustration).
The humeral pins may be inserted in the region of the deltoid insertion zone to avoid the radial nerve.
This will also avoid the zone of soft-tissue injury.

4. Pin insertion
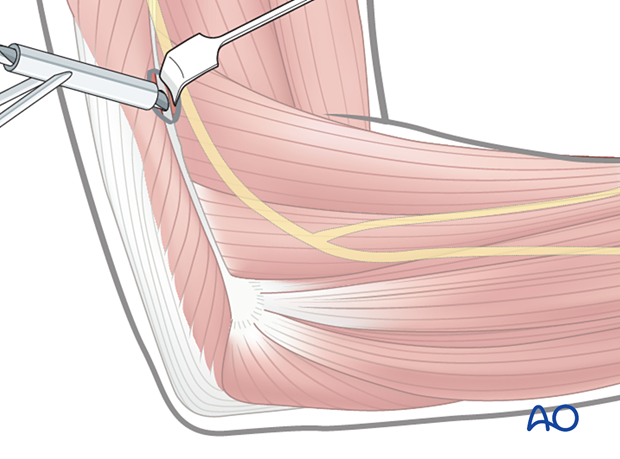
If pins are placed more distally, the following precautions should be taken to avoid nerve injuries.
Blunt dissection of the soft tissues and the use of small (Langenbeck) retractors will prevent damage to muscular, vascular, and neurological structures.
Prepare a channel for insertion of the pin, using a blunt clamp down to the bone. If there is any doubt, perform an incision big enough to prove that the drill sleeve (for the humerus a must) will have direct contact with the bone.

The radial nerve passes into the anterior compartment of the arm through the lateral intermuscular septum at the junction of the 3/5 and 4/5 of the humerus. Preoperative planning of the pin tracks helps to avoid damage to the nerve.
5. Reduction
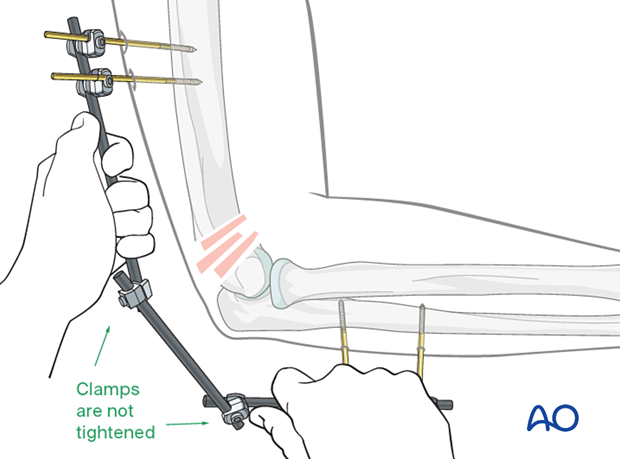
Use the fixator to align the upper extremity. This reduces stress on the neurovascular structures and soft-tissue envelope.
Anatomical reduction is not the goal of this procedure.
6. Fixation
Tighten the clamps to secure the alignment of the limb.
A rod can be added for additional stability, spanning from the most proximal to the most distal pin.
7. Aftercare
Positioning
The arm is supported in a “collar-and-cuff” sling for comfort.

Pin-site care
Proper pin insertionTo prevent postoperative complications, the pin-insertion technique is more critical than any pin-care protocol:
- Correct placement of pins (see safe zones) avoiding ligaments and tendons, eg, the triceps aponeurosis
- Correct insertion of pins (eg, trajectory, depth) avoiding heat necrosis
- Extending skin incisions to release soft-tissue tension around the pin insertion (see inspection and treatment of skin incisions)
Various aftercare protocols to prevent pin-track infection have been established by experts worldwide. Therefore, no standard protocol for pin-site care can be stated here. Nevertheless, the following points are recommended:
- The aftercare should follow the same protocol until the removal of the external fixator
- The pin-insertion sites should be kept clean; any crusts or exudates should be removed; the pins may be cleaned with saline and/or disinfectant solution/alcohol; the frequency of cleaning depends on the circumstances and varies from daily to weekly but should be done in moderation
- No ointments or antibiotic solutions are recommended for routine pin-site care
- Dressings are not usually necessary once wound drainage has ceased
- Pin-insertion sites need not be protected for showering or bathing with clean water
- The patient or the carer should learn and apply the cleaning routine
In case of pin loosening or pin-track infection, the following steps need to be taken:
- Remove all involved pins and place new pins in a healthy location
- Debride the pin sites in the operating theater, using curettage and irrigation
- Take specimens for a microbiological study to guide appropriate antibiotic treatment if necessary
Before changing to a definitive internal fixation, an infected pin track needs to heal. Otherwise, infection will result.
Rehabilitation
In the rare event that external fixation has been used as the definitive management of a distal humeral fracture, there is a significant risk of marked stiffness of the elbow joint. A prolonged rehabilitation program under the supervision of the surgeon and an experienced physical therapist will be necessary.
Follow-up
See the patient one week after surgery for a wound check. X-rays are taken to check the alignment.
