Temporary external fixator
1. Note on illustrations
Comment on illustrations
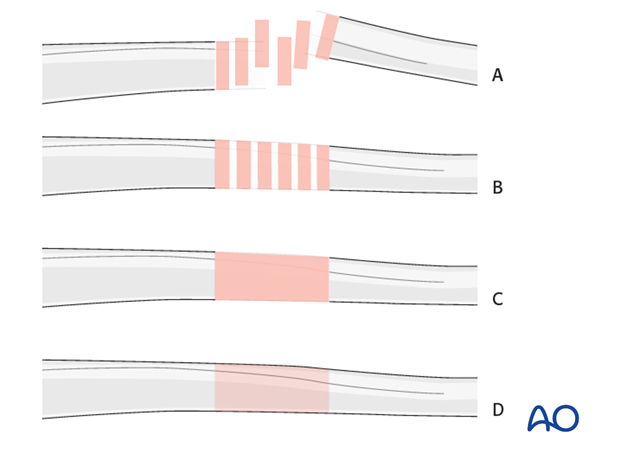
Throughout this treatment option illustrations of generic fracture patterns are shown, as four different types:
A) Unreduced fracture
B) Reduced fracture
C) Fracture reduced and fixed provisionally
D) Fracture fixed definitively
2. Principles of joint-spanning external fixation
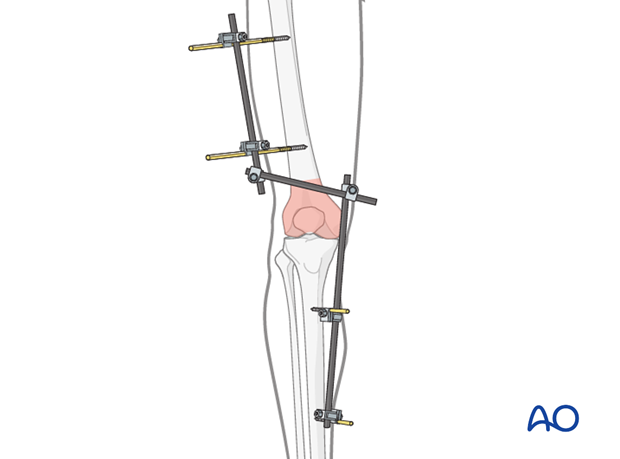
A joint-spanning external fixator is fixed to the femur and the tibia while the fracture zone is left virtually untouched (it is bridged). Provisional reduction is achieved with distraction.
Details of external fixation are described in detail in the basic technique for the application of modular external fixator.
Specific considerations for the tibia and the femur are given below.
3. Pin insertion (tibia/femur)
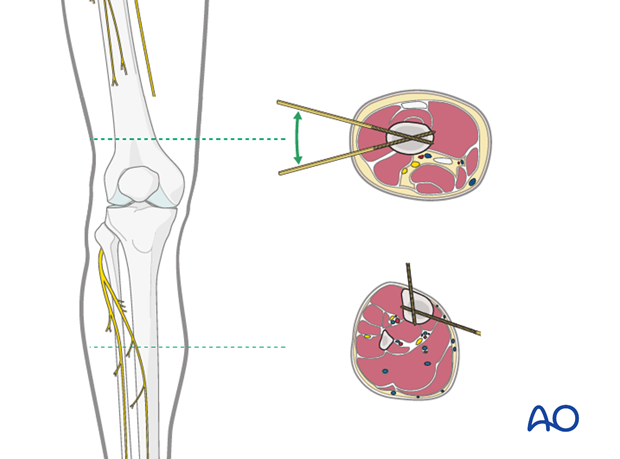
Safe zones for pin placement
For safe pin placement, make use of the safe zones and be familiar with the anatomy of the lower leg and the femur.
The safe zone for the femur is lateral. In temporary external fixation, the pins should be placed so that they do not interfere with planned later definitive fixation; this may mean placing femoral pins anteriorly or anterolaterally.
Note: It is not uncommon with external fixation in a trauma patient, where the fixator is on for a few weeks only, that pins are placed anteriorly rather than laterally on the femur.
Soft-tissue dissection
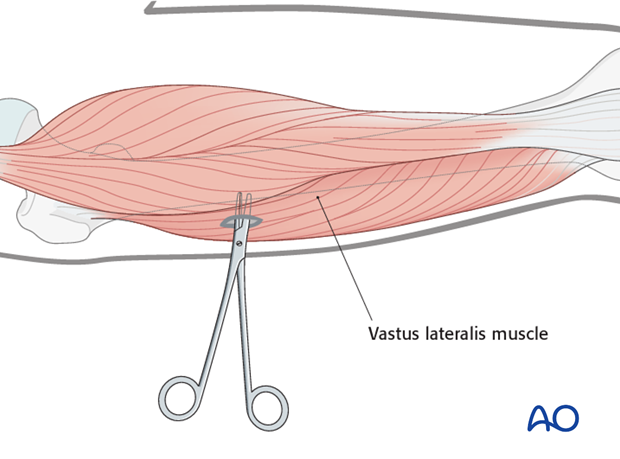
In the femur, blunt dissection of the soft tissues and the use of small Langenbeck retractors will minimize muscular damage.
Using a straight clamp, prepare a channel for the insertion of the pin.
Tibial pin placement
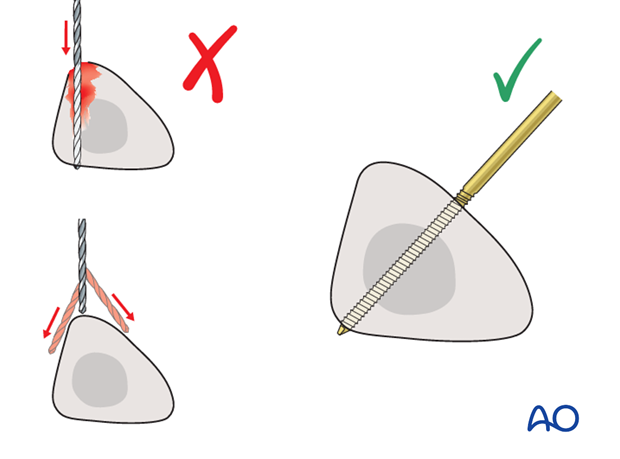
Drilling a hole in the thick tibial crest may be associated with excessive heat generation and there is a risk the drill bit may slip medially or laterally damaging the soft tissues. As the anteromedial tibial wall provides adequate thickness for the placement of pins, this trajectory is preferable. A trajectory angle (relative to the sagittal plane) of 20-60° for the proximal fragment and of 30-90° for the distal fragment is recommended.
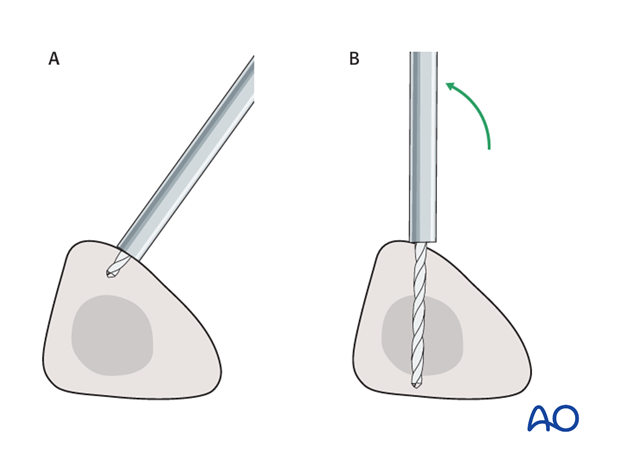
Alternatively, to avoid the frame catching on the opposite leg, the pins may be placed more anteriorly. The drill bit is started with the tip just medial to the anterior crest, and with the drill bit perpendicular to the anteromedial surface (A). As the drill bit starts to penetrate the surface, the drill is gradually moved more anteriorly until the drill bit is in the desired plane (B). This should prevent the tip from sliding down the medial or lateral surface.
4. Frame construction / reduction and fixation (tibia/femur)
Teaching video
AO teaching video: Femur--Tibia Articular Fracture Large External Fixator: Knee-bridging Modular Frame
Frame assembly
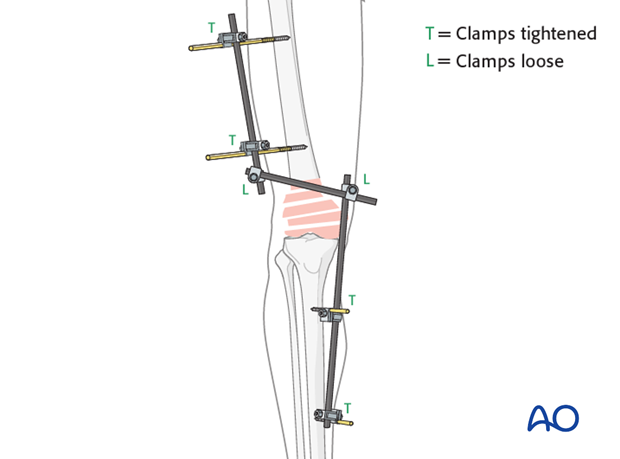
Pearl: Angle the rod over the tibia such that it is attached to the pins one on the lateral and one on the medial side. This results in a larger window over the condyle which can be beneficial for later (minimally invasive) surgery if it is necessary to maintain the external fixator during definitive osteosynthesis.
Reduction and fixation
Restore length with a bolster behind the knee to give slight flexion.
It should be understood that a perfect reduction will not be obtained.
Having obtained a reduction and fixed the clamps in place, the distal blood supply needs to carefully be checked, if necessary, with the use of a Doppler.
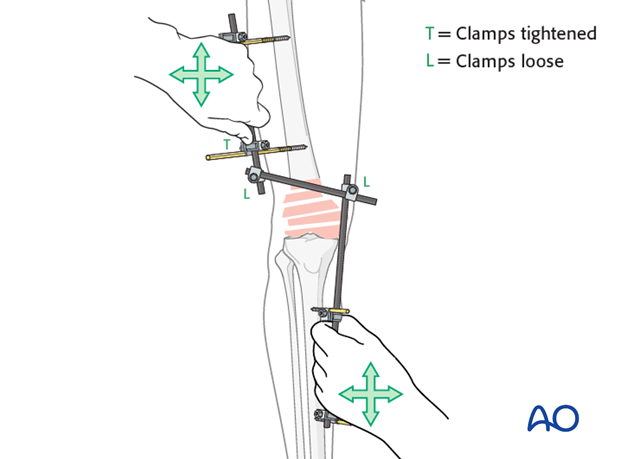
A second bar spanning the joint can be helpful for more stability at the fracture site.

Care must be taken that the fracture is not too distracted since the pull of the gastrocnemius muscle would hyperextend the condylar block.
Insufficient distraction leads to insufficient reduction.
5. Aftercare following external fixation
Thromboembolic prophylaxis
Thrombo-prophylaxis should be given according to local treatment guidelines.
Pin-site care
Proper pin insertionTo prevent postoperative complications, pin-insertion technique is important. Pin care protocol includes:
- Correct placement of pins (see safe zones) avoiding ligaments and tendons, eg tibia anterior
- Correct insertion of pins (eg trajectory, depth) avoiding heat necrosis
- Extending skin incisions to release soft-tissue tension around the pin insertion (see inspection and treatment of skin incisions)
Local aftercare protocols to prevent pin tract infection are generally in place. The following points are recommended:
- The pin-insertion sites should be kept clean. Any crusts or exudates should be removed. The pins should be cleaned using regular water and soap (by taking a normal shower). The frequency of cleaning depends on the circumstances and varies from daily to weekly but should be done in moderation.
- No ointments or antibiotic solutions are recommended for routine pin-site care.
- Dressings are not usually necessary once wound drainage has ceased.
In case of pin loosening or pin tract infection, the following steps need to be taken:
- Remove all involved pins and place new pins in a healthy location.
- Debride the pin sites in the operating theater, using curettage and irrigation.
- Take specimens for a microbiological study to guide appropriate antibiotic treatment if necessary.
Before changing to a definitive internal fixation an infected pin tract needs to heal. Otherwise, infection will result.
Follow up
See patient 7-10 days after surgery for a wound check. X-rays are taken to check the reduction.
Implant removal
The external fixator is usually removed prior to the definitive internal fixation. Occasionally, it may be maintained for aid in reduction of the fracture during plate fixation, but in these cases there must be no sign of any infection before going to the operating room.
