ORIF - Pre-contoured distal plate
1. Introduction
Most distal clavicle fractures will heal successfully and uneventfully with nonoperative management. Initial management typically requires temporary immobilization for comfort followed by gradual increase in activity.
Operative fixation is indicated for selected cases of displaced distal clavicle fractures in high demand patients. Plate fixation is a preferred technique if distal clavicular bone purchase is adequate.
Precontoured anatomic plates with locking capabilities facilitate and optimize fixation in the distal fragment.
While hook plate fixation is an option for those fractures with inadequate distal screw purchase, the high rate of plate irritation and subsequent need of removal of hook plates makes anatomic plate fixation preferred if technically feasible.
Pitfall: The typical mode of failure of distal clavicle fixation is pullout of the distal fixation with redisplacement of the shaft. It is mandatory for the operating surgeon to obtain sufficient distal fixation consistent with the expected compliance and healing potential of the patient such that union will occur prior to potential hardware failure. If, in the opinion of the operating surgeon, this is not obtainable with conventional plate fixation, convert to hook plate fixation.
2. Patient preparation and approach
Patient preparation
This procedure is normally performed with the patient either in a beach chair or a supine position.
Approach
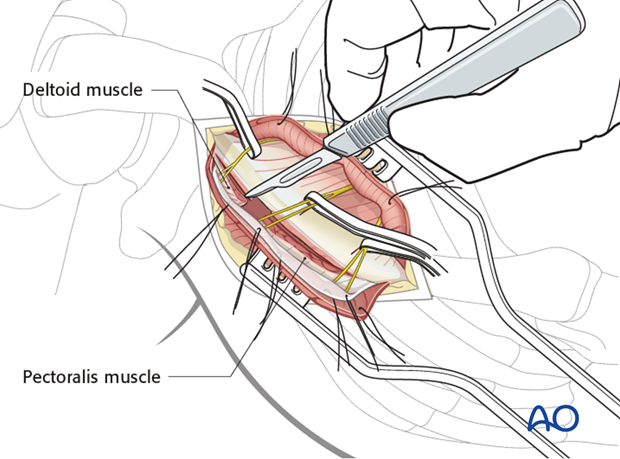
For this procedure a superior approach is normally used.
3. Reduction
Fracture assessment
Following reflection of the deltoid, the distal clavicle fracture site is identified and cleared of any hematoma or debris.
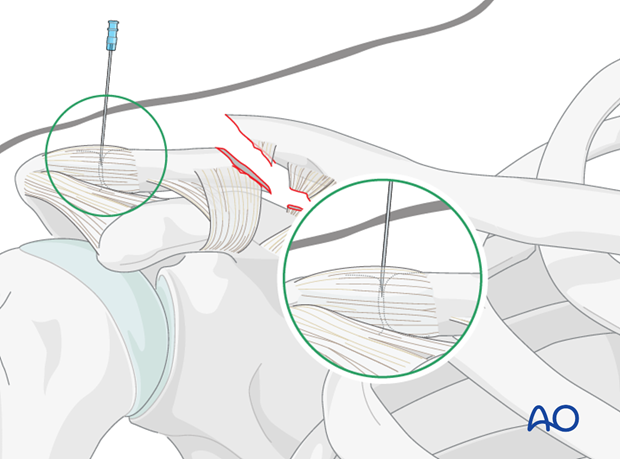
Pitfall: it is important to preserve the integrity of the acromioclavicular joint capsule, as this contributes to stability of the small distal clavicular fragment.
A sterile 18 gauge needle is used to identify the acromioclavicular joint. This allows the surgeon to determine accurately the size and integrity of the distal clavicular fragment. Assessment is then performed to determine whether conventional plate fixation is possible, or if hook plate fixation is required.
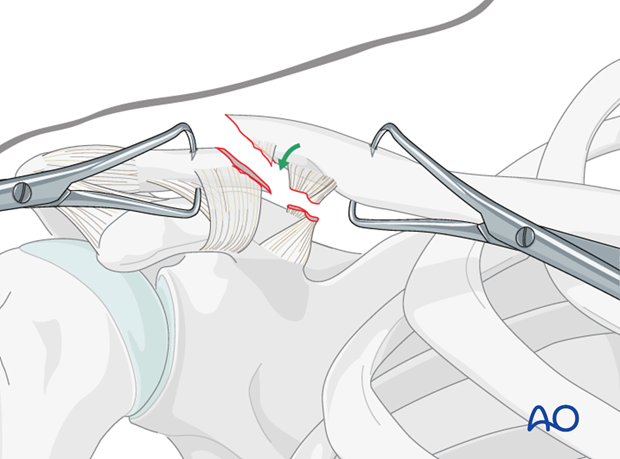
Reduction can be performed using fracture clamps on the proximal and distal fragments, with downward and anterior pressure on the proximal fragment and superiorly directed force on the shoulder girdle and attached distal fragment.
Alternatively, a ball spiked pusher may be utilized to align the fragments.
Temporary fixation
Following accurate reduction, temporary fixation with a K-wire directed from anterior to posterior can be performed.
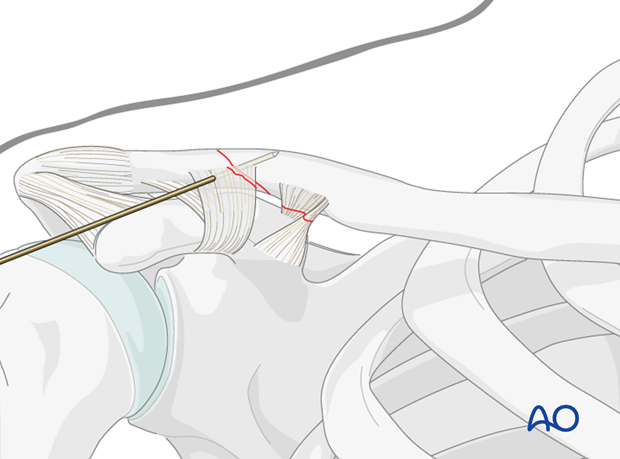
Alternatively (and preferentially) if fracture configuration permits, a lag screw can be placed at this point.

4. Fixation
Plate selection
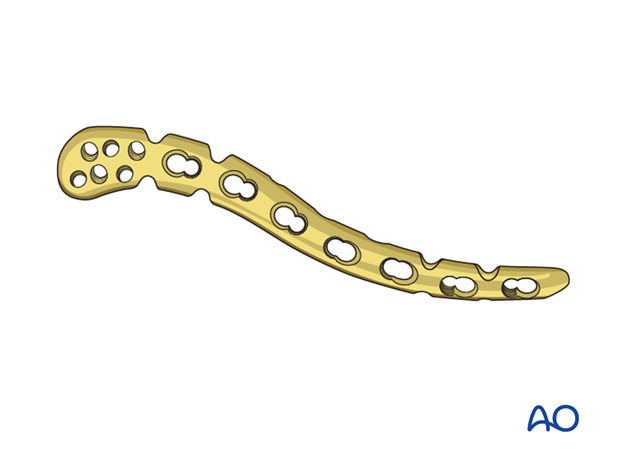
An anatomical precontoured plate for the distal clavicle is chosen for fixation. Advantages of these plates include the insertion of multiple (locked or unlocked) screws in the distal fragment to maximize fixation. Use the guide jigs to help you determine the predetermined pattern of locking screws which may also increase fixation strength.
While fixation is typically weakest in the distal fragment, it is important to assure proximal fixation with at least 3 bicortical screws in the shaft fragment.
Placement and temporary securement of the plate
The plate is then positioned on the distal clavicle and temporarily fixed with either K-wires drilled through preset holes in the plate or with a reduction clamp.
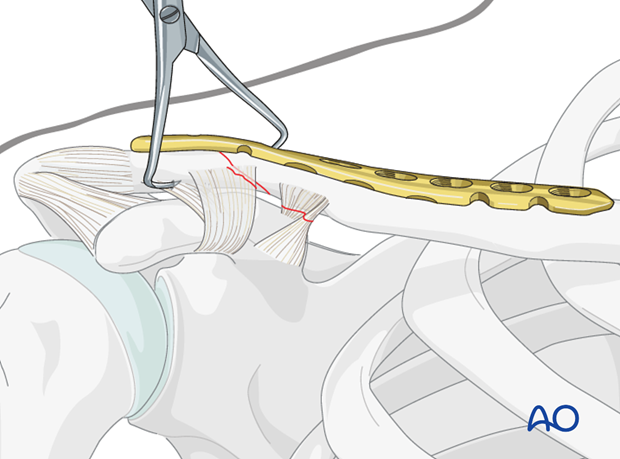
Pitfall: It is important to avoid screw penetration into the acromioclavicular joint. If there is any doubt an intraoperative radiograph can confirm plate position.
Alternative 1: Application in compression mode
If fracture pattern is amenable to compression, the plate can be applied in compression mode. To do this, screws are placed in the distal fragment to secure the plate to the distal fragment. Typically, cancellous screws are used in the distal fragment.
If desired threaded drill sleeves can be used to insert locking screws in a preset pattern in the distal fragment.
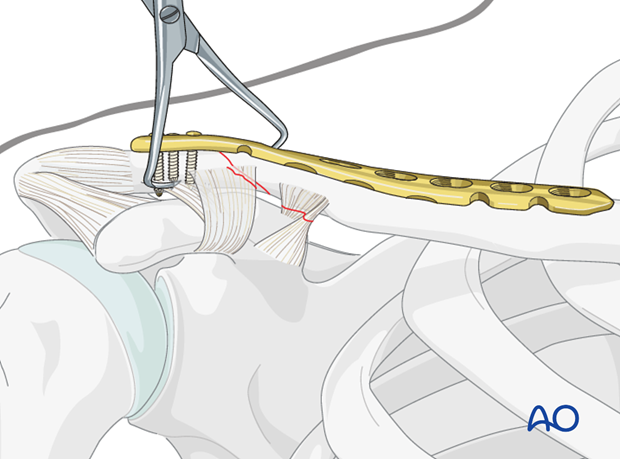
Then, a compression screw is inserted in the shaft of the plate to compress the fracture site.
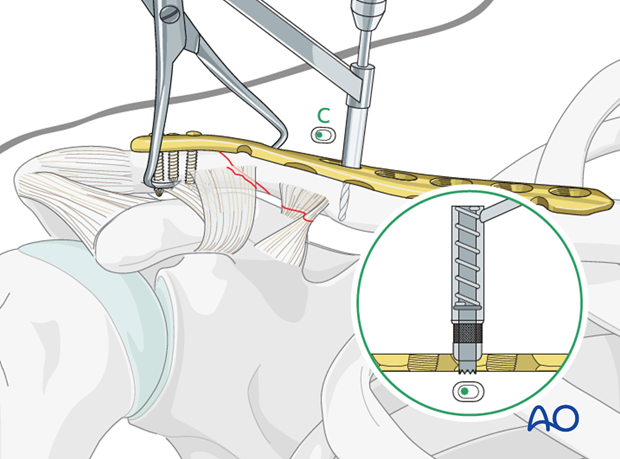
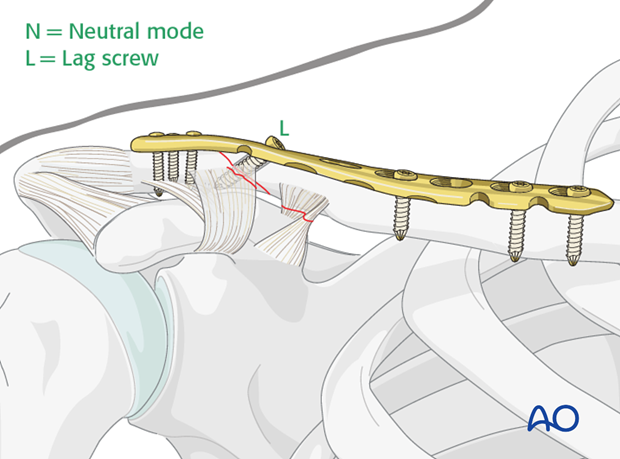
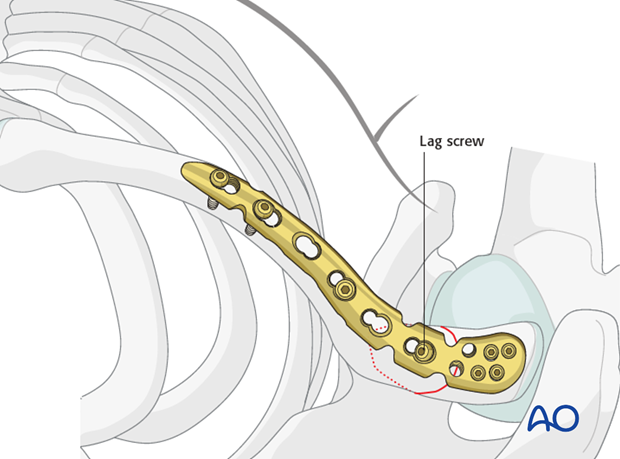
Alternative 2: Application in neutralization mode with lag screw through plate
Alternatively, if fracture configuration permits, a lag screw can be inserted across the fracture site through the plate. Following this step, remaining screws in the plate may be inserted.

Pearl: Additional stability
Redisplacement of the shaft fragment can be further prevented by the insertion of a coracoclavicular screw inserted through the plate and then into the coracoid. One must aim for the posterior base portion of the coracoid. Due to the intrinsic motion between the clavicle and the coracoid this screw will eventually loosen or break, but will provide 6-8 weeks of added fixation before failure. The placement of this screw is at the surgeon's discretion when added stability is deemed necessary.
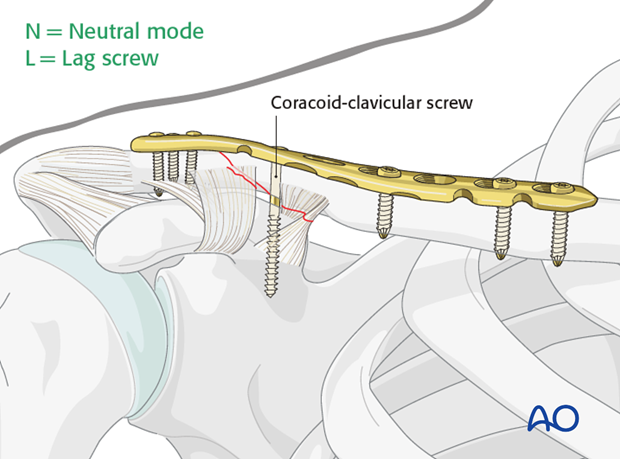
5. Check of osteosynthesis
At the conclusion of fixation, the fracture site, plate and screws are carefully checked to ascertain accurate reduction, correct plate placement, and avoidance of any intra-articular screw placement. If any doubt remains regarding these findings, an intraoperative radiograph should be taken for confirmation.
6. Aftercare
The aftercare can be divided into 4 phases:
- Inflammatory phase (week 1–3)
- Early repair phase (week 4–6)
- Late repair and early tissue remodeling phase (week 7–12)
- Remodeling and reintegration phase (week 13 onwards)
Full details on each phase can be found here.


