Combined approach to perilunate fractures and dislocations
1. Introduction
A combined approach to the carpus is not always indicated for perilunate injuries.
In the majority of cases, the dorsal approach is made first.
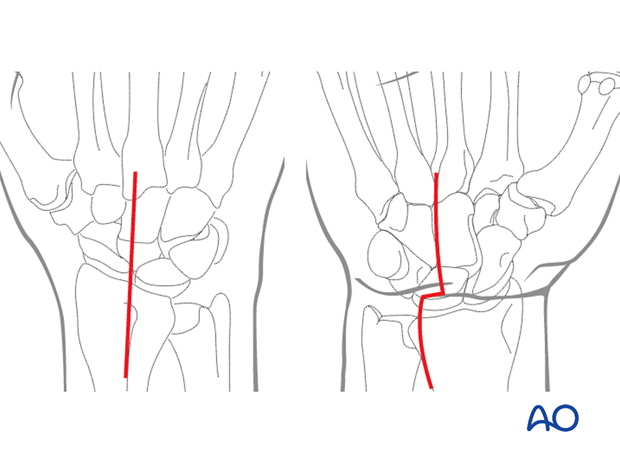
Continue with a (palmar) extended carpal tunnel approach if the reduction of the carpal bones could not be achieved with a dorsal approach only.
This is usually one of the following cases:
- Irreducible palmar dislocation of the lunate
- Irreducible palmar dislocation of other carpal bones (eg, fractured proximal scaphoid)
- Capsular or other soft-tissue interposition on the palmar side (osteochondral injuries)
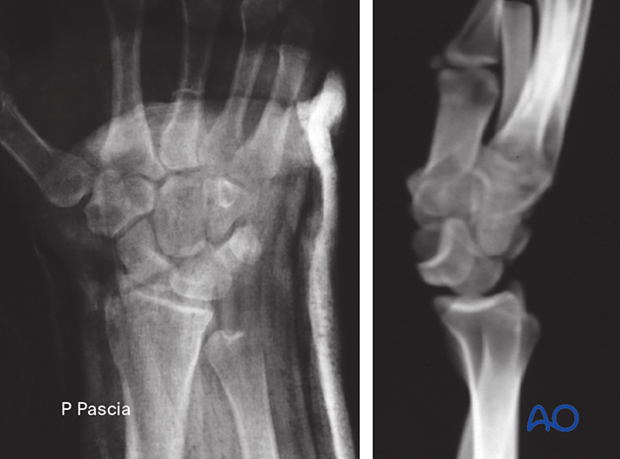
This lateral x-ray of the carpus demonstrates the pattern of lunate dislocation, which can be an indication for this combined approach.
2. Surgical anatomy
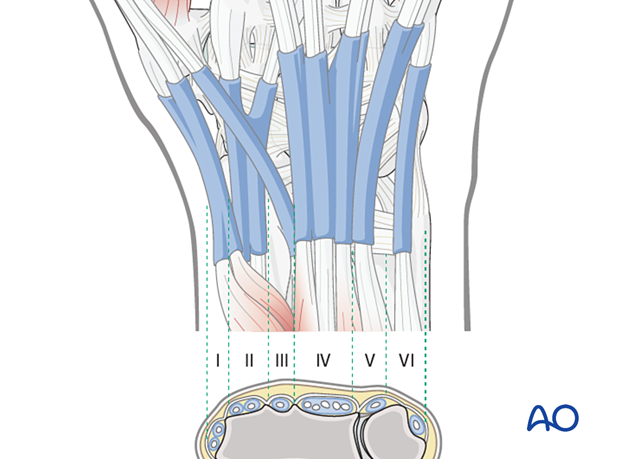
There are six extensor compartments on the dorsum of the radiocarpal region:
- The 1st compartment contains the tendons of abductor pollicis longus (APL) and extensor pollicis brevis (EPB)
- The 2nd compartment contains the extensors carpi radialis longus and brevis (ECRL and ECRB, respectively)
- The 3rd compartment contains the tendon of the extensor pollicis longus (EPL)
- The 4th compartment contains the tendons of the extensor digitorum
- The 5th compartment contains the tendon of the extensor digiti minimi
- The 6th compartment contains the tendon of the extensor carpi ulnaris (ECU)
3. Anatomical landmarks
The anatomical landmarks for dorsal approaches are:
- Radial styloid, which is palpated in the depth of the anatomical snuff box
- Lister’s tubercle
- Distal radioulnar joint (DRUJ)
- Ulnar head
- Ulnar styloid

4. Dorsal approach
Skin incision
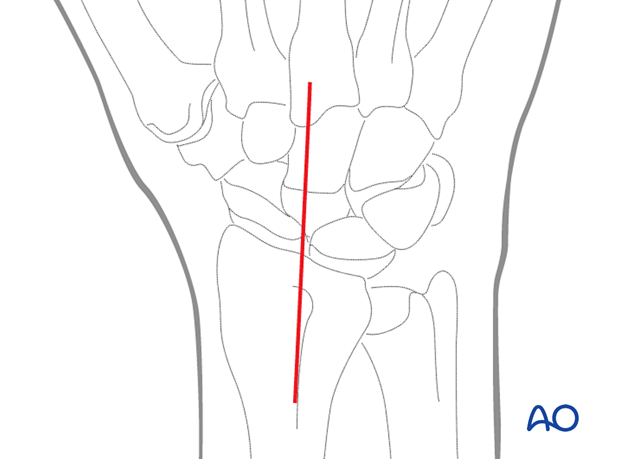
Make a straight skin incision beginning proximal and ulnar to Lister’s tubercle and ending distally at the level of the 3rd carpometacarpal joint.
The incision should be about 8 cm long. The incision can be extended proximally or distally, if necessary.
Elevation of the skin flap
Preserve the large longitudinal veins and ligate and divide the crossing branches to achieve exposure.
Elevate the skin flaps, complete with subcutaneous tissue, from the extensor retinaculum.
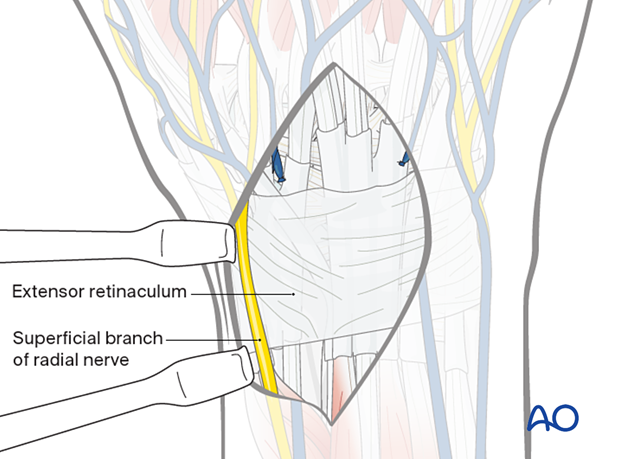
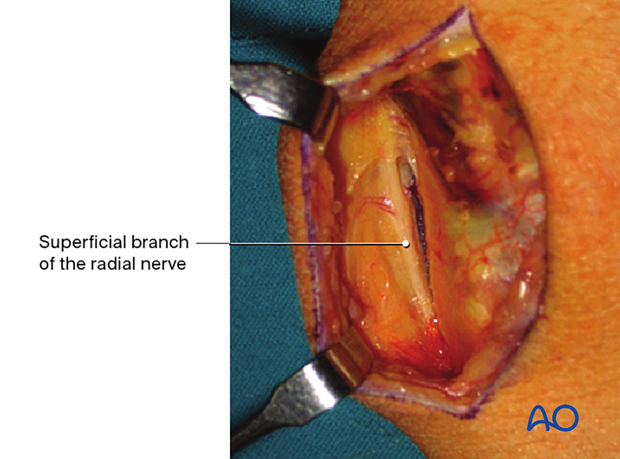
Intraoperative image showing the superficial branch of the radial nerve.
It is important to identify and protect the superficial dorsal branch of the radial nerve to avoid damage and painful neuromas.
Opening the 3rd compartment
Incise the extensor retinaculum over the EPL tendon, opening the 3rd extensor compartment. Start the incision on the ulnar side of the Lister’s tubercle and continue along the course of the tendon, which is angulated towards the thumb distally.
Release the EPL tendon and retract it radially.
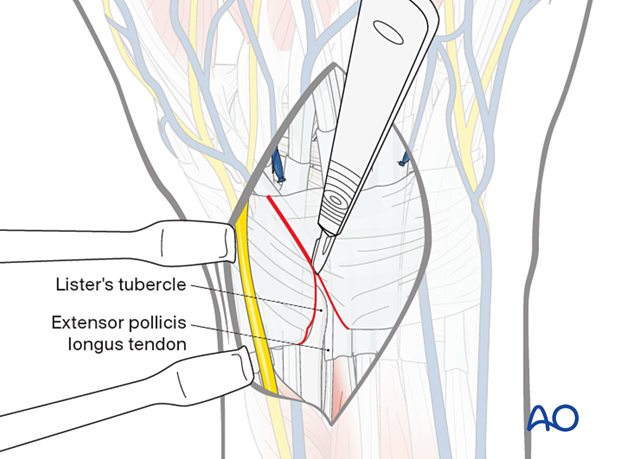
Make the incision on the radial side of Lister’s tubercle to release the tendons of the 2nd compartment.
Retract the tendons of both compartments radially.
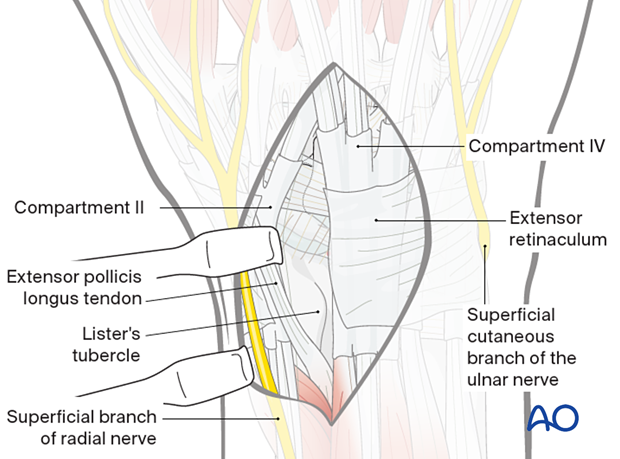
Elevation of the 4th compartment
Continue the dissection in an ulnar direction by subperiosteal elevation from the distal radius.
Elevate the 4th compartment and retract it ulnarly. This exposes the wrist capsule distally.

This intraoperative image shows the exposure of the wrist capsule after retraction of dorsal compartments. Proximally the dorsal interosseous nerve is exposed.

Capsular incision
Radially based capsular incision (after Berger and Bishop) is the standard approach to the dorsal wrist.
In case of existing tears in the dorsal capsule, these should be used and enlarged if necessary.
It is important that the radiolunotriquetral ligament insertion onto the radius is preserved.
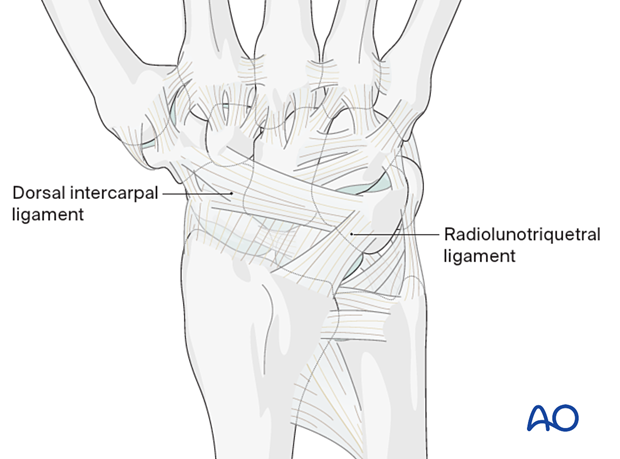
Elevate a radially based capsular ligamentous flap to gain a complete view of the carpus.
Start the capsulotomy incision radially deep to the floor of the 2nd extensor compartment.
Leave a fringe of 2–3 mm of the capsular attachment at the dorsal rim of the radius for subsequent suture repair.
- The incision continues in an ulnar direction along the dorsal rim of the radius
- It then turns distally in line with the fibers of the radiolunotriquetral ligament
- At the triquetrum, it turns radially in line with the fibers of the dorsal intercarpal ligament and ends on the dorsal ridge of the scaphoid

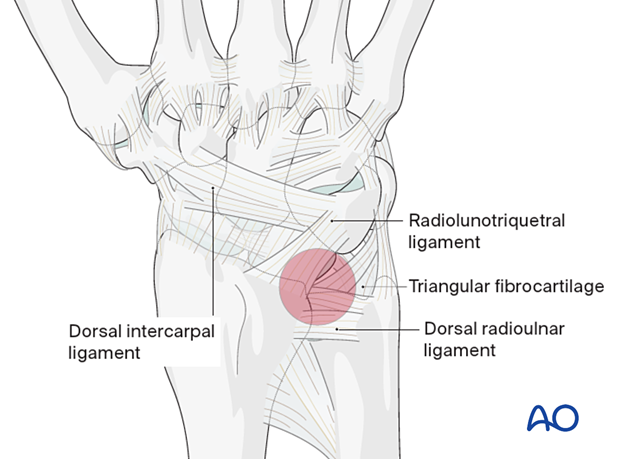
Elevation of the capsular flap
Elevate the capsular flap by sharp dissection in an ulnar-to-radial direction.
The proximal carpal row, with its intrinsic ligaments, and the midcarpal joint are exposed.

Intraoperative image showing the exposed midcarpal bones

5. Extended carpal tunnel incision
Introduction
After the dorsal approach, the palmar approach is performed if necessary (see above).
The incision begins distally at the level of the distal border of the flexor retinaculum, in the palm, in line with the radial side of the 4th metacarpal.
It continues proximally in the intereminence crease to the level of the transverse flexor crease of the wrist.
At this point, the incision angles 90° in an ulnar direction for 1–2 cm in the line of the wrist flexor crease and then turns proximally as a slightly curved, longitudinal extension, as far as necessary.

Elevation of the skin flaps
Elevate the skin flaps by sharp dissection, first from the surface of the palmar aponeurosis distally, then from the antebrachial fascia proximally – on the ulnar side of the palmaris longus tendon.
The skin incision on the ulnar side of the flexor retinaculum distally also protects the palmar cutaneous branch of the median nerve, which passes to the radial side of the palmaris longus tendon.

Opening the carpal tunnel
Identify the median nerve, which lies radial and deep to the palmaris longus tendon.
Insert a blunt instrument into the carpal tunnel between the median nerve and the flexor retinaculum. Now divide the flexor retinaculum longitudinally over the blunt instrument, which protects the median nerve.
The retinaculum should be divided to the ulnar side of the median nerve to protect its motor branch to the thenar muscles.
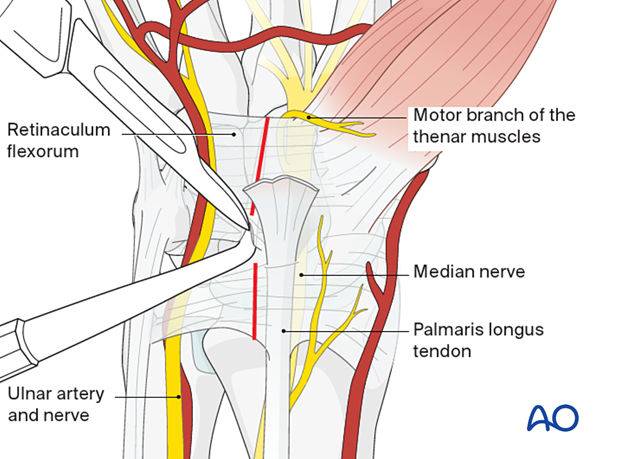
Retraction of the flexor tendons
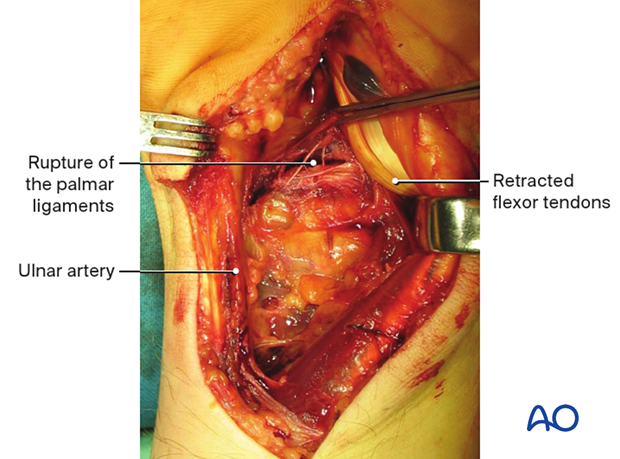
Opening the carpal tunnelRetract all the flexor tendons radially to expose the palmar carpal ligaments.
Only the ulnar nerve and artery remain on the ulnar side.
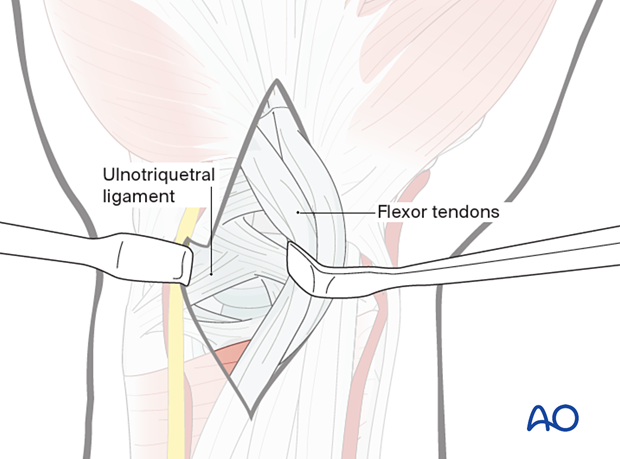
This intraoperative image shows a rupture of the palmar ligaments.
Option: approach to the radial palmar capsule
Sometimes the median nerve must be retracted radially, together with the tendon of flexor pollicis longus (FPL), and the flexor tendons of the fingers are retracted in an ulnar direction, thereby exposing the radial side of the palmar capsule.

6. Wound closure (dorsal)
Closing the capsular incision
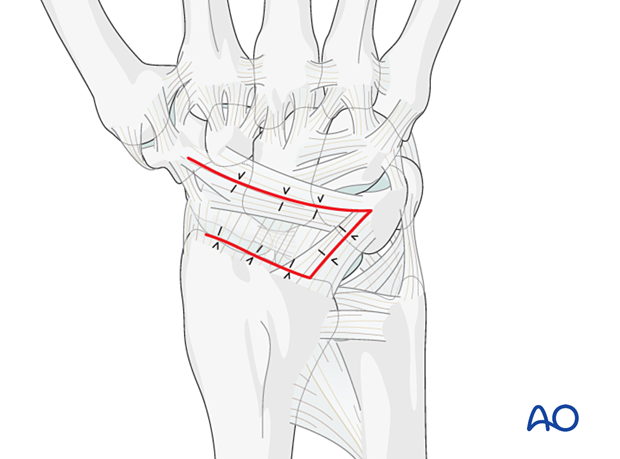
Repair the radially based flap with interrupted sutures.
Closing the extensor compartments
Close the 3rd compartment, avoiding any tension over the EPL tendon. The EPL tendon must glide smoothly. If not, the tendon is left superficial to the extensor retinaculum in the subcutaneous tissue.


