

Compression plate
1. Introduction
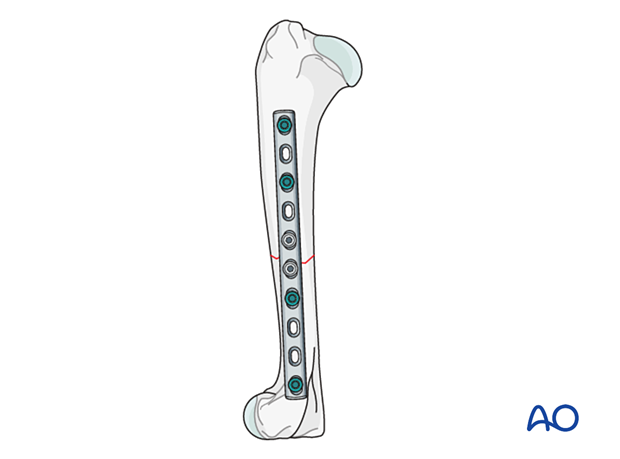
Plates with compression mode are the standard treatment for transverse humeral fractures.
The goal is to achieve anatomical reduction and rigid stability, which usually leads to direct bone healing.
Precise contouring is difficult due to the bone configuration. Dynamic compression plates require more precise contouring than locking compression plates, so the latter is preferred. Another advantage of locking compression plates is that locking screws provide more stable fixation than is possible with cortical screws.
2. Positioning and approach
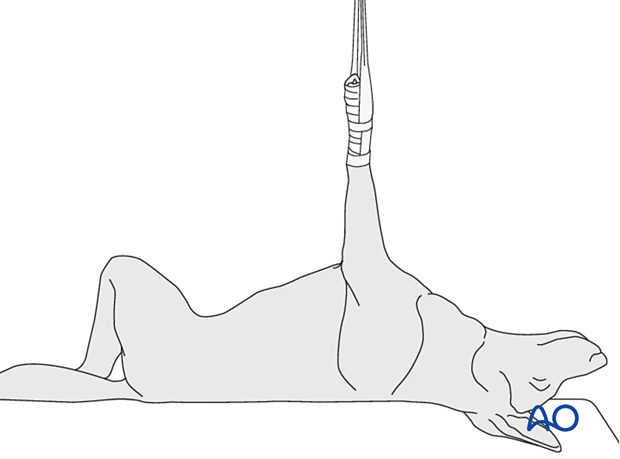
A lateral approach with the patient positioned in lateral recumbency is preferred for more proximal fractures.
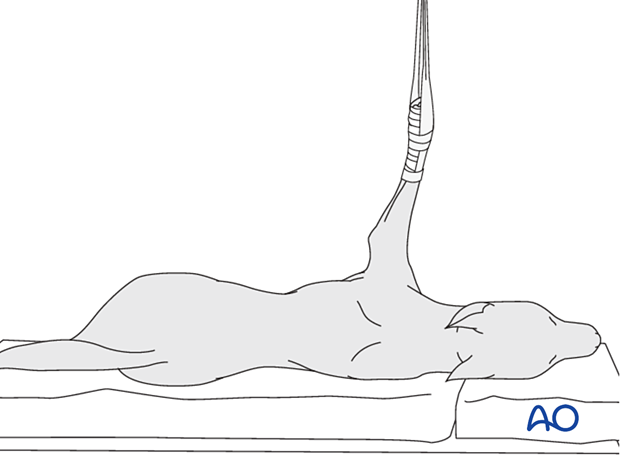
A medial approach with the patient positioned in dorsal recumbency is preferred for more distal fractures.
3. Reduction
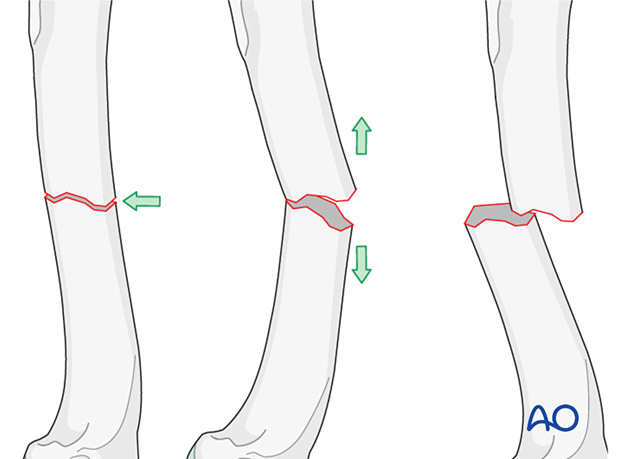
Bone-holding forceps are applied to the proximal and distal fragments for distraction. Distraction is necessary to counteract the strong muscles surrounding the bone, particularly in large-breed dogs.
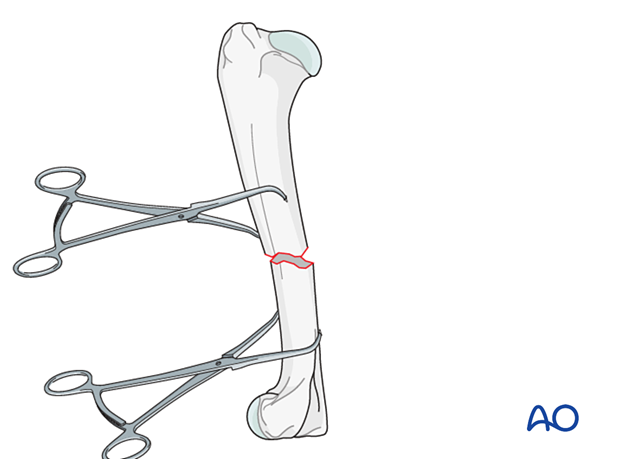
The fracture ends are elevated, toggled, and then reduced.
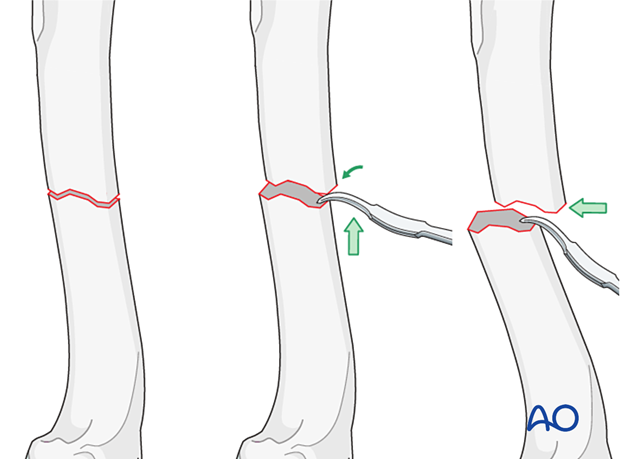
Alternatively, a Hohmann retractor or similar instrument can be prudently used as a lever to align the fragments.
Preliminary fixation
The anatomical reduction is carefully checked.
The bone holding forceps are kept in place, and an assistant helps keep the fracture reduced until the plate has been applied.
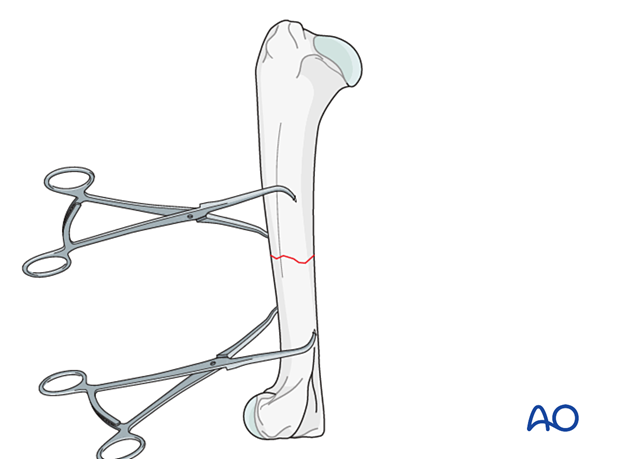
Plate selection
The plate's length should allow the placement of at least 3–4 screws in each major fragment.
Typically, two screws brought into compression at the fracture site will keep the fracture compressed. The remaining screws can be locking screws.
Read more about plate preparation.
Plate application
Following contouring, the plate is applied to the lateral side, for more proximal fractures, or the medial side, for more distal fractures.
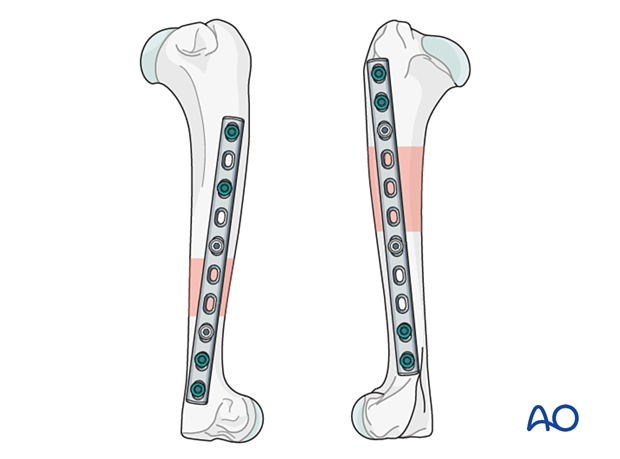
One screw is applied in compression mode on each side of the fracture line.
The first screw is inserted after drilling with a neutral or load guide through the plate on one side of the fracture line. The screw is not fully tightened.
Note: Compression plates must be slightly over-bent to produce a 2 mm gap between the plate and the bone at the fracture site. Over-bending the plate will ensure even compression across the fracture line.
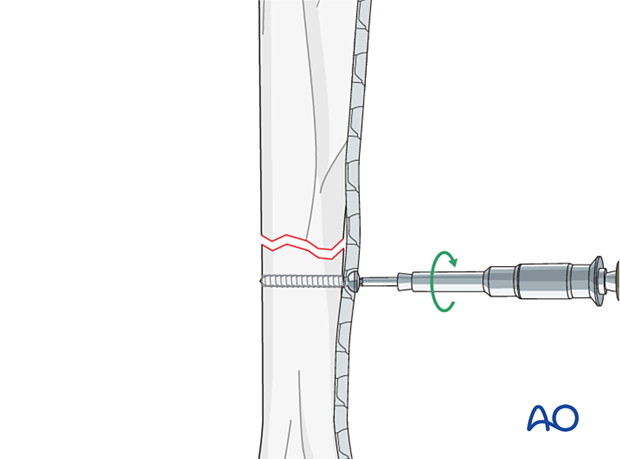
The second screw is inserted after drilling with a load guide on the other side of the fracture.
The two screws are tightened alternatingly, generating compression across the fracture line.
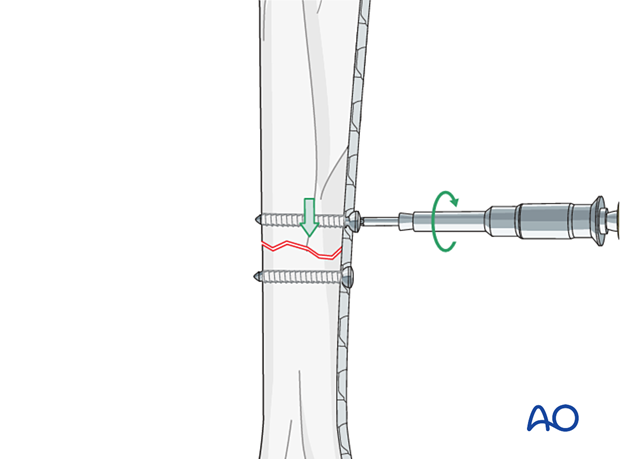
The remaining screws can be locking screws or, when the plate's bending fits the bone exactly, non-locking screws.
Usually, the most distal and most proximal screws are inserted first in a locking or neutral fashion, depending on the screws used.
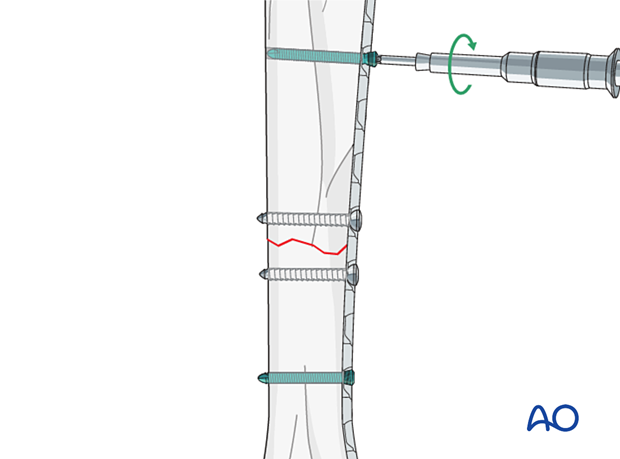
The remaining plate screws are inserted in either neutral or locking mode. Not all holes need to be filled with screws. Usually, 6-8 cortices are sufficient.
Note: It is possible to use the load guide for up to two screws on either side of the fracture line to achieve compression. These should be inserted before any locking screws are used. Using so many screws is rarely necessary, and it is possible to over-compress the bone.
4. Aftercare
Phase 1: 1–3 days after surgery
The aim is to reduce edema, inflammation, and pain.
Integrative medical therapies, anti-inflammatory medication, and analgesics are recommended.
Note: Animals carry 2/3 of their weight on the front limb. Therefore, leash confinement or cage rest and no jumping are recommended for six weeks postoperatively.
Phase 2: 4–10 days after surgery
The aim is to resolve hematoma and edema, control pain, and prevent muscle contracture.
Anti-inflammatory and analgesic medications may still be needed. Rehabilitation and integrative medical therapies can be used.
A careful evaluation is recommended if the dog does not start to use the limb within a few days after surgery.
Early ambulation is aimed for.
Radial nerve neurapraxia may occur in some cases. This neurapraxia usually resolves within a few days.
Phase 3: > 10 days after surgery
10-14 days after surgery, the sutures are removed.
Radiographic assessment is performed every 4–8 weeks until bone healing is confirmed.
Note: It can be challenging to assess bone union on radiographs when bone healing occurs without callus formation.


