

Lag screw fixation
1. Indications
The goal of 23-B2 fracture treatment is anatomical reduction.
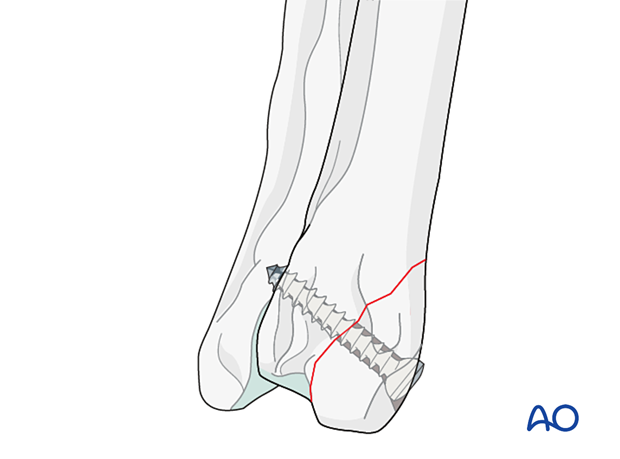
This technique is used for interfragmentary compression for larger bone fragments.
The fracture is reduced with a pointed reduction forceps placed across the fracture line and then fixed with an appropriately sized screw in lag fashion.
2. Preparation and approach
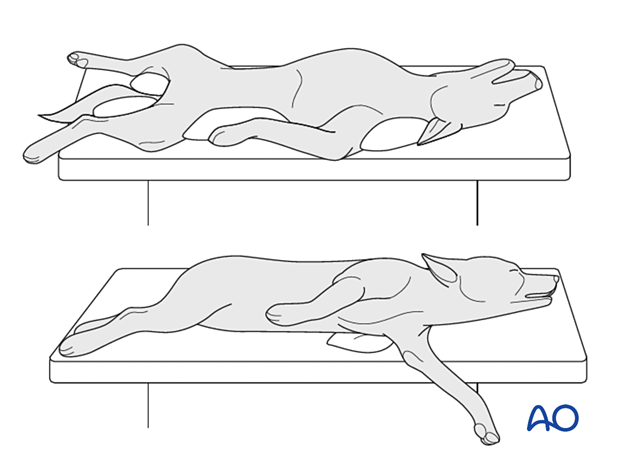
The patient can be in dorsal or lateral recumbency.
In lateral recumbency, the affected leg should be in contact with the table.
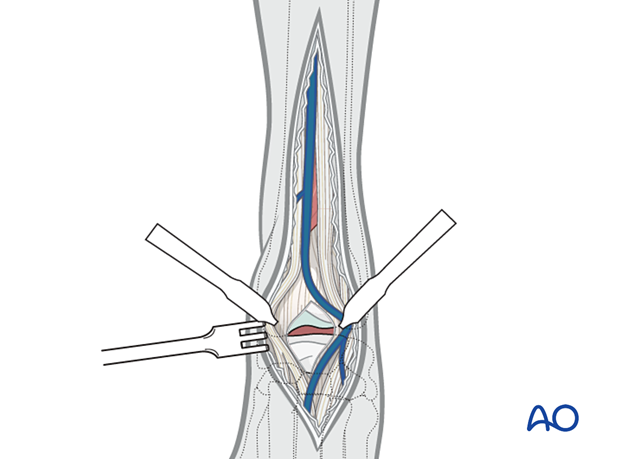
A cranial approach to the distal radius is performed and extended to the joint line.
An arthrotomy may be performed to inspect the articular surface and assess the accuracy of fracture reduction.
3. Reduction
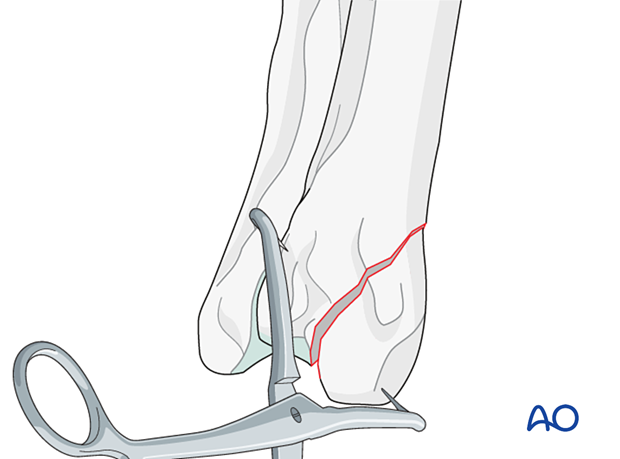
The goal is to achieve anatomical reduction.
Anatomical reduction is obtained with the help of one pointed reduction forceps placed across the fracture line.
4. Fixation
Implant selection
An appropriately sized lag screw is selected.
A flathead or a headless screw may be used as an alternative to avoid protrusion and irritation of the extensor tendons.
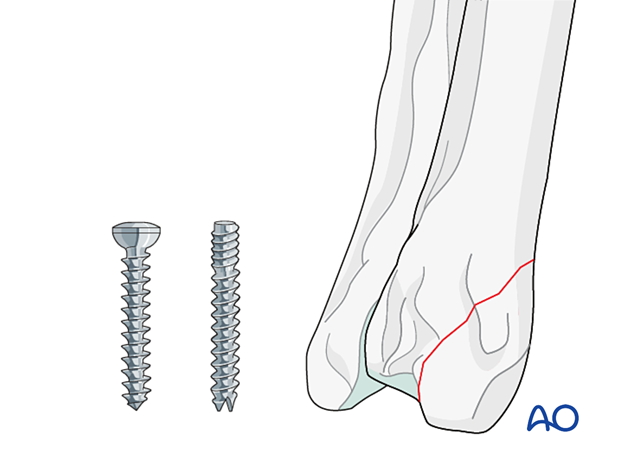
Placement of lag screw
Once the fracture has been reduced, the correct drill bit for the glide hole is used to drill a hole from the cranial surface of the distal fragment (dorsal slab) to the fracture line.
Read more about Lag screw fixation.
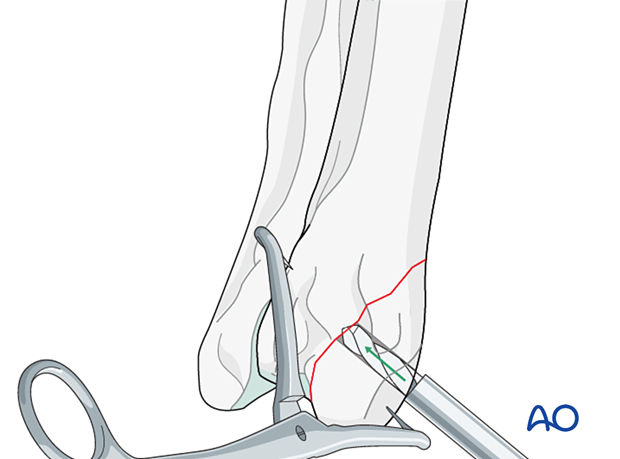
An appropriately sized drill guide is inserted into the glide hole and the correct drill bit for the threaded hole is used to drill a hole into the caudal cortex of the proximal fragment.
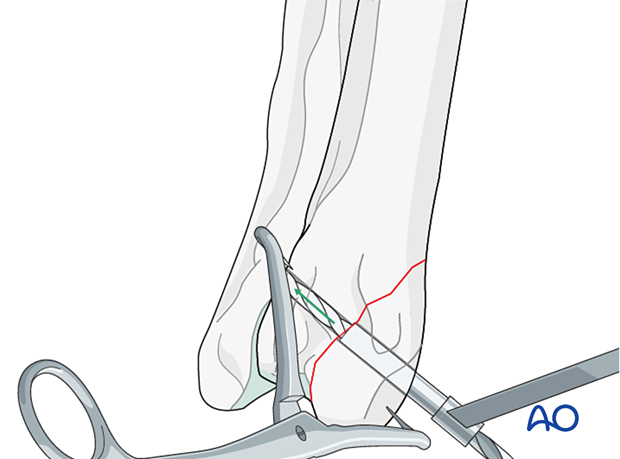
The hole depth is measured with a depth gauge, and the appropriate self-tapping screw is inserted and tightened.
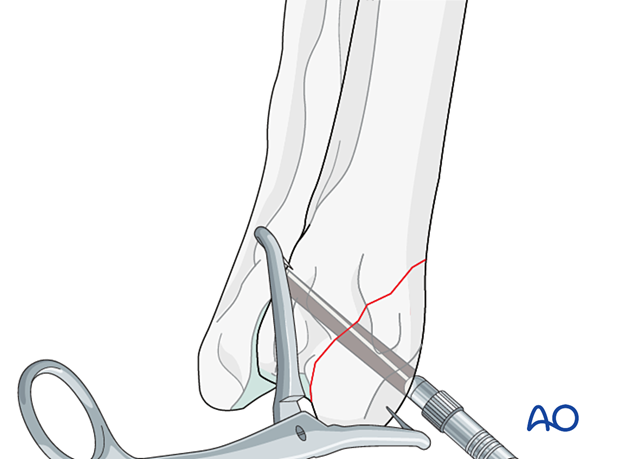
As an alternative, a flathead screw could be used.
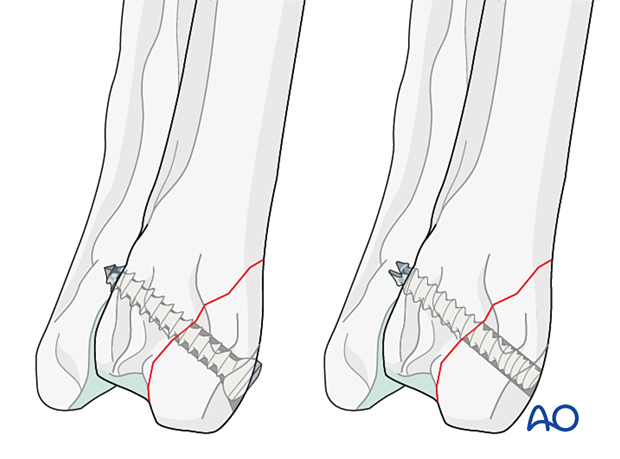
Headless cannulated screw
Headless cannulated screws have a hollow center through which a guide wire is placed. The guide wire is placed in the position of the proposed screw.
After generating the interfragmentary compression, the screw head is inserted deeper into the cortical surface.
Drilling, measurement of screw length, and screw insertion all require cannulated instrumentation when using this technique.
This technique offers several advantages, including the ability to redirect the guide wire for optimum screw location and enhanced temporary stability of the fracture while definitive screw placement occurs.
5. Aftercare
A Robert Jones or modified Robert Jones bandage can be applied for 1–3 days to decrease the edema and protect the surgical incision.
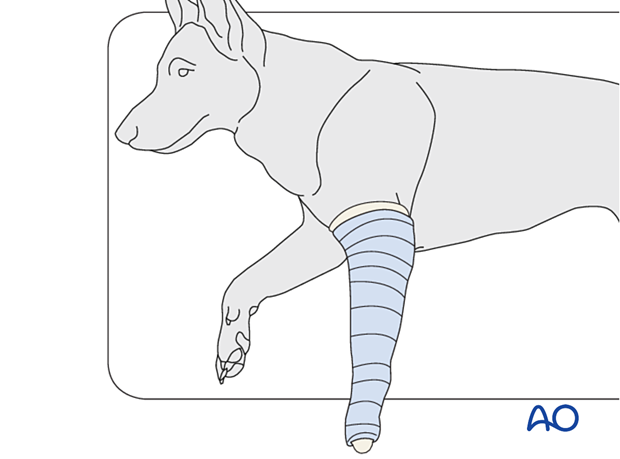
Phase 1: 1–3 days after surgery
The aim is to reduce edema, inflammation, and pain.
Integrative medical therapies, anti-inflammatory medications, and analgesics are recommended.
10–20 minutes of ice therapy is recommended every 8 hours in most cases.
The patient can immediately weight bearing, but with strict control of activities.
Phase 2: 4–10 days after surgery
The aim is to resolve hematoma and edema, control pain, and prevent muscle contracture. Anti-inflammatory and analgesic medications may still be needed.
Rehabilitation and integrative medical therapies can be used.
A careful evaluation is recommended if the patient is not starting to use the limb within a few days after surgery.
Phase 3: > 10 days after surgery
The sutures are removed 10–14 days after surgery.
Immature patients should be radiographed every 4 weeks.
A radiographic assessment is performed every 4–6 weeks until bone healing is confirmed, more frequent assessment may be necessary for skeletally immature patients.


