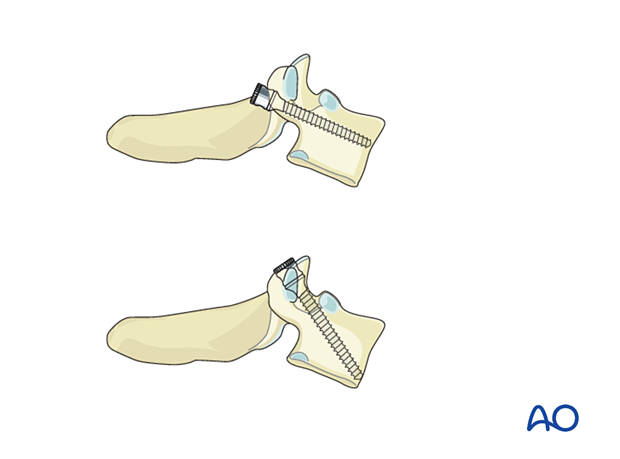
Pedicle screw insertion (T1–T3)
1. General considerations
Once the spine is exposed, the appropriate levels of fixation are confirmed with the image intensifier.
The upper thoracic spine is difficult to visualize in lateral fluoroscopy. It is, therefore, important that good-quality AP views are available during the procedure.
These pedicle screws can be combined with pedicle screws or lateral mass screws of the subaxial spine.

2. Pitfall
There is a large step-off between the pedicles or lateral mass screws in the lower cervical spine and the upper thoracic spine.
This needs to be taken into consideration when planning the fixation.
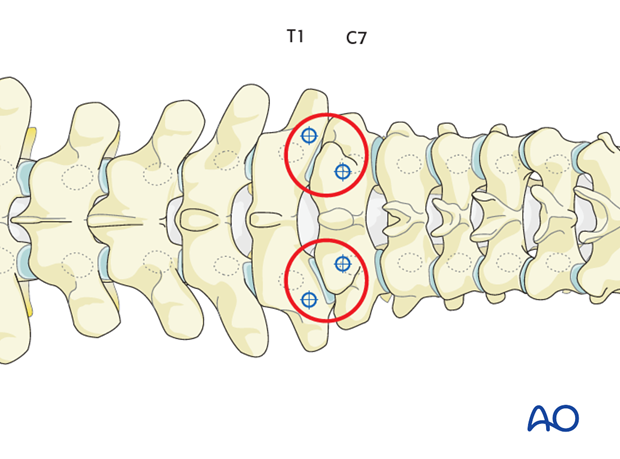
3. Entry Points
Pedicle screw fixation in the upper thoracic spine T1, T2, T3
The pedicles of T1 and T2, and to a lesser degree of T3, tend to be more widely spread than the pedicles lower in the thoracic spine. This is very important to know, as they do not lie in line with the inferior pedicles.
The entry point lies just below the rim of the upper facet joint, 3 mm lateral to the center of the joint near the superior border of the transverse process.
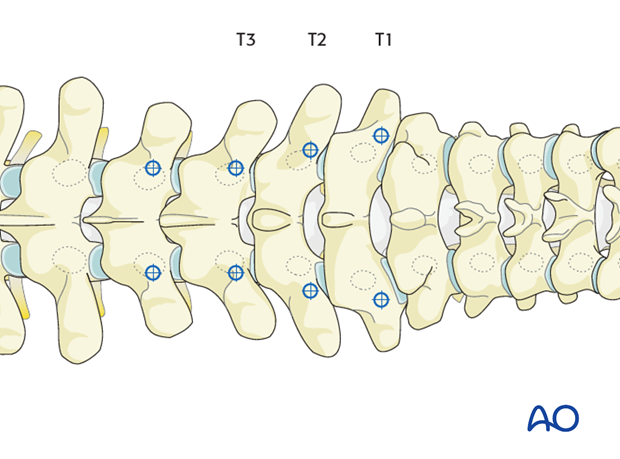
4. Opening of the cortex
Open the superficial cortex of the entry point with a burr or an awl.
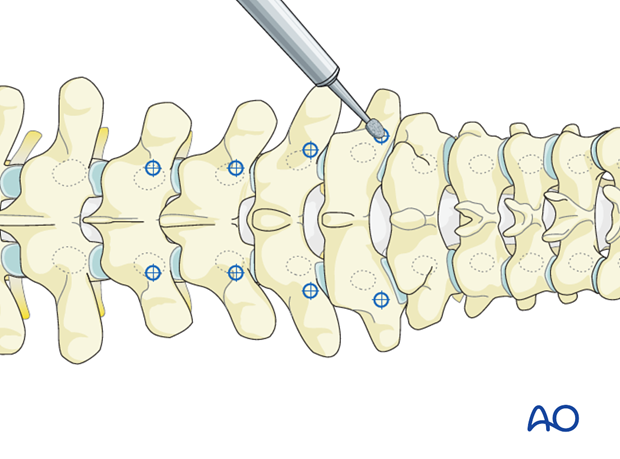
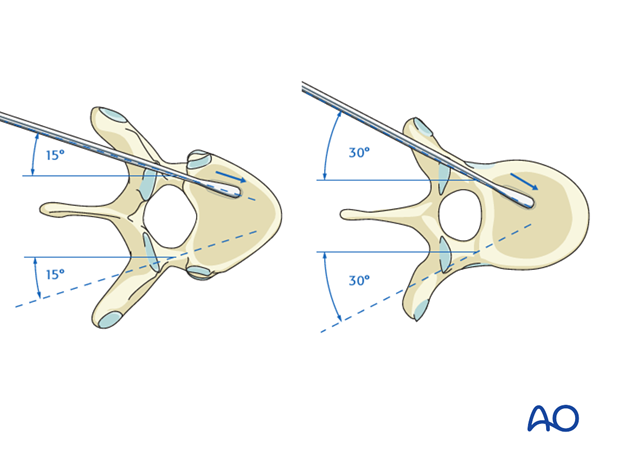
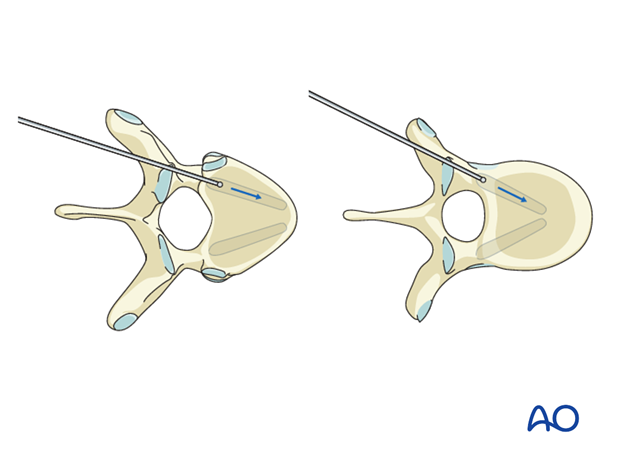
5. Medio-lateral inclination
Their transverse angulation ranges from 30° at the level of T1, to 15° at the level of T3.
Then, from T4 downward, the transverse angulation is almost sagittal.
6. Cranial-caudal angulation
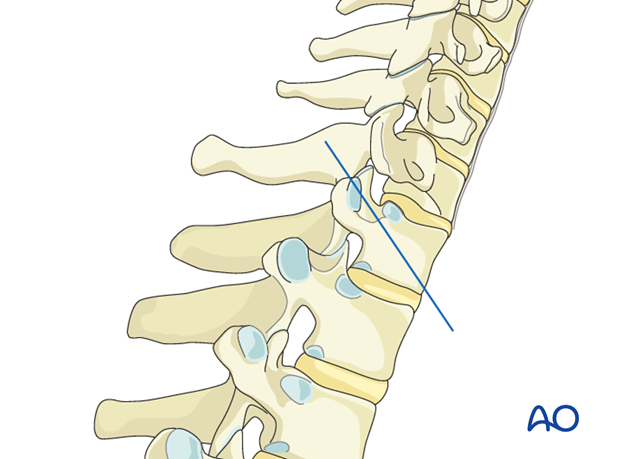
For the cranial-caudal angulation there are two options:
Anatomical angulation going from cranial to caudal.
Subchondral ("straightforward") orientation going parallel to the superior endplate.
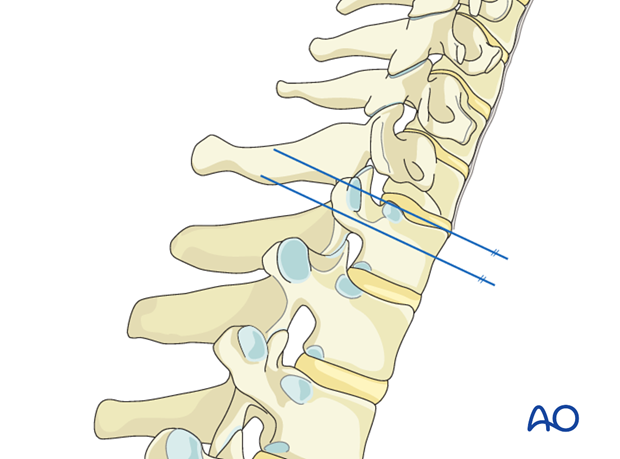
Pedicle preparation may be performed using the small 4 mm pedicle probe.
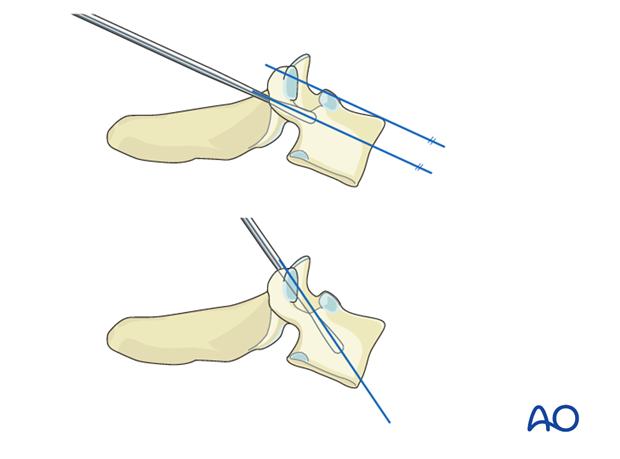
7. Screw insertion
Once the pedicle track has been created, it is important to confirm a complete intraosseous trajectory by pedicle and body palpation using a pedicle-sounding device. At any point in the process, radiographic confirmation can be obtained.
The relatively small pedicles in the area of T1–T2 allow a small margin of error.
- In the upper thoracic region, only AP views are possible.
- The selection of a mono- or a polyaxial screw is usually the choice of the surgeon.
Depending on the type of injury, either polyaxial screws, like in the cervical spine, or monoaxial thoracic type screws can be used.
Screw diameter in the upper thoracic spine is usually 4–4.5 mm. The length of the screw should be measured with an appropriate device.
A screw of appropriate diameter and length is carefully inserted into the same created trajectory.
