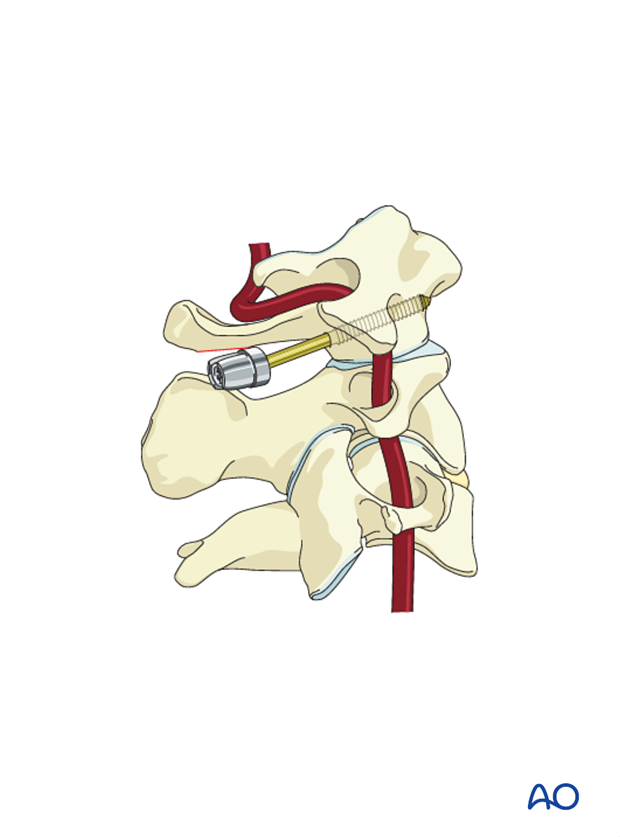
C1 lateral mass screw insertion
1. Drilling in the presence of a large posterior arch
If the posterior arch of C1 is large, drill through the posterior arch into the lateral mass of C1 under fluoroscopic guidance.
A preoperative 3D CT can help to determine if this is possible.
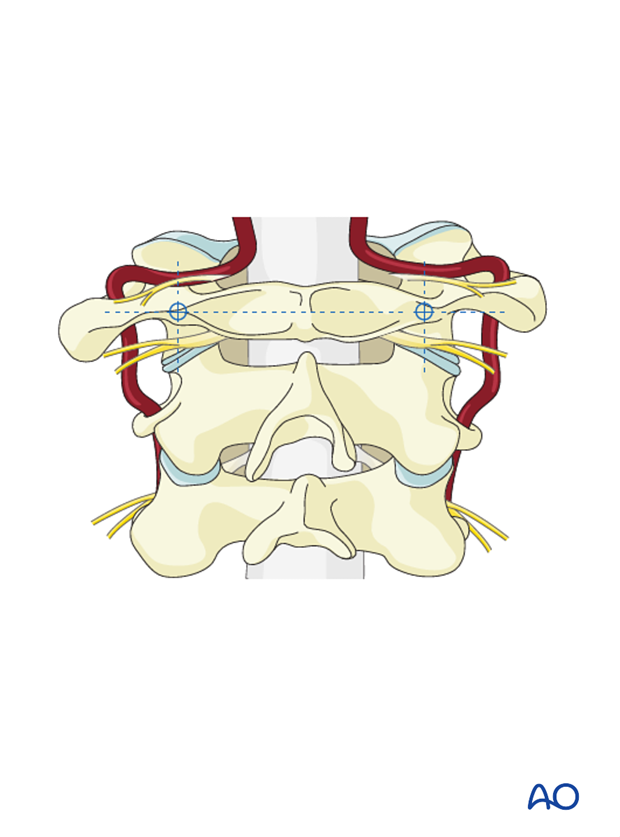
Using a handheld drill, with the drill guide set to 25 mm, drill a hole through the arch and into the lateral mass of C1.
Preoperatively it is helpful to measure the expected length of the C1 lateral mass screw. This measurement can help to guide the depth of the drilling.
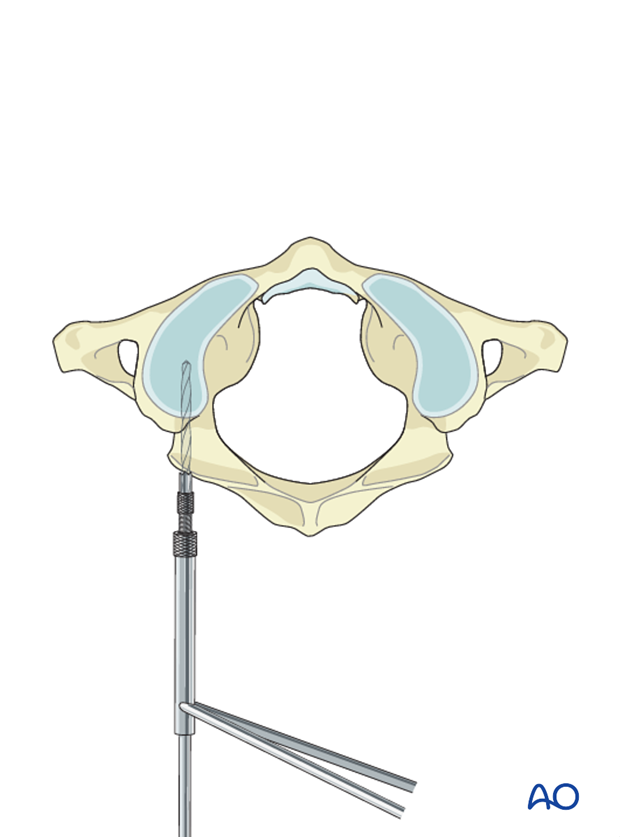
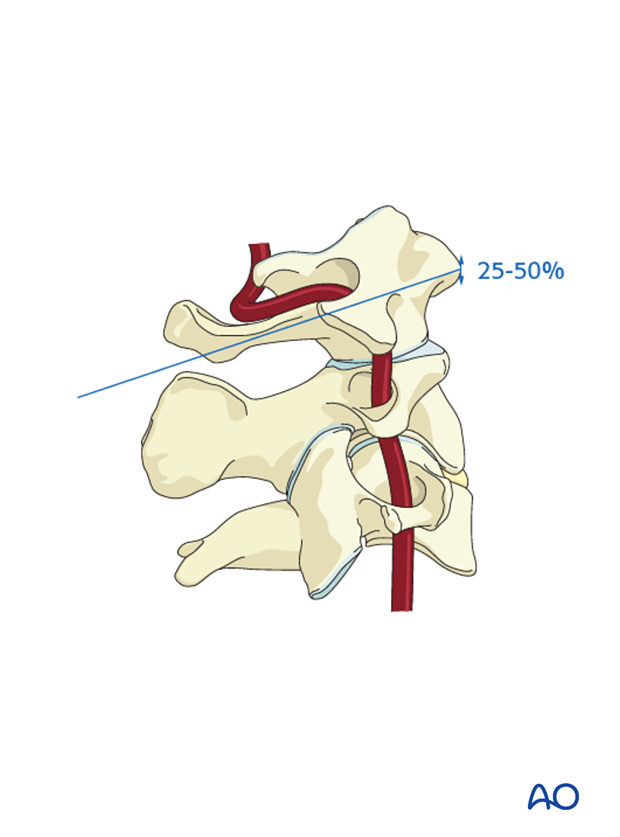
With the drill in place, check a lateral fluoroscopic image to determine the depth and trajectory. In the lateral fluoroscopic view, the tip of the drill should not advance further than the posterior cortex of the C1 tubercle.
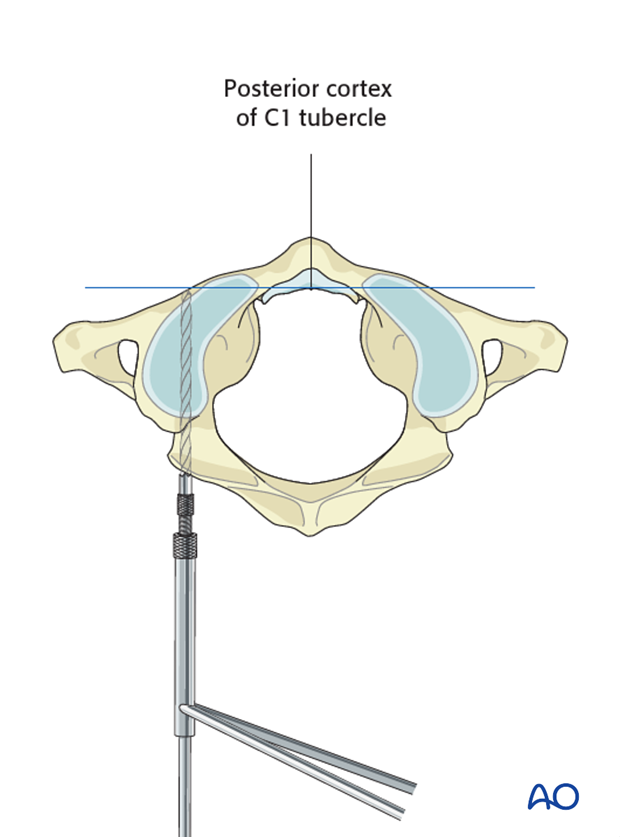
In the craniocaudal direction the drill should aim at the bottom 25–50% of the C1 tubercle (see illustration).
2. Drilling in the presence of a small posterior arch
If the posterior arch is not large enough to accept a screw, then the screw must be placed directly into the lateral mass, just caudal to the posterior arch of C1. To do this, use a burr to notch the undersurface of the posterior arch of C1 (see illustration). This allows for the screw to tuck into the space created so that it does not irritate the C2 nerve root.
The starting hole should be in the midplane of the lateral mass mediolaterally.
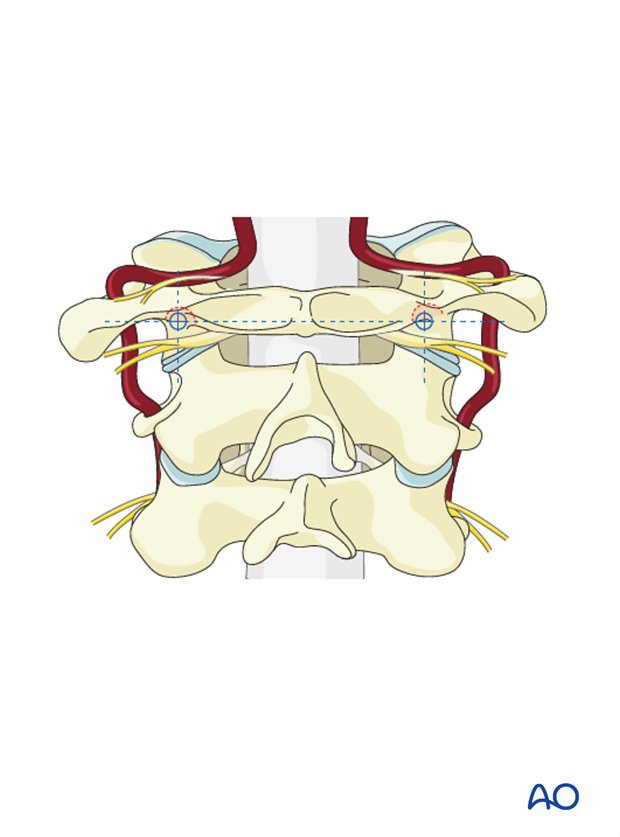
After dissecting the C2 nerve root caudally, as described in Posterior access to the occipitocervical spine (C0–C2), drill a starting hole in the lateral mass of C1 with a burr.
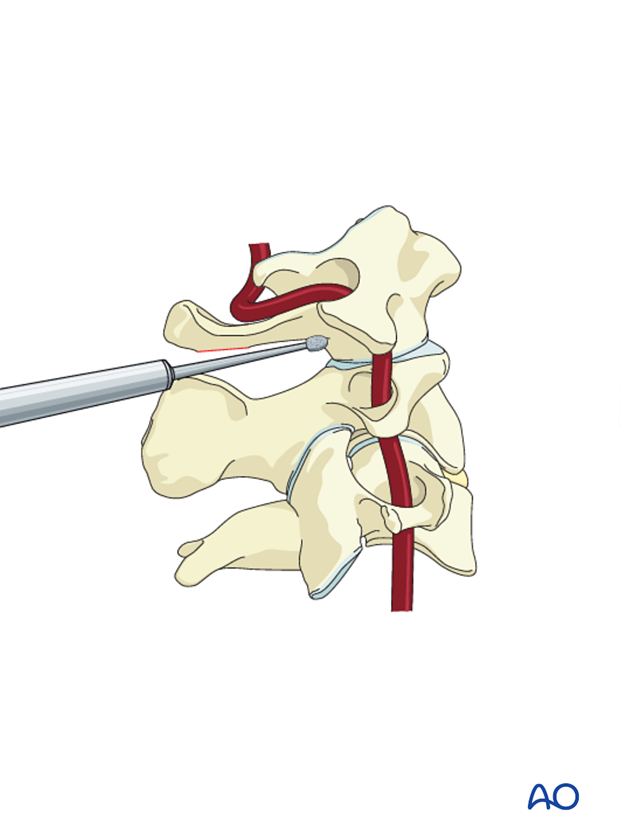
Drill into the lateral mass with a handheld drill under fluoroscopy using the same trajectory as for the posterior arch screw.
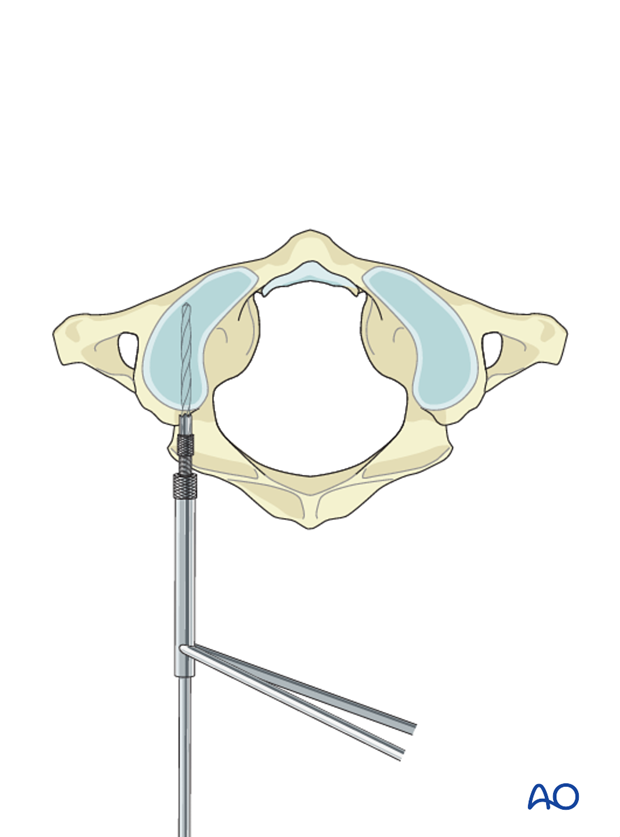
3. Screw insertion
Tap and measure the length of the screw. Insert it under fluoroscopic guidance, as needed.
