ISS fixation
1. Introduction
Iliosacral screw (ISS) fixation is a fluoroscopically guided, percutaneous procedure. Its primary use is for fixation of satisfactorily reduced sacral fractures or sacro-iliac joint disruptions. Anatomic reduction must be obtained before ISS insertion.
Screw placement and angulation will depend on the injury and the patients specific anatomy (variations are common).
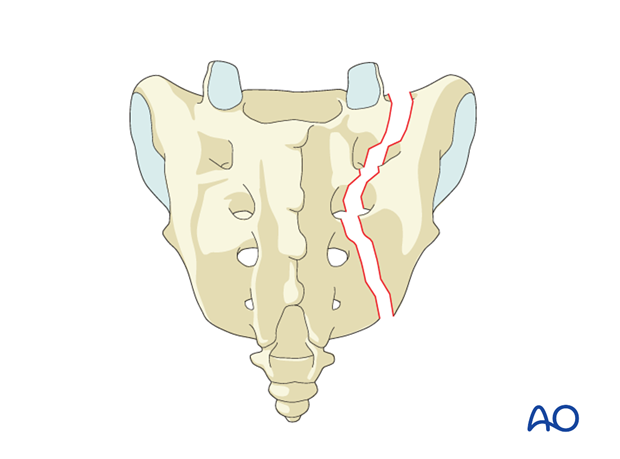
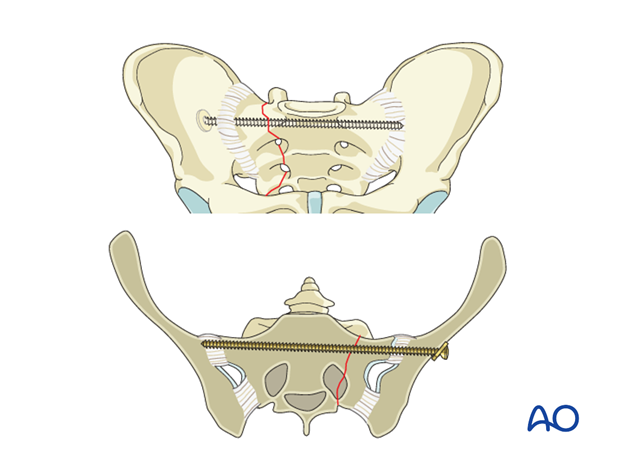
Principles of ISS fixation for sacral fracture
ISSs for sacral alar fractures are usually oriented transversely because this is the path of a transsacral channel. Screw channels for sacral fractures are narrow and precise screw placement is therefore essential.
ISS for sacral fractures can be unilateral, extending far into the contralateral sacral ala, transsacral, or transiliac extending beyond the contralateral ilium where a suitable nut on the screw threads can enhance fixation.
Compression of a comminuted alar fracture may injure a nerve root within the fracture zone. Thus, a fully threaded (position) screw may be preferable to a lag screw for ISS fixation. However, a screw that maintains excessive distraction increases the risk of nonunion. A washer is advisable for secure fixation on the ipsilateral side.
Fixation failure may occur, especially with grossly unstable injuries. Fixation can be enhanced by one or more of the following:
- 1 or 2 additional screws (S1 or S2 level)
- Supplementary posterior plates
- Spinopelvic fixation (especially for comminuted transforaminal vertical sacral fractures and bilateral injuries).
- Anterior pelvic ring fixation increases stability
Teaching video
AO teaching video: Pelvis – Sacral fracture – Reduction and fixation with iliosacral screws
2. Positioning and approach
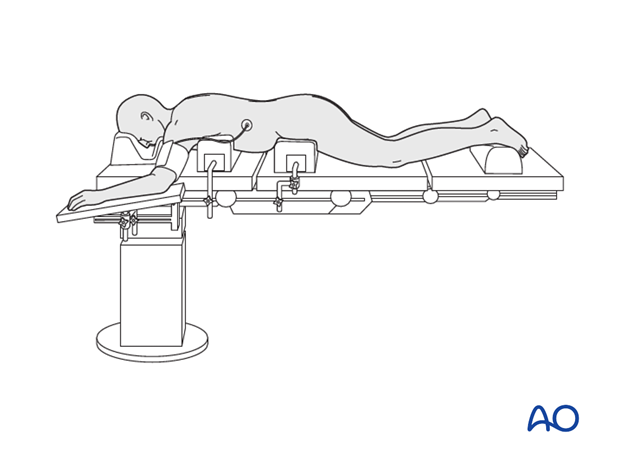
If an open reduction is required, the procedure is performed with the patient placed prone through a midline or paramidline approach.
If no open reduction is need, the procedure may also be performed with the patient placed supine.
3. Preoperative planning
An explicit, written pre-operative plan is strongly encouraged. In addition to overall assessment and preoperative planning, specific considerations are required for ISS.
These are:
- Patient's individual pelvic anatomy (normal vs. dysmorphic)
- Patient's specific sacral fracture configuration
- Optimal ISS type, location, trajectory, and length
- Selection of screw channels
- Need for additional fixation (see above)
More details on preoperative planning is found here.
4. Neural decompression
If open reduction and foraminotomy are required, after exposure is completed, identify and remove small bony fragments from the comminuted fracture zone. They may be located in the transforaminal region and may hinder fracture reduction.
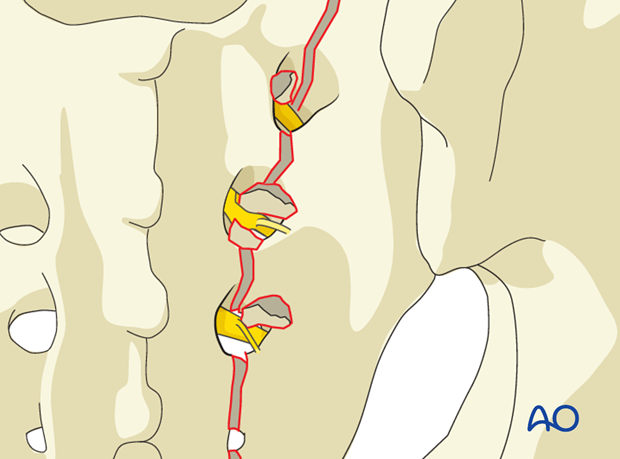
The complete fracture line has to be cleaned out and inspected.
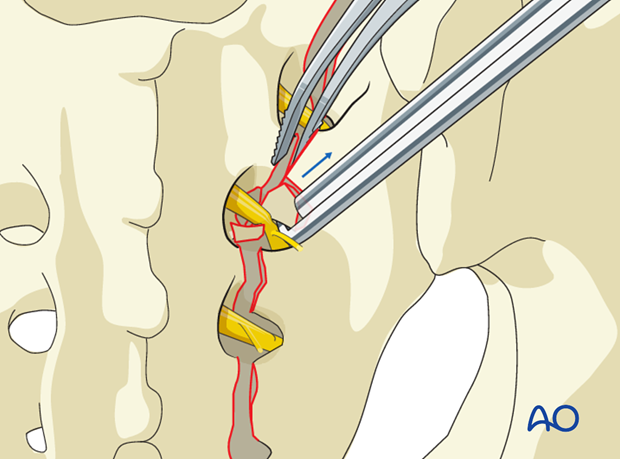
Enhance the exposure by using a lamina (bone) spreader.
Extract fragments that may compromise the sacral nerve roots.
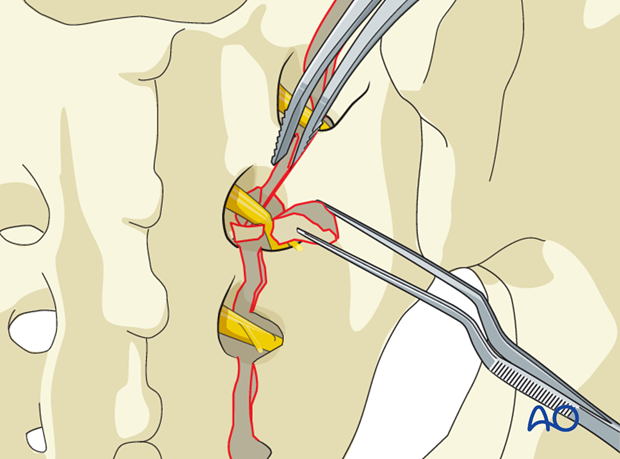
Additional foraminal patency can be achieved with the use of Kerrison rongeurs or high speed rotational burr to expand the nerve root channel.
5. Reduction
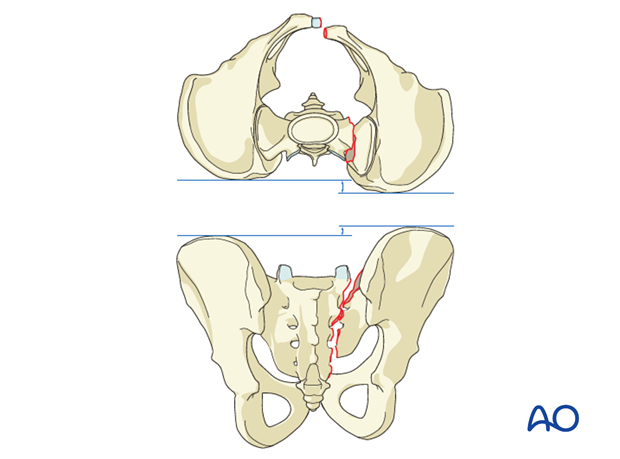
ISS fixation requires an essentially anatomically reduced sacral fracture. Significant residual displacement renders this procedure unsafe.
Displacement may make it impossible to accomplish ISS fixation without causing nerve root injury or resulting in an extraosseous screw that threatens adjacent neurovascular structures.
If displacement remains significant after closed reduction, open reduction should be considered.
A totally unstable sacral fracture is difficult to reduce anatomically without open technique. Thus, ISS can be used after anatomic open reduction.
The typical displacements are cranial and posterior together with sagittal plane rotation.
Preliminary fixation
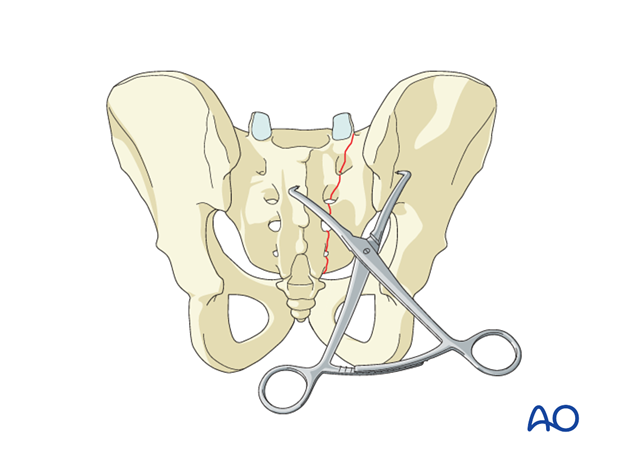
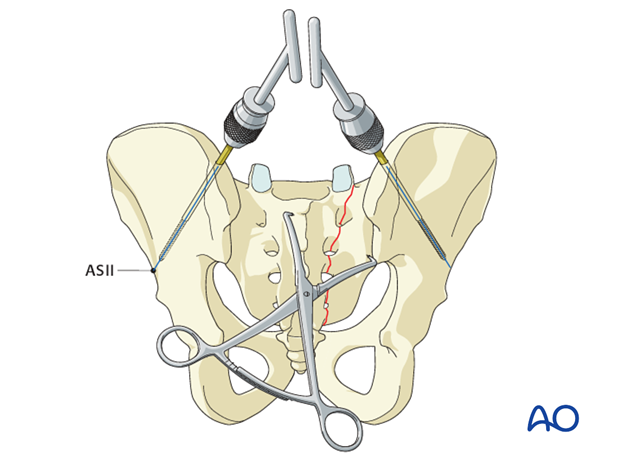
Once the fracture edges have been debrided, the primary reduction maneuver typically involves the use of two pointed reduction forceps (Weber clamps).
These span from the spinous process to the lateral ilium and are used to incrementally obtain a step by step reduction by alternating translation and clamping.
Preliminarily fix the anatomic reduction with pointed reduction forceps.
Additional reduction techniques
If needed, insert Schanz screws into both posterior iliac crests as a reduction aid for better rotational reduction.
6. Iliosacral screw insertion
Landmarks for stab incision
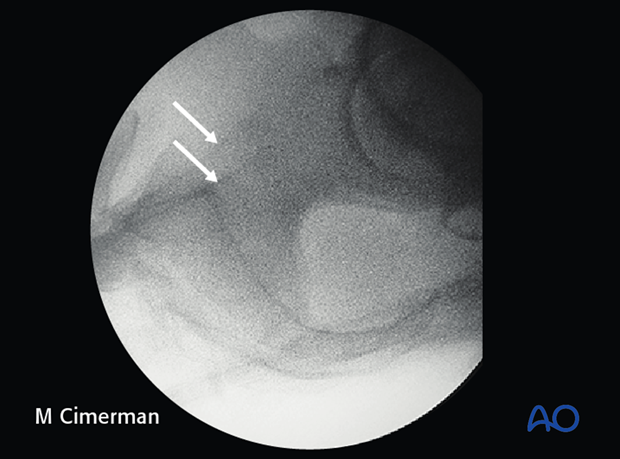
On the true lateral projection, identify the S1 body and iliac cortical densities (arrow) here overlapping correctly.

If double contours of the iliac cortical densities (see arrows) are visible as shown here, it is likely that the radiographic central ray is striking the pelvis obliquely. The C-arm should be adjusted to obtain a true lateral view, with superimposed ICDs and S1 cortices.
(This assumes that inlet and outlet views show that the pelvic reduction is anatomic.)
Location of screw entry point
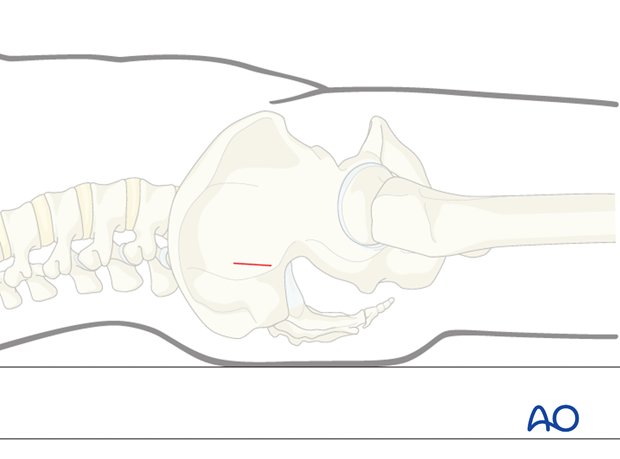
The entry point should be anterior in S1 and inferior to the iliac cortical density (ICD), which parallels the sacral alar slope, usually slightly caudal and posterior. The ICD thus marks the anterosuperior boundary of the safe zone for an iliosacral screw which may injure the L5 nerve root if it penetrates this cortex.
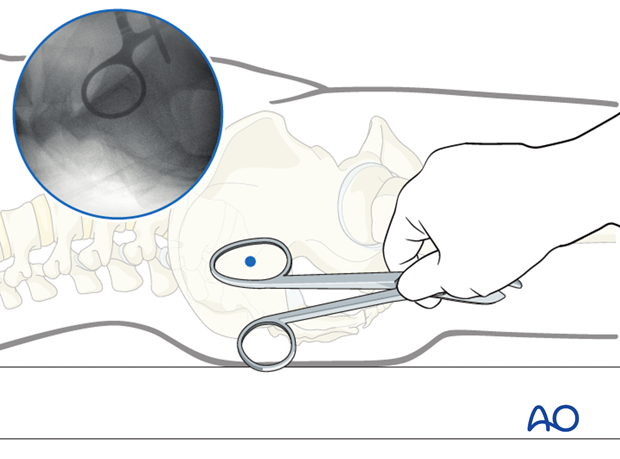
An instrument handle can help to target the desired entry site for the guidewire.
Incision
A stab incision is made at the identified site. The underlying tissues are dissected down to bone, by spreading with an appropriate blunt clamp, or with scissors if necessary.
There should be sufficient room for a protective drill sleeve, and for the planned screw and washer.
Guidewire insertion
A guidewire is tapped 2-3 mm, or drilled (oscillating mode preferred) into the planned screw entry point. This is monitored by X-ray on the true lateral projection.
Note that with a true lateral view, the power source and chuck must be removed from guidewire or drill to assess their position.
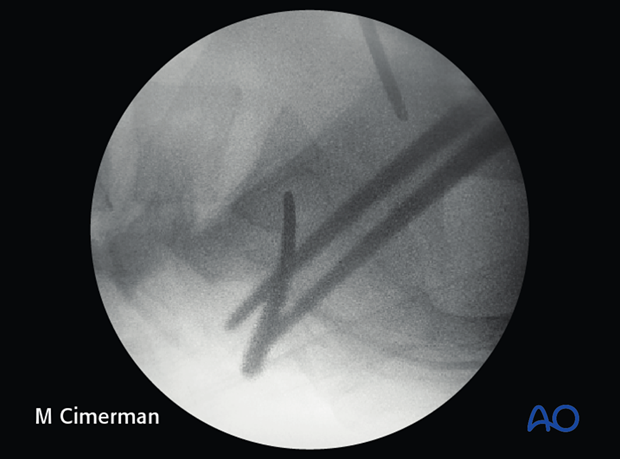
The guidewire is advanced 1 cm into the sacral ala according to chosen screw channel.
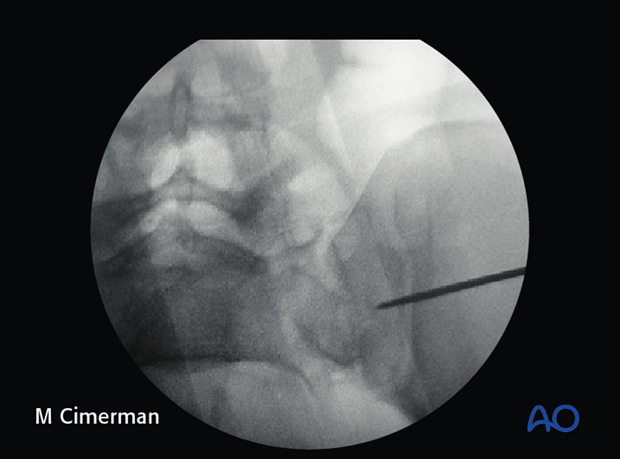
The position and trajectory of the guidewire is checked in inlet and…
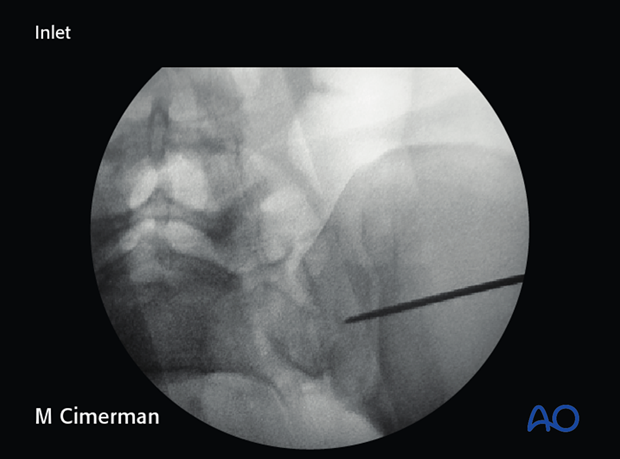
…outlet projection.
When the guidewire tip is just lateral to the neural foramen on the outlet view, pause to confirm that its position is satisfactory.
The desired trajectory is within but close to the anterior alar cortex on the inlet view, and cranial to the ventral foramen of the 1st sacral nerve root.
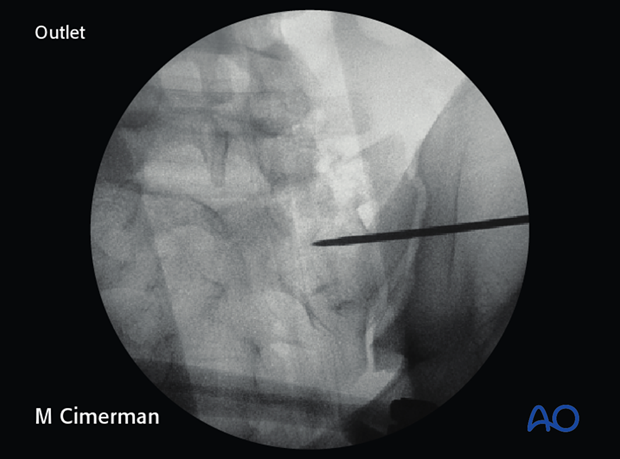
If the trajectory of the guidewire would compromise either the sacral foramen or the spinal canal, the guidewire is removed and then reinserted from a similar entry point but in the corrected trajectory.
Alternatively, the guidewire is left in place as a reference and a new one is inserted along the correct trajectory.
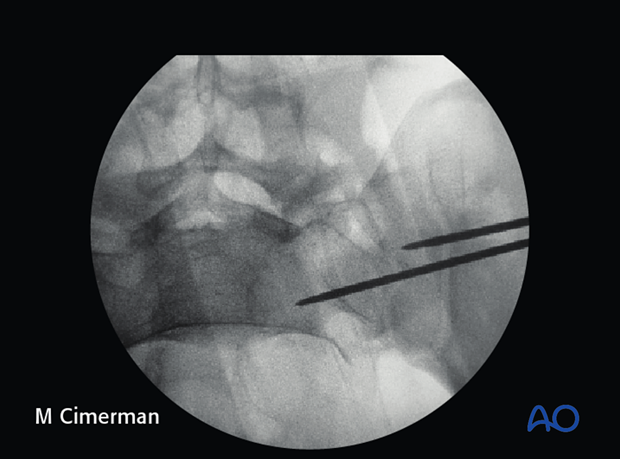
When a safe trajectory for the guidewire is confirmed, it is further advanced to the contralateral lateral border of the first sacral body.
When the guide wire reaches the center of the sacral body, the position is again verified in true lateral, inlet, and outlet view.
The wire must be far enough from cortices and neural foramina to accommodate the thread diameter of the planned screw.
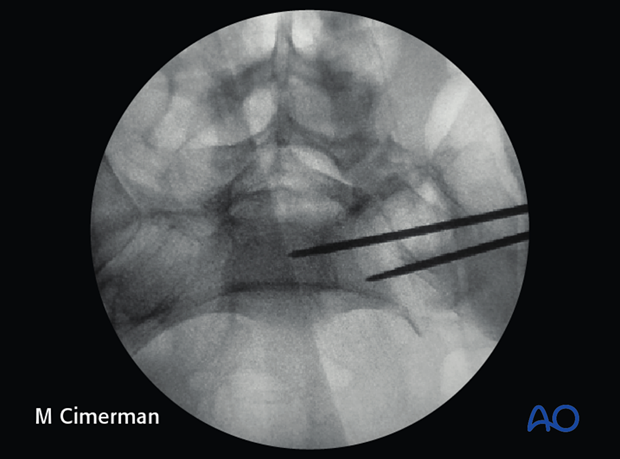
The guide wire can then be advanced across the midline.
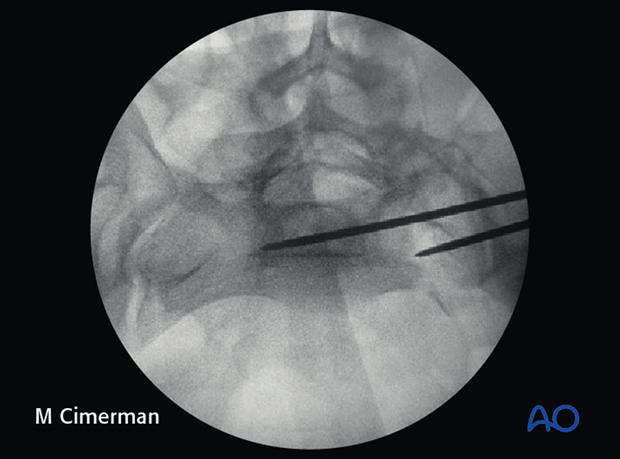
Screw insertion
The screw length is measured with a ruler or gauge suitable for the guidewire, and compared with the pre-operatively estimated length.
An appropriate screw hole is drilled over the guidewire, which should remain anchored in the bone, if it has been advanced far enough beyond the intended screw tip site.
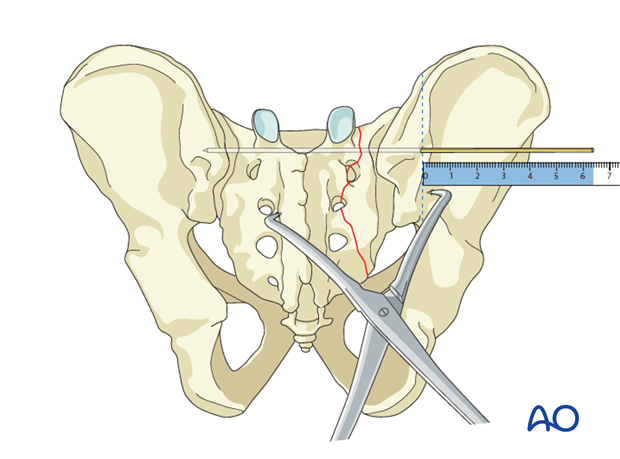
The chosen cannulated lag screw is inserted with a washer.
In case of comminution, fully threaded screws may be preferred to avoid over-compression of the sacral fracture and the neuro foramina. They may also be used to supplement an initial lag screw.
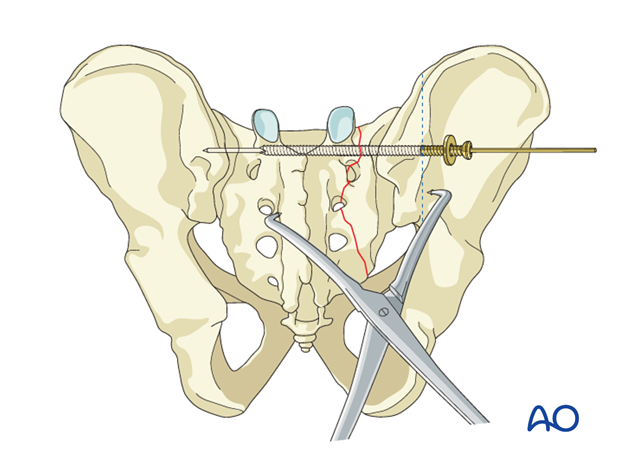
The guidewire is removed.
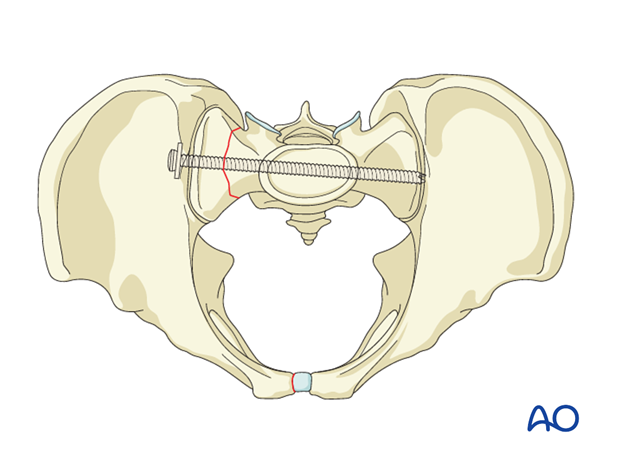
Pifall: Intrusion of screw head into illium
Excessive tightening of the screw will cause intrusion of the screw head into the ilium.
Such errors, which compromise fixation, are more likely with osteoporotic bone.
The use of a washer may help prevent this error.
With the C-arm rotated so its central ray is tangential to the ilium at the ISS insertion site, an excellent view of bone surface, washer, and screw head is available. This permits precise tightening of the screw without intrusion of washer and screw head through the iliac cortex.
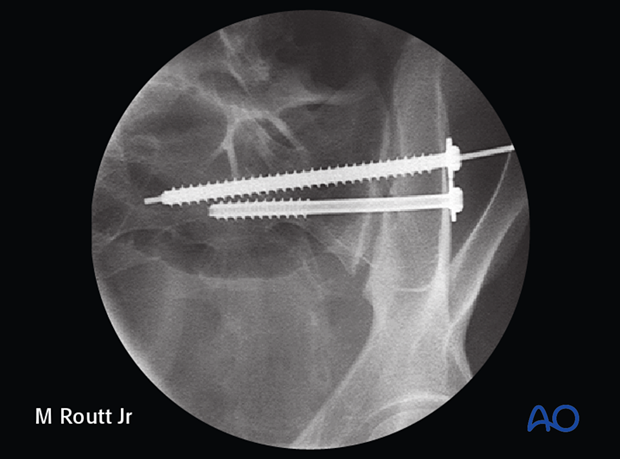
7. Check of osteosynthesis
Upon completion of the ISS procedure, use multiple C-arm images to assess
- Reduction of sacral fracture
- Overall pelvic ring alignment & symmetry
- Position of each screw, within cortical boundaries, and avoiding intra-osseous neural pathways
- Confirm that all guidewires and reduction aids have been removed
- Alignment and fixation of any associated ring injuries
Assessment of ISS requires AP, Inlet, outlet, and true lateral images of the posterior pelvis. Especially for bilateral injuries, radiographs that show the entire pelvic ring are necessary to confirm correction of complex deformities.
Make sure that any additional injury sites have been treated as planned.

8. Aftercare following open reduction and fixation
Postoperative blood test
After sacral surgery, routine hemoglobin and electrolyte check out should be performed the first day after surgery and corrected if necessary.
Analgesics
Adequate analgesia is important. Non pharmacologic pain management should be considered as well (eg. local cooling and psychological support).
Anticoagulation
Prophylaxis for deep vein thrombosis (DVT) and pulmonary embolus is routine unless contraindicated. The optimal duration of DVT prophylaxis in this setting remains unproven, but in general it should be continued until the patient can actively walk (typically 4-6 weeks).
Drains
Drains, if used, are usually removed after 48 hours.
Wound dressing
Dressings should be removed and wounds checked after 48h, with wound care according to surgeon's preference.
Physiotherapy
The following guidelines regarding physiotherapy must be adapted to the individual patient and injury.
- It is important that the surgeon decide how much mechanical loading is appropriate for each patient's pelvic ring fixation. This must be communicated to physical therapy and nursing staff.
- For all patients, proper respiratory physiotherapy can help to prevent pulmonary complications and is highly recommended.
Upper extremity and bed mobility exercises should begin as soon as possible, with protection against pelvic loading as necessary. - Mobilization can usually begin the day after surgery unless significant instability is present.
Generally, the patient can start to sit the first day after surgery and begin passive and active assisted exercises. - Patients who are treated with spino pelvic fixation constructs are typically allowed to bear weight as tolerated unless precluded by other injuries.
The following applies to patients treated without spinopelvic fixation:
- For unilateral injuries, gait training with a walking frame or crutches can begin as soon as the patient is able to stand with limited weight bearing on the unstable side.
- In unstable unilateral sacral injuries, weight bearing on the injured side should be limited to "touch down" (weight of leg). Assistance with leg lifting in transfers may be necessary.
- Progressive weight bearing can begin according to anticipated healing. Significant weight bearing is usually possible by 6 weeks but use of crutches may need to be continued for three months.
- Fracture healing and sacral alignment are monitored by regular X-rays every 4-6 weeks until healing is complete.
Bilateral unstable sacral fractures and spinopelvic dissociation
Extra precautions are necessary for patients with bilateral unstable sacral fractures and spinopelvic dissociation. Physiotherapy of the torso and upper extremity should begin as soon as possible. This enables these patients to become independent in transfer from bed to chair.
Patients with bilateral unstable sacral fractures and spinopelvic dissociation who are treated with spino pelvic fixation constructs are typically allowed to bear weight as tolerated unless precluded by other injuries.
The following applies to patients treated without spinopelvic fixation:
- For the first few weeks, wheelchair ambulation may be necessary. After 3-4 weeks walking exercises in a swimming pool are started.
- After 6 weeks, if pain allows, the patient can start walking with a three point gait, with less weight bearing on the more unstable side.
Full weight bearing is possible after complete healing of the bony or ligamentous legions, typically not before 12 weeks.


