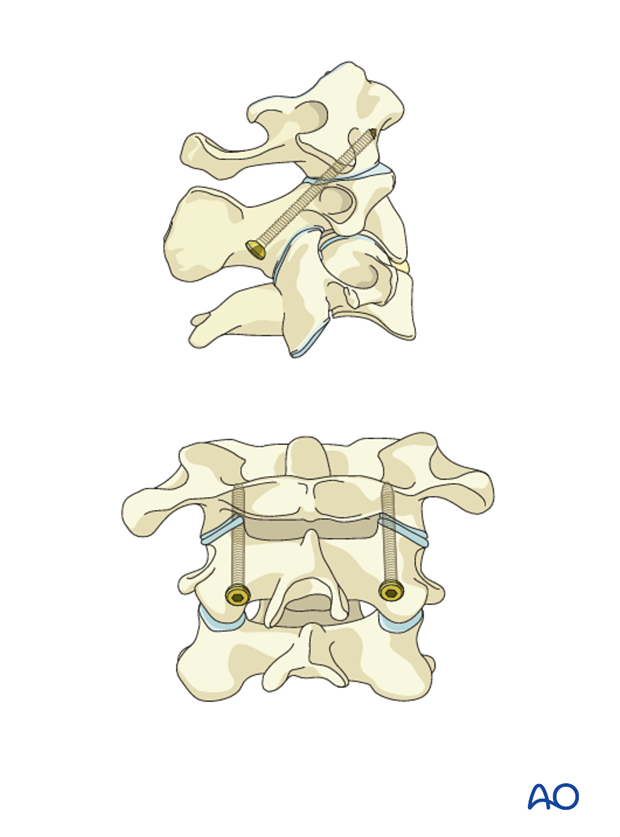
Posterior C1–C2 transarticular screw insertion
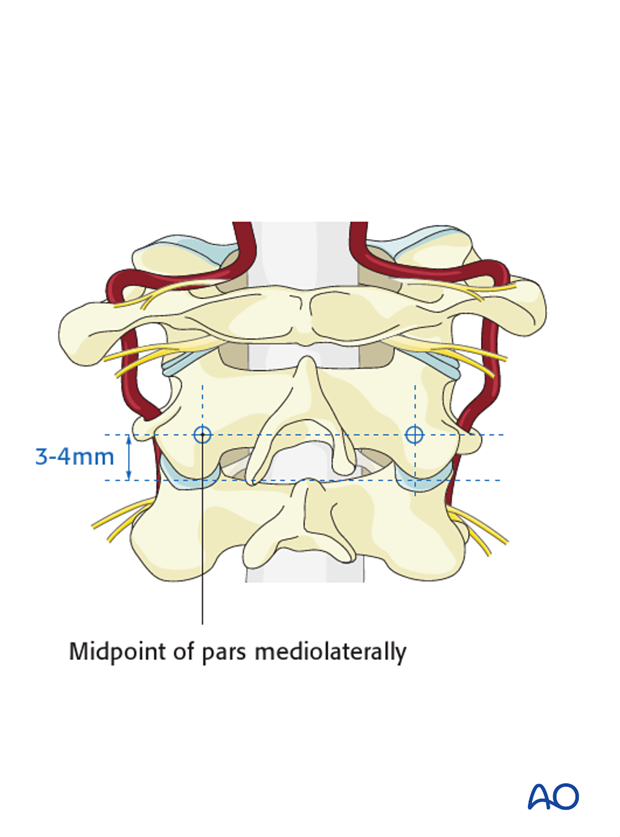
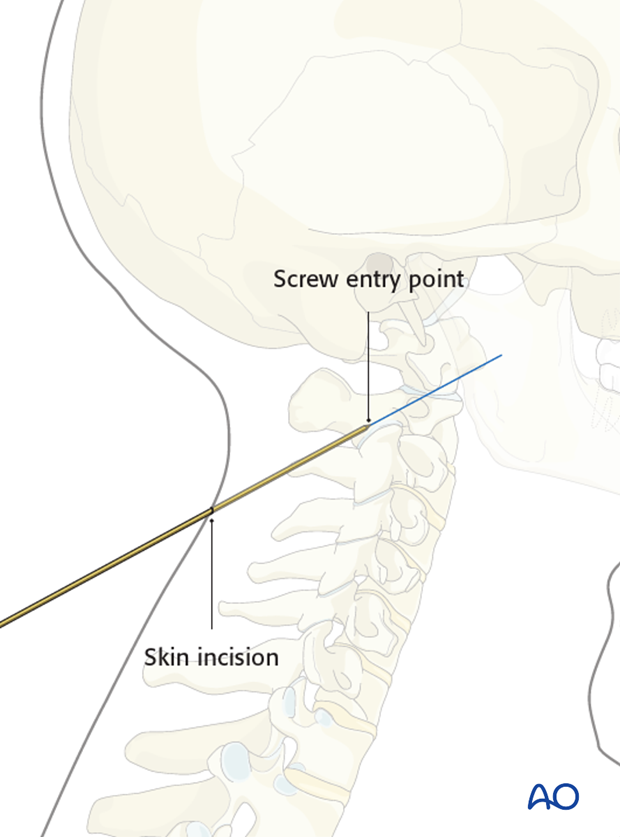
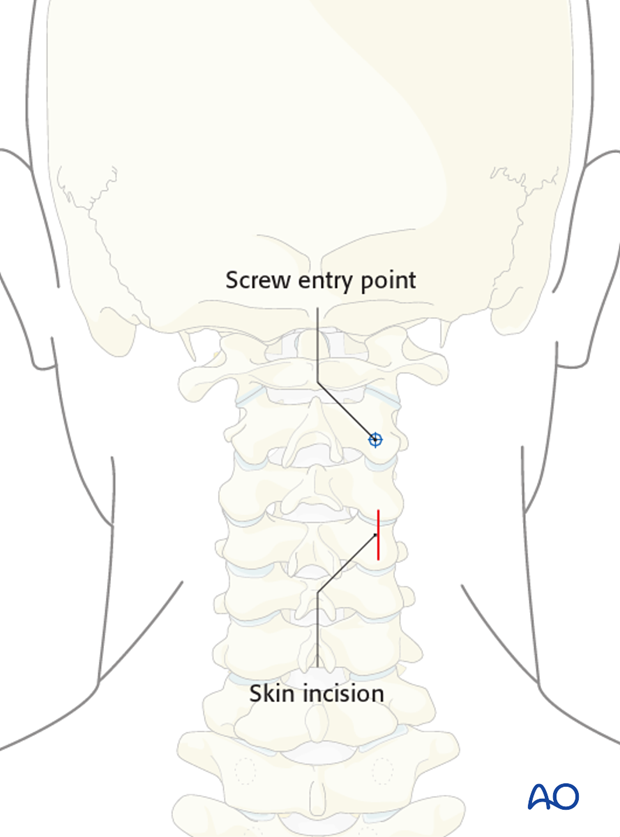
1. Screw entry point
The entry point of the screw is 3–4 mm cranial to the C2–C3 facet joint and in the midpoint of the pars mediolaterally.
2. Screw trajectory
The endpoint of the screw is located so that it just perforates the anterior arch of C1 and has adequate purchase in the lateral mass of C1.
Under lateral fluoroscopy, the landmark for this in the anterior posterior plane is the posterior cortex of the C1 tubercle.
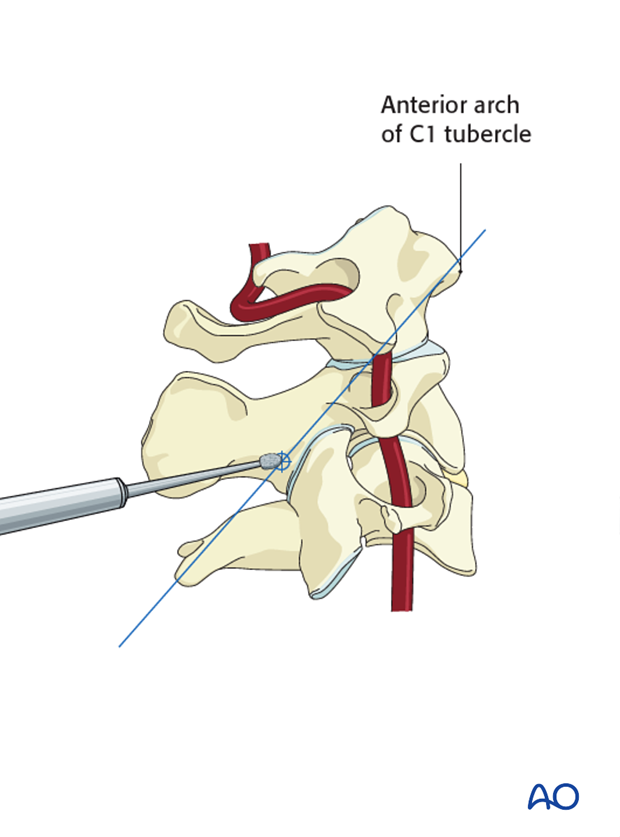
To determine where to insert the guide wire through the skin, hold a guide wire outside the patient under fluoroscopy.
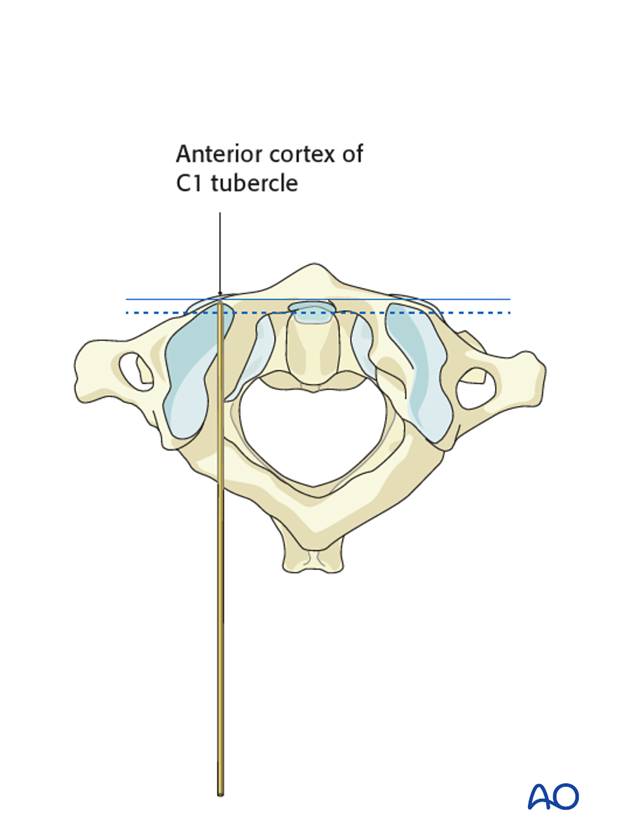
The guide wire trajectory should be aimed such that the tip ends up somewhere between the bottom 25–50% of the anterior tubercle of C1 (see illustration).
A straight guide wire going from the endpoint to the starting hole will determine where the skin incision needs to be made.
3. Guide wire insertion
Make a 10 mm skin incision at the K-wire entry point.
Place a small burr hole as the starting point for the guide wire.
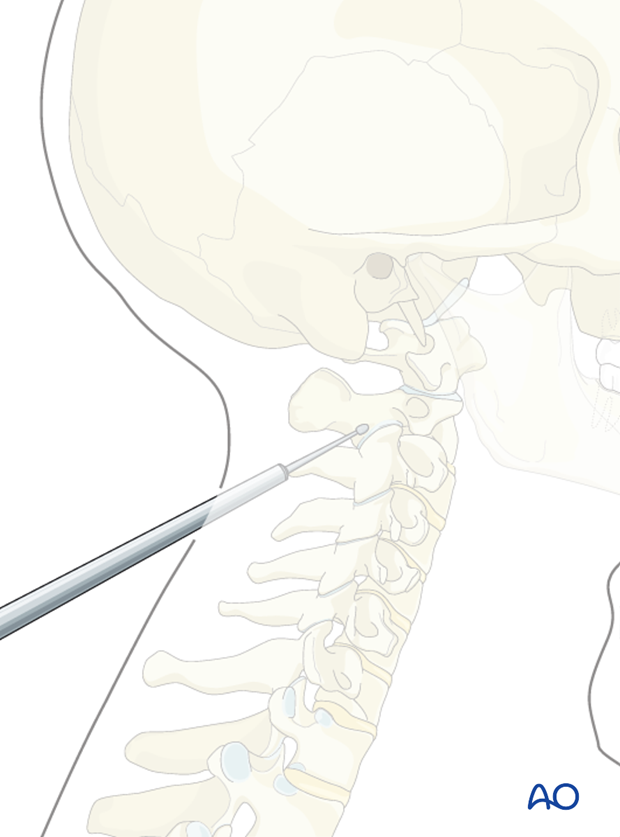
Insert and advance the guide wire under fluoroscopic guidance until the tip is docked at the prepared starting point.
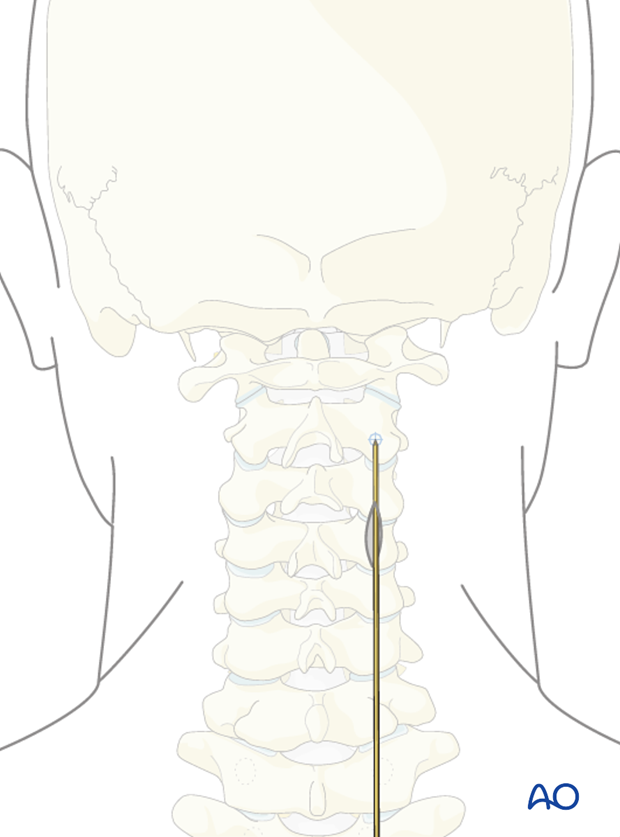
Using a wire driver, advance the guide wire until it reaches the end point.
In the lateral fluoroscopic view, the tip of the guide wire should not advance further than the posterior cortex of the C1 tubercle.
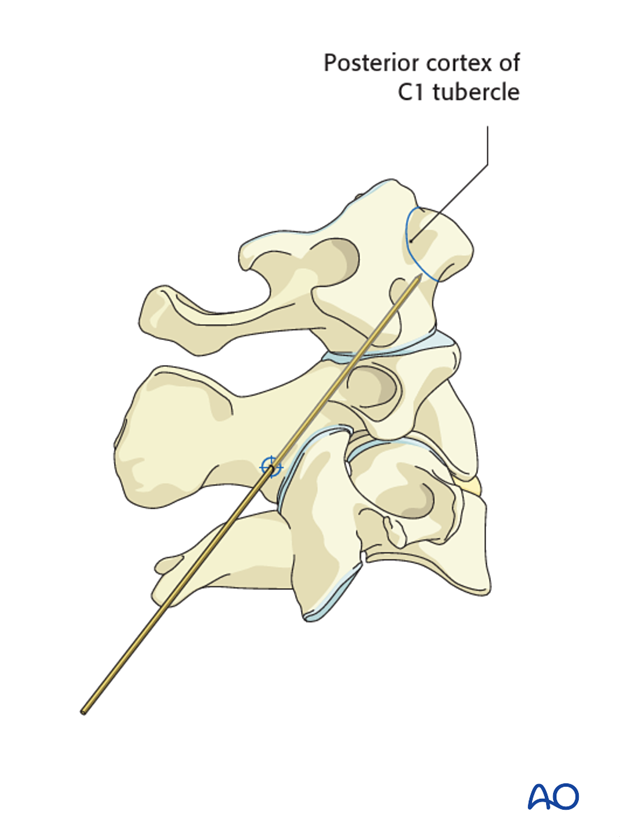
Take care to prevent penetration of the anterior cortex.
4. Screw insertion
Under fluoroscopic guidance, drill, tap, and insert the screw.
During the drilling and tapping, check fluoroscopy to make sure that the guide wire is not being advanced. Failure to do so can result in the guide wire injuring structures in the retropharyngeal region.
