Splint or plaster
1. Introduction to tibial fracture reduction and cast application
Periprosthetic fractures about a total knee replacement can occasionally be treated without surgical intervention as long as the patient is able to mobilize with limb immobilization.
2. Preparation for cast application
It is essential to prepare the patient and all necessary material and equipment before beginning the processes of fracture reduction and cast application.
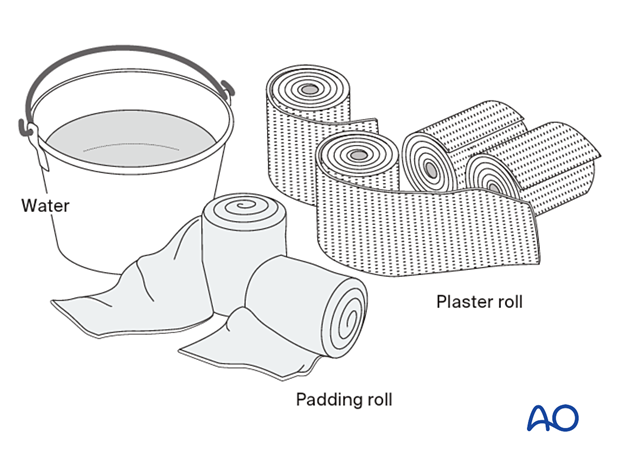
Required material
- 2-4 rolls 150 mm padding
- 8-9 plaster of Paris (POP) rolls, 150 mm wide
- Bucket with cool water
- Pillows to support casted leg
Everything must be assembled and ready before beginning the procedure.
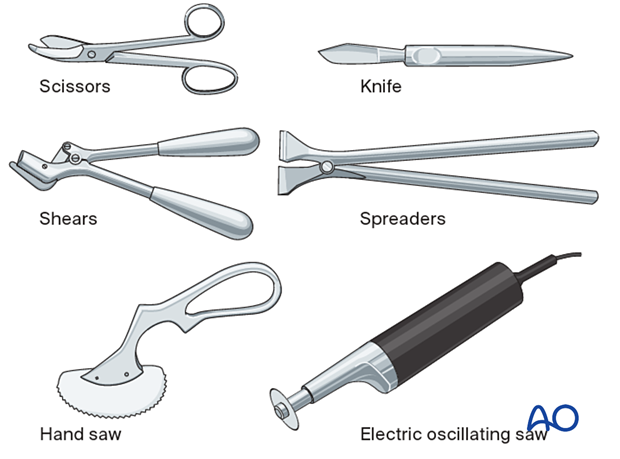
Required equipment
Scissors and a knife can be used to cut POP cast when still wet, just before it sets.
The other tools are required for dry POP.
3. Fracture reduction
Reduction principles
Reducing a fracture means restoring acceptable alignment.
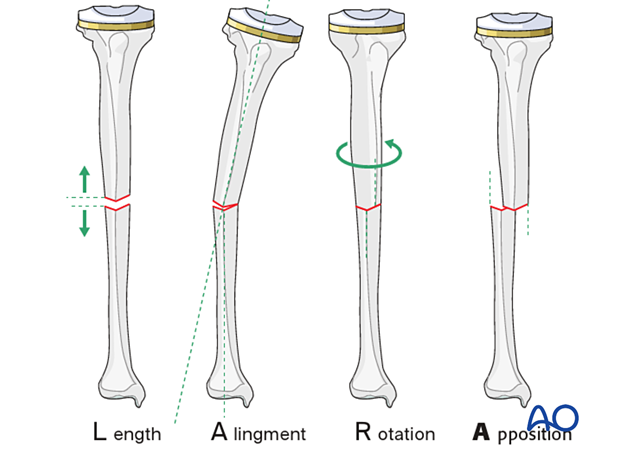
Proper reduction of a tibial shaft fracture requires correction of
- length
- axial alignment
- rotation
- apposition (bone contact)
If no x-rays are available during the procedure, the reduction is orientated with reference to the uninjured leg.
Reduction
During fracture reduction, the patient needs pain relief and muscle relaxation. Depending on the resources, this might be analgesia plus sedation, but preferably regional or general anesthesia.
Once the pain relief takes effect, the splint can be removed, and the knee gently bent so that the lower leg is in a hanging position.
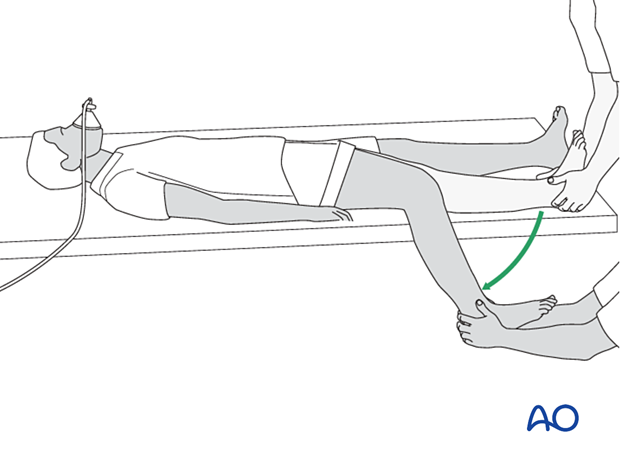
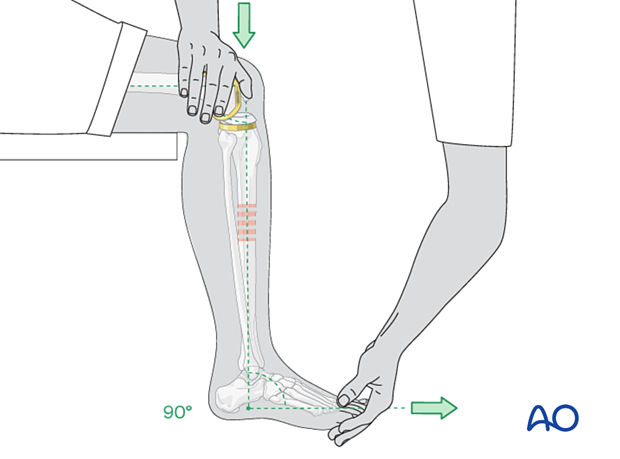
Fracture reduction is easiest with the leg hanging beside the table, with enough space between the leg and the table edge to apply the cast. The fully flexed knee relaxes the calf muscles, helps control rotation, and permits ankle dorsiflexion to neutral (90° to the leg).
The person treating the fracture pulls with both hands on the heel and ankle to overcome any shortening.
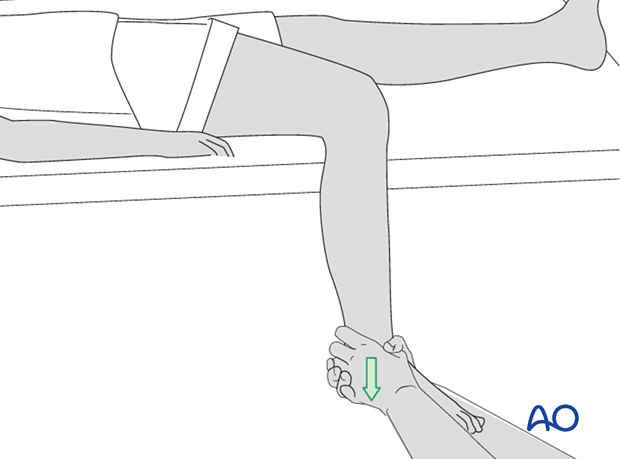
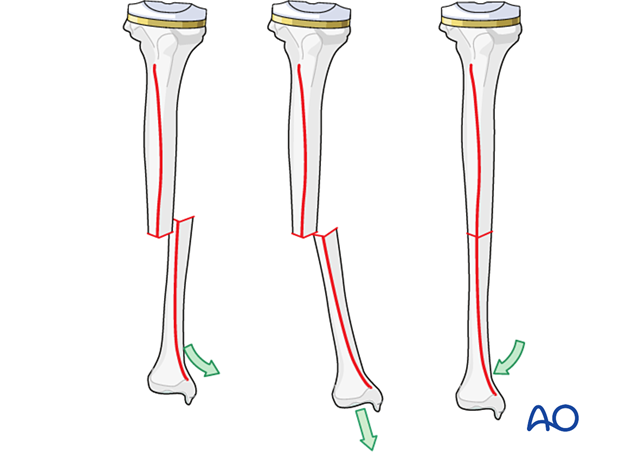
The illustration demonstrates the reduction of a transverse fracture. Reducing the distal fracture fragment anatomically restores length. The length is stable if the distal fragment is "hooked onto" the proximal one. A cast can maintain this length-stable reduction easily.
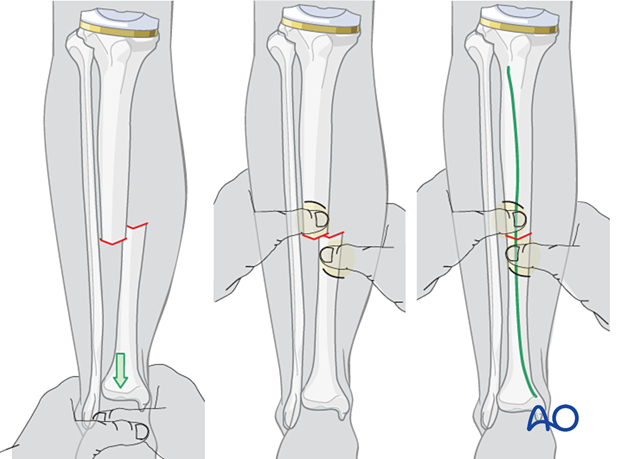
Fractures that are not transverse (spiral, oblique, or multifragmentary) cannot be "hooked on" and thus lack length stability. Shortening of 1 cm or even 2 cm is acceptable, but axial alignment, rotation, and apposition are still important to restore.

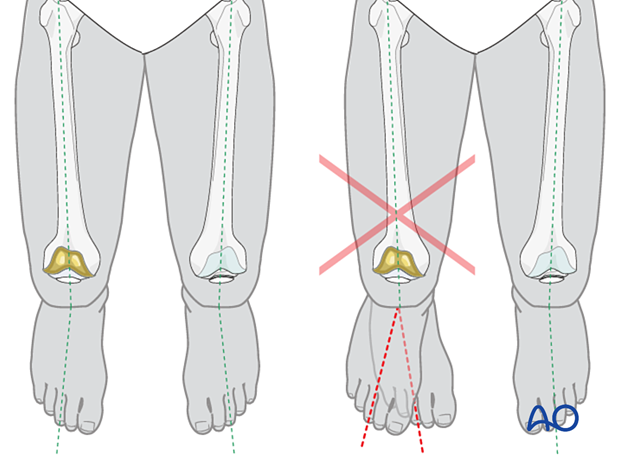
Rotation and apposition can be judged and corrected by aligning the anterior tibial crest of the distal fragment with the proximal one. This part of the reduction is aided and confirmed by local palpation. Rotational alignment is indicated by the angle between the foot axis and that of the thigh. This angle should match that of the opposite lower extremity. In general, coronal plane alignment should be within 5 degrees of angulation and sagittal plane alignment should be within 10 degrees.
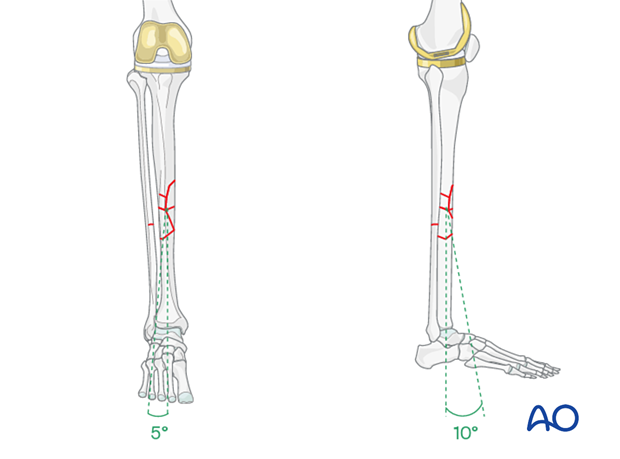
Reduction tip
End-on-end apposition of a transverse fracture can be difficult to achieve with traction and transverse pressure. In this case, as illustrated, increasing angulation may allow the fracture ends to be hooked, followed by deangulation to correct the tibial axis.
4. Cast application
Cast application requires the aid of an assistant. One person holds the reduction while the other (operator) applies the cast. If both are skilled in cast application, typically the one in charge takes responsibility for holding the reduction. If he or she must personally apply the cast, the assistant holds the leg.
The reduction should be repeatedly verified during cast application.
Holding the reduced position
The leg-holder stands on the medial side of the injured leg and controls the knee and thigh position while holding the ankle dorsiflexed to neutral. Rotational alignment is approximated by holding the big toe in line with the patella, as seen from superiorly or anteriorly. This maintains the normal slight external rotation of the tibia.
This technique usually holds the reduction that has been achieved and allows the operator to apply the padding and the plaster cast.
Assessment of rotational reduction
The best way to assess the rotational alignment of the tibia is by means of the angle between the long axes of the thigh and of the foot. If the rotational reduction is correct, the long axis of the foot is slightly externally rotated relative to the axis of the thigh. This foot-thigh angle should be the same as for the opposite lower extremity.
Application of POP
One of the treating team applies the padding from below the ankle to just above the knee.
Next, while maintaining the fracture reduction, apply around the lower leg 2-3 rolls of POP (dipped in cold water to give more time until hardening).

The POP cuff is molded firmly to the lower leg whilst keeping traction on the heel. Relax the molding pressure only when the POP cuff is firm (4-5 minutes).

Once the plaster cuff around the lower leg has dried and it stabilizes the fracture, the padding and the plaster are extended down around the ankle and the foot as far as the metatarsophalangeal (MTP) joints. Take care not to extend the plaster over the dorsum of the MTP joints, as this blocks dorsiflexion.
Do not let padding lie between layers of plaster.
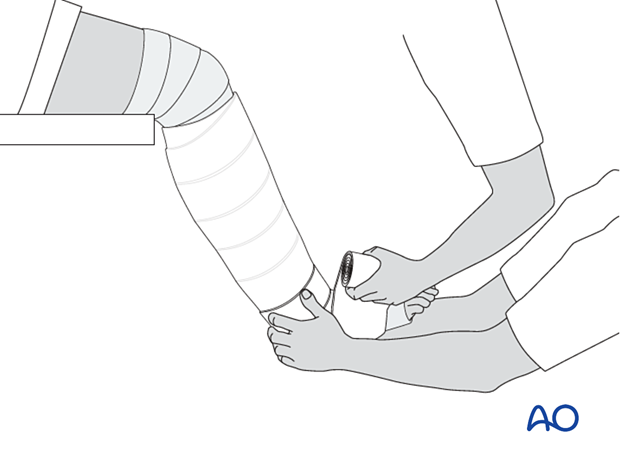
Once the below-knee plaster cast is firm, the knee is extended, and the lower leg lifted onto a cushioned leg support. One caregiver holds the foot and lower leg to maintain flexion of the knee at about 30° and the other extends the padding and the plaster as high as the upper thigh, remembering not to place padding between layers of plaster.
Always support the wet plaster with the flat hand, do not press dimples into the plaster with the fingertips, as this can cause pressure points inside.
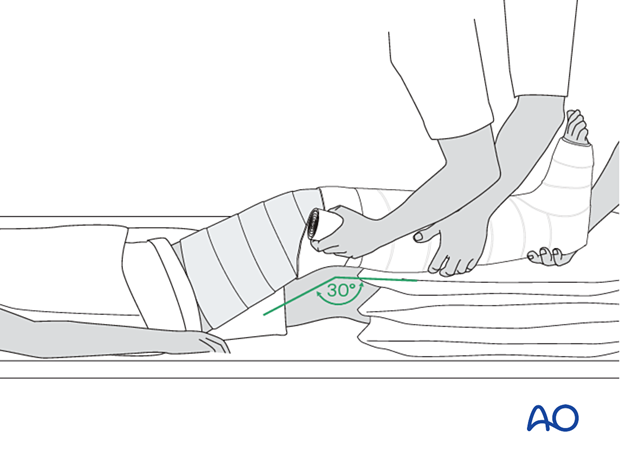
It is important to hold the knee position until the entire cast is firm.
The weak point of the plaster is the junction between the already well-dried below-knee POP and the extension to the above-knee cast.
This region should be reinforced with an extra roll of plaster.
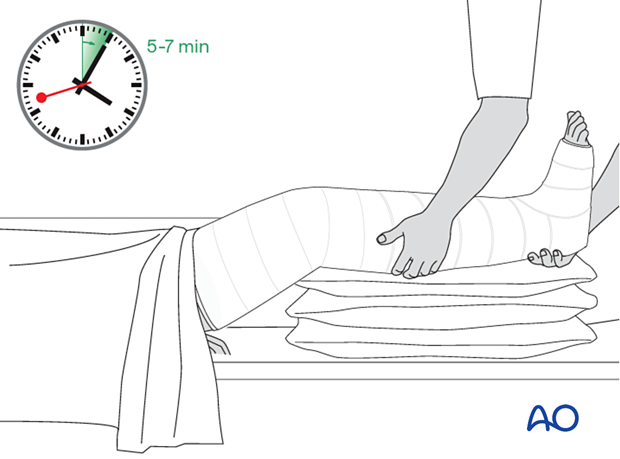
X-ray control after reduction should be delayed until the POP is quite dry (24-48 hours). The x-ray will confirm whether the position is acceptable or not.
5. Aftercare
General guidelines
If a plaster cast becomes loose, it should be removed and replaced with a new one, preferably waiting until the fracture has become sticky enough (+/- 4 weeks) to avoid losing the reduction during the replacement procedure.
The non-weight bearing should be maintained for 2-4 weeks depending on the fracture type.
Then graduated partial weight-bearing should be started and increased to full weight bearing by about 6 weeks.
Depending on fracture type, consideration of the transition from a long cast to a patellar tendon bearing cast should be made.
Weight-bearing requires protection of the cast bottom with a cast shoe, oversized sneaker, or equivalent.
Tibial shaft fractures usually take between 3 and 5 months for complete healing. If the foot is in a functional position, graduated partial weight bearing can begin as soon as possible comfort and presumed fracture stability permit.
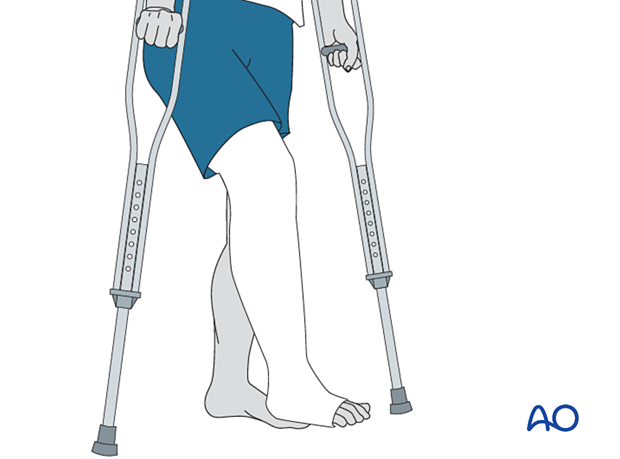
The plaster cast should not be removed until the fracture is stably healed. This is usually indicated by the patient’s ability to bear full weight in the cast without pain. For tibial shaft fractures, this will rarely occur before 14 weeks after injury. Displaced fractures or fractures due to high energy forces usually take longer to heal. It is usually necessary to replace the first cast before the fracture is healed sufficiently. Check stability carefully when definitive removal is done. Sometimes alignment that initially feels stable will be lost during the first week or two after cast removal. It is wise to check the patient within a couple of weeks to avoid missing such delayed deformity until it is very hard to correct.
After removal of the cast, and confirmation of a stable nontender fracture, rehabilitation should involve the dedicated knee and ankle mobilization for a prolonged period. Even if fully weight-bearing before cast removal, the patient may need crutches and partial weight-bearing for a period after cast removal.
At this stage, it may be advisable to give an anti-inflammatory for four weeks.
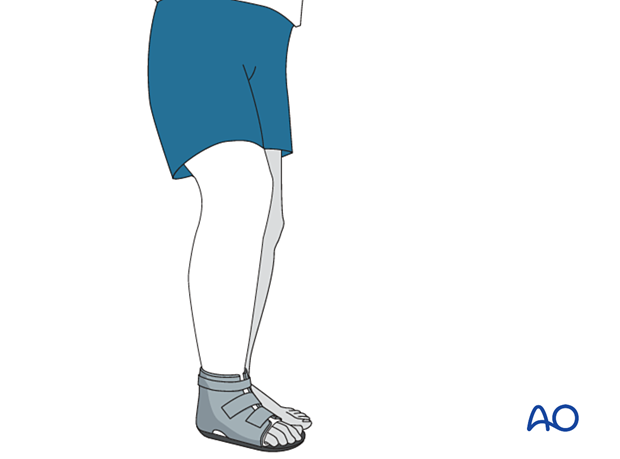
6. Sarmiento’s Patellar tendon-bearing cast
In mid-shaft and more distal tibial fractures, a patellar tendon-bearing (PTB) cast, as described by Sarmiento, can be applied. For more stable fractures, this cast may even be applied earlier than 6 weeks. For undisplaced tibia shaft fractures without significant swelling, it might even be used as the initial cast.
The application of such a cast requires considerable experience, especially the molding in the infrapatellar region.
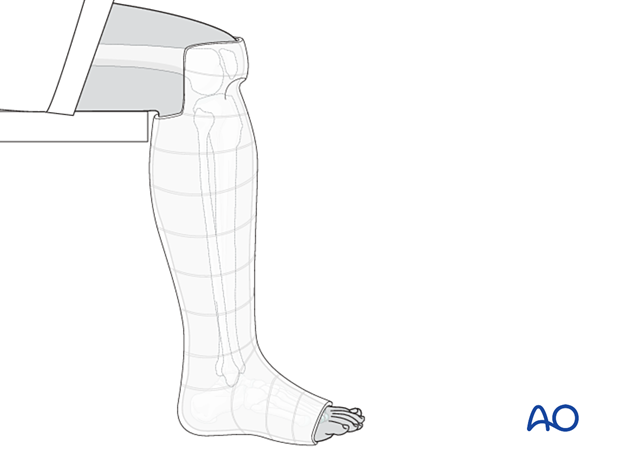
Application of the Sarmiento cast
Where materials are available, the cast can be made of fiberglass or thermoplastic material. Additionally, hinged foot support can be used to replace the cast around the ankle and foot, permitting also the mobilization of the ankle.
The patient sits on the edge of a table. The lower leg is steadied, and stocking and padding are applied above the knee. All bony prominences are protected by extra padding.
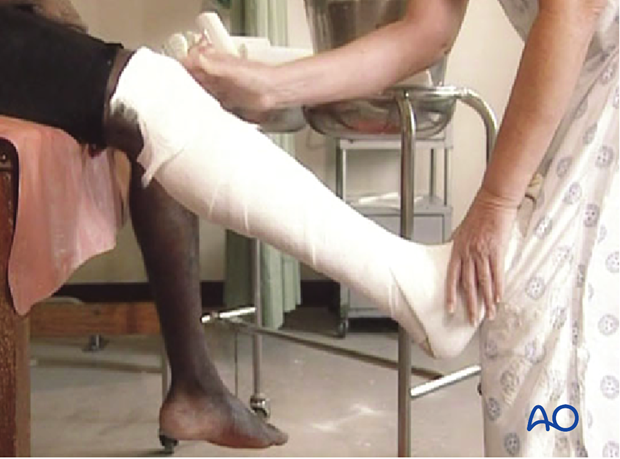
The POP is applied above the knee and then later trimmed to above the patella in front and below the popliteal fossa at the back.
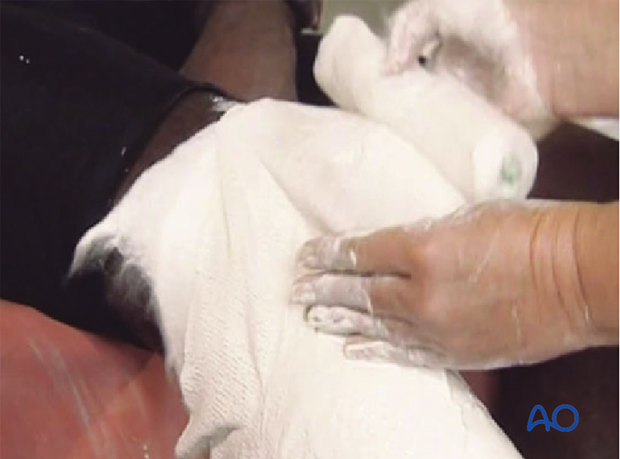
Molding of the Sarmiento cast
Before setting, the plaster is molded to fit the contours of the proximal tibia and fibula, not only around the tibial tubercle and patellar tendon, but also the fibular head, peroneal nerve, and posterior proximal calf. The cast should be triangular in cross-section, flat posteriorly, and molded to match the prominent tibial tubercle. This molding forces the cast away from the fibular head and peroneal nerve, helping to avoid local pressure. The prior total knee incision should be considered when selecting this type of mobilization in order to ensure its integrity.
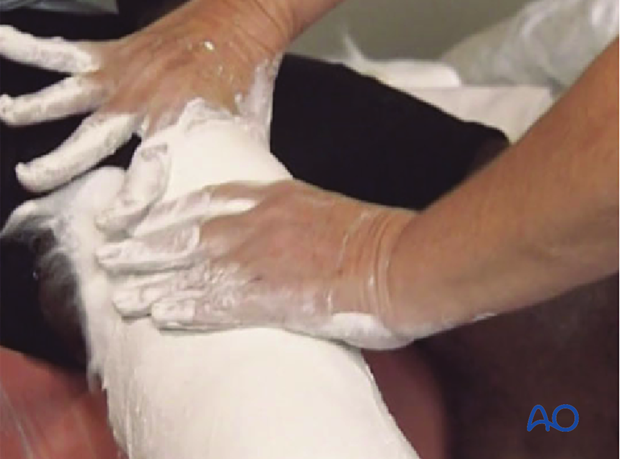
Trimming of the Sarmiento cast
Once firm, the proximal margin of the cast is trimmed from the proximal pole of the patella, circumferentially to the proximal part of the calf. Note that the posterior trim line is thus more distal than the anterior edge of the cast since it must be just below the popliteal flexion crease.
Check that knee extension is full, and that the knee can flex to 90 degrees. Then cast edges are padded by turning down the padding and stocking, to provide cushioning. The stocking is then secured to the outside of the cast with a little additional plaster.
Weight bearing
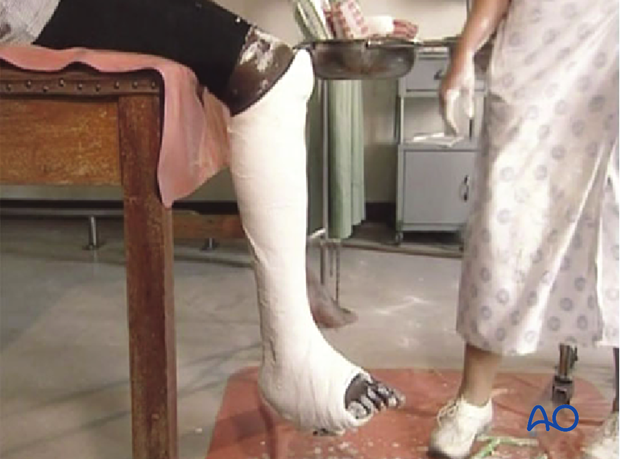
Once the plaster is fully hardened (24-48 hours), a cast shoe may be applied and weight-bearing and knee flexion started. The cast is retained until the union is sound, and the patient can comfortably bear full weight.
Gait training in a PTB cast is essential to ensure full knee extension, which is necessary for optimal fracture stability in this cast.
AO teaching video on Sarmiento / patellar tendon-bearing cast application
