Traction and bed rest
1. General considerations
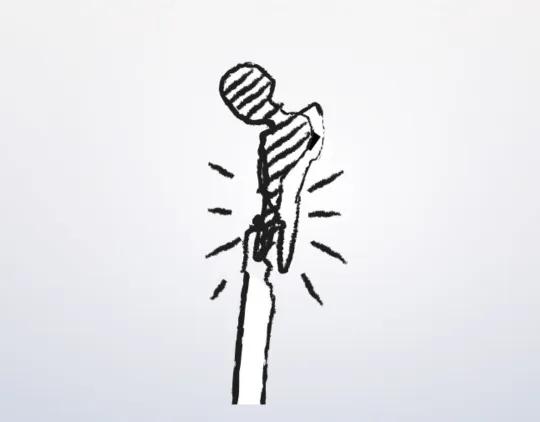
Periprosthetic fractures of the femur and acetabulum are often treated operatively.
Traction and bed rest are usually used as a temporary management strategy prior to operative treatment for unstable fracture types.
Nonoperative treatment means that the patient will be in a form of traction for at least 6-8 weeks, often 10-12 weeks.
The initial treatment is usually skin traction, later converted to skeletal traction.
Disadvantages of prolonged skin traction are:
- Loosening
- Constriction
- Friction
- Allergy
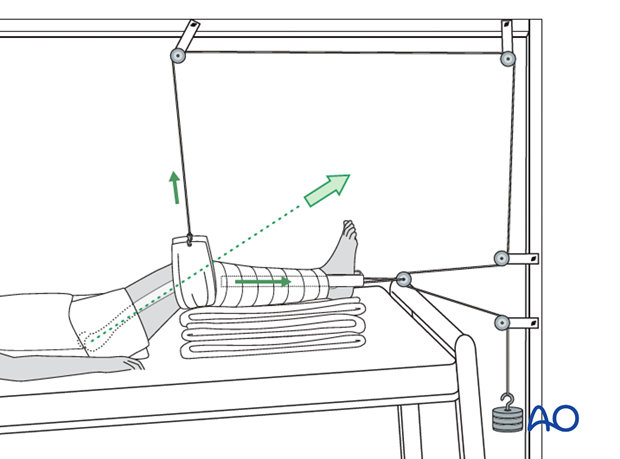
If skin traction is likely to be used for more than 24 hours, greater patient comfort and better control of the femoral fracture can be achieved by using Hamilton-Russell skin traction.
A padded sling is placed behind the slightly flexed knee and skin traction applied to the lower leg. The traction cord and pulley system is as illustrated.
The principle of the parallelogram of forces determines that the upward pull of the sling and the longitudinal pull of the skin traction create a resulting force in the line of the femur, as illustrated.
This configuration of traction also allows control of rotation, by side-to-side adjustment of the pulley above the knee.
2. Skin traction
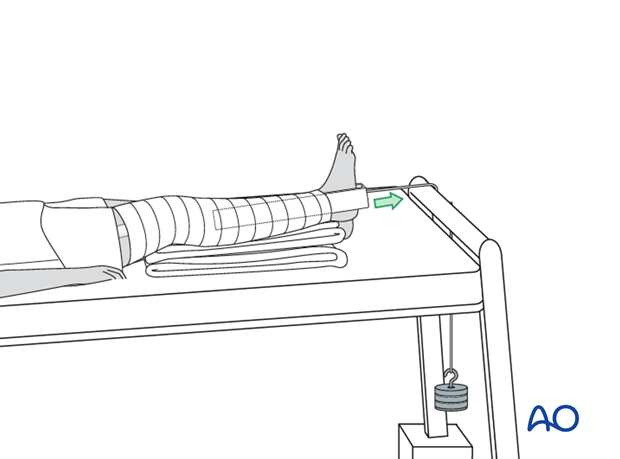
Skin traction over the end of the bed with 7 kg will be the initial treatment of a femoral fracture.
With the tilted bed the weight of the patient acts as countertraction.

This photograph shows a commercially available skin traction kit.
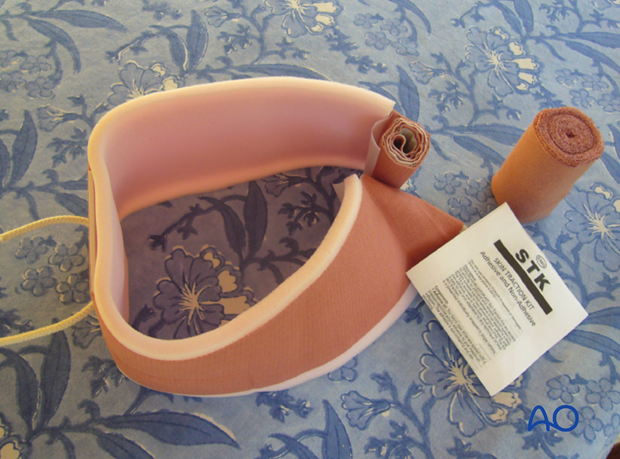
Prior to the application of the adhesive traction strip, the skin is painted with friar’s balsam.
The strip is then applied below the level of the fracture on the medial and lateral aspects of the leg as shown, carefully avoiding any creases.
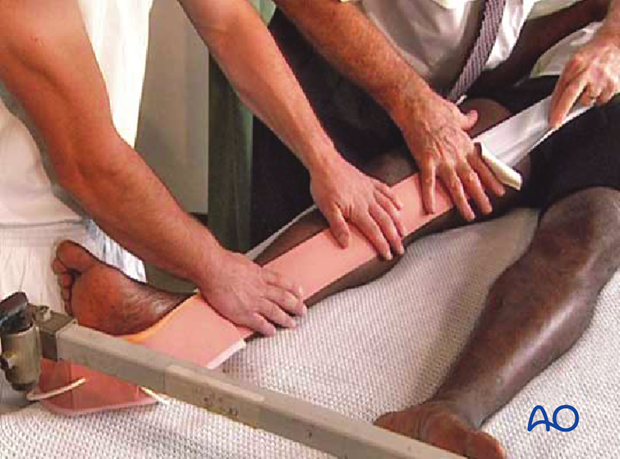
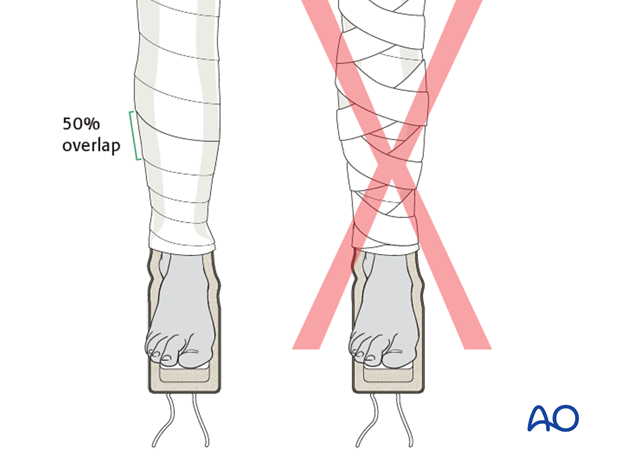
To prevent the development of blisters, the skin traction needs to be applied without folds or creases in the adhesive material and the covering bandage should be non-elastic.
Should a crease be inevitable, due to the contour of the limb, the creased area should be lifted, partially slit transversally and the edges overlapped.
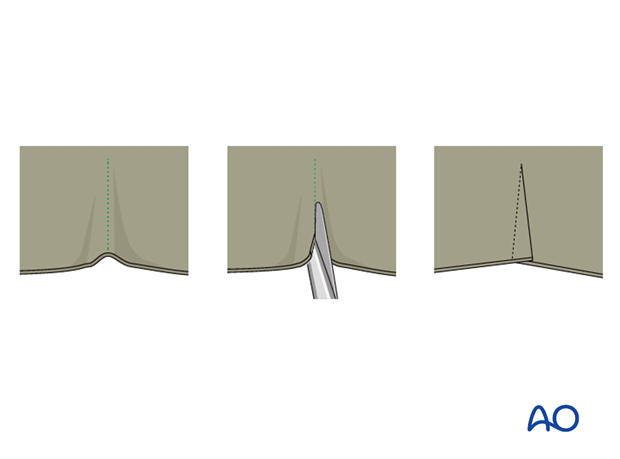
Once the adhesive strip is satisfactorily in place, ensuring that the padded lower section overlies the malleoli, a spiral inelastic bandage is carefully wrapped around the limb from just above the malleoli to the top of the strip.
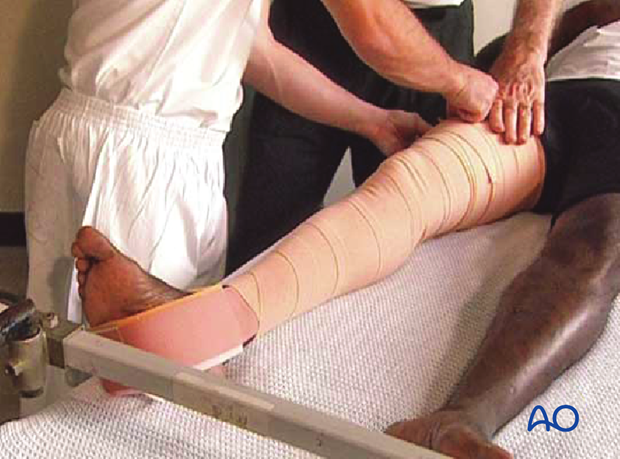
Apply the overlying bandages spirally overlapping by half.
The traction strip should be applied to the level of the fracture only, but not above.
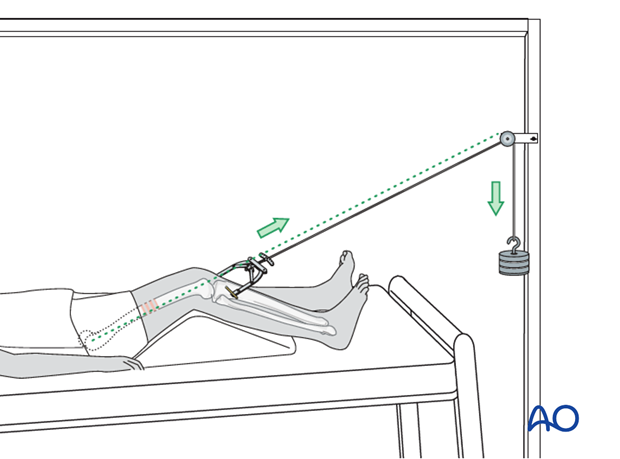
3. Skeletal traction via distal femur pin
Preparation
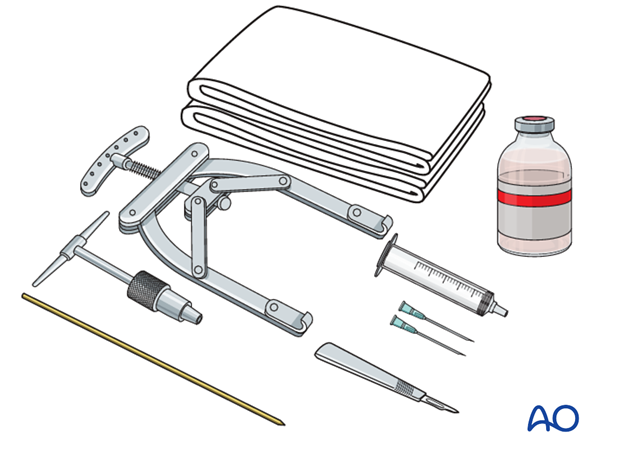
Equipment needed:
- Sterile towels
- Disinfectant
- Syringe
- Needles
- Local anesthetic
- Scalpel with pointed blade
- Sharp pointed Steinmann pin or K-wire
- Jacobs chuck with T-handle or wire driver
- Stirrup
- Traction bowl
- Weights
- Rope
- Traction setup on hospital bed
Anesthesia
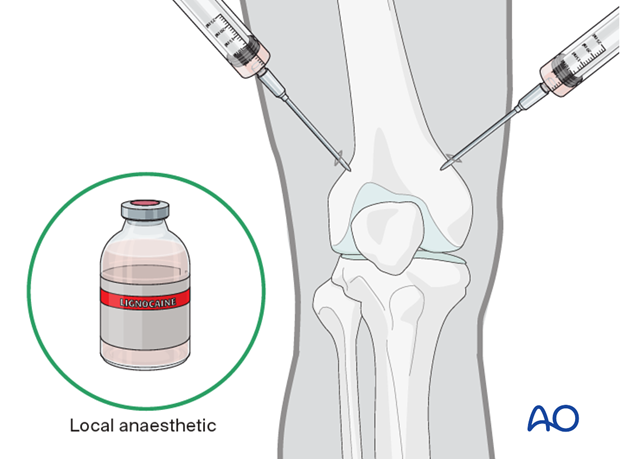
After painting the skin with antiseptic and draping with sterile towels, inject a bolus of local anesthesia on each side of the distal femur (into the medial skin at the proposed site of pin insertion and laterally at the anticipated exit point). Infiltrate down to the periosteum, roughly 2-3 fingers above the superior pole of the patella.
Pin insertion
Flex the knee to 30° palpating the patella for neutral rotation. At the entry point, a stab incision is made through the skin with a pointed scalpel.
A Steinmann pin or K-wire, mounted in the T-handle or wire driver, is inserted manually at a point about 2-3 fingers above the superior pole of the patella.
As the pin is felt to penetrate the far cortex, check that the exit will coincide with the area of local anesthetic infiltration. If not, inject additional local anesthetic. Once the point of the pin clearly declares its exit site, make a small stab incision in the overlying skin.
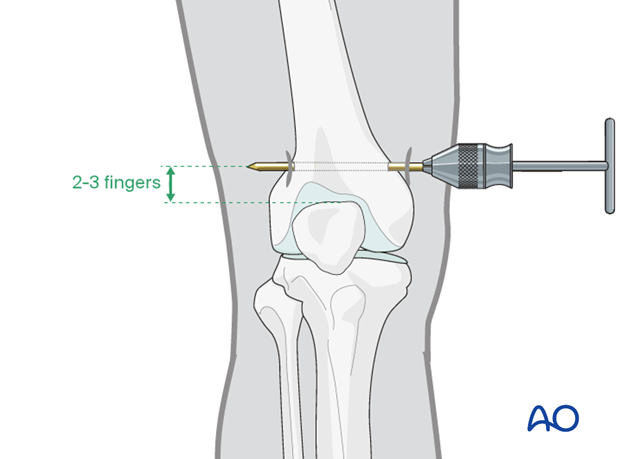
Ensure that there is no tension on the skin at the entry and exit points. If there is, then a small relieving incision may be necessary.
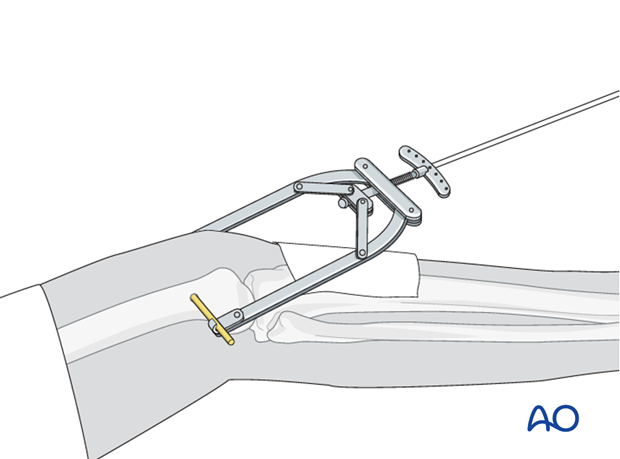
Connect the pin with an appropriate traction stirrup.
Be sure to pad the extremity from the traction bow.
Pin care
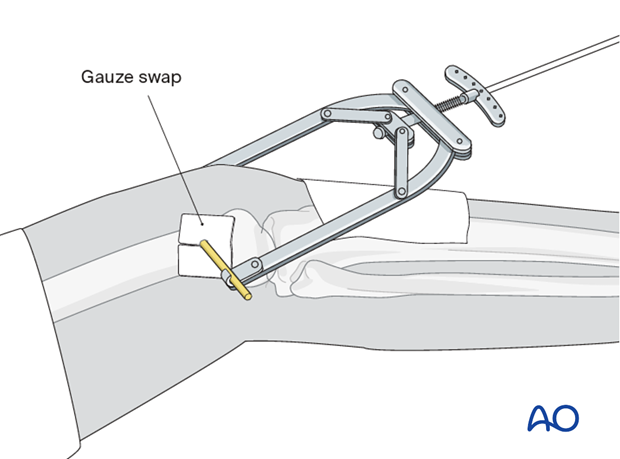
To prevent pin track infection, apply a slit gauze swab around the pin and do not remove the crust that develops around the pin on the skin. The gauze swab should only be changed infrequently.
Reduction
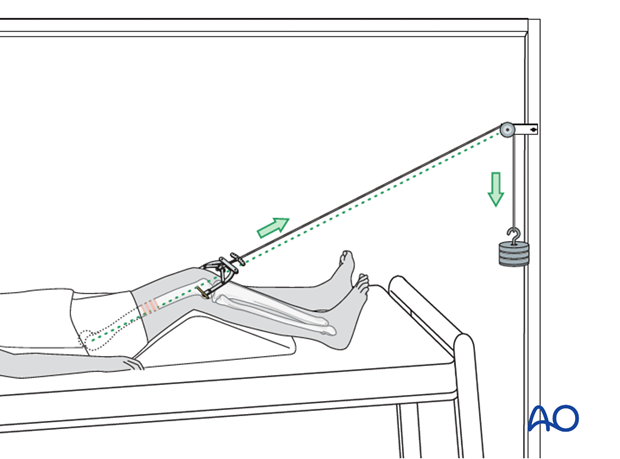
The pull on the femur (weight at the end of the traction) should be enough to correct length and to reduce the fracture.
For maintenance traction 10% of the patient’s body weight is usually sufficient.
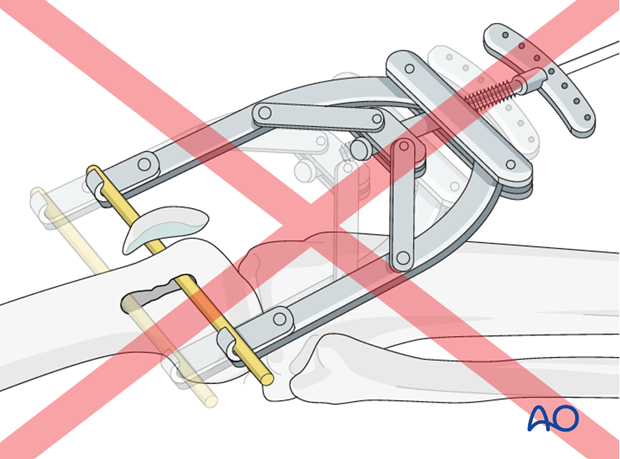
The pull should always be in line with the femur.
The thigh can be supported on a firm triangular foam wedge, or by folded pillows.
4. Skeletal traction via tibial pin
Preparation
Pack with:
- Sterile towels
- Disinfectant
- Syringe
- Needles
- Local anaesthetic
- Scalpel with pointed blade
- Sharp pointed Steinmann pin, or Denham pin
- Jacobs chuck with T-handle
- Stirrup

Anesthesia
After painting the skin with antiseptic and draping with sterile towels, inject a bolus of local anesthesia on each side of the tibial tuberosity, into the lateral skin at the proposed site of pin insertion and medially at the anticipated exit point, infiltrating down to the periosteum.

Pin insertion
At the entry point, a stab incision is made through the skin with a pointed scalpel.
A Steinmann pin or K-wire, mounted in the T-handle or K-wire driver, is inserted manually at a point about 2 cm dorsal to the tibial tuberosity.
As the pin is felt to penetrate the far cortex, check that the exit will coincide with the area of local anesthetic infiltration. If not, inject additional local anesthetic. Once the point of the pin clearly declares its exit site, make a small stab incision in the overlying skin.
Once the pin is in place, ensure that there is no tension on the skin at the entry and exit points. If there is, then a small relieving incision may be necessary.
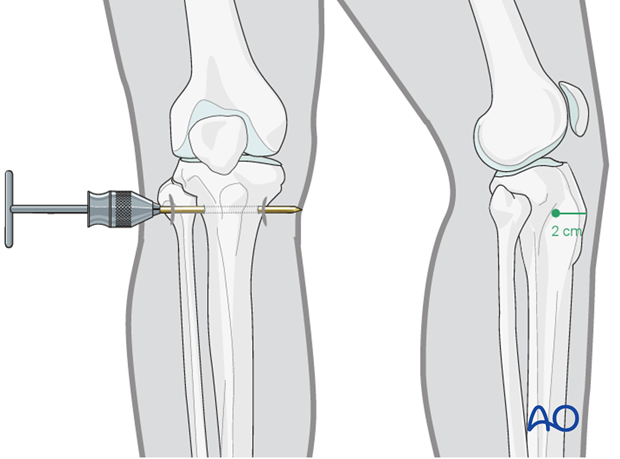
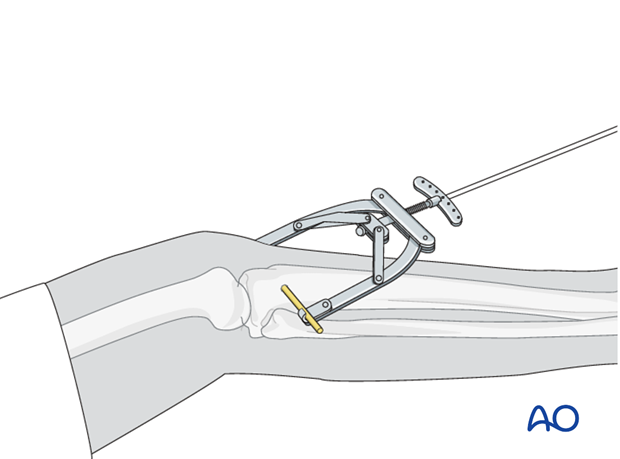
Connect the pin with an appropriate traction stirrup.
It is important that the stirrup be freely mobile around the traction pin, to prevent rotation of the pin within the bone. Rotating pins loosen quickly and significantly increase the risk of pin track infection.
Be sure to pad the extremity from the traction bow.
Reduction
The pull on the femur (weight at the end of the traction) should be enough to correct length and to reduce the fracture.
For maintenance traction 10% of the patient’s body weight is usually sufficient.
The pull should always be in line with the extremity.
The thigh can be supported on a firm triangular foam wedge, or by folded pillows.
