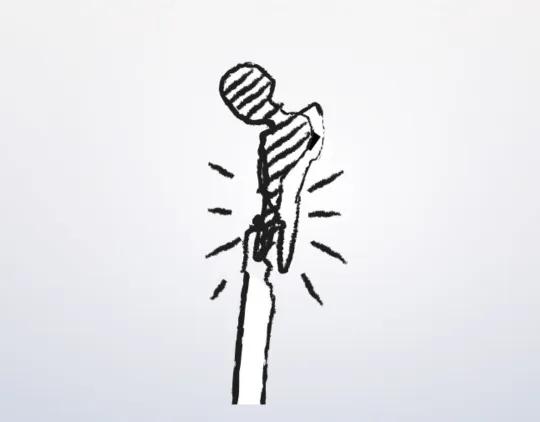
Femur – Extended Trochanteric Osteotomy
1. Preliminary remarks
Scar tissue due to previous exposure might obscure typical landmarks.
The posterolateral approach to the hip for arthroplasty in the lateral decubitus position is essentially the same as the Kocher-Langenbeck, but exposure is limited to the hip joint, respecting but not exposing the sciatic nerve. The femoral attachment of the short external rotators and the hip capsule should be repaired if possible, to reduce the risk of postoperative dislocation.
The anterior approach to the hip for arthroplasty in the supine position is the distal aspect of the Smith-Petersen approach. The direct head of the rectus femoris is ideally maintained.
The ETO will be described for a posterolateral approach as this tends to be the workhorse for the revision arthroplasty.
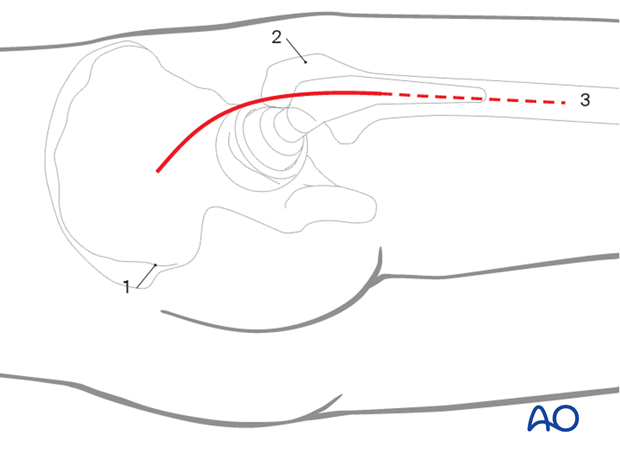
2. Skin incision
Outline all bony landmarks with a sterile marking pen:
- Posterior superior iliac spine (PSIS)
- Greater trochanter
- Shaft of femur
A curvilinear incision centered at the greater trochanter and carried distally to the level of the tip of the femoral prosthesis.
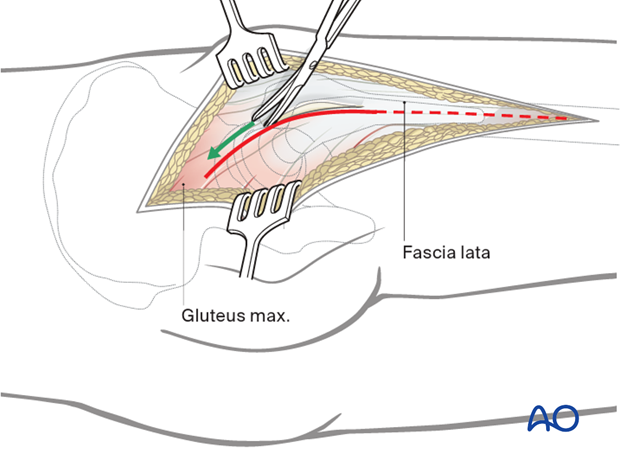
3. Dissection of fascia lata
Incise the fascia lata in line with the skin incision and extend distally to incorporate the entire ETO, exposing the vastus lateralis for a subvastus approach.
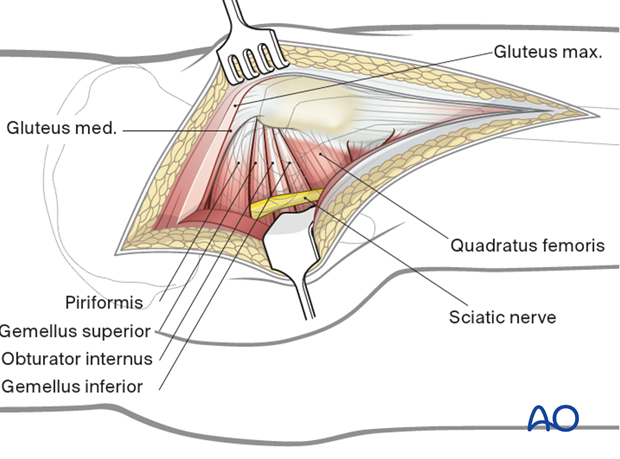
4. Protection of sciatic nerve
Retraction of the gluteal muscle flap posteriorly shows short external rotators inserting on femur (at least partially obscured by fat). The sciatic nerve can be palpated posteriorly in the depths of the wound. Its exposure is not necessary for uncomplicated hip arthroplasty, but the surgeon should be aware of the nerve’s location and avoid injuring it with retractors. The surgeon should consider exposing the sciatic nerve for more extensive surgical dissection.
5. Exposure of short rotator tendons
Bluntly dissect the tendinous insertions of the short external rotators.
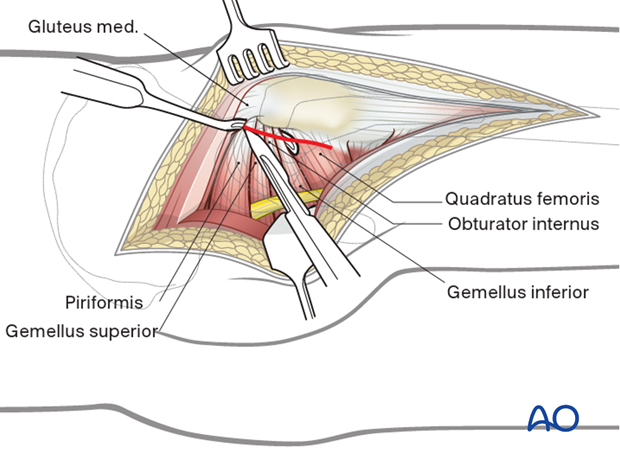
6. Exposure
Before dividing the tendons, place heavy, nonabsorbable stay sutures for retraction and subsequent repair. One suture can be placed in the piriformis tendon, and the other in the conjoined tendons of obturator internus and gemelli. Reflection of the short rotator muscles exposes the hip capsule. Next, enter the joint with a broad-based capsulotomy as shown.
Alternatively, the short external rotators and the capsule can be taken down together.
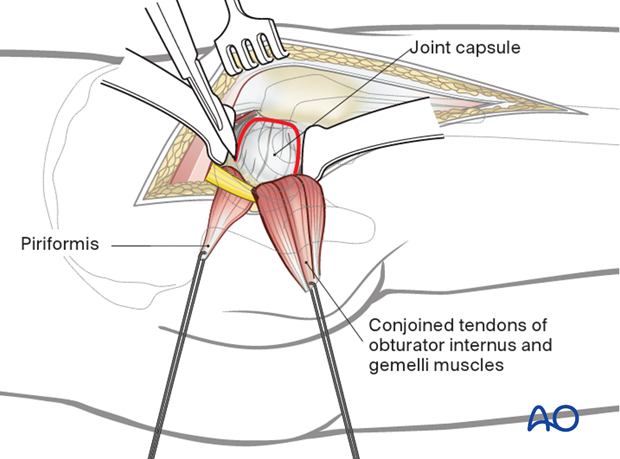
Expose the hip joint by creating and reflecting a full thickness, broad-based flap through the posterior hip capsule. Heavy (e.g. #2) non-absorbable sutures can be used to tag the capsule to aid in retraction and subsequent repair.
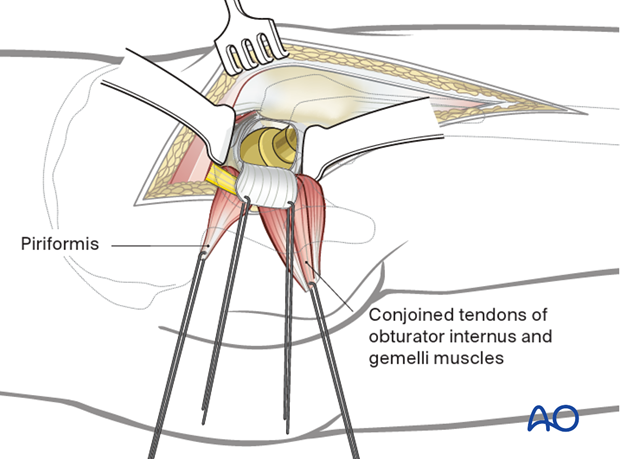
7. Extended Trochanteric Osteotomy (ETO)
In order to preserve vascularity of the femur, soft tissue stripping should be limited.
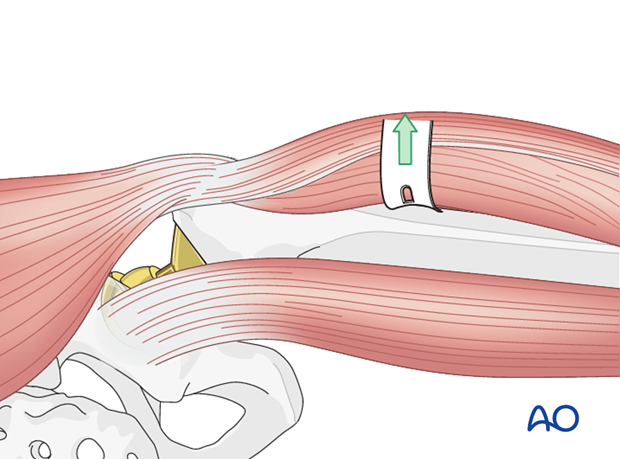
Outline the osteotomy using multiple drill holes with a narrow, high-speed pencil burr or a drill bit. Begin at the base of the greater trochanter in the sagittal plane and extend distally, staying just anterior to the linea aspera.
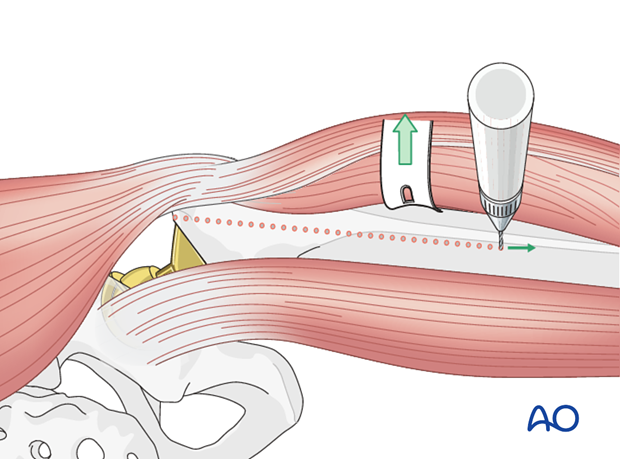
Carry the osteotomy distally to the tip of the implant, as determined by preoperative templating, to allow for full exposure and easy removal of the implants.
When this point is reached, carry the osteotomy anterolaterally for a distance of one-third of the femoral circumference. Connect the drill holes using a high-speed, narrow pencil burr or oscillating saw, penetrating the proximal cortex and cement mantle, if present.
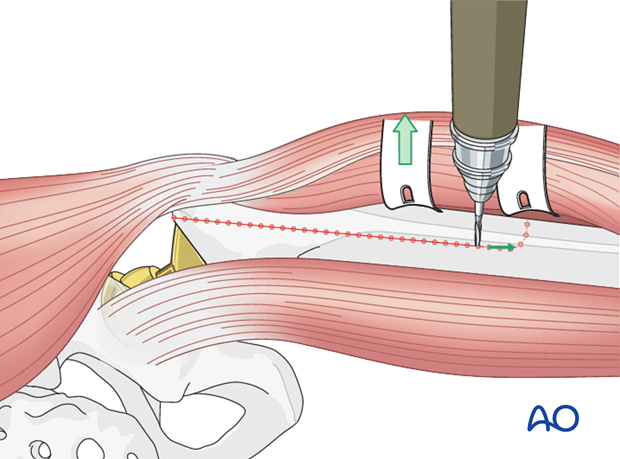
The osteotomy segment will consist of one-third the femoral circumference. If the prosthesis has remained in the canal, the pencil burr or saw blade will be used to disrupt the bone/prosthesis interface.
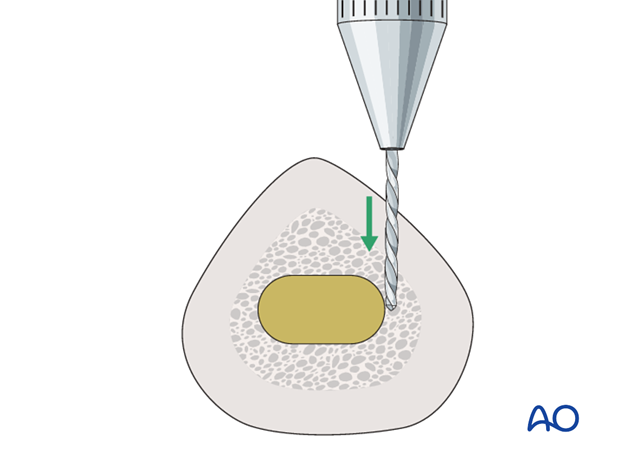
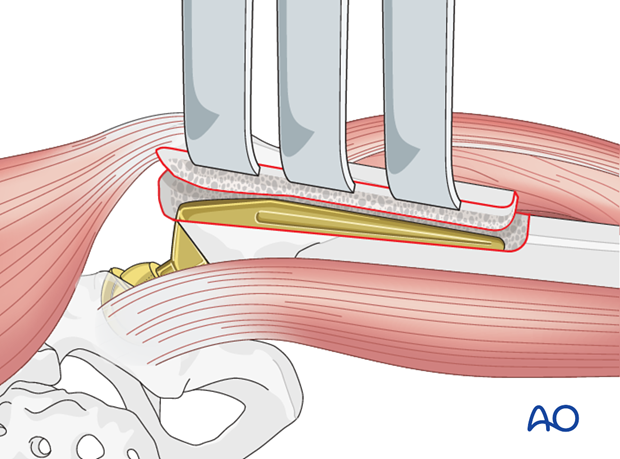
Hinge open the osteotomy based on an anterolateral hinge of periosteum and muscle. Use multiple, wide osteotomes to create a controlled fracture through the anterolateral cortex and lever the osteotomy open.
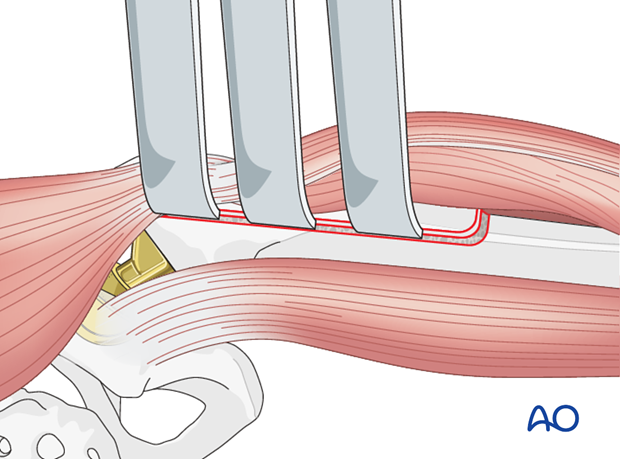
Retract the osteotomy for excellent visualization of the fixation surfaces of the proximal femur and femoral canal. This permits removal of the cement and/or cementless implants under direct vision using hand or power instruments.
8. Cement and/or bony pedestal removal
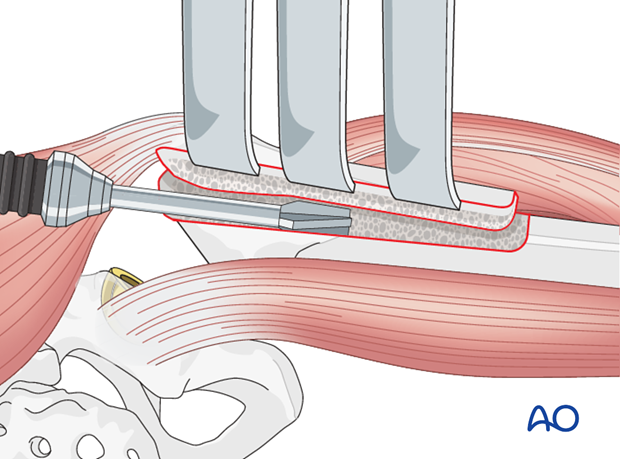
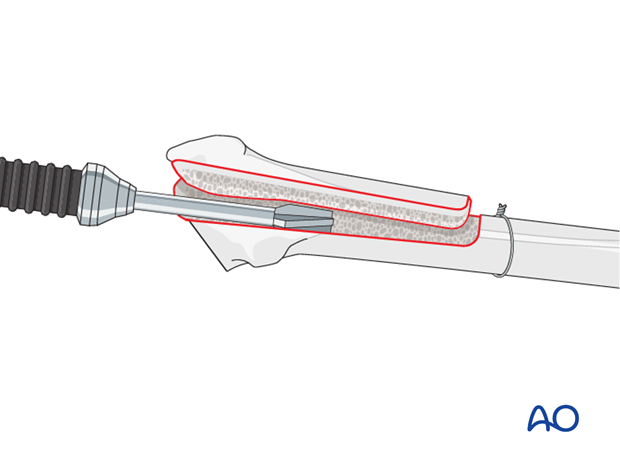
With the osteotomy retracted, perform cement and/or bony pedestal removal (if present) under direct vision, minimizing the possibility of perforation. Dedicated instrumentation may be used, such as ultrasonic devices or specific set for cement removal.
9. Closure
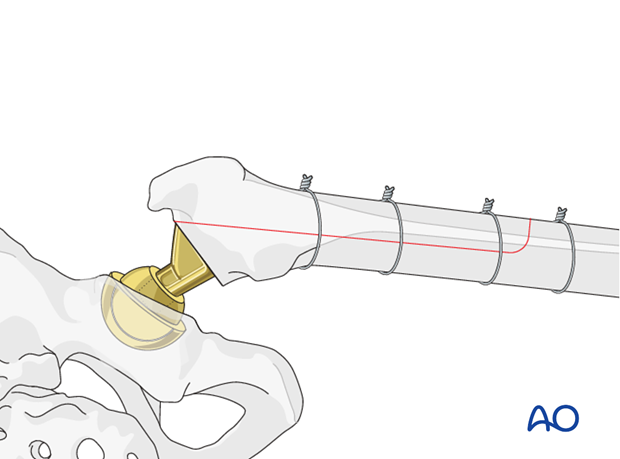
At the completion of the reimplantation of the prosthesis, the ETO should be reduced and fixed with cerclage wires or cables.
Standard soft tissue closure of the posterior approach should be performed.
Considerations for periprosthetic fracture patients
A layered closure is preferred for periprosthetic fractures. A subfascial drain should be considered as blood loss can be significant and periprosthetic fracture patients are at high risk of requiring anticoagulation immediately postoperatively. A hematoma requiring evacuation must be avoided. The wound is closed in layered fashion according to the surgeon's preference.
Sterile dressing should be applied, and negative pressure incisional wound care can be considered.

