Nonoperative treatment - Long leg cast
1. General considerations
Introduction
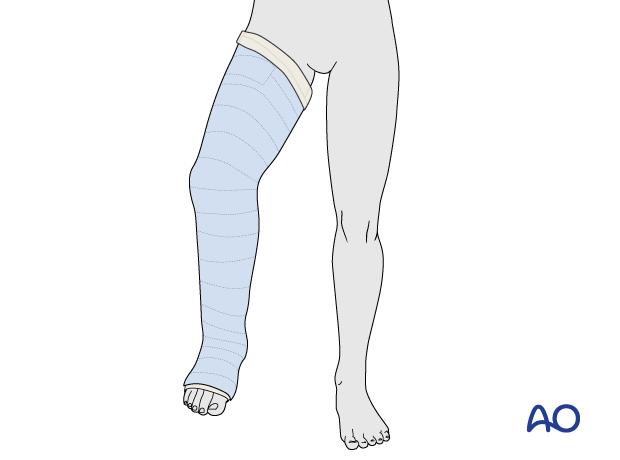
A long leg cast is necessary for most fractures of the tibial and fibular shaft.
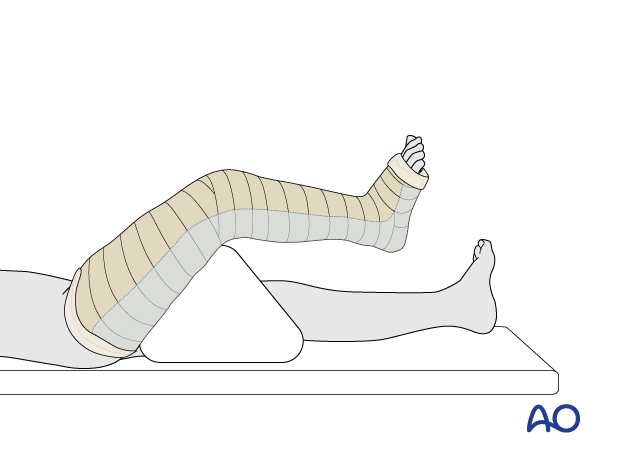
The cast may be applied in two stages, initially over the lower leg and foot and then extending to the thigh with the knee flexed.
This initially controls the fracture alignment and facilitates casting of the thigh with the knee in the correct position.
Complications
- Pressure sores
- Skin irritation
- Loss of reduction
- Compartment syndrome
- Thermal burns (avoid using hot water)
- Malalignment
Varus malalignment usually occurs in an isolated tibial shaft fracture. Valgus malalignment usually occurs in fractures of both bones.
Splinting
If severe swelling prevents application of a circumferential cast, a temporary splint may be applied as an alternative.
With the knee flexed, apply padding around the leg and slabs of casting material posteriorly, covering half of the circumference.
Secure the splint with an elastic bandage.
Cast wedging
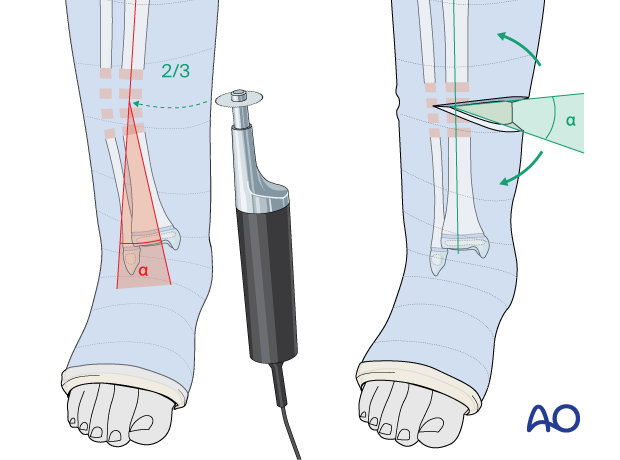
Cast wedging is useful for correcting angular deformities that persist or recur after cast application.
Wedging a cast is more controlled than removing and reapplying it.
The optimal time is 1–2 weeks after injury.
2. Preparation
Read the additional material on preoperative preparation.
Material
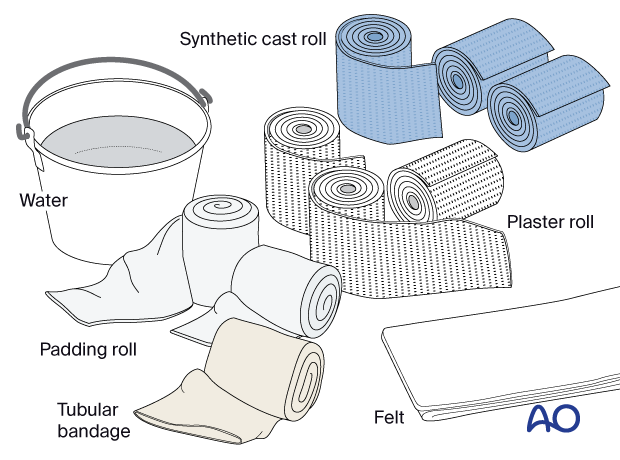
- Tubular bandage (stockinette) of appropriate size
- Cast padding
- Felt
- Casting material: synthetic, plaster of Paris, or a combination of both
- Water
The water temperature should ideally be between 22° and 25° C.
3. Casting
Dressing
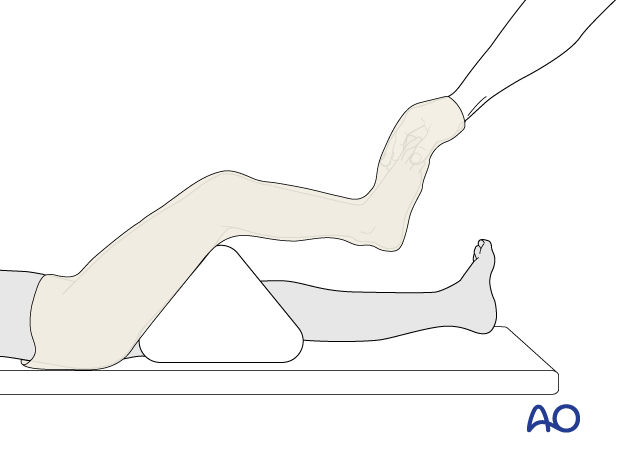
An assistant supports the leg with the knee flexed.
The distal edge of the cast extends to the base of the toes. The proximal edge lies just below the groin.
Apply a tubular bandage and cut it slightly longer than the length of the final cast.
The assistant holds the toes, not the stockinette, with the ankle in a neutral position.
Padding
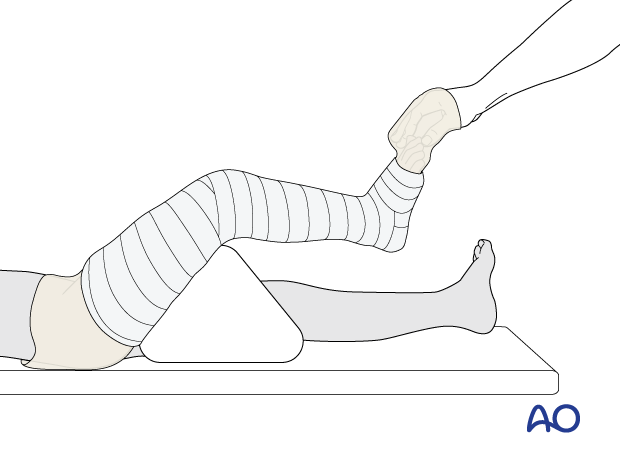
Add thick felt or additional padding at the free edges of the cast and prominent areas (eg, fibular head, patella, tibial crest, malleoli, and heel) to prevent pressure sores.
Apply cast padding without creases, overlapping each layer by 50%.
It should be appreciated that, when more padding is applied, there will be less support at the injury site.
Cast application to the lower leg
The assistant holds the ankle.
Apply the first layer of cast material and overlap each layer by 50%.
Mold the cast to oppose any deformity of the underlying fracture.
Avoid sharp edges at the ends of the cast.
Apply further layers of cast material to produce sufficient stability.
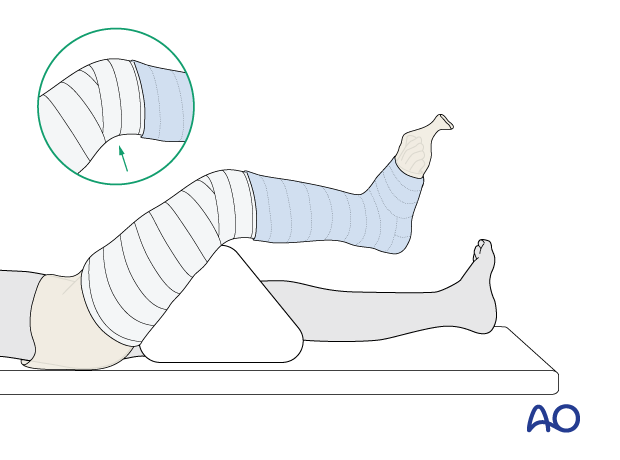
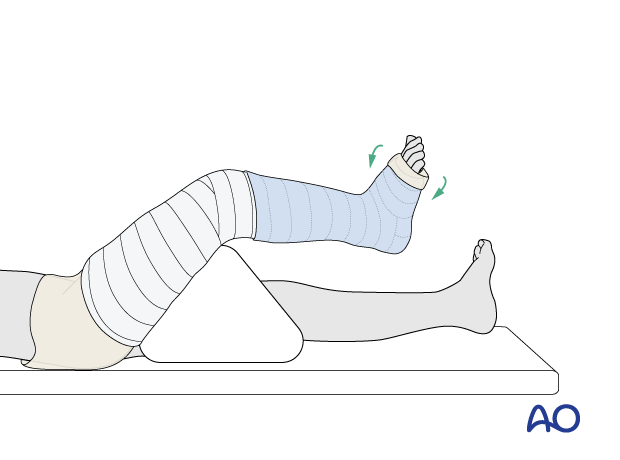
Fold the tubular bandage and padding over the lower edge of the cast before applying the final layer of casting material to the leg.
Ensure that all toes are visible for vascular assessment.
Extending the cast
Remove the triangular support.
Do not increase knee flexion while applying the upper part of the cast. This prevents injury to the skin behind the knee by the edge of the lower cast.
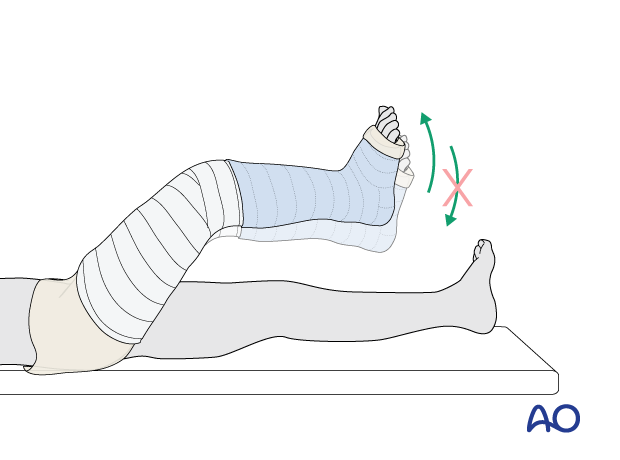
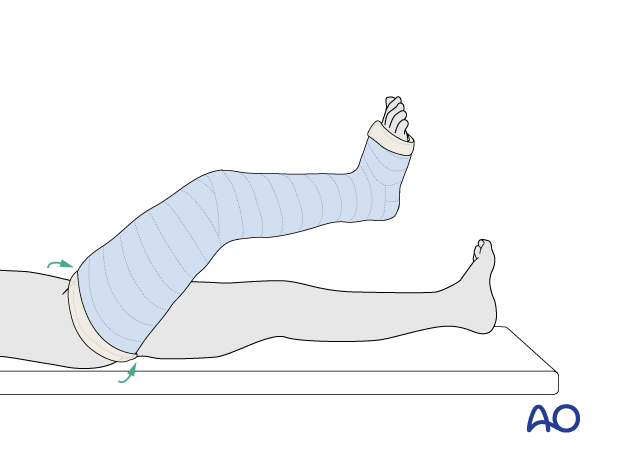
Extend the cast to include the thigh, overlapping the upper part of the leg cast.
Fold the tubular bandage and padding over the upper edge of the cast before applying the final layer of casting material to the thigh.
4. Final assessment
After cast application, check the fracture configuration with x-rays in both planes.
Confirm normal toe color and capillary refill at the end of cast application.
5. Cast wedging
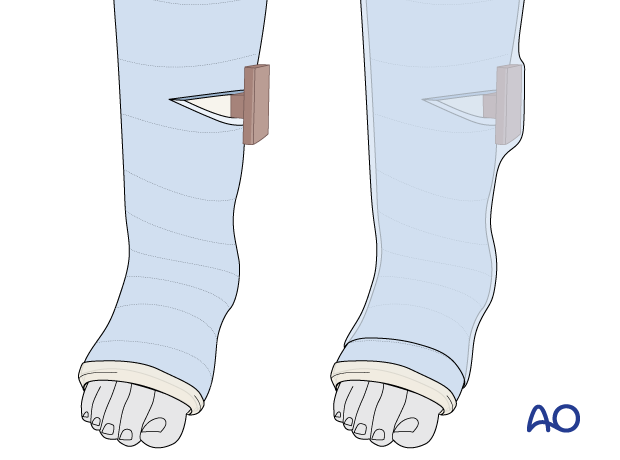
Cast wedging may be used to counteract residual or recurrent deformity 1–2 weeks after injury when early callus present.
If cast wedging has been performed, change to a short cast may be delayed.
Take an x-ray with a paper clip or other metal marker taped to the cast close to the fracture level.
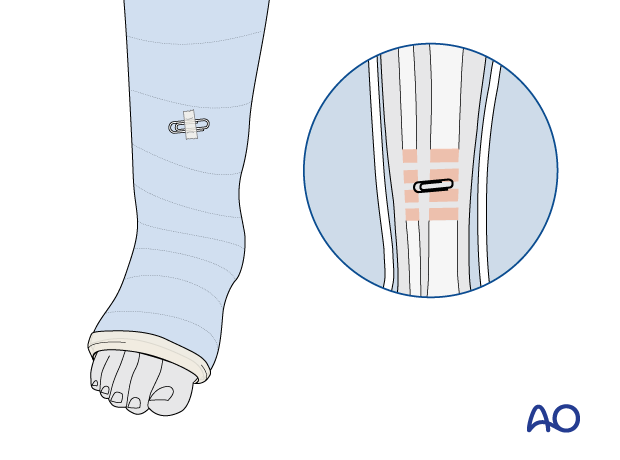
Measure the angular deformity in two planes and calculate the magnitude and direction of the oblique plane deformity. This illustration demonstrates a simple coronal plane (varus) deformity.
The position of the wedge should be at the level of a mid-diaphyseal fracture.
Cut at least 2/3 of the circumference of the cast leaving a hinge on the convex side of the deformity.
Open the cast gradually by an amount that corrects the deformity, which can be estimated by the x-rays. The rate of correction depends on the level of pain.

In more distal fractures, the wedge should be above the level of the fracture to provide sufficient leverage for deformity correction.
In this situation, the size of the wedge does not correspond exactly to the geometry of the fracture and the angle of the wedge is less than the angle of the deformity.
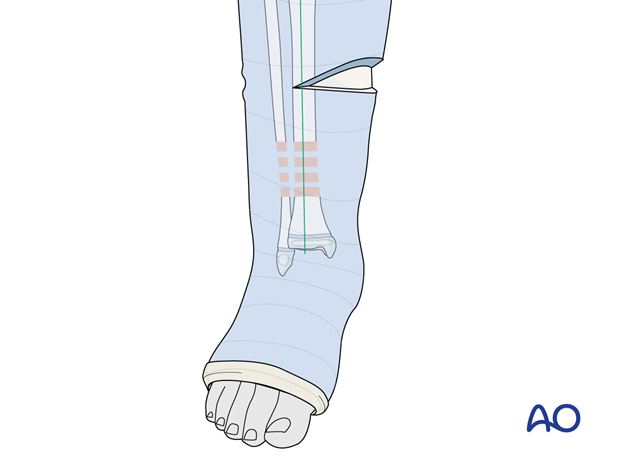
Apply a wooden T-shaped block or cork into the opening to hold the correction.
Fill the gap with cast padding and overwrap the cast with a new layer of POP/fiberglass cast.
6. Aftercare
Instructions to parents/carers
Parents/carers should understand the following precautions and instructions:
- Elevate the foot to the level of the heart to avoid swelling
- Check daily for swelling, discoloration, and impaired toe circulation (any of which should be reported immediately)
- Urgently report signs suggesting skin irritation ulceration, and cast soiling
- Make sure the cast padding remains dry and avoid inserting anything between the cast and skin
Immediate postinjury care
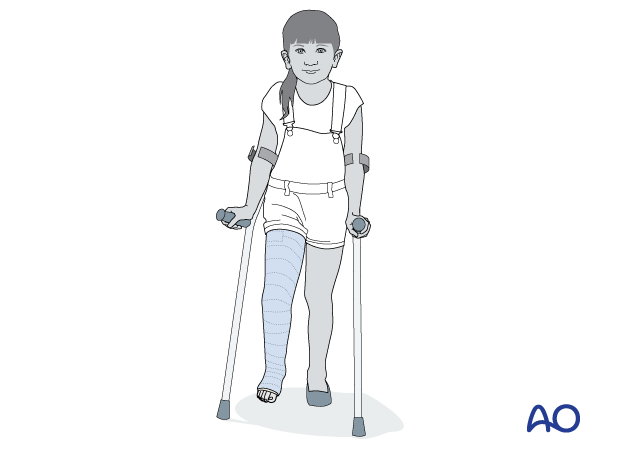
Non-weight-bearing or touch weight-bearing is encouraged for unstable injuries.
Older children may be able to use crutches or a walker.
Younger children may require a period of bed rest followed by mobilization in a wheelchair.
Pain control
Routine pain medication is prescribed for 3–5 days after injury if required.
Neurovascular examination
The patient should be examined frequently to exclude neurovascular compromise or evolving compartment syndrome.
Follow-up
The first clinical and radiological follow-up is usually undertaken 1–2 weeks after injury to confirm fracture position.
A radiograph to evaluate bone healing should be taken after about 4 weeks. When clinical and radiological signs indicate that the fracture no longer needs external support, the cast can be removed.
Mobilization
After cast removal, graduated weight-bearing is usually possible.
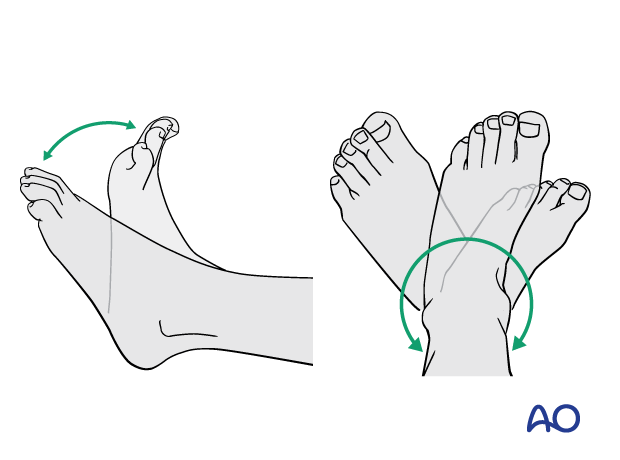
Patients are encouraged to start range-of-motion exercises. Physiotherapy supervision may be necessary in some cases but is not mandatory.
Activities that involve running and jumping are not recommended until full recovery of local symptoms.
Follow-up for growth disturbance
Leg length should be evaluated up to 2 years following injury due to the effect of growth stimulation.


