External fixation
1. General considerations
Introduction
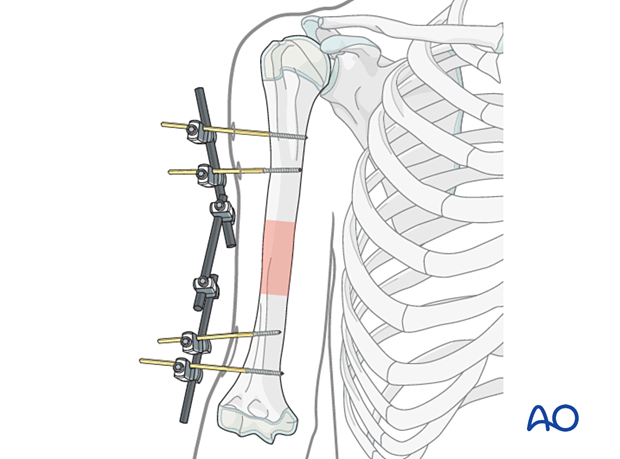
External fixation of pediatric humeral shaft fractures is rarely necessary and is usually a temporary measure in:
- Polytraumatized patients with multiple extremity injuries to facilitate nursing care
- Injuries of the humerus with extensive soft-tissue damage with or without neurovascular involvement
Principles of modular external fixation
A modular external fixator generally requires an image intensifier but can be applied rapidly without intraoperative x-rays and adjusted later.
See the basic technique for application of modular external fixator in children.
Specific considerations for the humeral shaft fractures are given below.
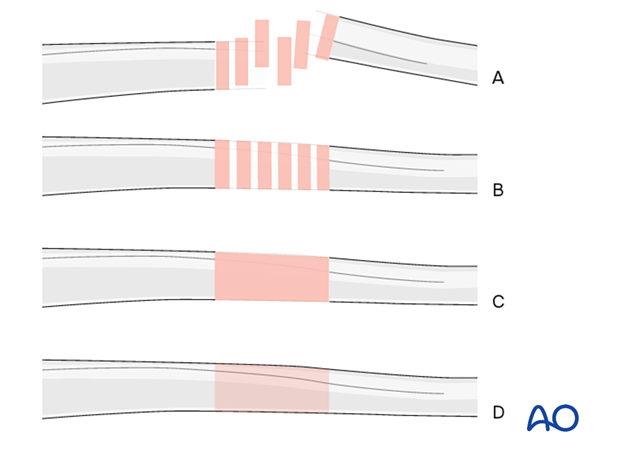
Throughout this section, generic fracture patterns are illustrated as:
- Unreduced (A)
- Reduced (B)
- Reduced and provisionally stabilized (C)
- Definitively stabilized (D)
Pin size in humeral fractures
External fixation is suitable for all ages, but the pin diameter must be appropriate to the size of the bone.
Pins with an appropriate thread diameter are suitable for the humerus and should typically be between ¼ and ⅓ of the external bone diameter.
2. Patient preparation and approach
Patient positioning
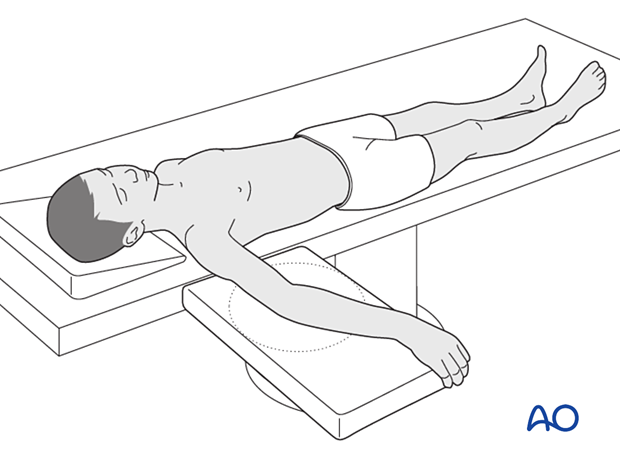
Place the patient in a supine position with the arm on a radiolucent arm board.
3. Pin insertion
General considerations
Inserting external fixator pins may be associated with damage to neurovascular structures and knowledge of the local neurovascular anatomy is therefore essential.
Pins are placed so that they do not interfere with later definitive fixation.
Two pins are placed proximal and distal to the fracture.
The proximal pins are placed anterolaterally, taking care not to injure the axillary nerve or the long head of the biceps.
The distal pins can be placed laterally but the radial nerve is at risk.

Soft-tissue dissection
Incise the skin and perform blunt dissection of the soft tissues with scissors down to the bone. The use of a drill sleeve and trocar prevents damage to muscle and neuro-vascular structures.
Proximal third
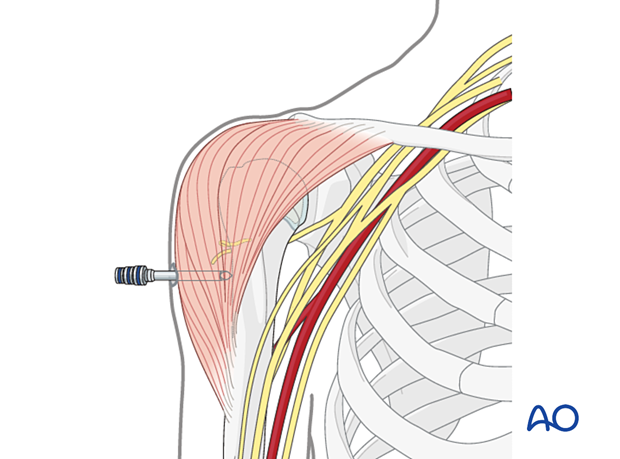
Pins may be inserted from a (antero-) lateral direction through the deltoid muscle.
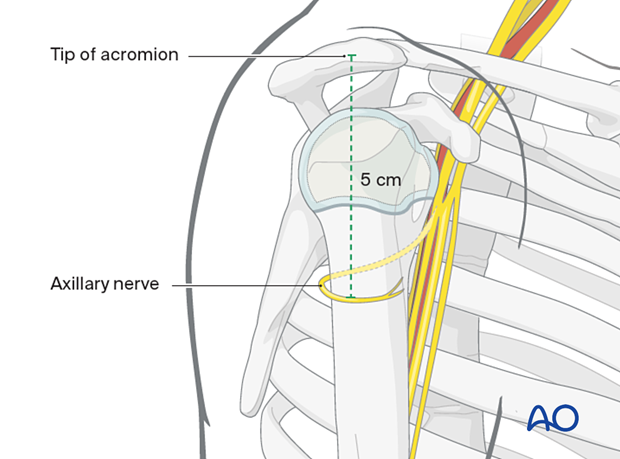
Avoid damage to the physis, the axillary nerve, and the long biceps tendon.
The tips of the pins should just perforate the far cortex to prevent injury to the medial neurovascular bundle.
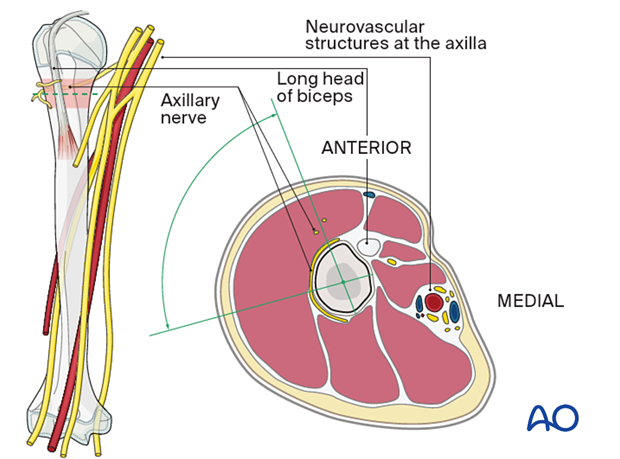
The axillary nerve runs dorsolaterally around the humeral metaphysis on average 5 cm distal to the tip of the acromion in children of 6 years and older.
To reduce axillary nerve injuries, use incisions which are large enough to ensure palpation and/or direct visualization of the nerve.
Middle third
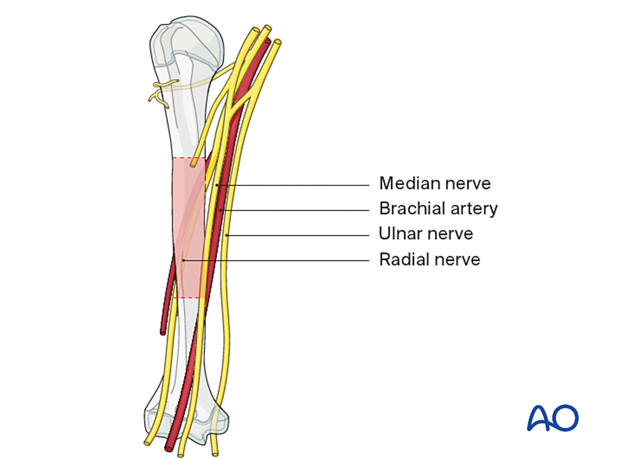
Avoid posterior and lateral pin placement in the middle third as the radial nerve, which is in close relationship with the dorsal diaphyseal cortex, can be damaged.
To reduce radial nerve injuries, use incisions which are large enough to ensure palpation and/or direct visualization of the nerve.
Distal third
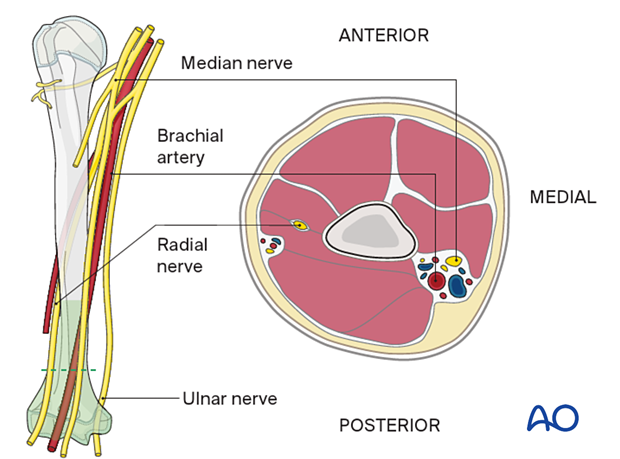
Pins are generally inserted laterally but placement may be dictated by a soft-tissue injury. A posterior, posterolateral, or posteromedial pin insertion through the triceps could be used to avoid damage to the radial and ulnar nerves.
Avoid penetration of the olecranon fossa.
The tips of the pins should just perforate the far cortex to prevent injury to the neurovascular bundle.
Use incisions which are large enough to ensure palpation and/or direct visualization of the nerve.
4. Final assessment
Check pin placement and fracture alignment with an image intensifier or x-ray.
Pin sites
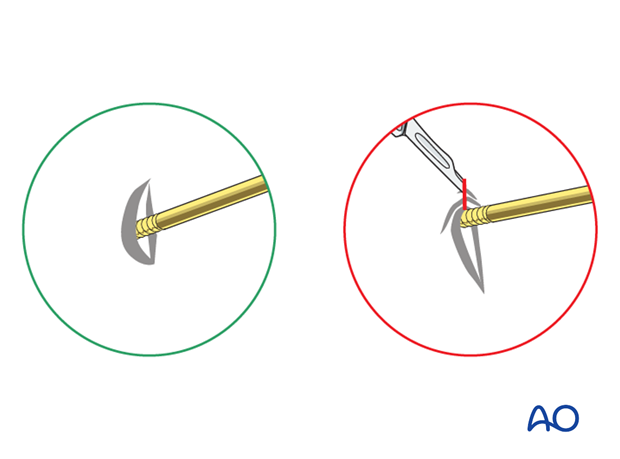
Check the skin at all pin sites and incise if tethered.
Dress the pin sites.
5. Aftercare
Pin-site care
There is no universally agreed protocol for pin-site care.
The following points are however recommended:
- Pin-site care should continue until removal of the external fixator.
- The pin sites should be kept clean.
- Crusts or exudates should be removed.
- The pins may be cleaned with water, saline, disinfectant solution or alcohol.


