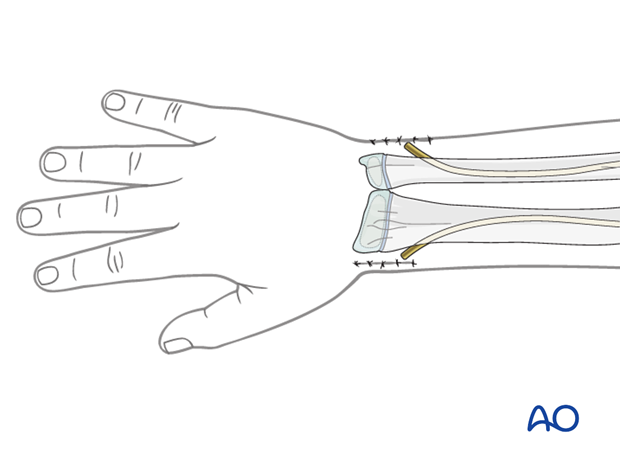
Radial head, Salter-Harris II: ESIN
1. Instruments and implants
Instrument set for ESIN
- 1.5-2.5 and occasionally 3.0 mm elastic nails
- Alternatively: 30 cm long, 1.6-2.5 mm K-wires with the tip bent
- Awl or drill
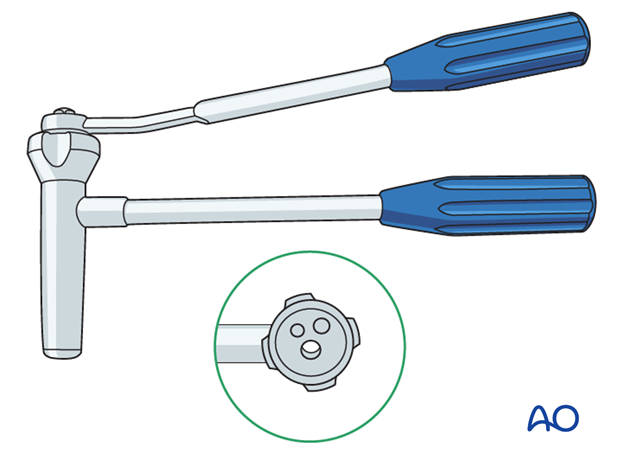
- Inserter
- Nail cutter
- Small hammer
- Optional: end caps
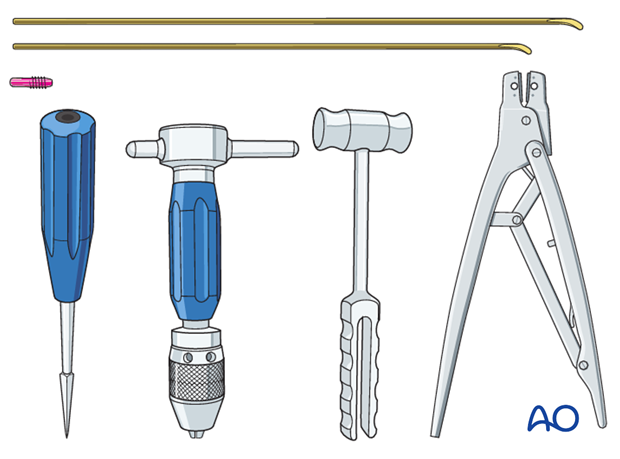
The end cutter is useful to avoid sharp ends and soft-tissue irritation.
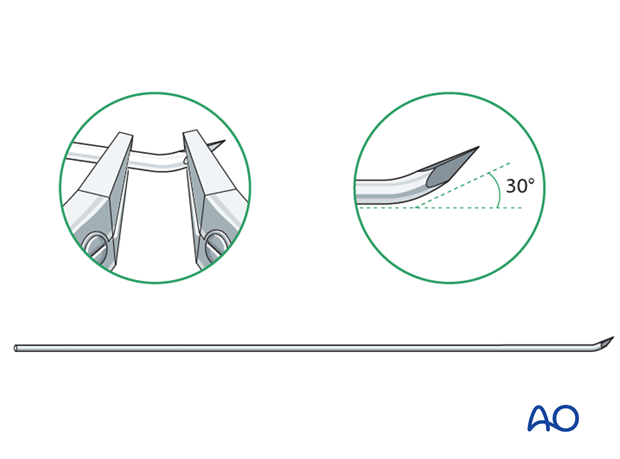
Use of K-wires
Ring fixator wires may be used.
Bend the tip by approximately 30° to provide a gliding aid.
Nail diameter
For optimal reduction and intramedullary three-point fixation, the nail diameter should be between 60% and 70% of the medullary canal.
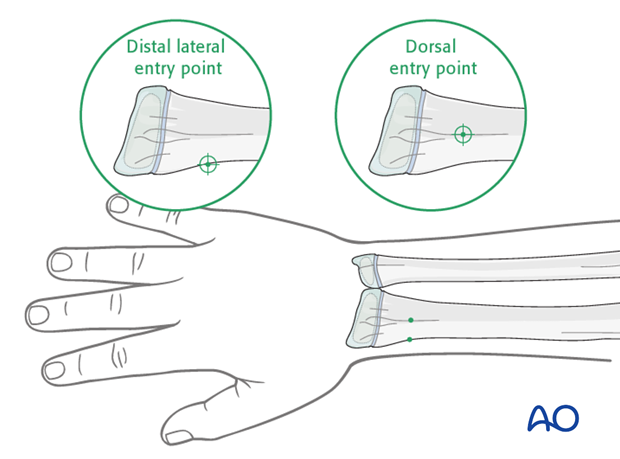
2. Entry point
The distal lateral entry point is in common use and shown in this procedure.
Insertion through Lister’s tubercle (dorsal entry point) is also well established and offers more versatile nail manipulation.
Opening the canal
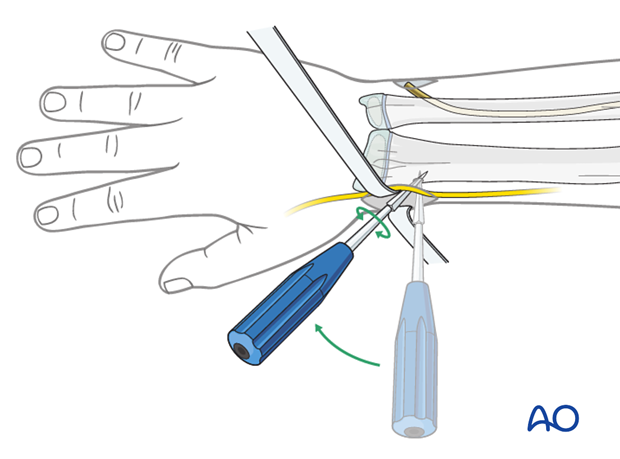
Use small scissors or a surgical clip and small retractors to dissect to the bone under direct vision.
Note: Avoid injury to the superficial radial nerve and the cephalic vein.
Place the awl or drill directly onto the bone and perforate the near cortex of the bone under visual control perpendicular to the bone.
Do not hammer the awl to avoid perforation of the far cortex.
When the medullary canal is reached, lower the awl or drill 45° to the shaft axis and advance it with oscillating movements to produce an oblique canal.
3. Nail insertion
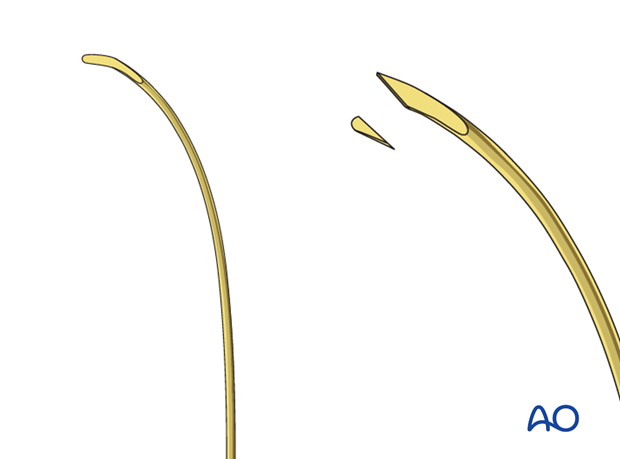
Precontour the first 5 cm of the nail as this enhances reduction of the displaced radial head.
Produce a sharp tip by cutting the inner end of the tip.
This facilitates entry into the hard bone of the epiphysis.
The manufactured blunt end will displace the radial head.
Some surgeons prefer to use a sharp K-wire with a bent tip.
Fix the nail into the inserter and pass it into the canal.
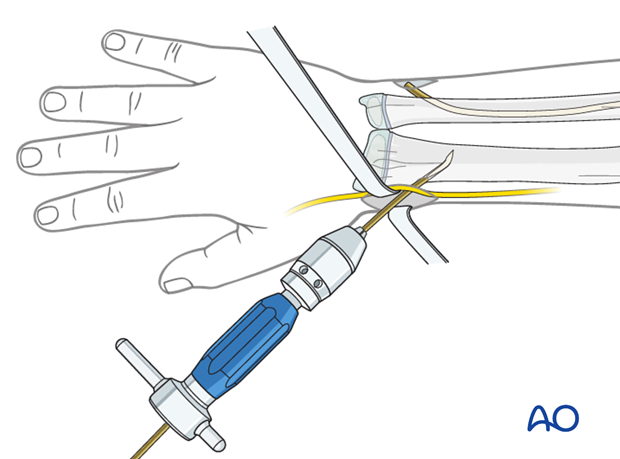
Pearl: insertion of nail tip perpendicular to shaft
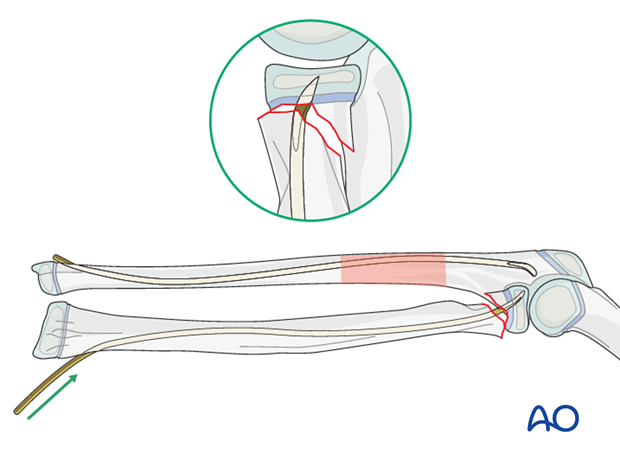
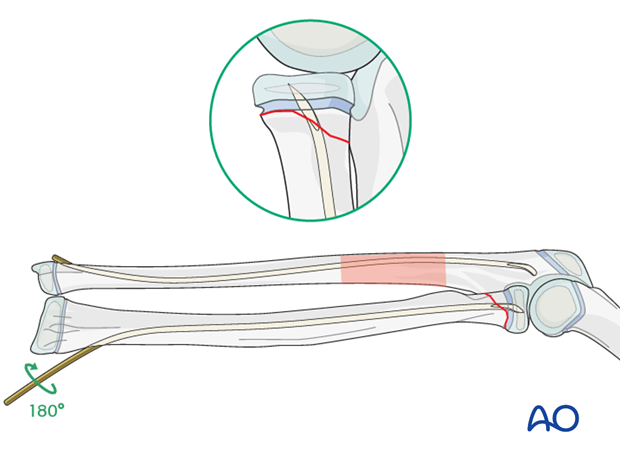
Insert the nail with the tip perpendicular to the shaft axis until the far cortex is felt. Rotate the nail 180° and advance it using the curved side of the tip as a gliding aid.
If the tip is stuck in the far cortex and cannot be advanced, remove the nail and bend the tip to give a slightly more pronounced curvature.
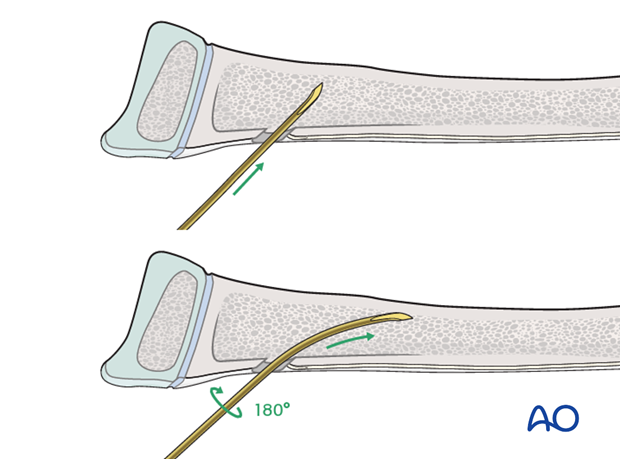
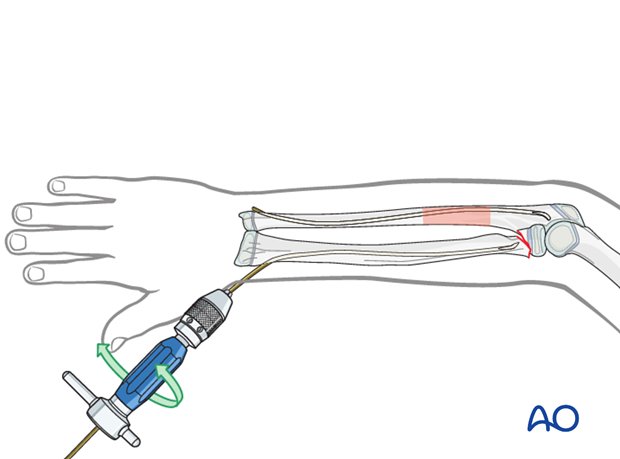
Advance the nail to the fracture site with an oscillating maneuver.
Pearl: A short working length (3-5 cm) between the entry point and the inserter improves control of the nail during insertion.
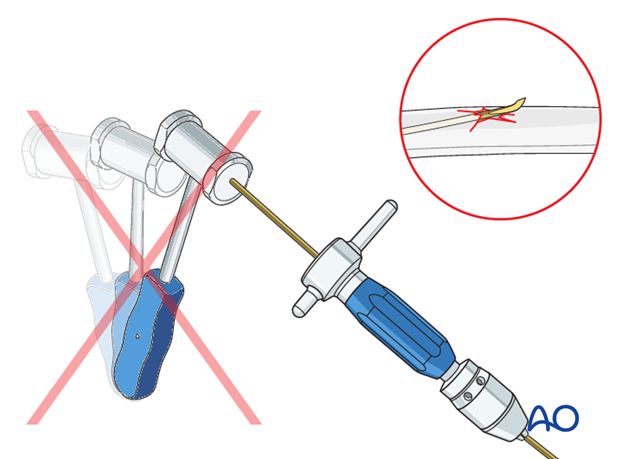
Pitfall: iatrogenic fracture
In young children, the nail tip may become stuck because of the narrow medullary canal.
Do not use a hammer if the nail is stuck as this risks iatrogenic fracture.
Withdraw by 2 cm, rotate the nail to free the tip and continue advancing.
4. Reduction
Orientation of forearm and nail
Rotate the arm to obtain the maximal displacement of the neck fracture on the image intensifier.
Point the nail tip to the head fragment.
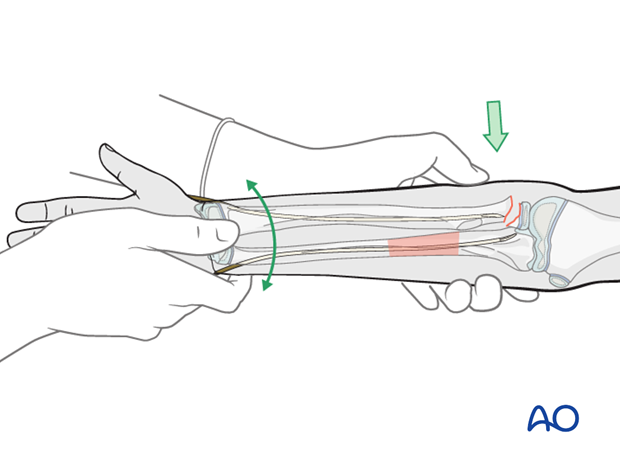
Manual reduction
If the radius does not reduce spontaneously after reduction and fixation of the ulna, ensure that the ulna is accurately realigned and consider overcorrection.
If after ulnar fixation the radial shaft remains displaced and does not allow the nail tip to be advanced into the head, partial reduction of the fracture is attempted by traction, pressure, and rotational movements.
If this is not successful remove the radial nail and recontour the first 3-4 cm with a more pronounced bend and reinsert it.
Open reduction
If there is residual displacement of the radial neck fracture after optimization of the ulnar correction, an open reduction should be performed.
Open reduction may also be necessary if an image intensifier is not available or if soft-tissue structures are trapped between the fragments.
A lateral approach to the proximal radius may be used to visualize the radial neck fracture.
Note: The risk of avascular necrosis of the radial head is higher after open reduction which should be avoided if possible.
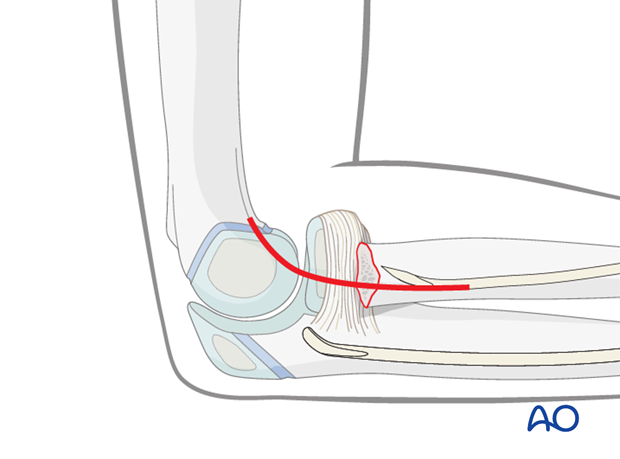
5. Fixation
Following partial reduction, advance the nail into the head.
Turn the nail to anatomically reduce the radial shaft onto the head.
If reduction is not perfect, pull the nail tip back to the metaphysis, reposition it, push it forward again and repeat the reduction maneuver.
In all fractures, perforate the growth plate to get sufficient hold in the head fragment. This is best done with gentle hammer blows.
In young children most of the radial head is unossified. If the tip is advanced just beyond the visible ossification center, it will still be within chondral tissue and not in the joint.
Pearl: If the ossification center is not visible on a normal x-ray an arthrogram should be performed.
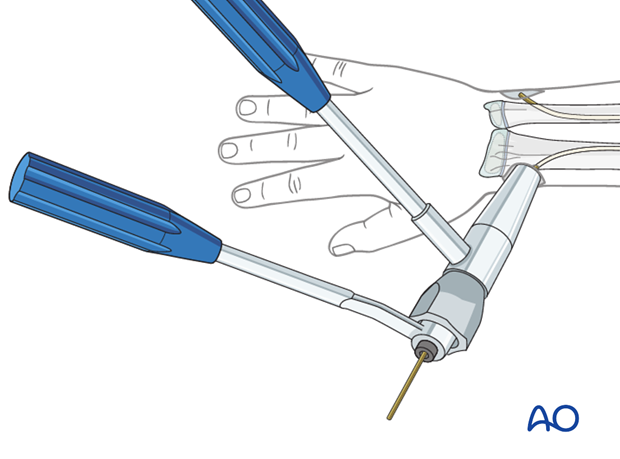
6. Cutting the nail and wound closure
When using the lateral entry point, cut the nail near the bone.
If a dedicated nail cutter is not available, cut the nail slightly shorter as the end will be sharper and this prevents skin perforation.
Gently withdraw the nail by 1 cm, cut the nail outside the skin and reinsert to the original position with an impactor.
Ensure that the nail tip does not irritate the superficial radial nerve.
When using the dorsal entry point, the nail should be left long or protected with small end cap to prevent rupture of the extensor pollicis longus.
Close the subcutaneous tissue and skin in a standard manner.
