Traction
1. General considerations
Introduction
Treatment with traction requires skillful application of the device and careful attention to detail with constant monitoring throughout the treatment period to avoid skin problems or vascular compromise.
All types of traction can be converted to a spica cast or definitive surgical stabilization.
Traction types
There are a variety of devices that depend on the patient’s age, weight, fracture configuration, and resources available.
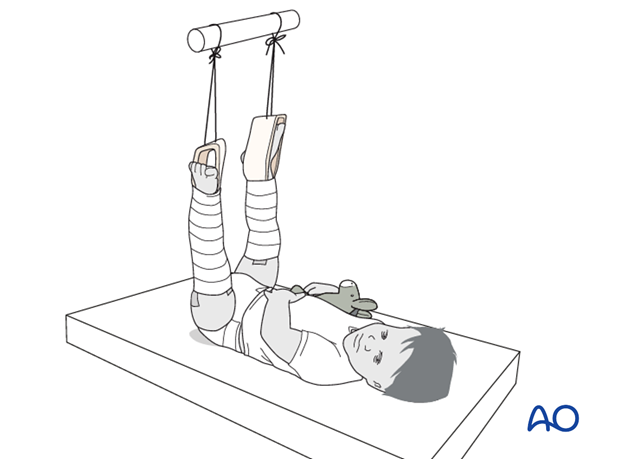
In children up to 2 years of age with a bodyweight up to 12–15 kg, overhead skin traction is preferable.
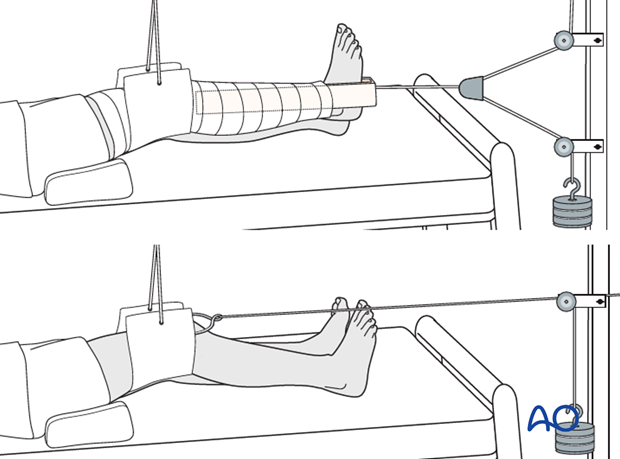
In children older than 2 years and heavier than 12–15 kg, longitudinal traction is an alternative. Traction can be applied with an adhesive bandage to the skin or with skeletal fixation using a transosseous pin. Disadvantages include malunion, prolonged hospital stay and pin-track infections if skeletal devices are used.
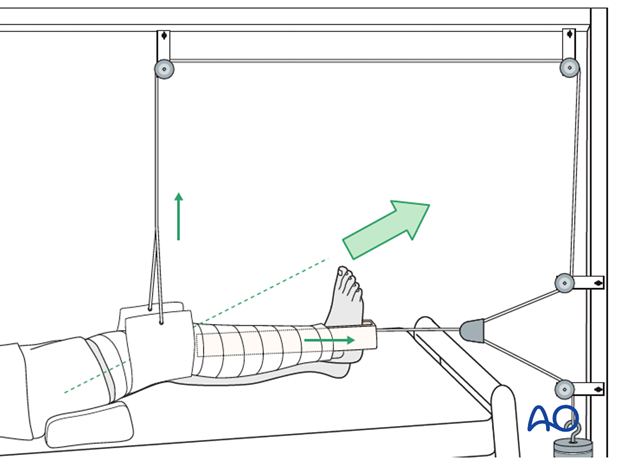
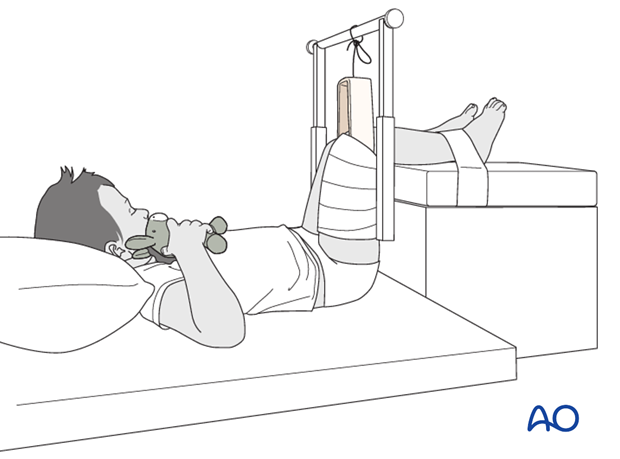
An alternative in children older than 2 years is 90/90 traction. Less weight is needed because of the support under the upper legs and fewer skin problems are therefore seen. A further advantage of this method is rotational control, which can be useful in unstable fracture patterns.
Complications of skeletal traction
Management of femoral fractures with skeletal traction in older children has become less common because of frequent significant complications, which include:
- Growth plate injury
- Pin-track infection
- Muscle wasting
- Pressure sores
- Increased resource utilization
- Inadequate reduction
Carefully place the traction pin under image intensifier control to avoid this complication.
If an image intensifier is not available, place the pin proximal to the normal level of the superior pole of the patella to avoid the growth plate.
The following steps are necessary to manage pin loosening or pin-track infection:
- Remove the traction pin and place a new pin in a healthy location, proximal to the area of involved skin.
- Debride the pin site in the operating theater, using curettage and irrigation.
- Take specimens for microbiological study to guide appropriate antibiotic treatment if necessary.
A patient in traction must regularly perform exercises of all muscle groups, in bed under the supervision of a physiotherapist.
Good nursing care is required to prevent soft-tissue breakdown over pressure areas. This involves frequent skin checks and regular offloading areas at risk.
Traction for 6 weeks is an expensive use of hospital resources and should only be considered when other option are unavailable.
Whilst length is often preserved, it is difficult to maintain alignment and rotation with traction. This may result in fracture malunion that requires surgical correction.
Preparation
Read the additional material on preoperative preparation.
2. Overhead skin traction
Position the patient supine on a bed.
Start with the uninjured side as this causes less pain.
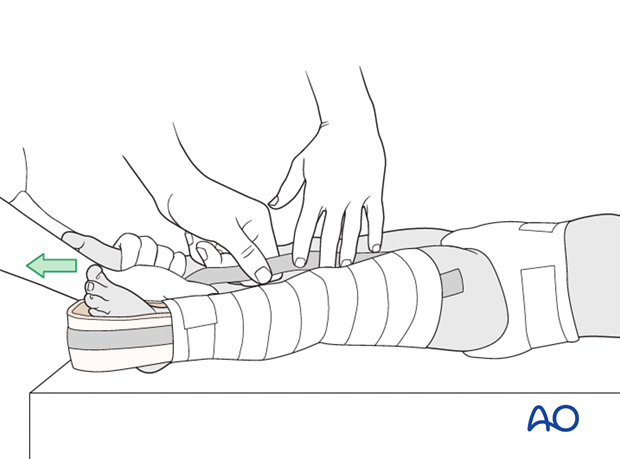
Position the stirrup of the traction set with the strings for weight attachment at the foot leaving space for ankle movement.
Apply the long adhesive bandages from ankle to hip to distribute the skin tension forces over a large area to prevent blisters and skin necrosis.
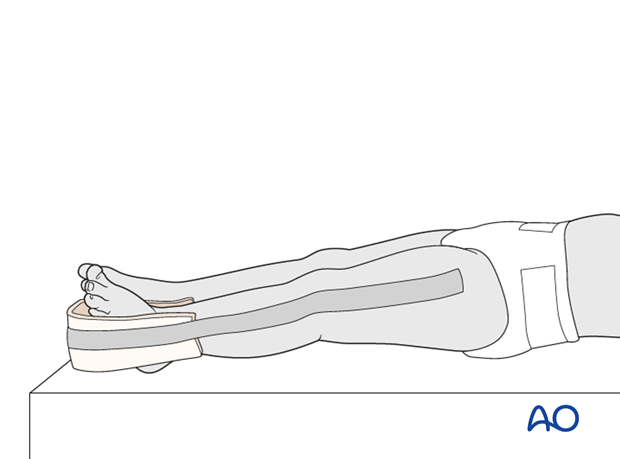
Wrap a bandage over the adhesive bandage to further reduce shear forces.
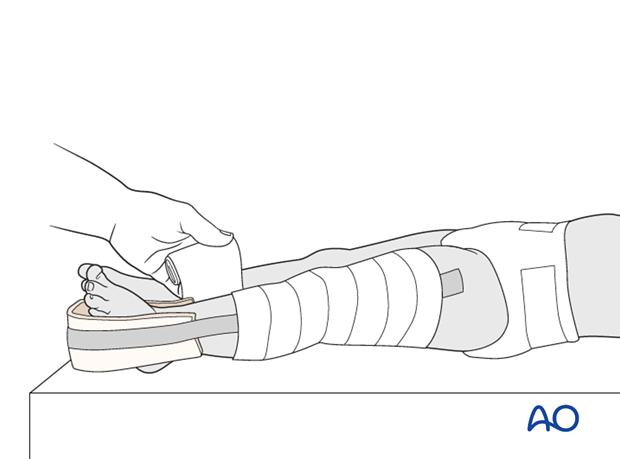
Use an assistant to apply gentle traction and provide stability when applying the bandage on the injured side.
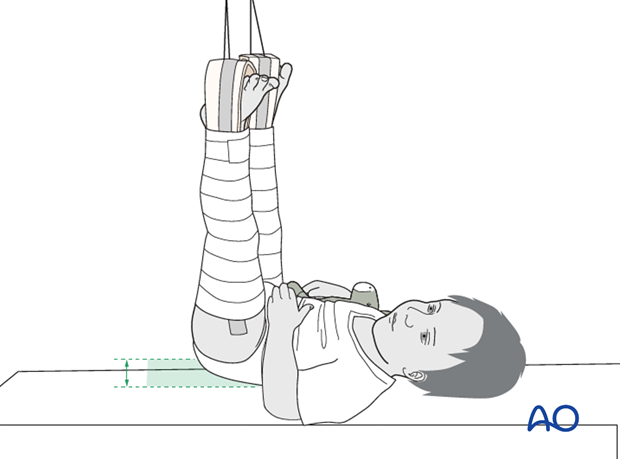
Position the hip in 90° flexion and use sufficient weight to raise the buttocks just above the sheet, producing the correct amount of traction on the leg.
Perform regular neurovascular observations and check for loosening of the bandage.
3. Longitudinal skin traction
Place the patient supine on the bed.
Position the stirrup of the traction set with the strings for weight attachment at the foot leaving space for ankle movement. Use an assistant to apply slight traction and provide stability when applying the bandage.
Apply the long adhesive bandages from ankle to hip to distribute the skin tension forces over a large area to prevent blisters and skin necrosis. Wrap a bandage over the adhesive bandage to further reduce shear forces.
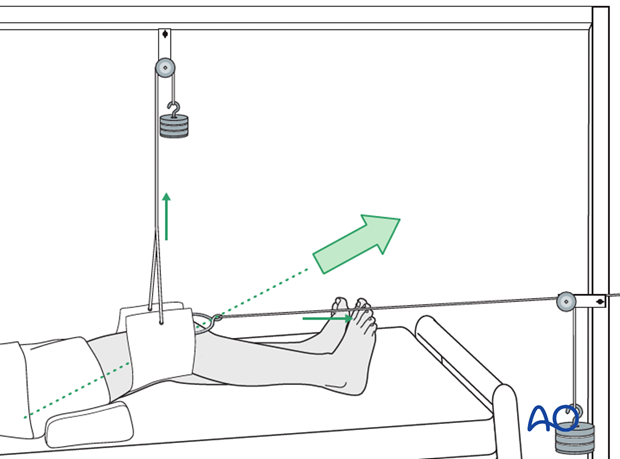
Apply the sling just above the knee and place the leg on a support, eg a pile of towels, to produce 30° knee flexion.
This neutralizes the muscle forces, controls rotational deformities, and maintains the femoral bow, which may require a small pillow or towel under the thigh.
The resulting traction direction should be in line with the femoral axis.
The traction weight is determined by the age and weight of the child and should be sufficient to maintain length and alignment. 500 g per year of age is a good initial weight to use. The foot of the bed should be raised, tilting the bed, to stop the child being pulled down the bed.
Perform regular neurovascular observations and check for loosening of the bandage.

4. 90/90 traction
Place the patient supine with both lower legs on a support and the hip and knee flexed to 90°.
Apply an adhesive bandage to the entire upper leg on the injured side.
Adjust the lower leg support so that the buttocks are just lifted from the bed and stabilize the lower leg with a second adhesive bandage.

5. Skeletal traction
Skeletal traction via tibial or femoral pin
Skeletal traction may be used as an alternative, particularly if it is decided to use traction as the definitive treatment of an older child.

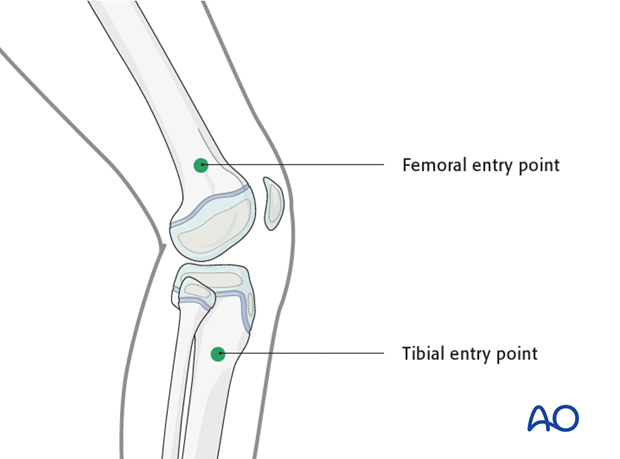
The pin may be inserted either in the distal femur or the proximal tibia. Take care not to injure the growth plate.
In a child, this is generally performed under general anesthetic.
Preparation
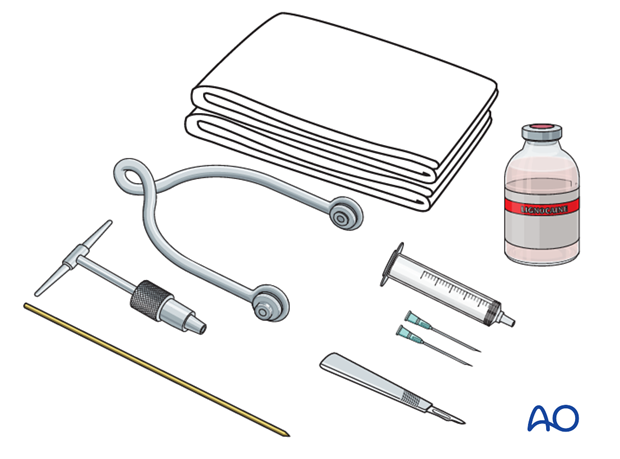
Pack with:
- Sterile towels
- Disinfectant
- Syringe
- Needles
- Scalpel with pointed blade
- Sharp pointed threaded pin
- Jacobs chuck with T-handle
- Stirrup
- Power driver
Pin insertion
At the entry point, perform a stab incision through the skin with a pointed blade.
A threaded pin is preferred as it has a lower tendency to back out.
Insert the pin into the metaphysis about 2 cm away from the growth plate.
Use of a power driver is recommended.
As the pin is felt to penetrate the far cortex, advance carefully until its point is palpable, and make a small stab incision in the overlying skin.
Ensure that there is no skin tension at the entry and exit points. Perform a small relieving incision if necessary.
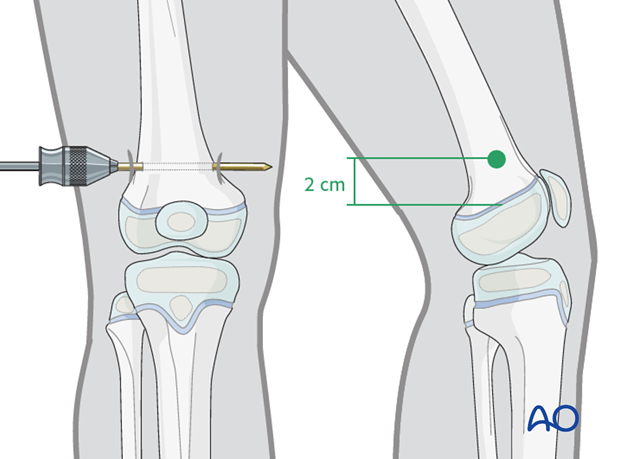
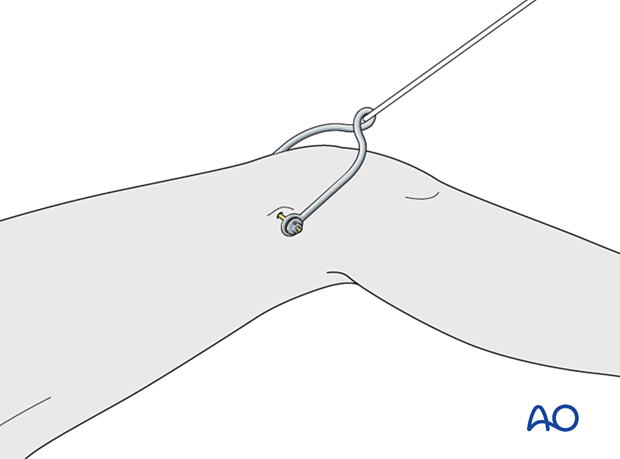
Mount the stirrup to the pin.
Make sure that the stirrup is freely mobile around the traction pin, to prevent rotation of the pin within the bone. Rotating pins loosen quickly and this significantly increases the risk of pin-track infection.
Pin-site care
There is no universally agreed protocol for pin-site care but the following points are recommended. They should be undertaken until removal of the traction.
- The pin-insertion sites should be kept clean. Any crusts or exudates should be removed. The pins may be cleaned with saline and/or disinfectant solution/alcohol. The frequency of cleaning depends on the circumstances and varies from daily to weekly.
- Antibiotic solutions and skin preparations are not recommended for routine pin-site care.
6. Control of length and rotation
Check length and rotation daily.
Increase or decrease the traction weight to correct the length if needed.
Checking rotational alignment is reliant on clinical examination. Generally, if the patella is facing up then the rotational alignment will be satisfactory.
7. Removal of traction
Traction can be removed once healing is demonstrated on x-ray. This is age dependent and equates to approximately 1 week of traction per year of age.
8. Aftercare
Mobilization
Mobilization with crutches or a walker commences after completion of nonoperative treatment of the fracture.
Physical therapy may be required for gait training, hip and knee range-of-motion exercises and muscle strengthening.
Activities involving running, and jumping are not recommended for three months.

Follow-up
Clinical and radiological follow-up is usually undertaken after 2–4 weeks.
Clinical assessment of leg length and alignment is recommended at one-year. It uses a tape measure from the ASIS to the medial malleolus.
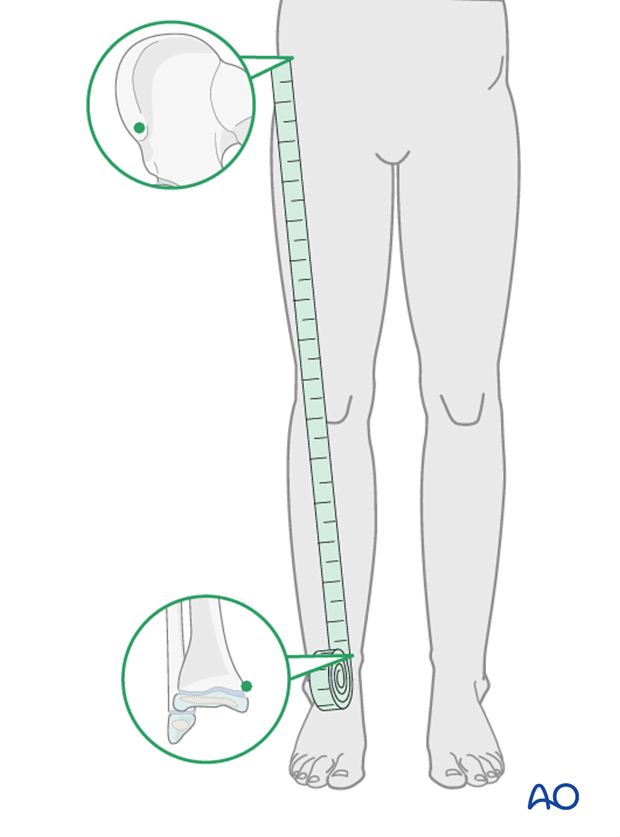
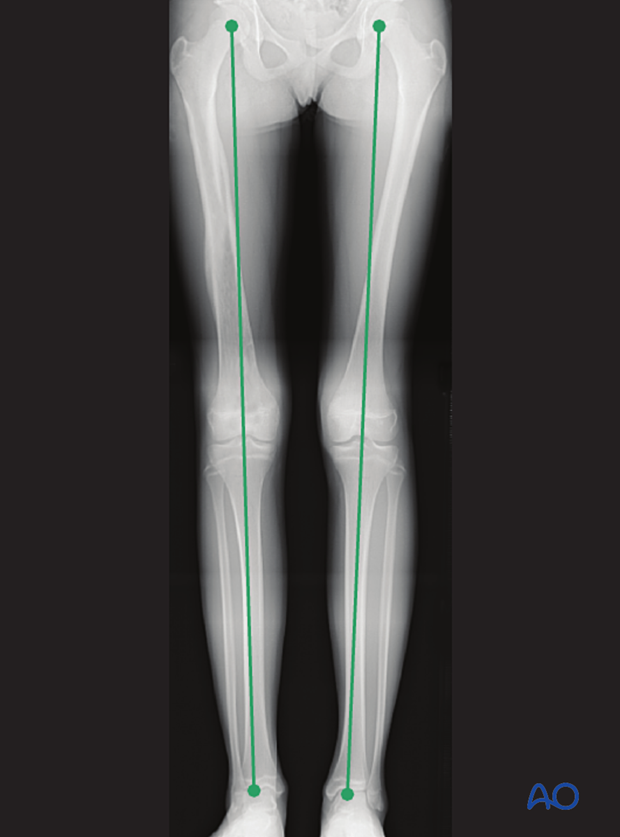
If there is any concern about leg length discrepancy or malalignment, long-leg x-rays are recommended.
Leg length is measured from the femoral head to the ankle joint.
