Hip spica casting
1. General considerations
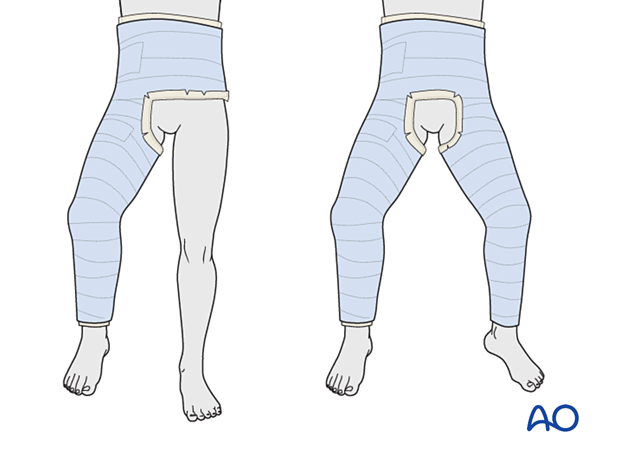
Single-leg, one-and-a-half-leg, or two-leg spica
Whilst a single-leg spica is adequate for most circumstances; some surgeons prefer to extend the cast to the uninjured side as this can help to provide more stability, especially in young children.
Complications
- Loss of reduction
- Compartment syndrome
- Pressure sore
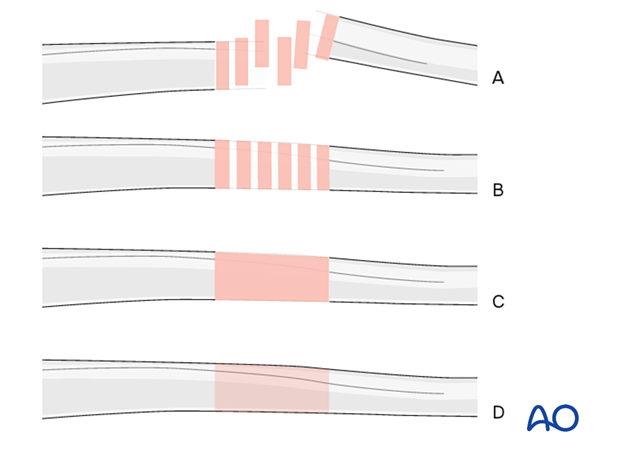
Throughout this section generic fracture patterns are illustrated as:
- Unreduced
- Reduced
- Reduced and provisionally stabilized
- Definitively stabilized
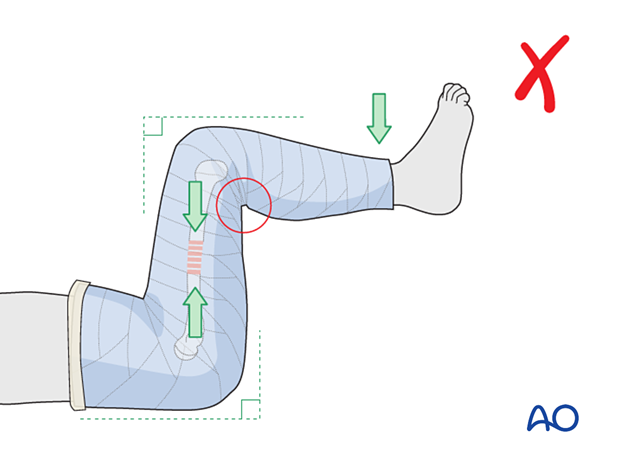
Pitfall: compartment syndrome
It is also important to avoid flexion of the hip and knee beyond 90° as extremes of flexion are associated with an increased risk of compartment syndrome.
2. Material and equipment
Material
- Tubular bandage (stockinette) sized both for leg and for body
- Cast padding
- Felt
- Casting material: fiberglass or plaster of Paris
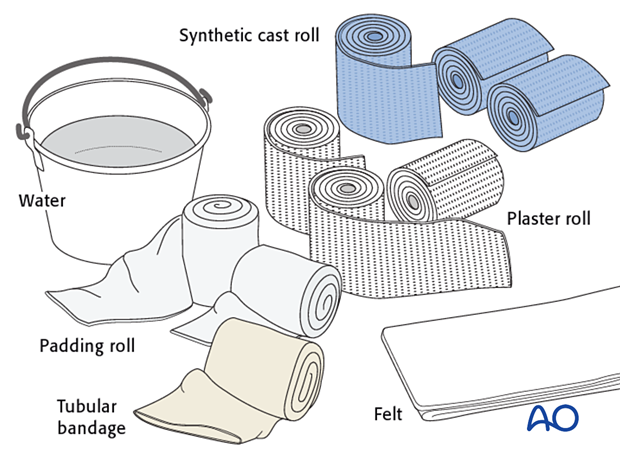
Equipment
- Hip spica box or table
- Folded towel as abdominal spacer
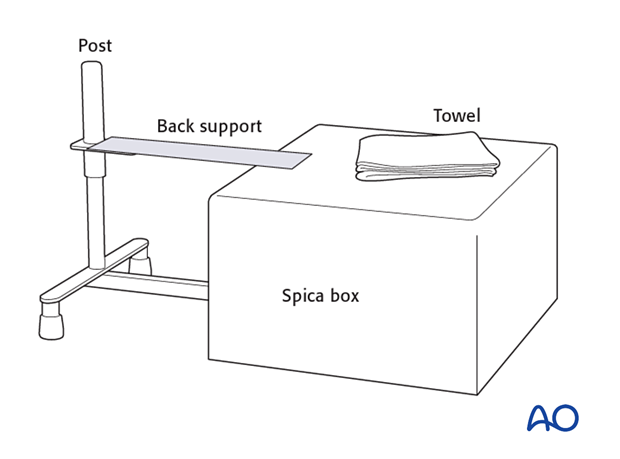
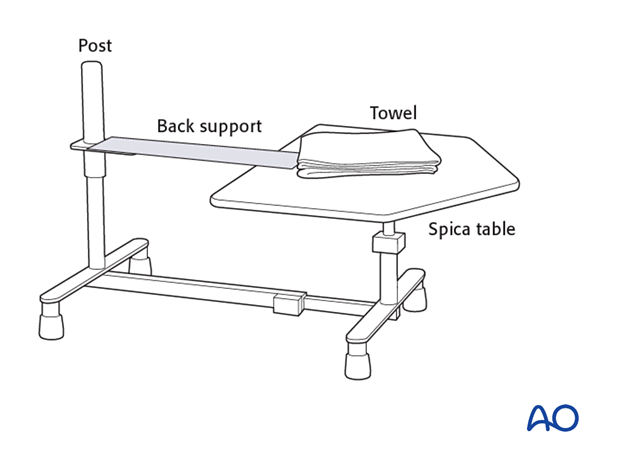
3. Patient preparation
Read the additional material on preoperative preparation.
Dressing
Cut a generous length of tubular bandage to dress the injured leg and a larger diameter tube for the torso. Tape the two parts of the tubular bandage together to prevent separation of the bandages as the child is moved.
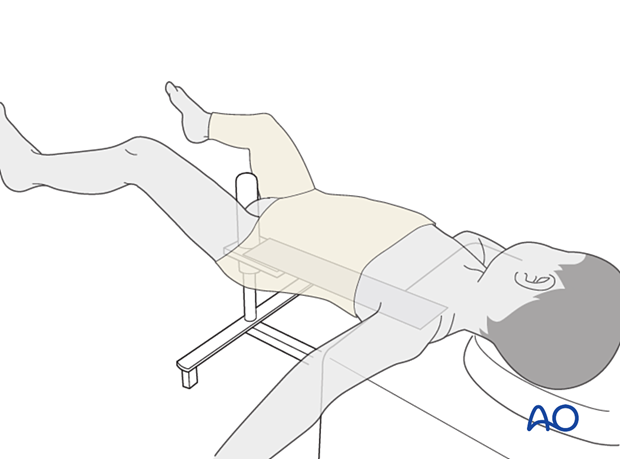
Place the back support for the spica box against the patient's skin underneath the tubular bandage.
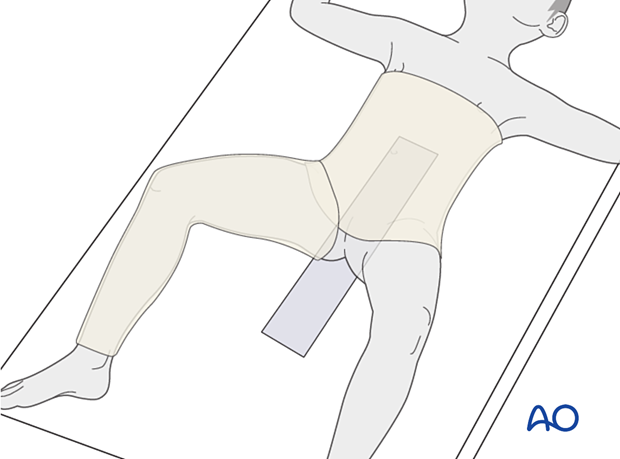
Placement on hip spica box
Transfer the anesthetized child onto the hip spica box. Make sure that enough people are available to help positioning and stability.
The child’s sacrum should rest on the back support with its perineum against the padded post. The shoulders should be supported by the spica box leaving almost the entire torso free for casting.
The back support can be secured to the apparatus with tape.
4. Leg position and closed reduction
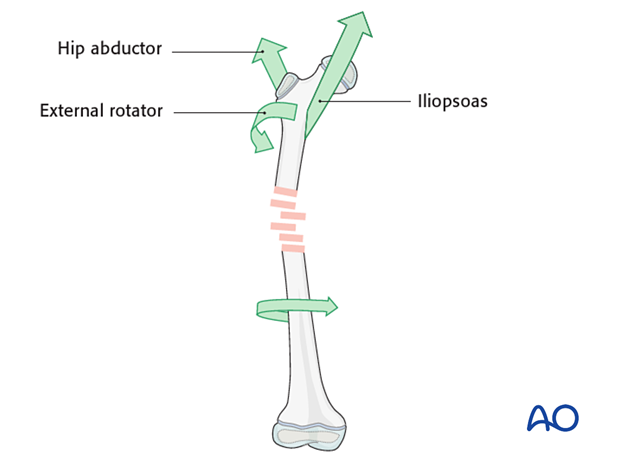
In general, unstable pediatric femoral fractures are reduced with gentle traction with the leg placed in 45–60° of hip flexion, 30–45° of hip abduction and a few degrees of external rotation. This helps align the distal fragment to the proximal femur, which is typically flexed, abducted and externally rotated due to muscle forces.
For more proximal fractures, more hip flexion may be indicated.
For convenience and child positioning the knee is flexed to about 70°. This allows for comfort whilst lying and sitting.
Confirmation of reduction
Check the reduction under image intensification, this is particularly important for unstable fractures.
Up to 100% displacement and 2 cm of shortening are acceptable and will not result in any long-term malalignment.
Coronal and sagittal angulation of up to 10–30° may also be acceptable. This is dependent on the age of the child and modeling capacity.
5. Single-leg spica
Dressing
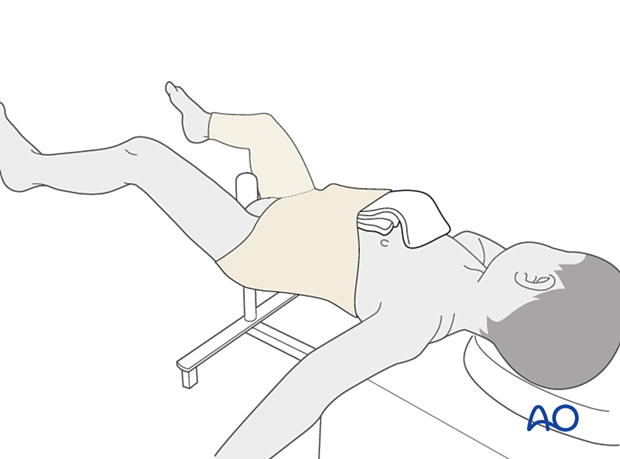
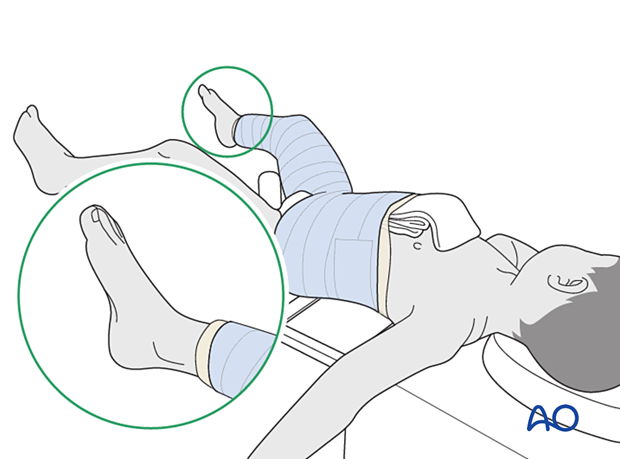
Place a folded towel over the central abdomen, inside the tubular bandage, to create space in the cast for breathing. Bring the tail of the towel towards the neck for ease of removal.
Padding
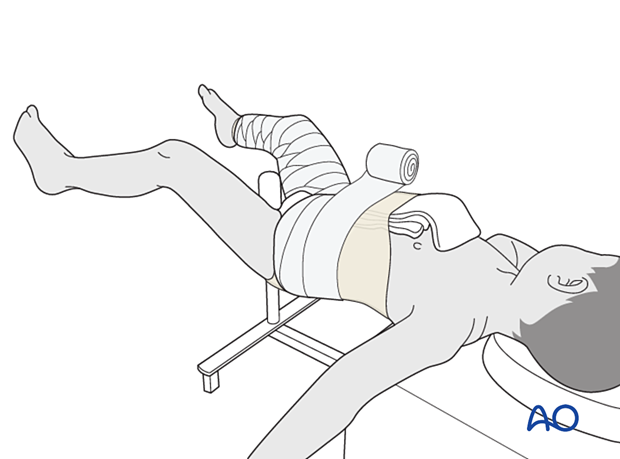
Apply a layer of cast padding, using a larger width for the body and a narrower one for the leg.
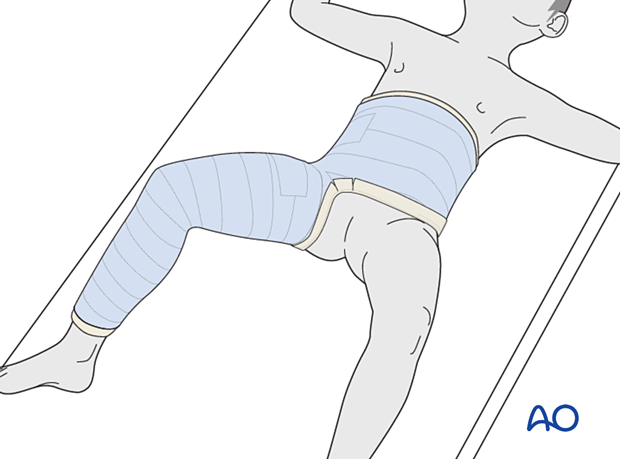
The cast extends from the nipple line, or just below, to just above the malleolus of the ipsilateral ankle.
Consider adding thick felt over the padding at the free edges of the chest and leg.
Cast application
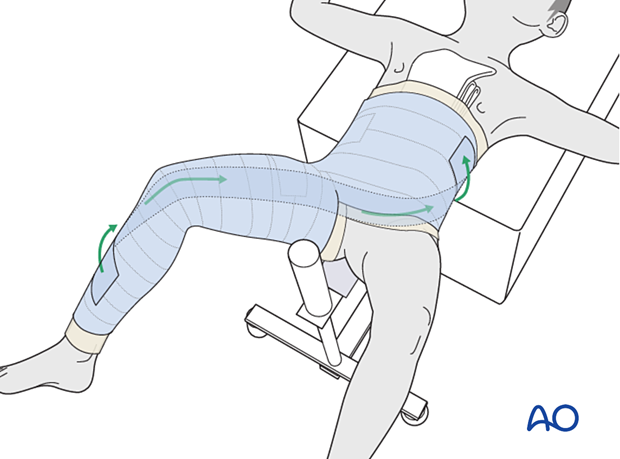
Apply a first layer of cast material to the leg and body sections, taking care to connect leg to body securely, in a figure of eight (spica technique).
Reinforcing slabs of casting material may be applied between the body and leg segments.
Molding to maintain reduction
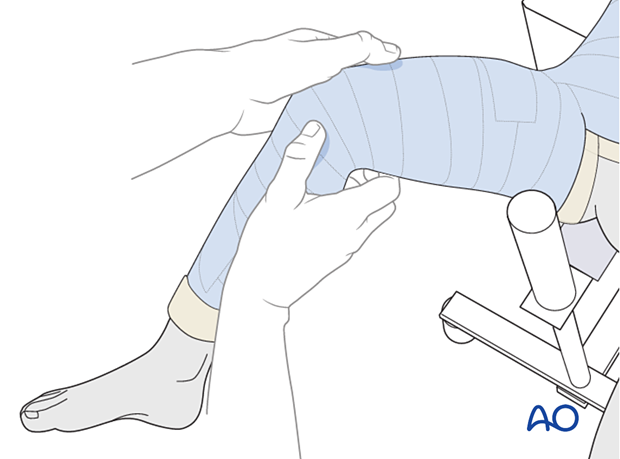
Mold the thigh segment of the cast to maintain reduction of the fracture. The anterolateral border of the cast should be molded to be flat, or mildly concave, at the fracture site. Some surgeons mold enough to produce 10° of initial valgus. This helps prevent the common fracture displacement into varus and apex anterior angulation. The pull of the hip abductors and the hip flexors on the proximal fragment are the deforming forces producing this displacement.
Pressure should be continued until the cast hardens. However, the cast will not achieve full strength for 36 hours.
Finalizing the cast
Fold the tubular bandage and padding over the edges before applying the final layer of casting material.
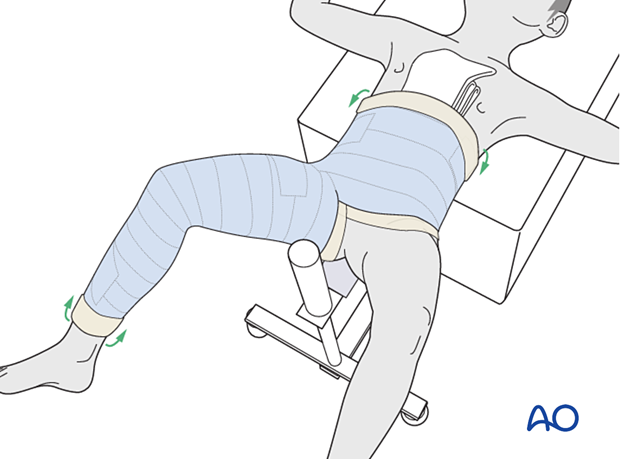
Once the cast material is hardened transfer the child from the spica box and remove the abdominal towel and the back support from the cast.
Trim the edges of the cast, to allow flexion of the opposite hip and adequate access to the perineal area.
Consider adding waterproof adhesive tape to the perineal edge of the cast.
Splitting the cast
If the cast around the abdomen has been applied too tightly, split it down the side and spread to allow for expansion or remove and reapply it.

6. One-and-a-half- and two-leg spica
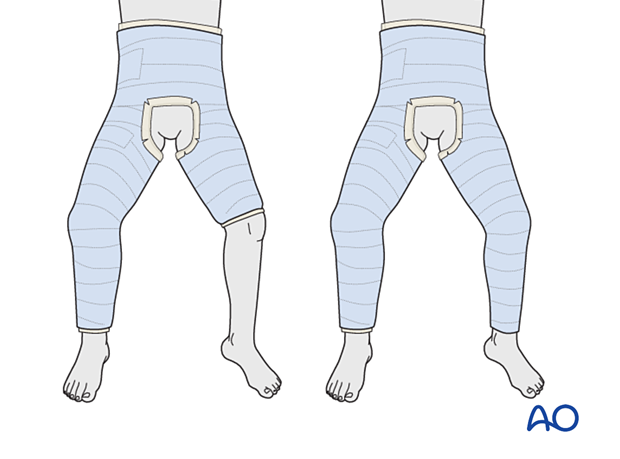
One-and-a-half- and two-leg spicas are applied in the same way as the single-leg spica with the cast, on the contralateral leg, extended to the knee or ankle.
Apply reinforcing slabs of casting material across the hip region of both legs.
Option: bar
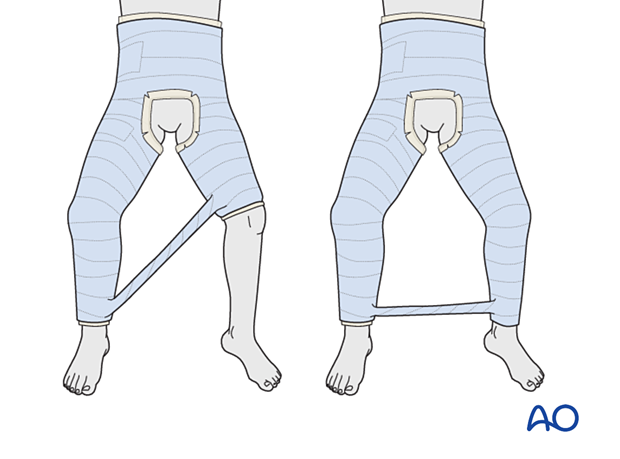
Consider the addition of a bar between the two legs to provide more stability to the cast.
7. Removal of spica cast
The spica cast can be removed once healing is demonstrated on x-ray. This is age dependent and should generally be possible within 4–6 weeks.
8. Aftercare
Mobilization
Mobilization with crutches or a walker commences after completion of nonoperative treatment of the fracture.
Physical therapy may be required for gait training, hip and knee range-of-motion exercises and muscle strengthening.
Activities involving running, and jumping are not recommended for three months.

Follow-up
Clinical and radiological follow-up is usually undertaken after 2–4 weeks.
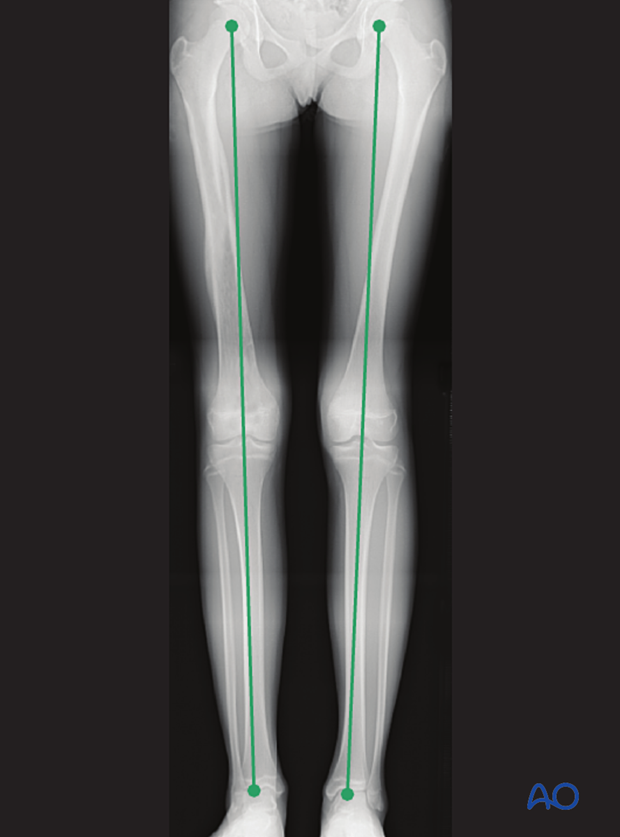
Clinical assessment of leg length and alignment is recommended at one-year. It uses a tape measure from the ASIS to the medial malleolus.
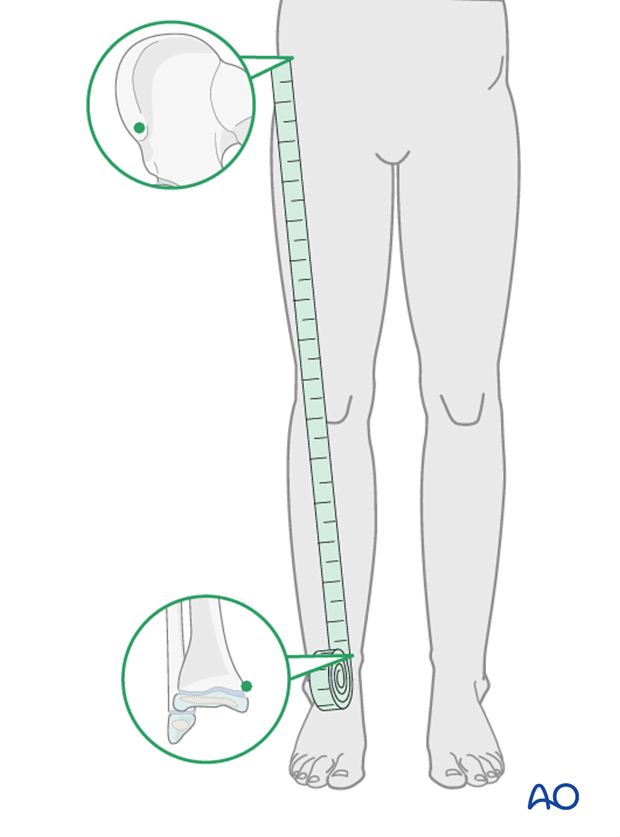
If there is any concern about leg length discrepancy or malalignment, long-leg x-rays are recommended.
Leg length is measured from the femoral head to the ankle joint.
