Elastic nailing
1. General considerations
This method involves fracture reduction and internal fixation with elastic nails (elastic stable intramedullary nailing; ESIN) in the skeletally immature patient.
The nails are inserted in an antegrade direction.
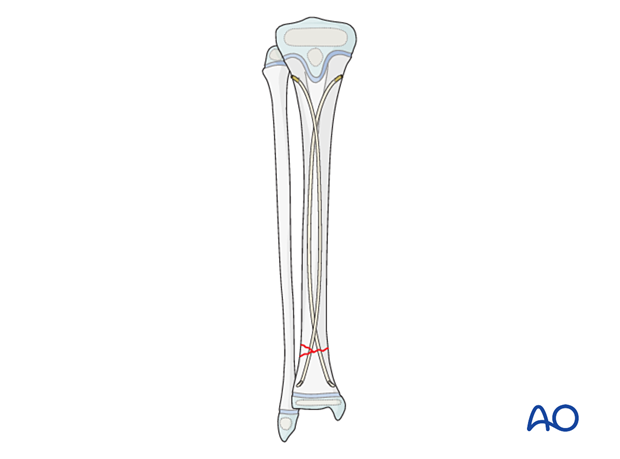
Nail configuration
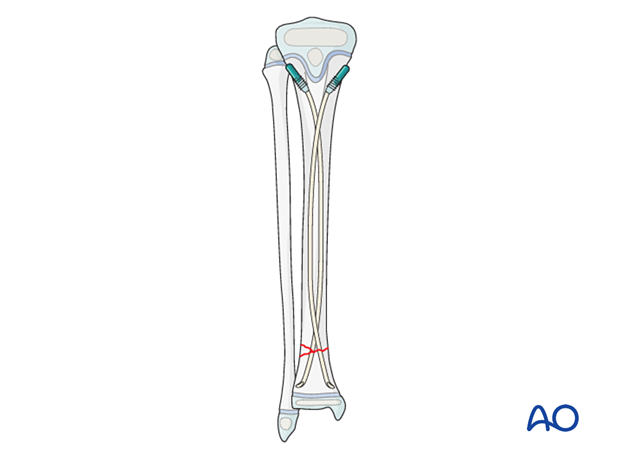
There are two recommended configurations:
- Option 1: The nails cross just distal to the entry points and proximal to the fracture; crossing of the nails at the level of the fracture should be avoided
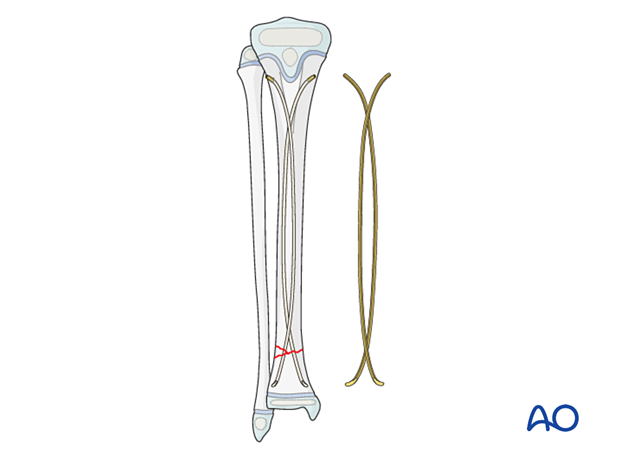
- Option 2: The nails only cross in the proximal shaft and do not cross distally
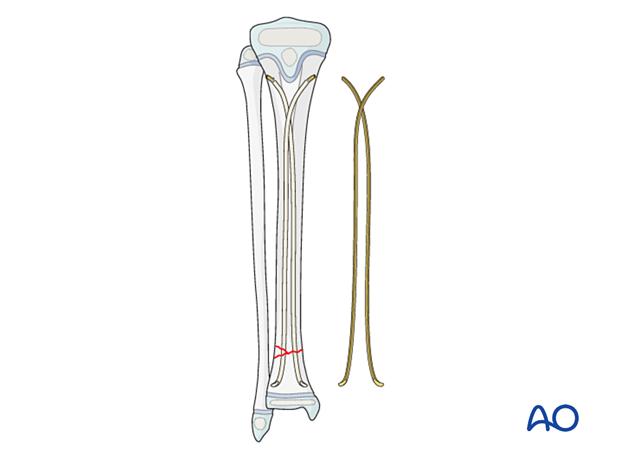
Associated fibular fracture
A fibular fracture often reduces with reduction and fixation of the tibial fracture and does not require separate consideration.
If the alignment and stability of the fibular fracture are unsatisfactory after fixation of the tibial fracture, surgical treatment of the fibular fracture is also required.
If the distal tibial fracture is highly comminuted, fixation of the fibular fracture may add to overall stability.
2. Instruments and implants
Instrument set
- 2.5–4.0 mm elastic nails
- Awl or drill
- Inserter
- Hammer
- End caps and insertion device
- Impactor
- Extraction plier
- Nail cutter
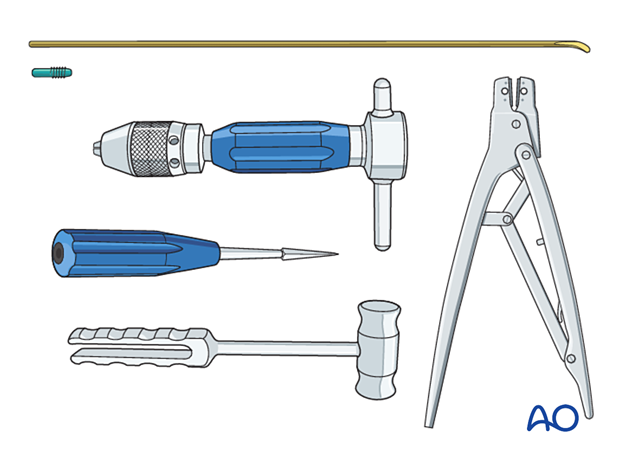
The nail cutter is useful to avoid sharp ends and soft-tissue irritation.
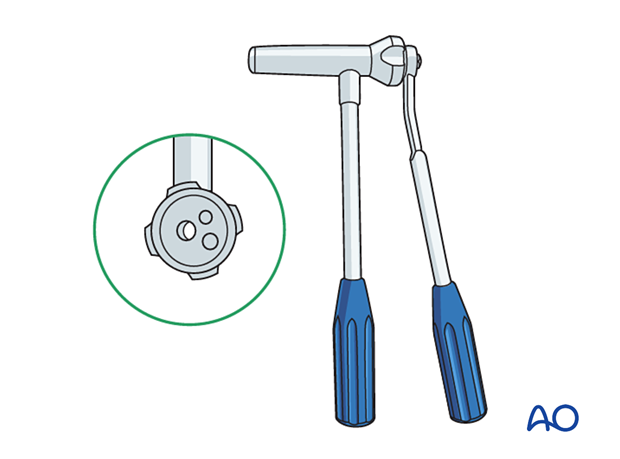
Nail diameter
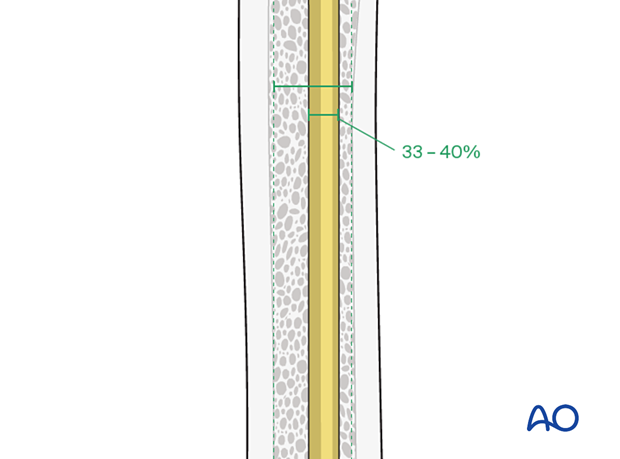
To estimate the optimal nail diameter, place the selected nail on the leg, parallel to the bone, and check with an image intensifier.
For optimal stability, the nail diameter should be between 33% and 40% of the narrowest part of the medullary canal.
Both nails should be the same diameter.
3. Patient preparation
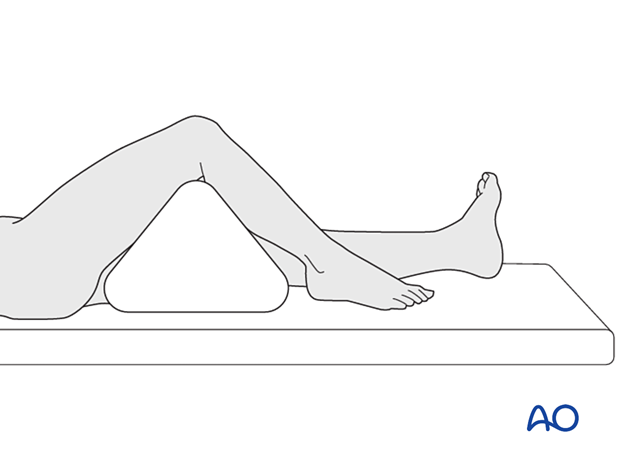
Place the patient in a supine position on a radiolucent table.
Put a bolster or triangle underneath the knee.
4. Approach
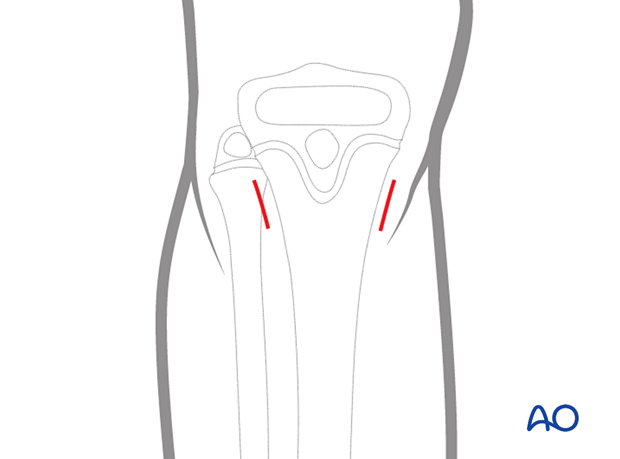
Expose the bone at both entry points.
An inadequate incision may lead to skin perforation and infection. The initial skin incision may be enlarged distally to prevent this.
5. Opening the canal
The medial and lateral entry points are 2 cm distal to the proximal tibial physis, avoiding the cartilage of the apophysis. The lateral entry point may be more anterior due to muscle coverage.
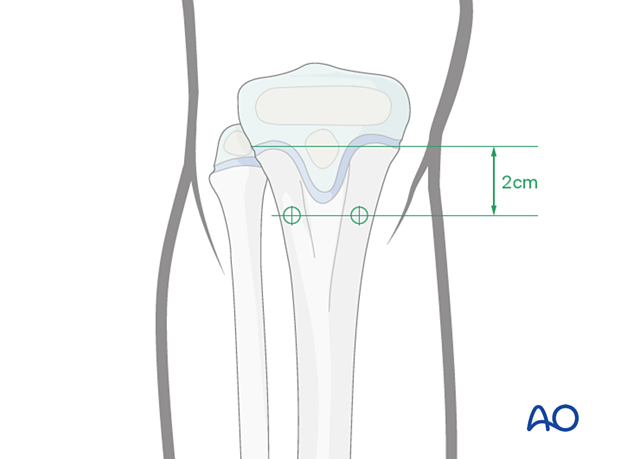
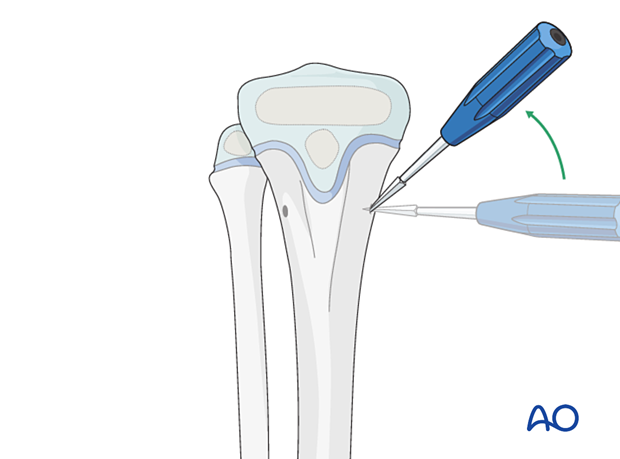
Place the drill or awl directly onto the bone and perforate the near cortex, under direct vision, perpendicular to the bone.
When the medullary canal is entered, angle the drill or awl handle 45° to the shaft axis.
Avoid perforating the far cortex.
6. Nail insertion
Crossing the nails at the level of the fracture should be avoided.
Precontour both nails in the distal third with the apex at the predetermined level.
If only one crossing is intended, the nail should be evenly contoured throughout its length.
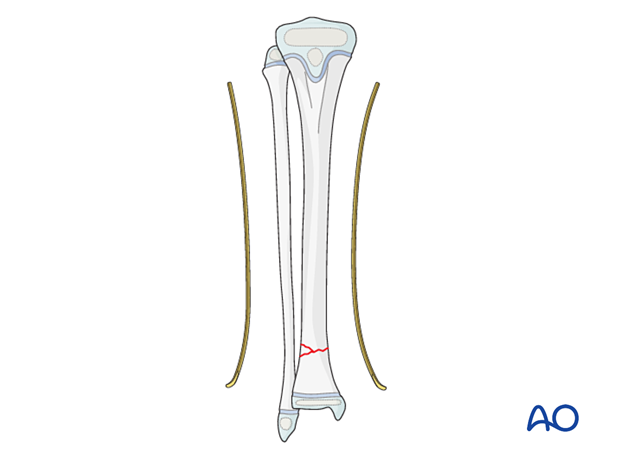
Insert the nail through one of the entry points into the intramedullary canal and advance it towards the fracture site with gentle oscillating movements.
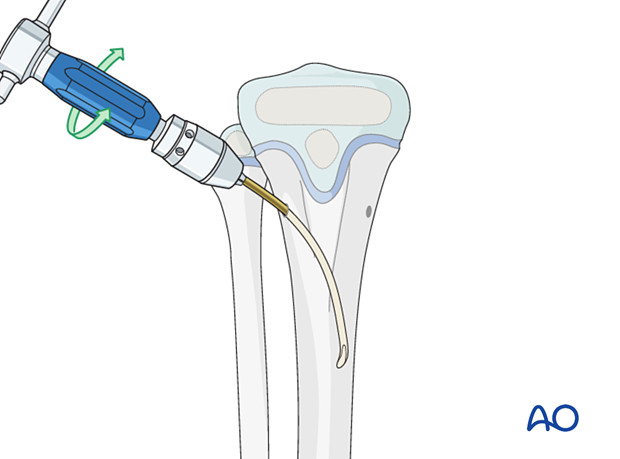
Insert the nail with the tip perpendicular to the shaft axis until the far cortex is felt. Rotate the nail up to 180° and advance it using the curved side of the tip.
If the tip is stuck in the far cortex and cannot be advanced, remove the nail and bend the tip to give a slightly more pronounced curvature.
A short working length (3–5 cm) between the entry point and the inserter improves control of the nail during insertion.
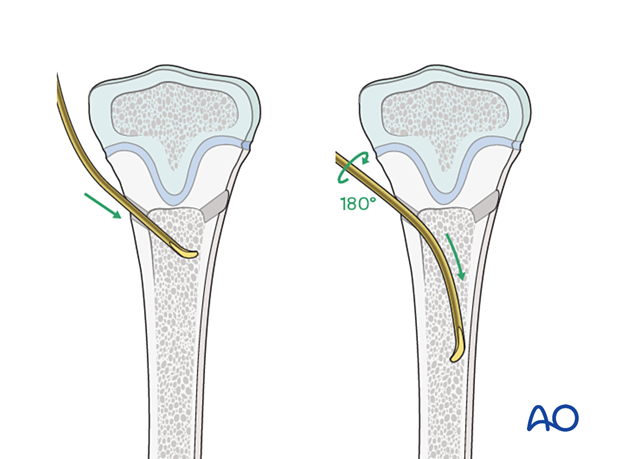
Insert the second nail into the other entry point in an identical manner.
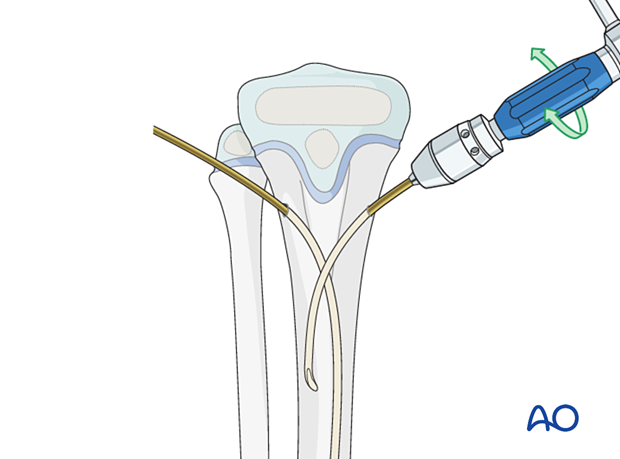
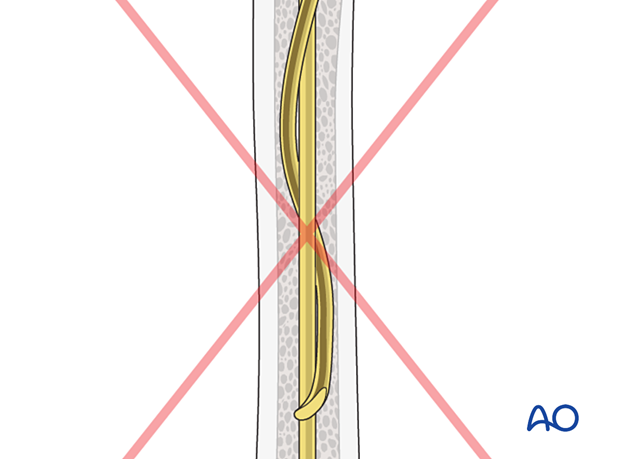
Make sure that the nails do not cross more than once to avoid twisting around each other in the medullary canal. This “cork-screw effect” would prevent nail advancement and an effective biomechanical construct.
To avoid this, do not rotate the nail more than 180° while inserting.
If this happens, reinsert the nails.
7. Distal fragment advancement
Reduce the fracture and advance both nails, with an oscillating movement, past the fracture site into the distal fragment.
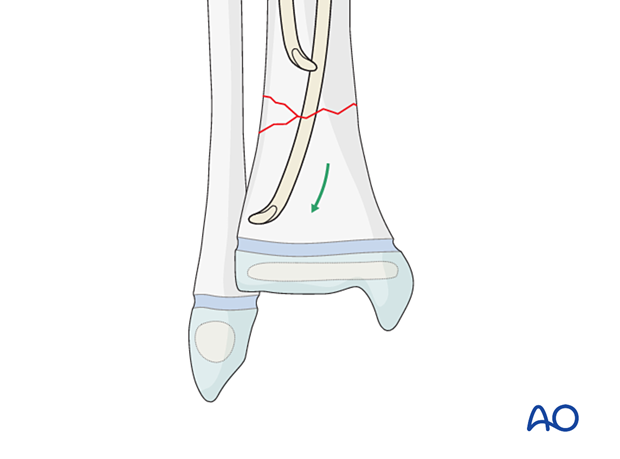
If it is difficult to advance either nail while positioned against the cortex, rotate the tip towards the center of the bone and advance it across the fracture.
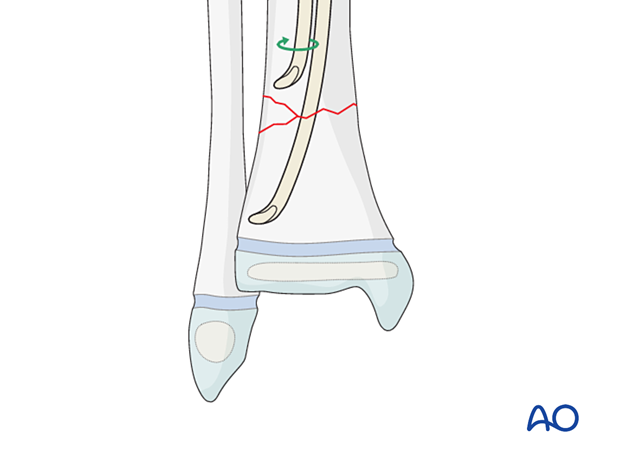
Once the nail has crossed the fracture, redirect the nail tip by reversing the initial direction of rotation.
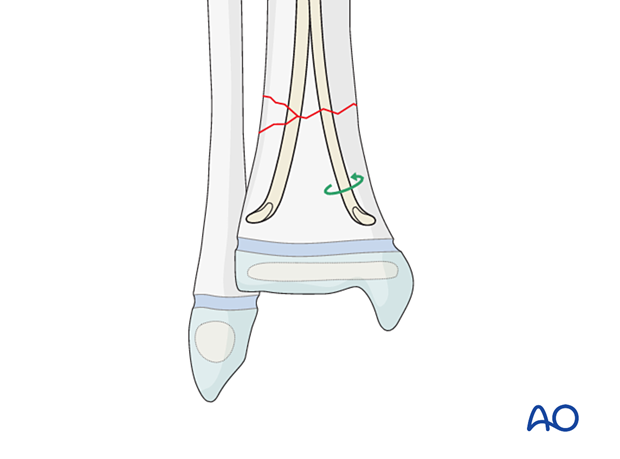
8. Final seating
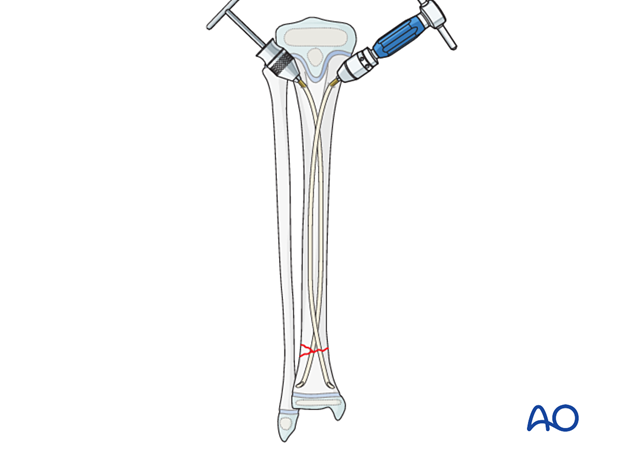
Advance the nails and impact them into the metaphyseal bone.
Align the nail tips so that they diverge.
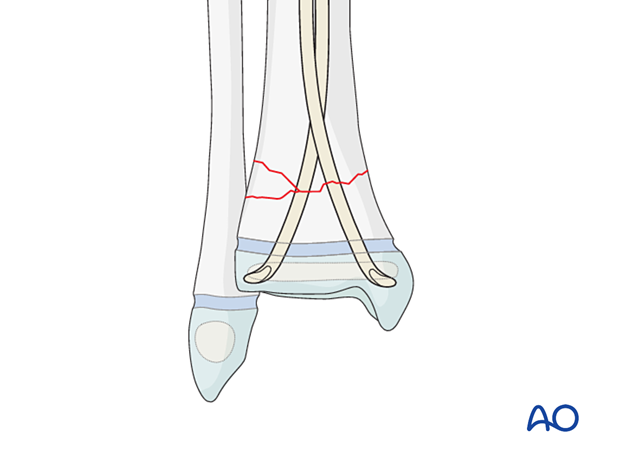
If the fracture is very distal, the physis can be perforated with the nails.
A single pass of a smooth nail across a physis is unlikely to produce a growth arrest.
9. Cutting the nails
Cut the nails with the nail cutter.
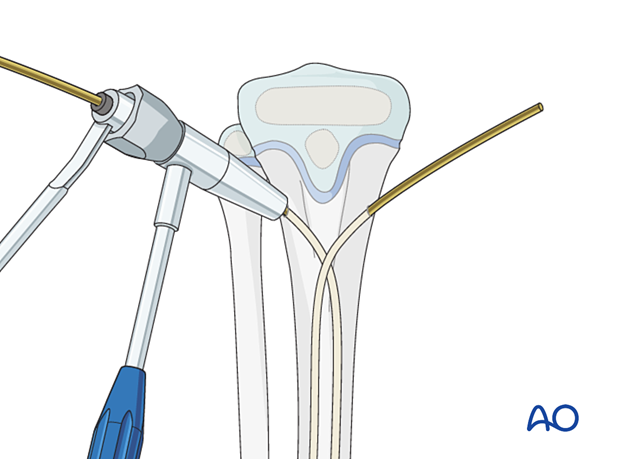
If this is not available, withdraw the nails far enough to apply a wire cutter but not beyond the fracture.
Reinsert the nails so at least 1 cm remains outside the bone.
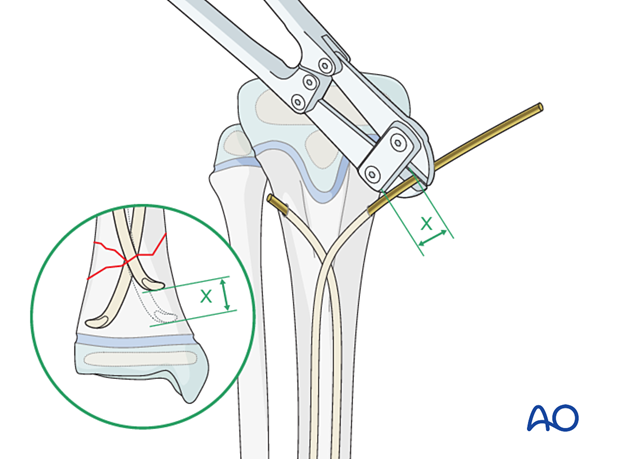
End caps
End caps may be used to increase axial stability and protect soft tissues.
The impactor can be used to ensure that the correct length of the nail remains outside the bone.
Bend the nail ends to elevate them from the bone to facilitate end-cap insertion.
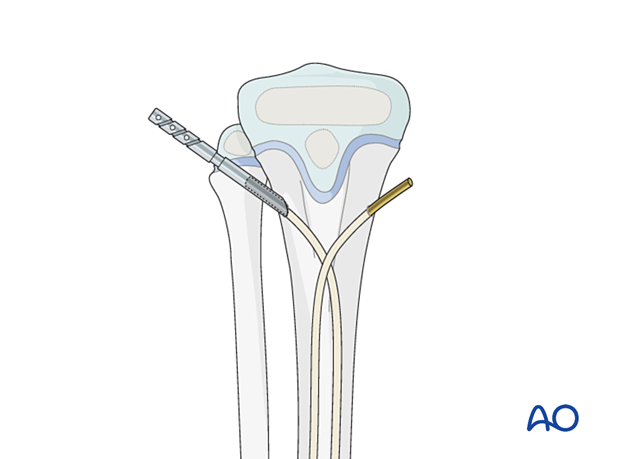
Insert the end cap over the cut end of the nail and screw it into the metaphysis.
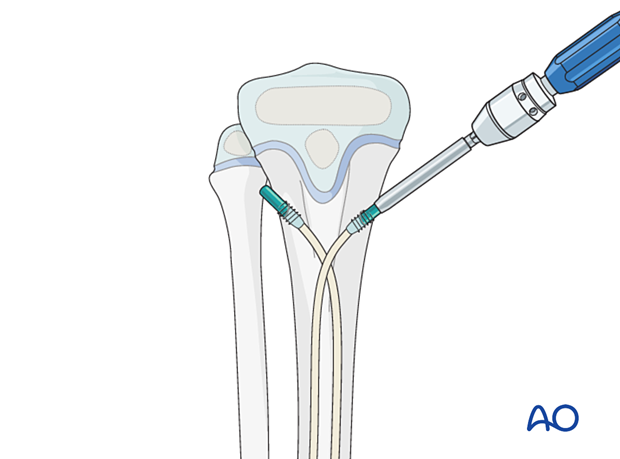
Final construct
10. Fibular fracture management
Most fibular fractures do not require treatment. Indications for fixation include:
- Augmentation of the stability of tibial fracture fixation
- Significant displacement of the fibular fracture
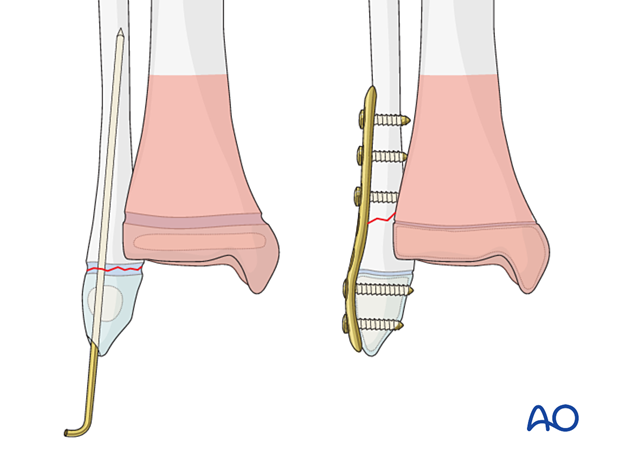
The type of fracture pattern dictates the method of fixation of the fibular fracture.
In a younger child, these fractures may be fixed with K-wires in a standard manner. Multiple passes of the K-wire through the physis should be avoided.
In an older patient with a closing physis, these fractures may require plate fixation.
If screws are inserted on both sides of the physis, compression should be avoided and the periosteum and perichondral ring not be disturbed. To protect the perichondral ring, a dissector or elevator may be used to offset the plate during screw insertion. The plate should be removed soon after the fracture has healed.
11. Final assessment
Recheck the fracture alignment and implant position clinically and with an image intensifier before anesthesia is reversed.
Confirm stability of the fixation by moving the ankle through a range of dorsi/plantar flexion.
12. Immobilization
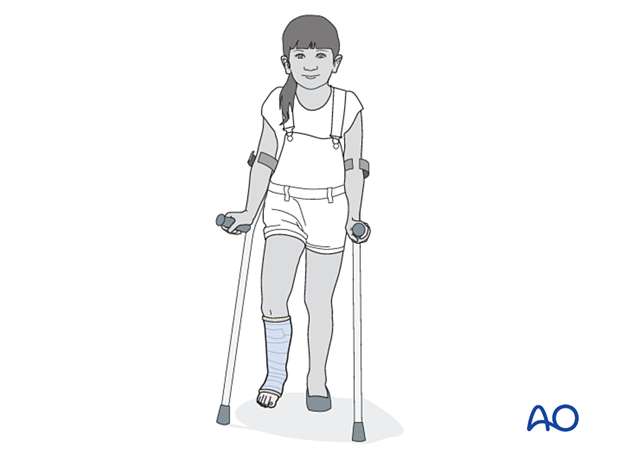
A molded below-knee cast or fixed ankle boot is recommended for a period of 2–6 weeks as the strength of fixation may not provide sufficient stability for unrestricted weight-bearing.
13. Aftercare
Immediate postoperative care
Weight-bearing is encouraged.
Older children may be able to use crutches or a walker.
Younger children may require a period of bed rest followed by mobilization in a wheelchair.

Pain control
Patients tend to be more comfortable if the limb is splinted.
Routine pain medication is prescribed for 3–5 days after surgery.
Neurovascular examination
The patient should be examined frequently to exclude neurovascular compromise or evolving compartment syndrome.
Discharge care
Discharge follows local practice and is usually possible within 48 hours.
Follow-up
The first clinical and radiological follow-up is usually undertaken 5–7 days after surgery to check the wound and confirm that reduction has been maintained.
Cast removal
A cast or boot can be removed 2–6 weeks after injury.
Mobilization
After cast removal, graduated weight-bearing is usually possible.
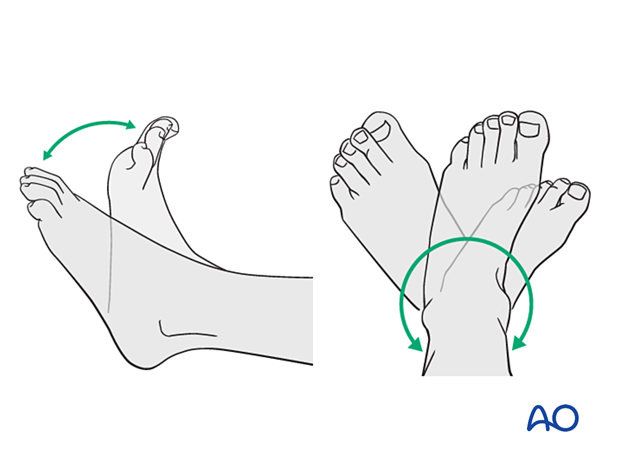
Patients are encouraged to start range-of-motion exercises. Physiotherapy supervision may be required in some cases but is not mandatory.
Sports and activities that involve running and jumping are not recommended until full recovery of local symptoms.
Implant removal
Implant removal is not mandatory and requires a risk-benefit discussion with patient and carers.


