External fixation
1. General considerations
Principles of modular external fixation
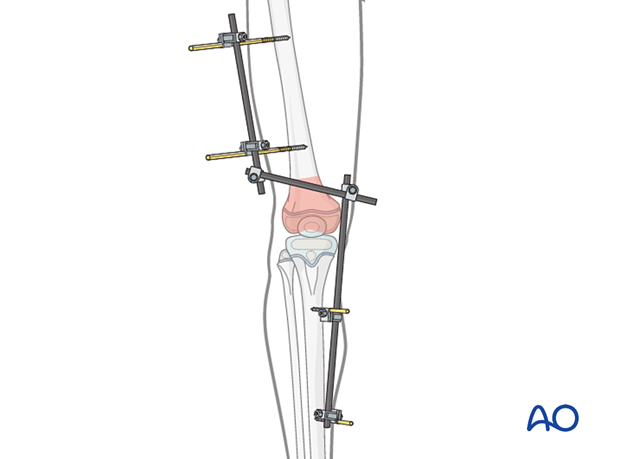
A joint-spanning fixator is often necessary in distal femoral fractures.
It is applied to the femur and the tibia, while the fracture zone is not disturbed.
Provisional reduction is achieved with distraction.
Details of external fixation are described in the basic technique for application of modular external fixator in children.
Specific considerations for the femoral shaft are given below.
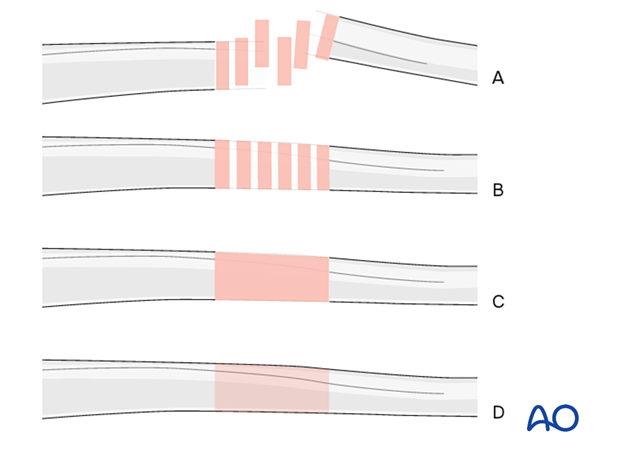
Throughout this section generic fracture patterns are illustrated as:
- Unreduced
- Reduced
- Reduced and provisionally stabilized
- Definitively stabilized
Pin size in femoral fractures
External fixation is suitable for all ages, but the pin diameter must be appropriate to the size of the bone.
Pins with a thread diameter of 3.0–6.0 mm are suitable for femoral fractures and should typically be between ¼ and ⅓ of the external bone diameter.
2. Patient preparation and approach
Patient positioning
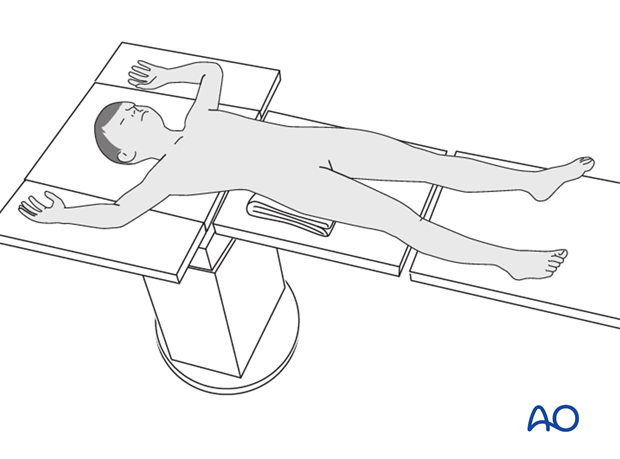
Place the patient in a supine position without traction on a radiolucent fracture table, with a bump under the ipsilateral flank.
When positioning the patient check the rotational alignment of the uninjured femur.
Approaches for safe pin placement
For safe pin placement make use of the safe zones and be familiar with the anatomy of the lower leg and the femur.

3. Pin insertion
Pin placement in the femur
The safe zone for the femur is lateral. In temporary external fixation, the pins should be placed so that they do not interfere with planned later definitive fixation; this may mean placing femoral pins anteriorly or anterolaterally.
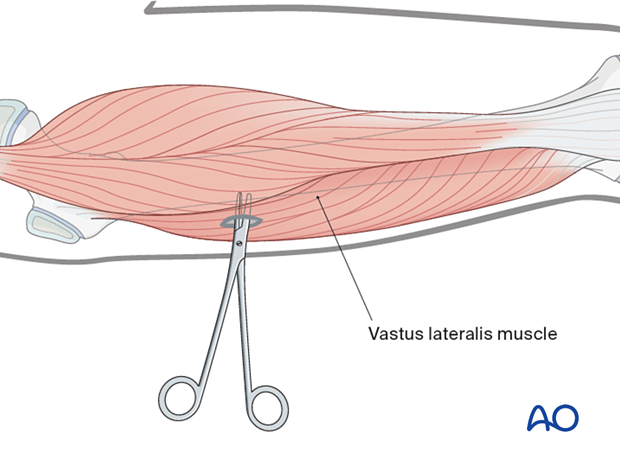
In the femur, blunt dissection of the soft tissues and the use of small retractors will minimize muscular damage.
Using a straight clamp, prepare a channel for the insertion of the pin.
Pin placement in the tibia
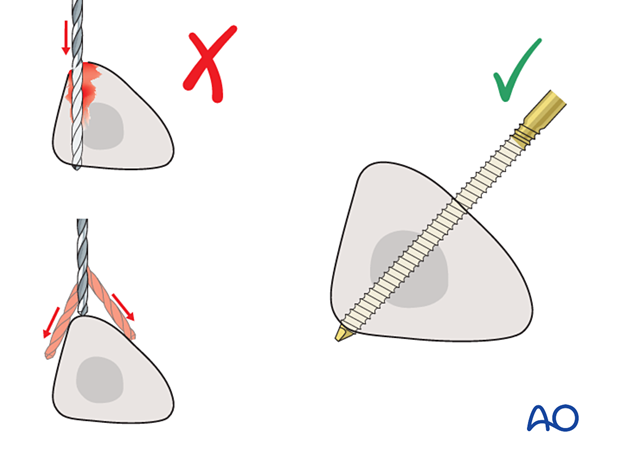
Drilling a hole in the thick tibial crest may be associated with excessive heat generation.
There is also a risk that the drill bit may slip medially or laterally damaging the soft tissues.
As the anteromedial tibial surface provides adequate thickness for placement of pins, this trajectory is preferable.
A trajectory 20°–60° relative to the sagittal plane for the proximal fragment and 30°–90° for the distal fragment is recommended.
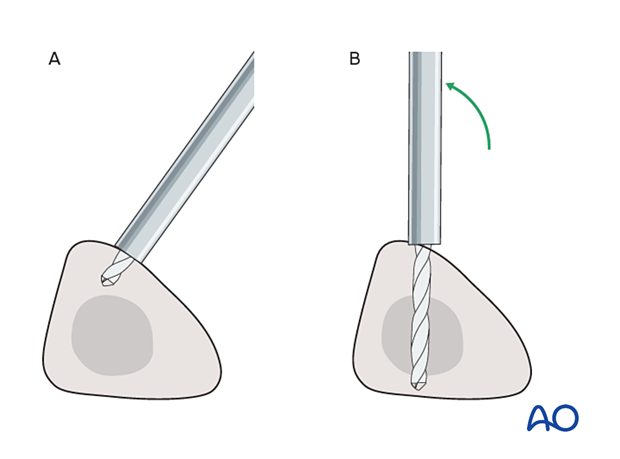
To avoid the fixator catching on the opposite leg, the pins may be placed more anteriorly. The drill bit is initially placed with the tip just medial to the anterior crest, and with the drill bit perpendicular to the anteromedial surface (A).
As the drill bit starts to penetrate the surface, the drill is gradually moved more anteriorly until the drill bit is in the desired plane (B).
This should prevent the tip from sliding down the medial or lateral surface.
4. Frame construction
Frame assembly
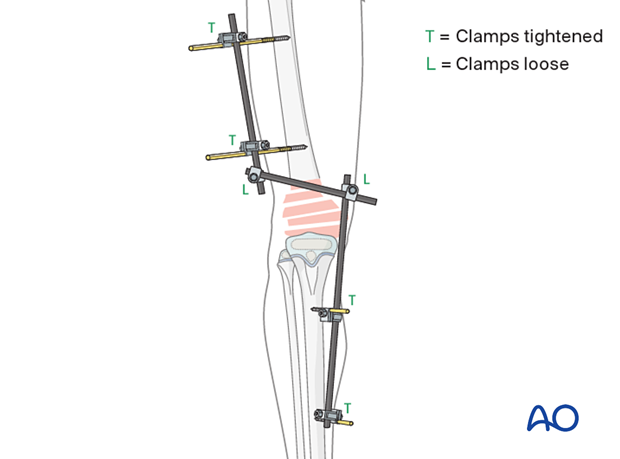
Attach the appropriately sized rods to the proximal and distal pins and tighten the rod-to-pin clamps.
Loosely apply a connecting rod to the two partial frames.
5. Reduction and fixation
Place a bolster behind the knee to produce slight flexion.
In a fracture with metaphyseal comminution, it should be understood that anatomical reduction will not be obtained and is not necessary.
When the growth plate is involved, anatomical reduction at the level of the growth plate is desirable.
This usually needs additional internal fixation but can be conducted as part of the same procedure.
Tighten the rod-to-rod clamps.
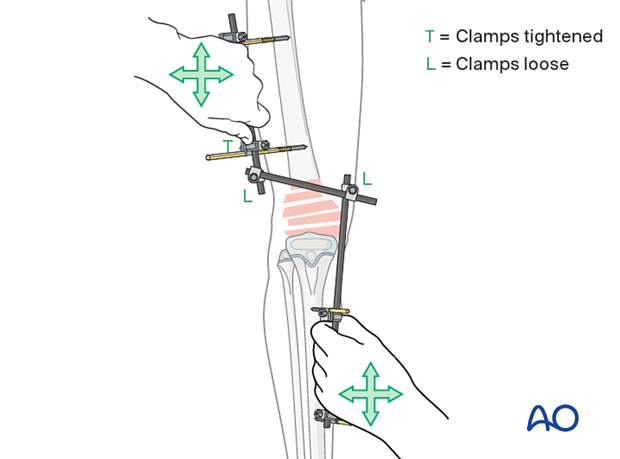
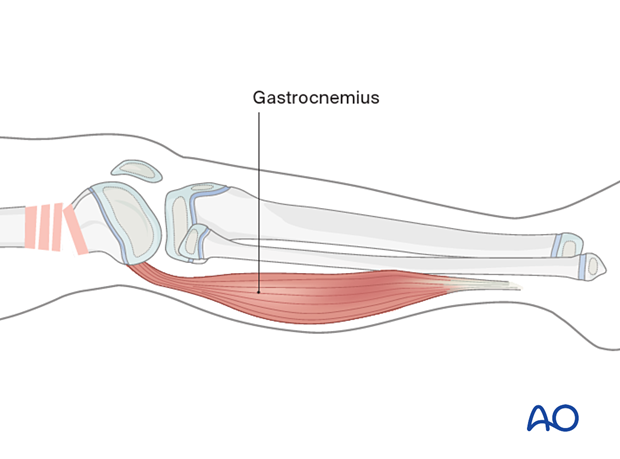
Pitfall: Flexion of the articular block
Additional rod
Another rod may be added to the construct to increase stiffness.

Pin sites
Fully flex the hip to release tethering of the vastus lateralis by the pins.
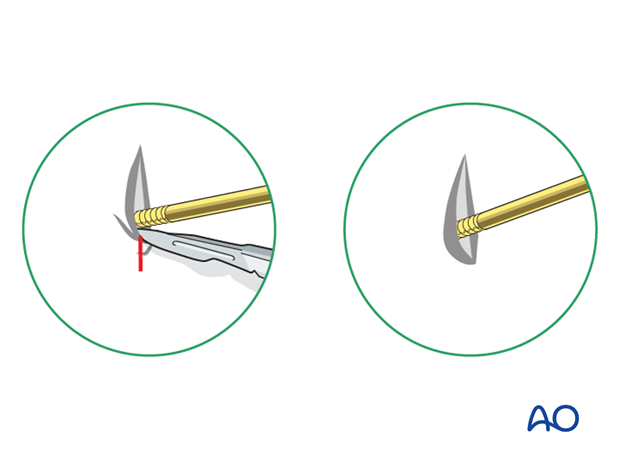
Check the skin at all pin sites and incise if tethered.
Dress the pin sites to prevent skin motion.
6. Final assessment
Check pin placement and fracture alignment under image intensification.
Use clinical examination to check lower extremity alignment.
7. Aftercare
Pin-site care
Pin-care protocolThere is no universally agreed protocol for pin-site care.
The following points are however recommended:
- Pin-site care should continue until removal of the external fixator.
- The pin sites should be kept clean.
- Crusts or exudates should be removed.
- The pins may be cleaned with water, saline, disinfectant solution or alcohol. The frequency of cleaning varies from daily to weekly.
- Ointments or antibiotic solutions are not recommended for routine pin-site care.
- Pin sites do not need to be protected whilst showering or bathing with clean water, but should be dried immediately.
Initial management is with oral anti-staphylococcal antibiotics.
In case of pin loosening or unresponsive pin site infection, the following steps should be taken:
- Remove all involved pins and place new pins in a healthy location.
- Debride the pin sites in the operating theater, using curettage and irrigation.
- Take specimens for microbiological culture to guide appropriate antibiotic treatment.
Internal fixation following an infected external fixator pin has a high risk of infection and should be avoided unless no reasonable alternative is available.
Mobilization
The patient should be encouraged to move the hip and ankle, within the limits of comfort.
In most cases the fixator is not stable enough to allow initial weight bearing. Partial weight bearing can be resumed when callus is visible, typically at 4 weeks.
Follow-up
The patient should be seen 5–7 days after surgery for a wound check.
X-rays are taken to check stability and alignment.
Fixator removal
Fixator removal is determined by the age of the child and healing rate.
Look for mature callus bridging 3 or 4 cortices of the femur before removing the frame.
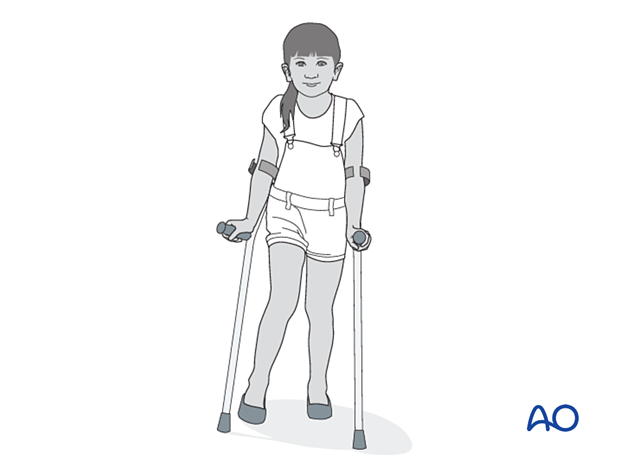
Refractures are a common complication and many surgeons recommend partial weight bearing with crutches after fixator removal to allow further strengthening of the callus.
Follow-up for growth deformity
All patients with physeal fractures of the distal femur should have clinical and radiological examination 8–12 weeks postoperatively to assess for signs of physeal growth disturbance or resumption of growth.
Examination should be repeated at intervals until resumption of normal growth is documented. This can be seen as a horizontal growth line (Harris line) that is parallel to the entire physis on both AP and lateral views.
A growth line that converges towards the growth plate may be the earliest sign of growth arrest and should prompt investigation/treatment or referral as appropriate.
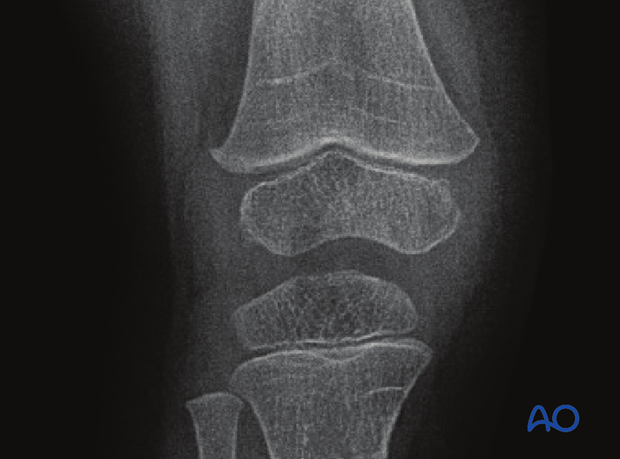
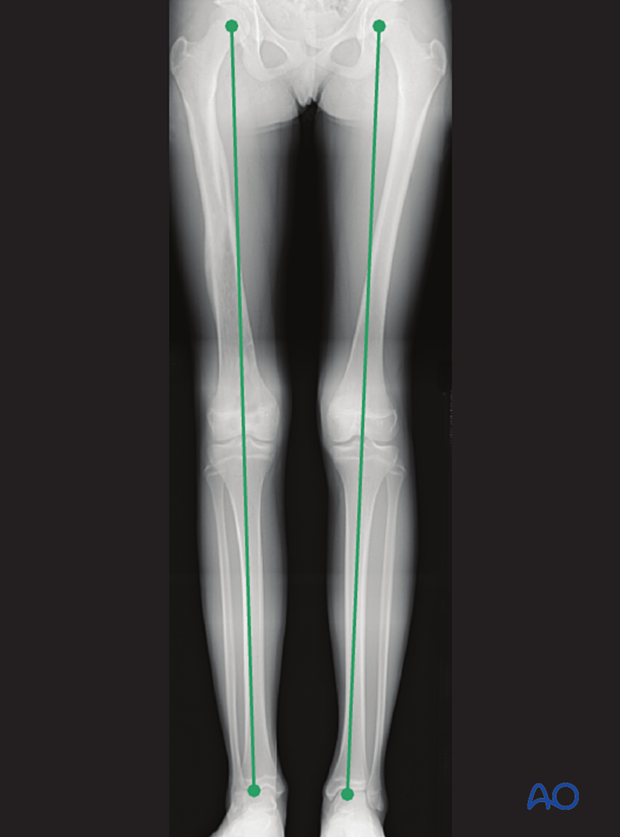
Clinical assessment of leg length and alignment is recommended at one-year.
Clinical assessment of leg length uses a tape measure from the ASIS to the medial malleolus.
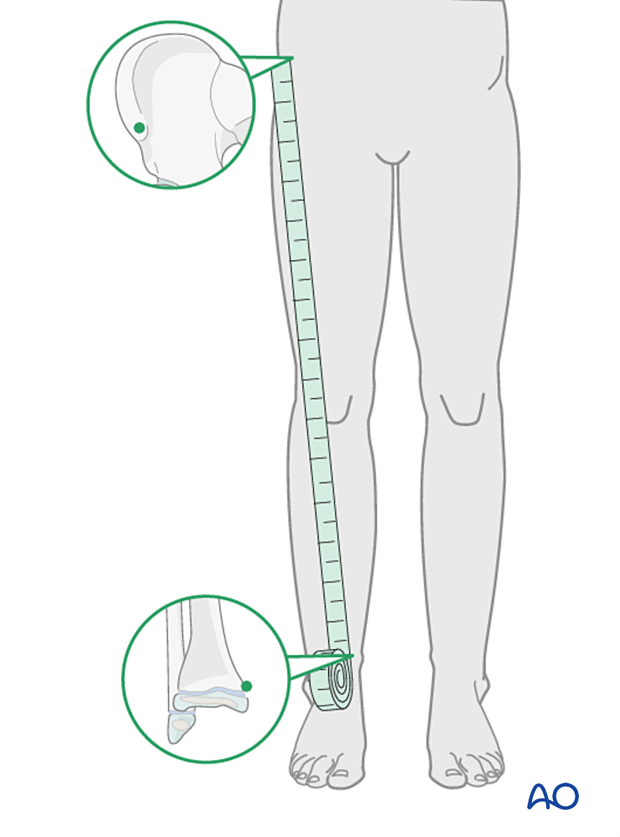
If there is any concern about leg length discrepancy or malalignment, long leg x-rays are recommended.
Leg length is measured from the femoral head to the ankle joint.
