Ring fixator (Ilizarov)
1. Principles and indications
Principles
As the ring fixator is an external fixator, it gives relative stability.
As pins are inserted across different planes in a multiplanar fixation, the construct provides great stability.
The stiffness of the construction can vary depending on the configuration of the fixation, the number of rings used, and usage of different types of pins such as K-wires or Schanz screws.
Depending on the assembly, the fracture can be distracted, or compressed, and deformities can be corrected.
A common use for the ring fixator is distraction osteogenesis to correct bone loss, shortening and deformity.
Indications
In fresh fractures, there are several indications for using a ring fixator:
- Severe soft-tissue compromise
- Multifragmentary fractures
- Fractures of the proximal or distal diaphysis, possibly with extension into the metaphysis
- Bone loss
- Delayed presentation of the fracture (>3 weeks)
2. Patient preparation
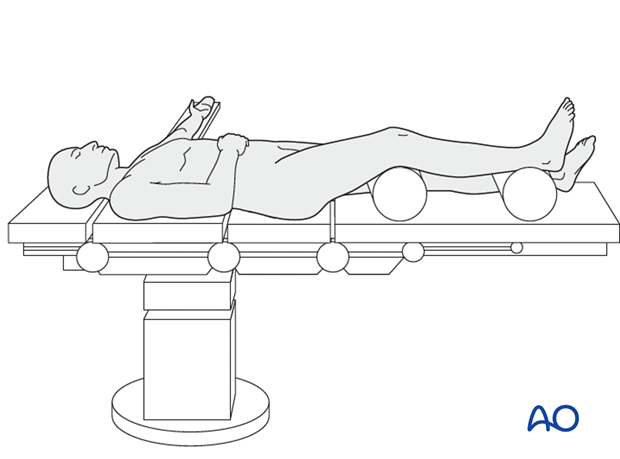
This procedure is normally performed with the patient in a supine position for ring fixator.
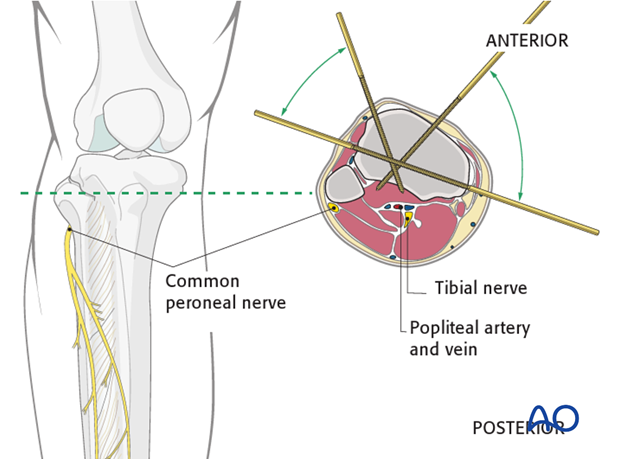
3. Safe zones for pin insertion
Inserting percutaneous instrumentation through safe zones reduces the risk of damage to neurovascular structures.
4. Fixation
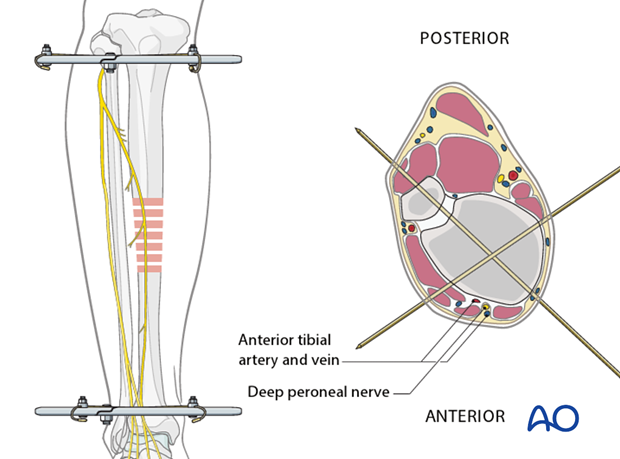
Proximal ring placement
The proximal ring is placed at the level of the head of the fibula and parallel to the knee joint.
The first wire is inserted from posterolateral to anteromedial going through the fibular head.
A second wire should be inserted as perpendicularly as possible to the first one from anterior to posteromedial.
A third wire is inserted between these two.
Distal ring placement
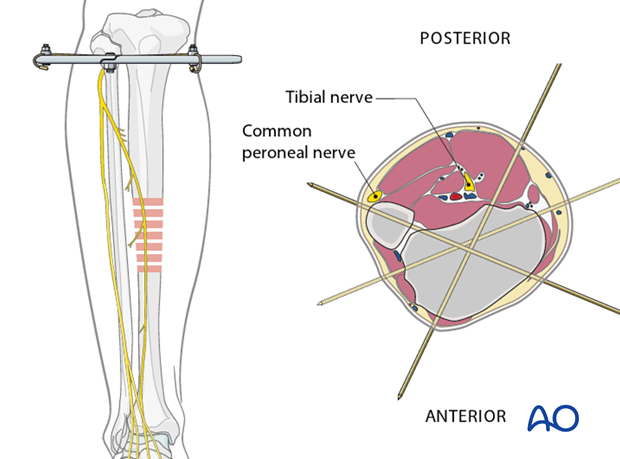
Place the ring at the level of the proximal end of the syndesmosis.
The first K-wire is inserted from posterolateral to anteromedial through the fibula.
A second wire should be inserted as perpendicularly as possible to the first one from anterolateral to posteromedial.
A third wire is inserted between these two.
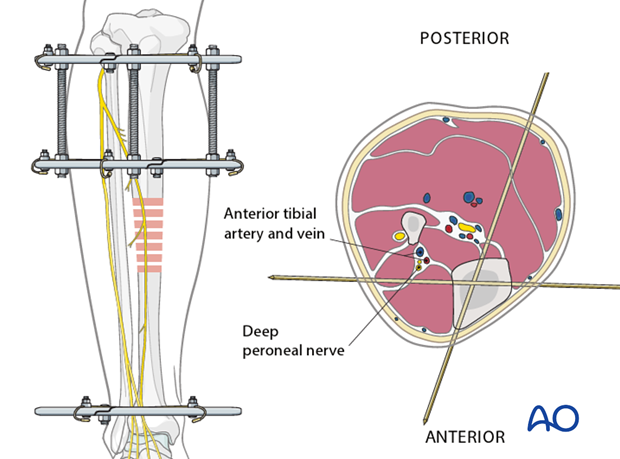
First intermediate ring
Add a second ring in the proximal fragment of the midshaft, connecting it with 4 rods to the proximal ring.
The distance of this third ring to the fracture will determine the working length. More length means more flexibility while a shorter length will give greater rigidity.
Insert 2 K-wires as perpendicular to each other as possible.
Note:
Using a Schanz screw will make the construct more rigid.
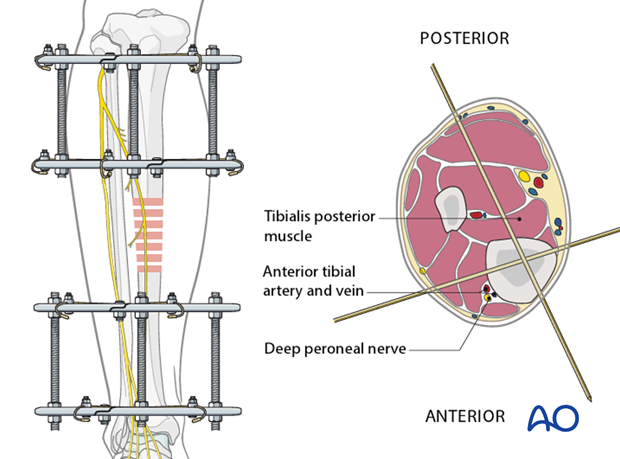
Second intermediate ring
Add a second ring in the distal fragment of the midshaft, connecting it with 4 rods to the distal ring.
Again, the distance of this fourth ring to the fracture will determine the working length. More length means more flexibility while a shorter length will give greater rigidity.
Insert 2 K-wires as perpendicular to each other as possible.
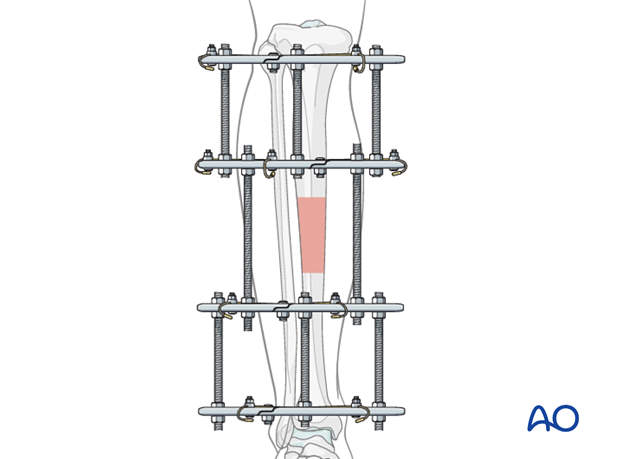
5. Reduction and final fixation
Connect the two intermediate rings with 4 rods without completely tightening the bolts.
Reduce the fracture by manipulating the rings. When reduction has been achieved, tighten the bolts.
6. Aftercare following application of a ring fixator
Immediate postoperative care
Immediately after surgery, while the patient is still in the hospital, emphasis is given to:
- Pain control
- Mobilization
- Infection and deep veinous thrombosis (DVT) prophylaxis
- Early recognition of complications
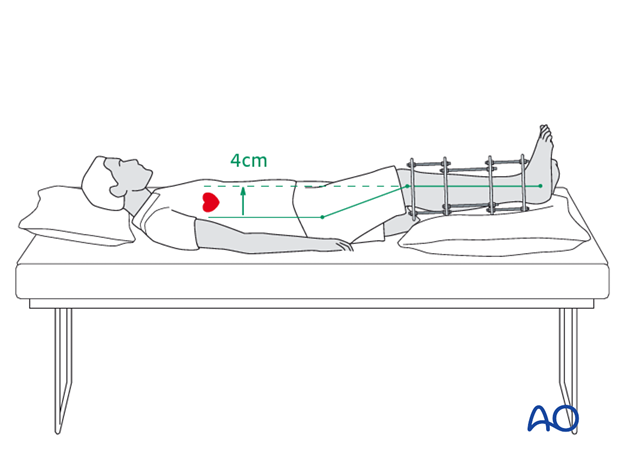
The patient’s leg should be slightly elevated, with the leg placed on a pillow, 4 cm above the level of the heart.
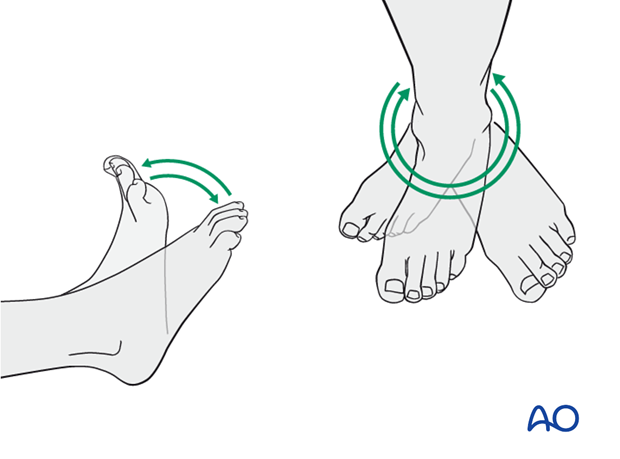
Advise the patient about foot positioning in order to avoid equinus deformity.
Pin-site care
Proper pin/wire insertion
To prevent postoperative complications, pin/wire-insertion technique is more important than any pin/wire-care protocol:
- Correct placement of pins/wires (see safe zones) avoiding ligaments and tendons, eg tibia anterior
- Correct insertion of pins/wires (eg trajectory, depth) avoiding heat necrosis
- Extending skin incisions to release soft-tissue tension around the pin/wire insertion (see inspection and treatment of skin incisions)
Pin-site care
Various aftercare protocols to prevent pin tract infection have been established by experts worldwide. Therefore no standard protocol for pin-site care can be stated here. Nevertheless, the following points are recommended:
- The aftercare should follow the same protocol until removal of the external fixator.
- The pin/wire-insertion sites should be kept clean. Any crusts or exudates should be removed. The pins/wires may be cleaned with saline and/or disinfectant solution/alcohol. The frequency of cleaning depends on the circumstances and varies from daily to weekly but should be done in moderation.
- No ointments or antibiotic solutions are recommended for routine pin-site care.
- Dressings are not usually necessary once wound drainage has ceased.
- Pin/wire-insertion sites need not be protected for showering or bathing with clean water.
- The patient or the carer should learn and apply the cleaning routine.
Pin/wire loosening or pin tract infection
In case of pin/wire loosening or pin tract infection, the following steps need to be taken:
- Remove all involved pins/wires and place new pins/wires in a healthy location.
- Debride the pin sites in the operating theater, using curettage and irrigation.
- Take specimens for a microbiological study to guide appropriate antibiotic treatment if necessary.
Before changing to a definitive internal fixation an infected pin tract needs to heal. Otherwise infection will result.
Mobilization
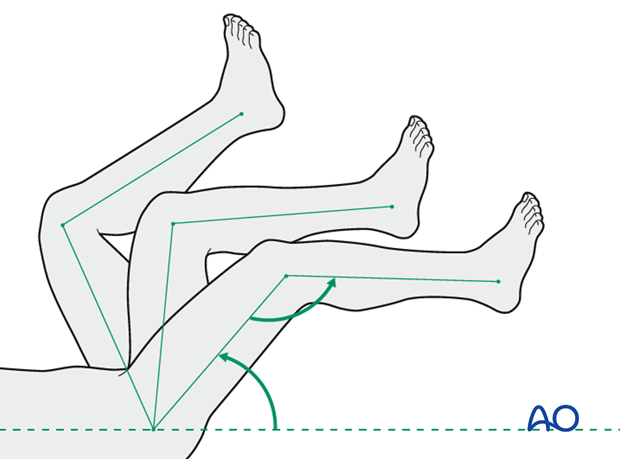
Immediately postoperatively, all joints (hip, knee, ankle) are actively mobilized.
Weight bearing
Partial weight-bearing with crutches should begin as soon as possible.
Depending on the consolidation, weight bearing can be increased after 6-8 weeks with full weight bearing when the fracture has healed.
Follow up
Clinical and radiological follow-up is recommended after 2, 6 and 12 weeks.
Implant removal
Remove the fixator after clinical and radiographical bony healing.
