K-wire fixation
1. Principles
Comminuted fractures
Fractures of the distal phalanx are the most common fractures in the hand.
Most frequently, the thumb, the middle finger, or somewhat less often, the index finger is injured.
Common complications of these injuries are:
- altered sensitivity (numbness, hyperesthesia, tenderness)
- cold sensitivity (cold intolerance)
- restriction of DIP joint movement
- nail growth abnormalities
The vast majority of fractures result from crush injuries with associated soft-tissue (nail bed, or pulp) lacerations.
Anatomy
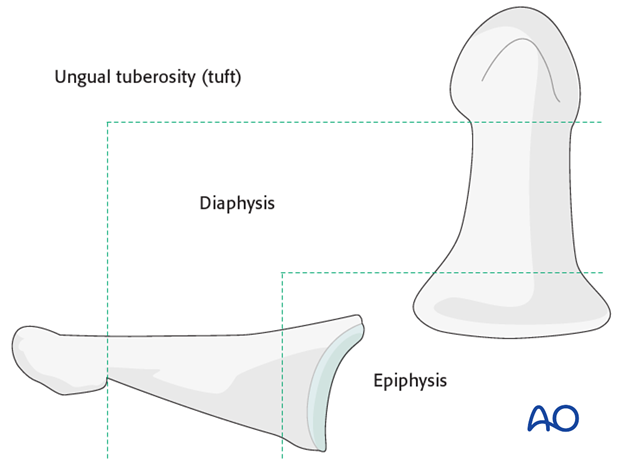
The distal phalanx is divided into three anatomical zones: most proximally the epiphysis, followed by the diaphysis (“waist”), and finally the ungual tuberosity (“tuft”).
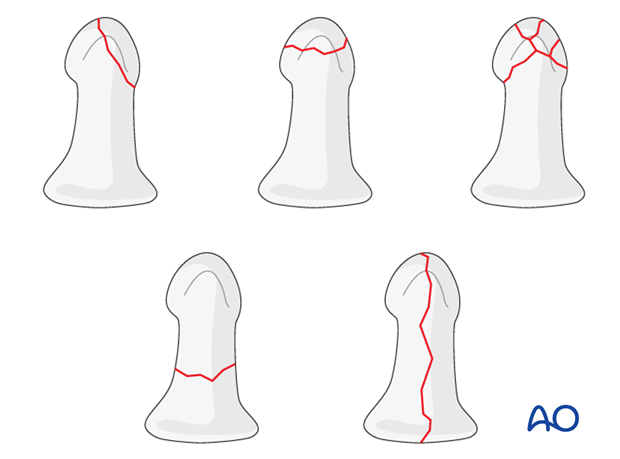
Classification of distal phalangeal fractures (after Schneider)
Schneider divides distal phalangeal fractures into tuft fractures, shaft fractures and articular fractures.
Tuft fractures include
- simple fractures
- comminuted fractures
Shaft fractures include
- transverse fractures
- longitudinal fractures
Articular fractures include
- palmar (flexor digitorum profundus avulsion fractures)
- dorsal (extensor avulsion, mallet fractures)
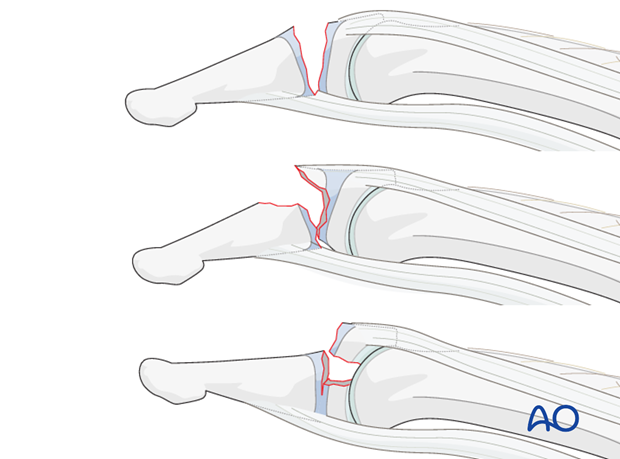
Intraarticular pediatric fractures after Salter-Harris
In children, three injury types are classified:
Type I: Passing through the growth plate.
Type II: Passing through the growth plate with tiny, triangular-shaped fracture fragment from the dorsal aspect of the distal phalangeal metaphysis.
Type III: Fracture across the epiphysis, exiting through the growth plate.
Diagnosis
The majority of fracures of the distal phalangeal diaphysis are closed and either undisplaced, or minimally displaced.
If these fractures are stable, they can be treated nonoperatively with splintage.
Crush injuries often have associated soft-tissue lacerations. Some of these are open fractures.
Fractures of the diaphysis can be transverse, oblique, or comminuted.
Obliquity of the fracture may occur either in the plane visible in the AP view, or in the plane visible in the lateral view. Always confirm the fracture configuration with views in both planes.
Diagnosis is based on
- the clinical history of the trauma and mechanism of the injury
- the clinical examination of the patient
- the x-rays.
AP and lateral x-rays are necessary for diagnosis. Be careful to avoid overlap of other fingers in the x-rays.
Recognizing nail-bed injuries
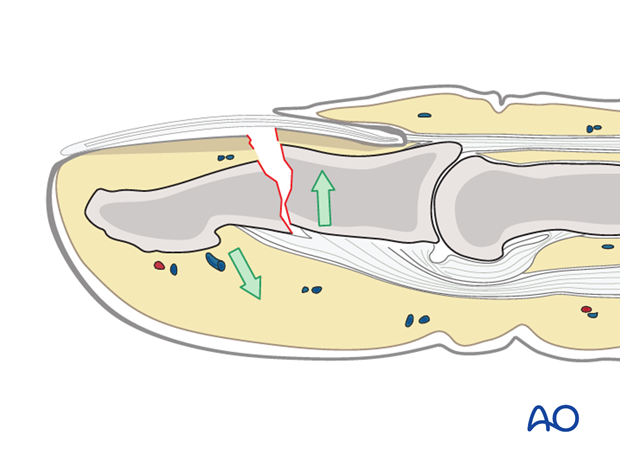
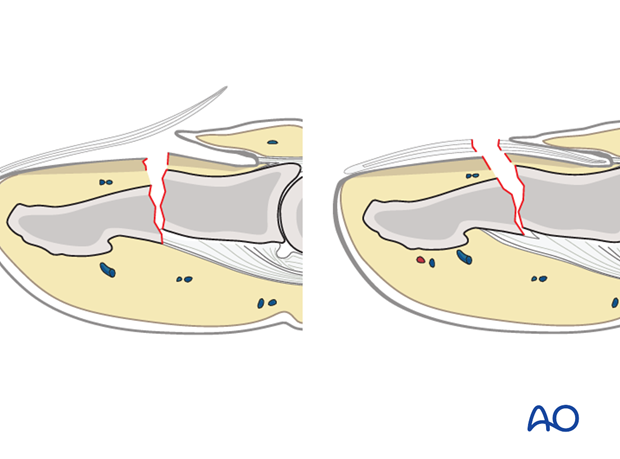
Closed fractures may look harmless on x-rays, but in the majority of cases, the nail bed has been torn.
Flexor and extensor tendons displace the fracture with a typical palmar angulation of the tuft fragment.
Open fractures
Open fractures present in two ways: with an avulsed nail plate, or with a fractured nail.
In both types, the fracture opens dorsally, and the nail bed is also injured.
It is mandatory precisely to repair the nail bed. Otherwise, permanent deformity of the nail growth can result.
These procedures are very difficult to conduct successfully without the help of magnifying loupes.
The general principles for treating all open fractures apply. As the majority of these injuries are due to crushing, edema of the soft tissues is most likely to develop and primary closure of any associated skin lacerations is not advisable.
2. Preparation and approach
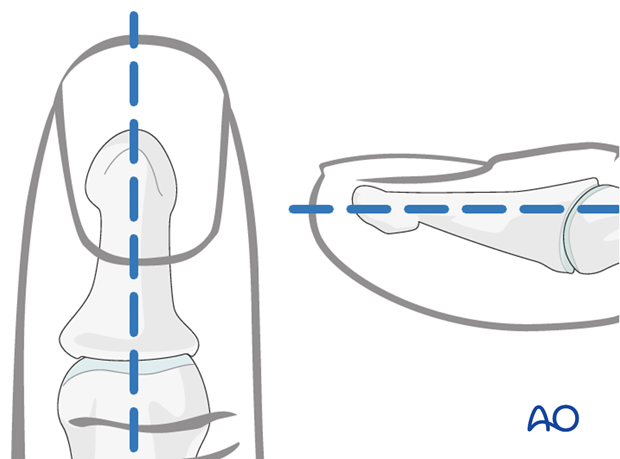
Marking K-wire track
In order to avoid unnecessary radiation from image intensification, mark the planned track of the K-wire with a skin marker (or methylene blue) on the distal phalanx in both the AP and the lateral aspects.
Approach
For this procedure a percutaneous approach through the finger tip is normally used.
3. Fracture reduction
Cleaning of the fracture site
In case of an open fracture, lift the nail and irrigate the fracture site to gain a better view. Clear the fracture site of blood clots and debris.
Reduction by manipulation
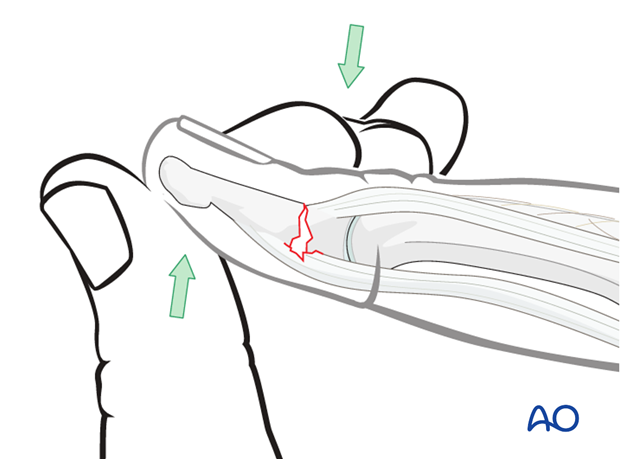
Reduction can be obtained by digital manipulation.
Extend the distal fragment of the fracture by applying pressure with the thumb. Apply counterpressure with the index finger onto the dorsal aspect of the proximal fragment.
It is mandatory that the dorsal aspect of the fracture be reduced without a step, so that no sharp edges can injure the nail bed or the germinal zone.
Use K-wire as joystick
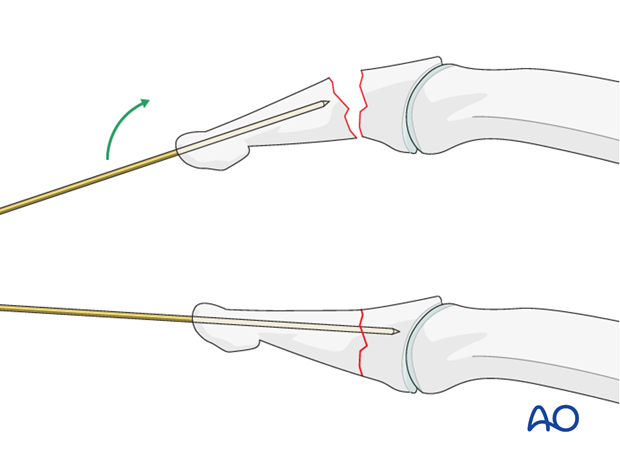
A K-wire can be introduced through the tip of the distal phalanx and advanced not quite up to the fracture line. Use the K-wire as a joystick to reduce the fracture.
Once reduction is satisfactory, the wire can be advanced across the fracture plane.
Inside-out procedure for reduction
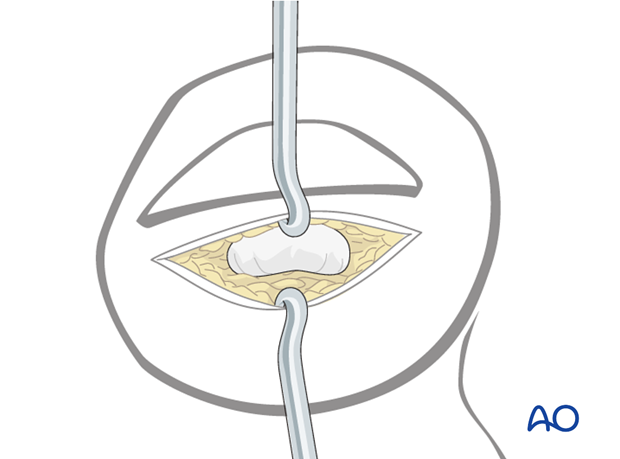
Another option, in open fractures, is to introduce a double-ended K-wire in a retrograde fashion with the inside-out technique. This has the advantage of being a much easier and more precise way to prepare the K-wire track.
Flex the distal fragment to gain an optimal view of the fracture surface. Insert the K-wire through a drill guide and advance it along the medullary canal and through the distal tip of the tuft, piercing the soft tissues until it exits the skin.
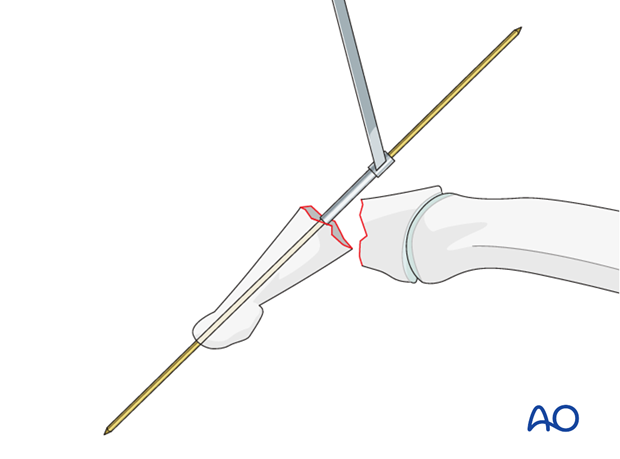
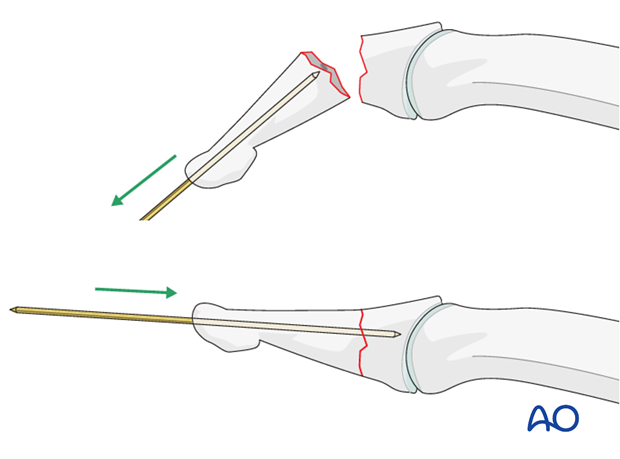
Leaving the drill guide in place for soft-tissue protection, pull on the distal end of the K-wire until it is flush with the fracture surface.
Use the K-wire as a joystick to reduce the fracture, and advance it through the fracture up to the base of the distal phalanx.
4. Inserting the K-wire
Pitfall: slipping K-wire
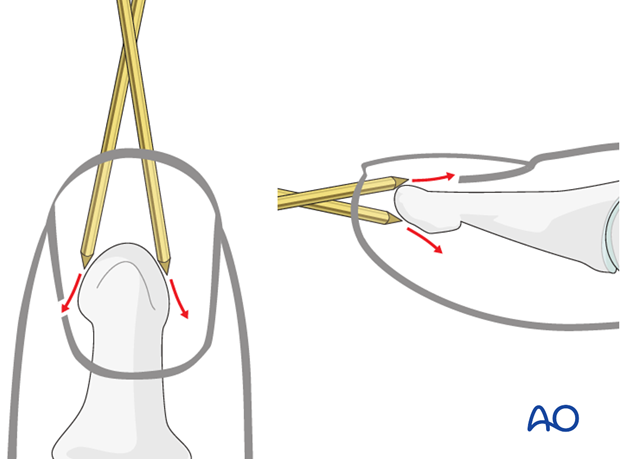
Due to the conical shape of the tip of the distal phalanx, there is a risk of slippage of the K-wire, either in a lateral, palmar, or dorsal direction.
Pearl: preventing slippage
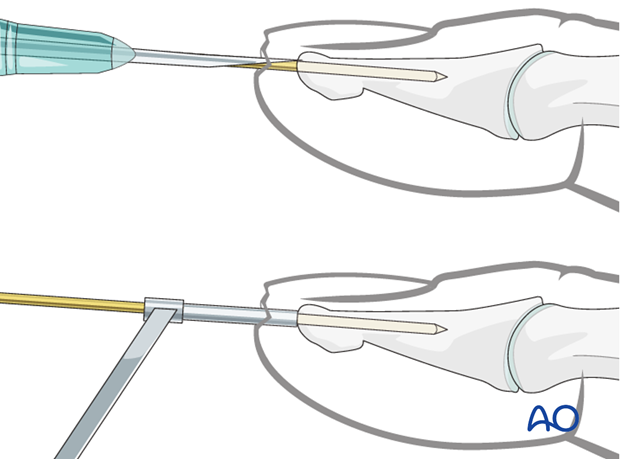
To prevent the K-wire from slipping during introduction, either a 16 gauge hypodermic needle or a 1.0 mm drill guide can be used. Either finds good purchase on the tip of the distal phalanx and will ensure that the K-wire is inserted in the center and along the longitudinal axis of the phalanx.
Pitfall: K-wire in wrong plane
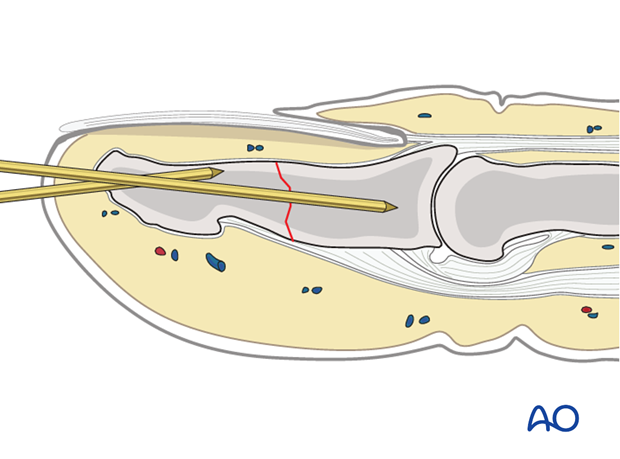
If a K-wire is mistakenly inserted at an angle to the axis of the phalanx, we recommend leaving it in until a second K-wire has been inserted in the correct orientation. This will prevent the wire from going unintentionally along the wrong track.
Fully insert the K-wire
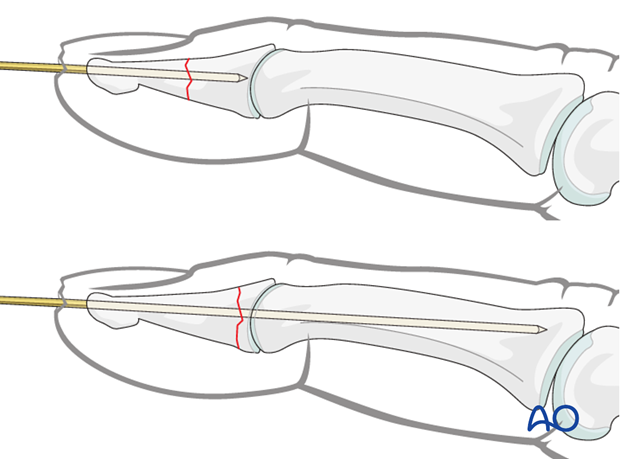
The K-wire is advanced across the distal phalanx up to the DIP joint.
Proximal or comminuted fractures
In very proximal, or comminuted, fractures, the K-wire is advanced across the DIP joint into the middle phalanx, as far as its base, in order to achieve more stable fixation. Be careful not to penetrate the PIP joint.
Cut the K-wire
There are two methods for completing K-wire fixation. Each method has its advantages and disadvantages.
K-wire beneath the skin
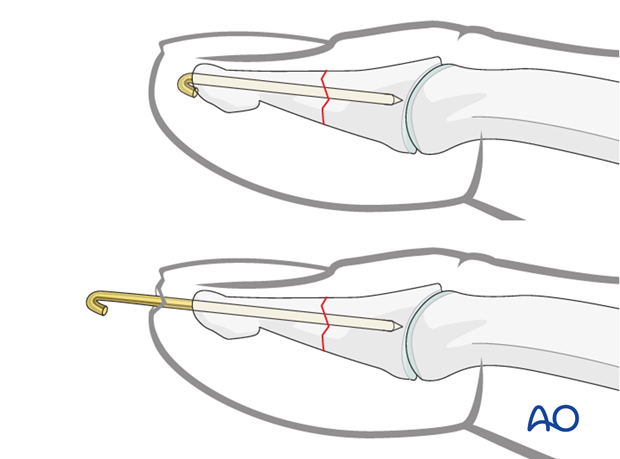
Cut the K-wire just distal of the tip of the distal phalanx. Retract it by about 5 mm (be careful not to pull the tip of the wire back through the fracture plane), bend it through 180 degrees and then bury it in the bone to avoid soft-tissue irritation.
This method has the advantage that the patient may speedily regain full use of the finger.
However, removal of the K-wire requires another minor surgical procedure under local anesthesia.
K-wire protrusion through the skin
Cut the K-wire so that it protrudes through the skin, about 1 cm from the tip of the finger. Bend its end to form a tight U-configuration to prevent catching on clothing, etc.
Leaving the K-wire to protrude through the skin in this way has the advantage of its being easy to remove. The disadvantages are patient discomfort and risk of pin-track infection.
5. Repair of the nail bed
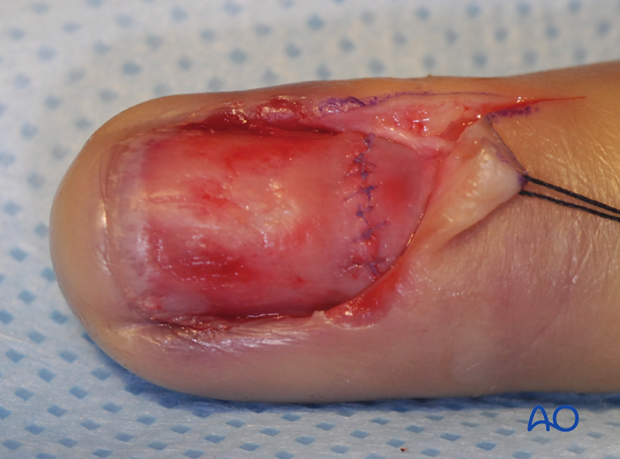
It is desirable precisely to repair the nail bed or the germinal zone, otherwise, permanent deformity of the nail growth can result.
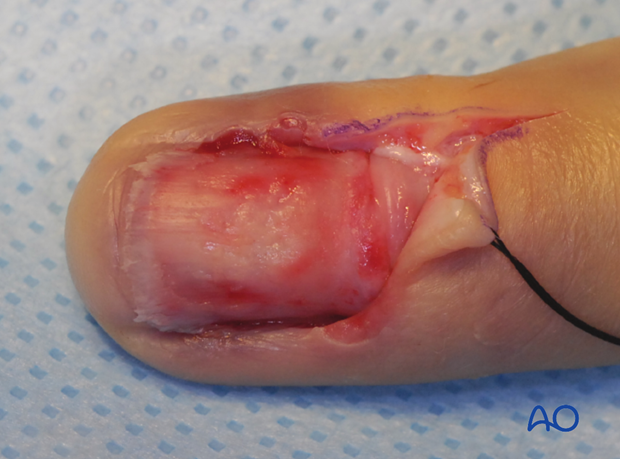
Separate stitches using 8.0 absorbable suture material should be used. Precise reduction of the nail is necessary.
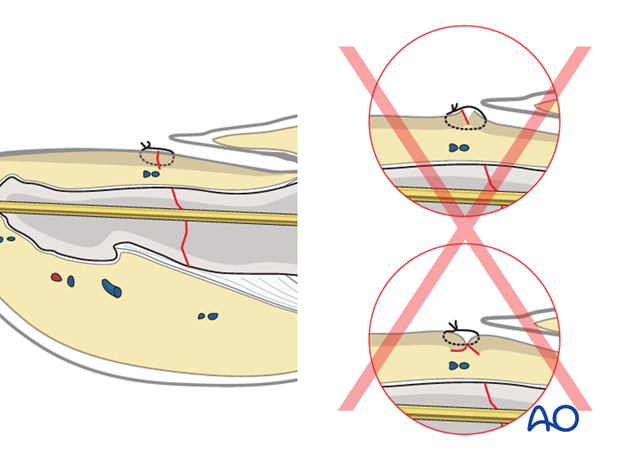
Pitfall: Eversion or inversion of nail bed edges
Be careful to suture the torn edges of the nail bed without eversion or inversion, otherwise, permanent deformity of nail growth can result.
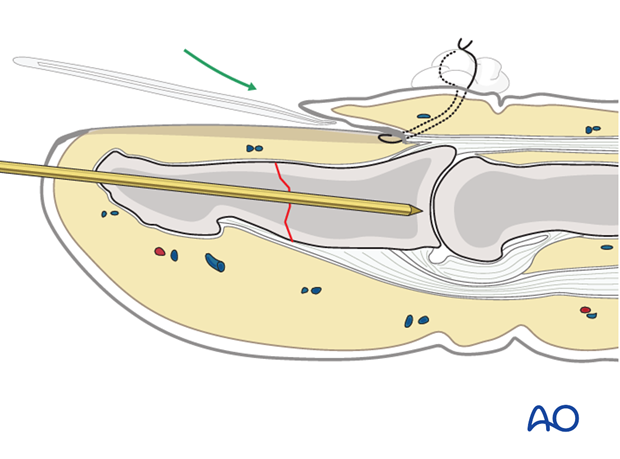
6. Dislocation of the nail bed
Often, the nail bed and the germinal matrix are avulsed. In such cases, they will have to be reinserted.
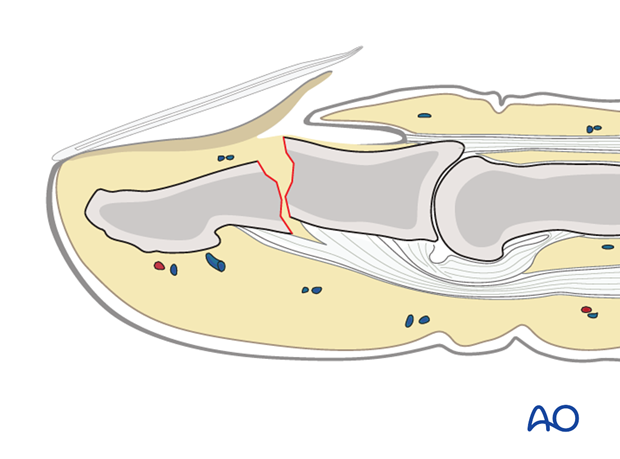
Anatomy
A thorough grasp of the detailed anatomy of the distal segment of the finger is important in the diagnosis and management of these injuries.
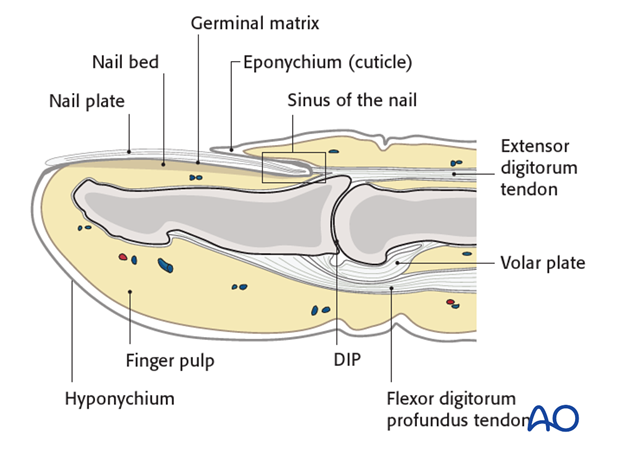
Remove the nail
If the nail is still attached, remove it and preserve it in a betadine solution.
Insert suture
Insert a needle with a 5 (0) nonresorbable nylon suture from dorsal into the sinus, exiting the sinus distally to the eponychium.
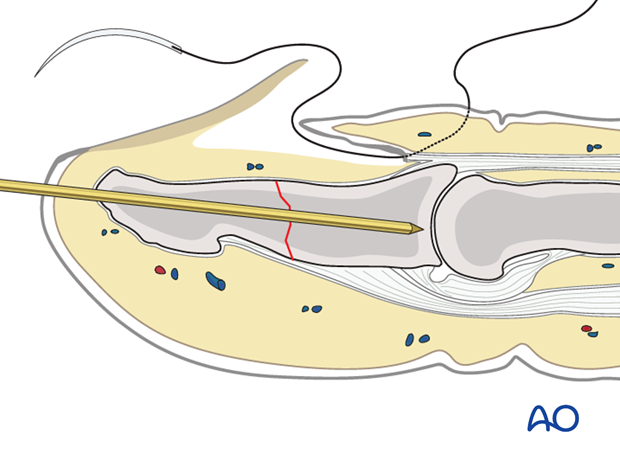
Pass suture through matrix
Pass the suture through the free border of the germinal matrix.
Then pass the suture back through the matrix and the sinus of the nail, so that it exits parallel to the first pass of the stitch, separated from it by approximately 5 mm.
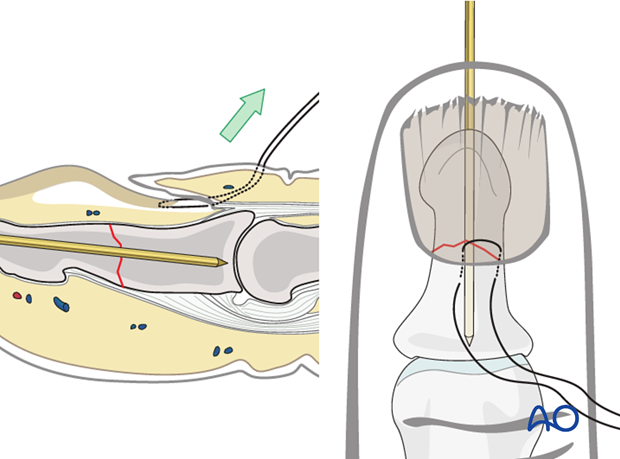
Insert nail matrix
Replace the nail matrix into the sinus by gentle traction on both ends of the suture.
Tie the suture over a cotton, or foam, ball to avoid skin pressure injury.
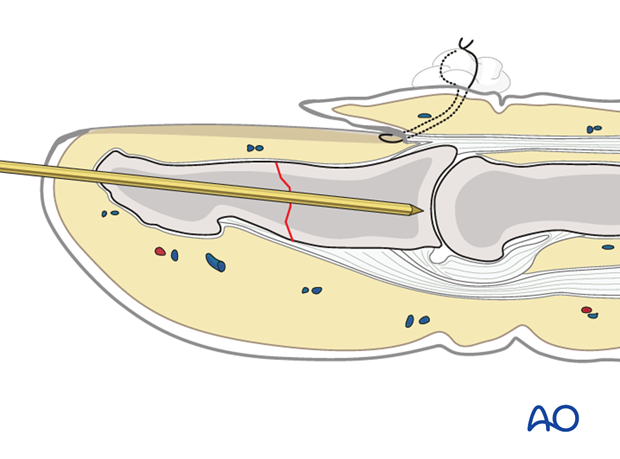
Reinsertion of the nail
If the nail is in good condition, carefully reinsert it.
Reinsertion of the nail will serve to stabilize the fixation and to prevent scarring between the eponychium and the nail matrix.
Secure distal nail tip
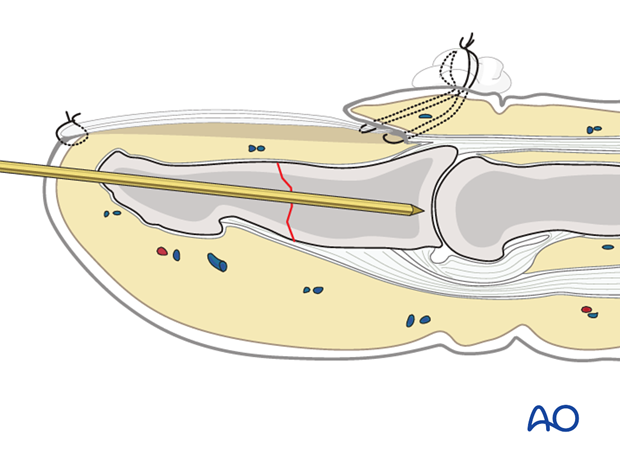
After reinsertion, the nail has a tendency to tilt upwards distally.
To prevent this, use a small suture at the nail’s distal tip to secure it to the nail bed.
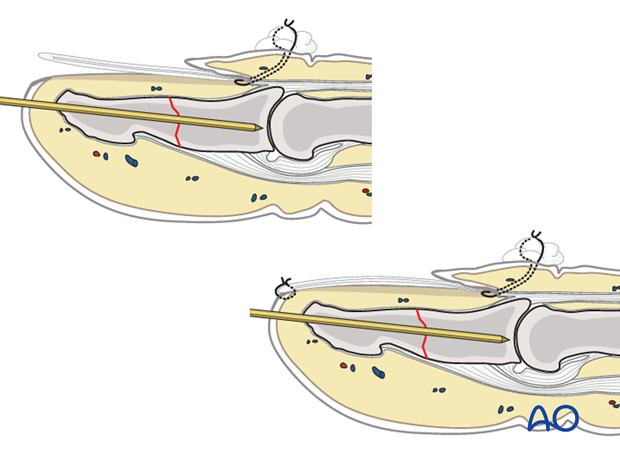
If the sinus is damaged
In some patients, the sinus is injured in such a way that it can not retain the nail plate in position. In such a case, suture the nail to the sinus in a similar fashion to that described for the nail bed.
7. Aftertreatment
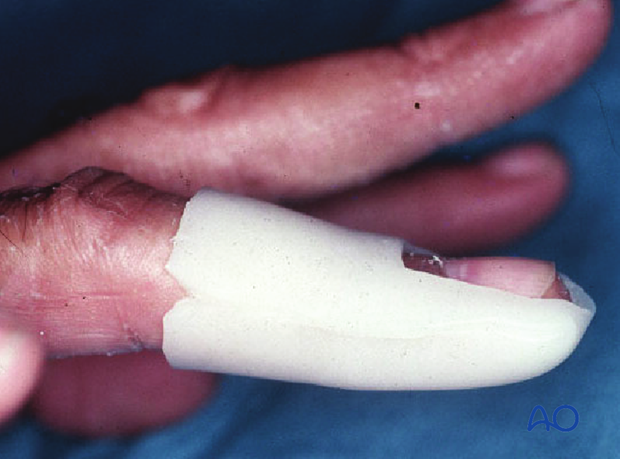
Postoperatively
After K-wire fixation, the DIP joint has to be immobilized in extension, leaving the PIP joint free. Either a malleable aluminium splint, or a custom-made thermoplastic splint can be used.
While the patient is in bed, use pillows to keep the hand elevated above the level of the heart to reduce swelling.
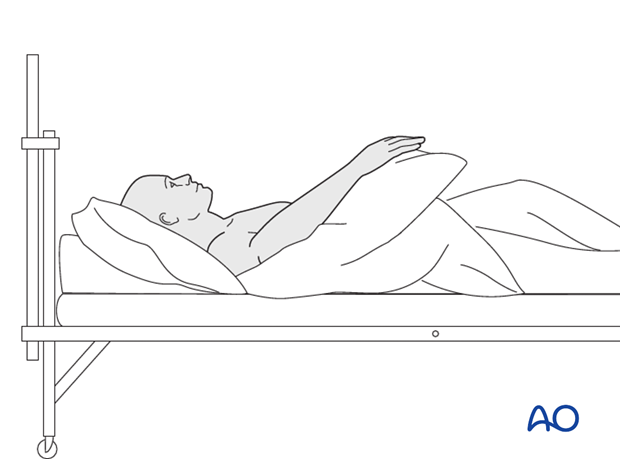
For ambulant patients, put the arm in a sling and elevate to heart level.
Instruct the patient to lift the hand regularly overhead, in order to mobilize the shoulder and elbow joints.

Follow up
See the patient 5 days and 10 days after surgery.
Implant removal
If K-wire crosses the DIP joint
Radiological healing will take between 6 months and 1 year. However, after 8 weeks, the majority of the fractures are intrinsically stable. The K-wire can then be removed.
If the K-wire is in the distal phalanx only
If the distal tip of the K-wire was buried in the bone, does not protrude through the skin and is causing no problems, there is no need for its removal.
However, if the K-wire protrudes through the skin, about 6 weeks is the maximal time it can be left in place.


