Lag screw fixation
1. Principles
Anatomy
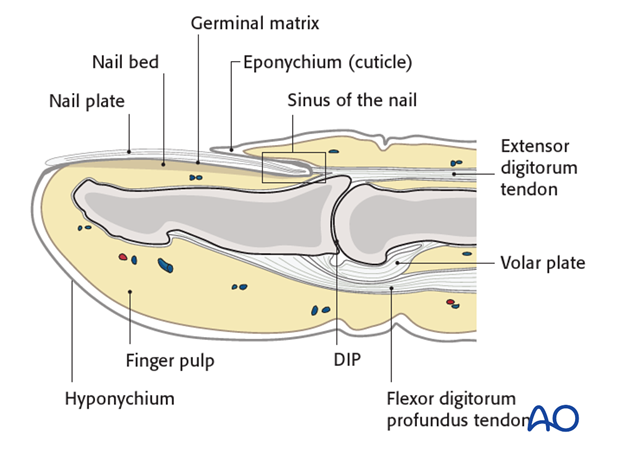
The distal phalanx is divided into three anatomical parts: most proximally, the metaphysis, followed by the diaphysis (“waist”), and finally the ungual tuberosity (“tuft”).
The base of the distal phalanx has a prominent crest on the dorsal aspect with the insertion of the terminal extensor tendon. The tendon is adherent to the joint capsule.
On the palmar surface is the insertion of the flexor digitorum profundus tendon. This is adherent to the volar plate and to the periosteum.
The flexor tendon occupies the whole width of the base of the distal phalanx. It is made up of 2 different fibers. The superficial fibers attach to the lateral aspects of the phalanx. The deep fibers run centrally and attach more distal in the palmar aspect of the phalanx.
The volar plate is very flexible, allowing hyperextension of the DIP joint to allow pulp-to-pulp pinching, which is unique to humans. This flexibility is also facilitated by the absence of check reins, which might be attached to the middle phalanx.
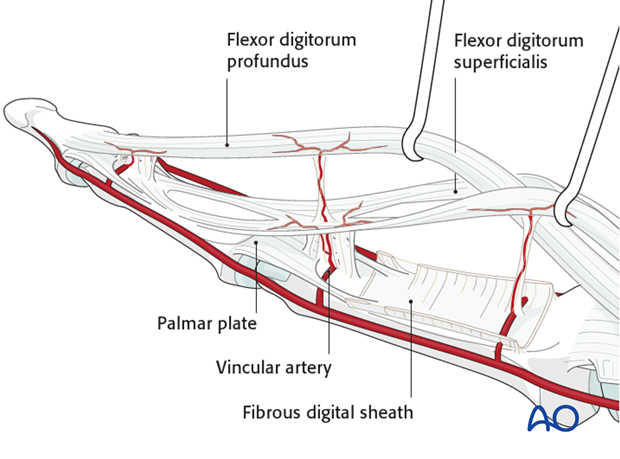
The vincular arteries, essential for vascularization of the flexor tendon, are at risk in palmar avulsion injuries. If the flexor tendon retracts, they are disrupted. This negatively affects the healing process.
Classification
A useful classification for this type of injury comes from Leddy and Packer.
Type I
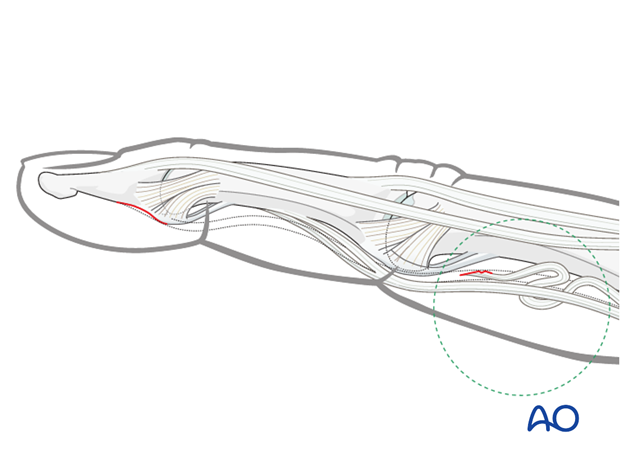
Tendon rupture at its insertion at the distal phalanx, without a bony fragment. The tendon is retracted, often into the palm, where it can be palpated. The patient feels some tenderness or pain where the tendon is located.
The vincular arteries are ruptured, impairing the vascularity of the flexor tendon.
Success of treatment of this injury relies heavily on
- accuracy of diagnosis,
- rapid surgical intervention.
The flexor digitorum profundus (FDP) tendon must be repositioned and reinserted. This is not possible after 10 days following the injury because of:
- tendon swelling
- collagen regeneration
- Muscle contracture
Reinsertion after this period will lead to a significant flexion contracture of the finger (myostatic contracture).
Type II
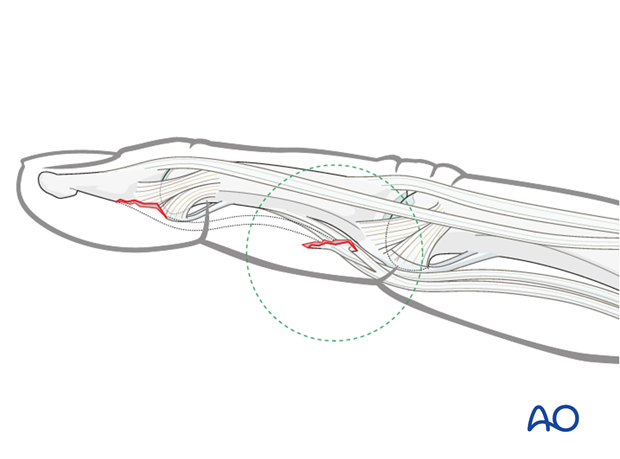
Tiny fracture fragment. This is usually not easy to see in an x-ray, but may be palpated.
The tendon is retracted to the PIP joint and is prevented from retracting further by the bony fragment catching in the bifurcation of the superficialis tendon (as shown in the drawing). The long vincular artery remains intact.
Type III
FDP avulsion fracture with a large fragment.
This fragment remains minimally displaced because of the volar plate attachment, the collateral ligament, and the IV annular pulley.
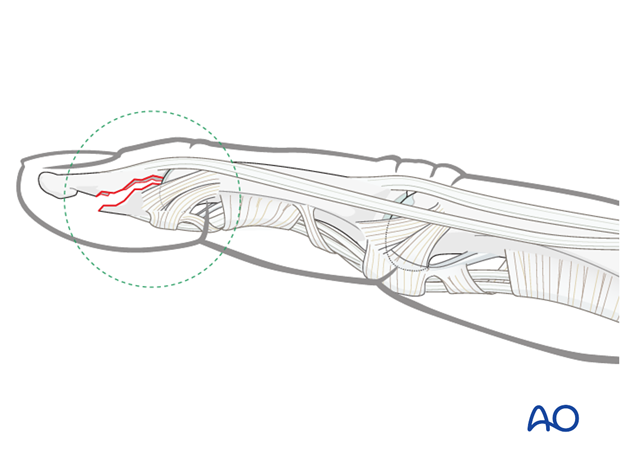
Palmar avulsion injury
An avulsion injury destroys the synergistic balance of the pull exerted by flexor and extensor tendons. The continuity of the flexor tendon is lost. This results in inability to flex the DIP joint.
Avulsion fractures of the flexor digitorum profundus tendon are uncommon, but particularly disabling. The ring finger is the digit most commonly affected.
Mechanism of the injury
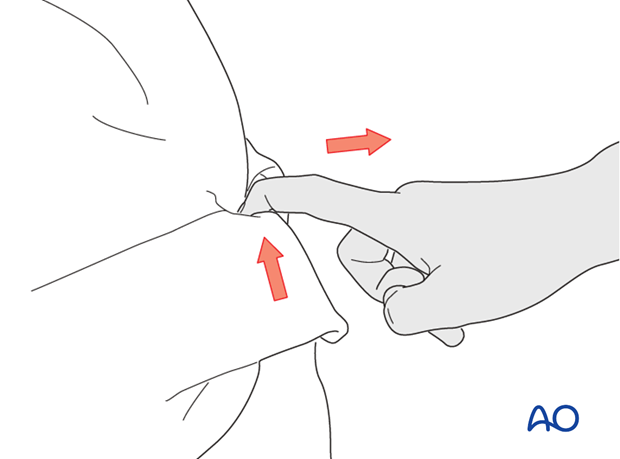
These injuries are commonly caused by sporting accidents.
Typically, hyperextension and a strong pull on the flexor tendon causes this fracture, as happens when the finger gets caught while tackling a sporting adversary.
Indication for operative treatment with a lag screw
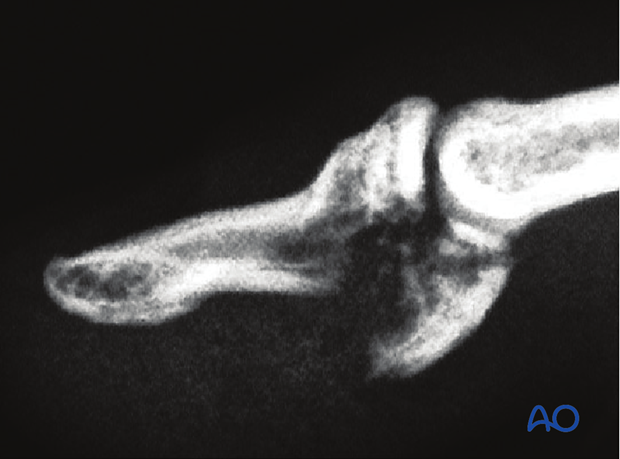
The main indication for lag screw fixation of avulsion fractures of the proximal distal phalanx is an avulsed fragment bearing more than 40% of the articular surface.
2. Diagnosis
Diagnosis is based on
- the clinical history of the trauma and mechanism of the injury
- the clinical examination of the patient
- palmar ecchimosis, swelling and pain in the area of detachment
- inability to flex the DIP joint. Make sure that flexion of the DIP joint is examined
- the x-rays.
AP, lateral and oblique x-rays are necessary for diagnosis. Be careful to avoid overlap of other fingers in the x-rays.
Low-dosage radiographs, as used to visualize soft tissues, can be very useful to identify small flakes.
Examination
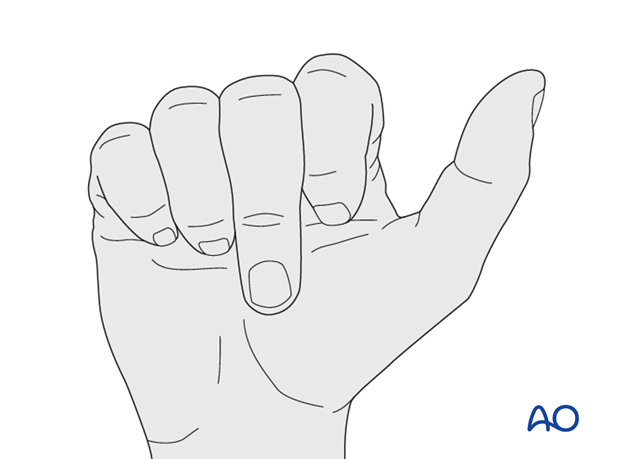
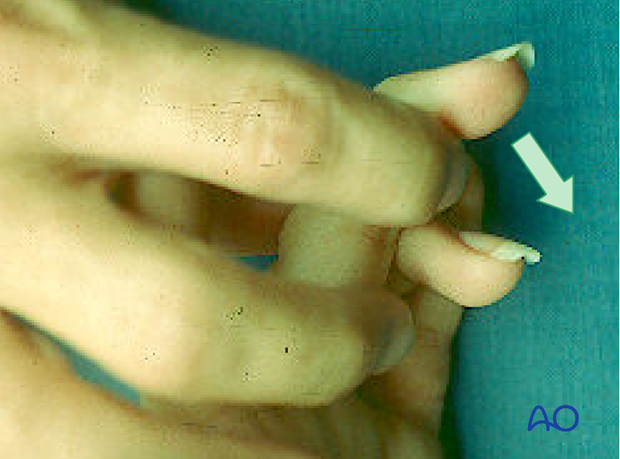
When the MP and PIP joints flex normally, sometimes the examiner might miss the fact that the DIP joint does not. Always be sure to check for normal DIP joint flexion.
Function of the flexor digitorum superficialis (FDS) can be checked by holding the non-injured fingers extended. The PIP joint should now flex normally, while the DIP joint is locked.
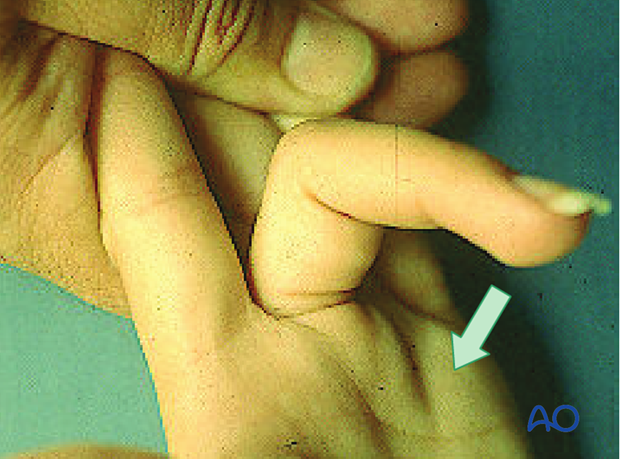
Function of the FDP is examined by holding the PIP joint of the injured finger in extension. The DIP joint should now be able to flex. If flexion is not possible, the continuity of the FDP may be interrupted.
3. Approach
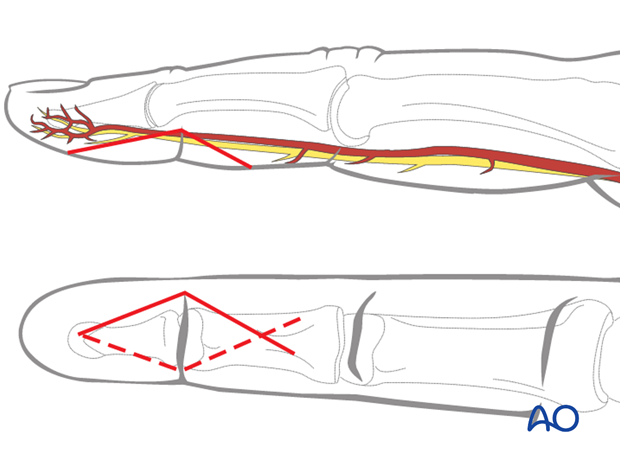
For this procedure a palmar approach to the DIP joint is normally used.
4. Reduction
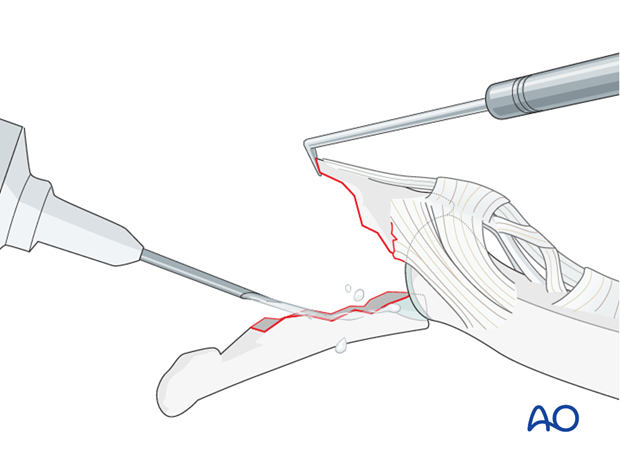
Visualize the joint
Hyperextend the distal phalanx to gain a maximal view of the joint.
Use a syringe to clear out blood clot with a jet of Ringer lactate.
Assess fracture geometry and look for comminution or impaction.
Often, comminution is not apparent from the x-rays, and can only be determined under direct vision.
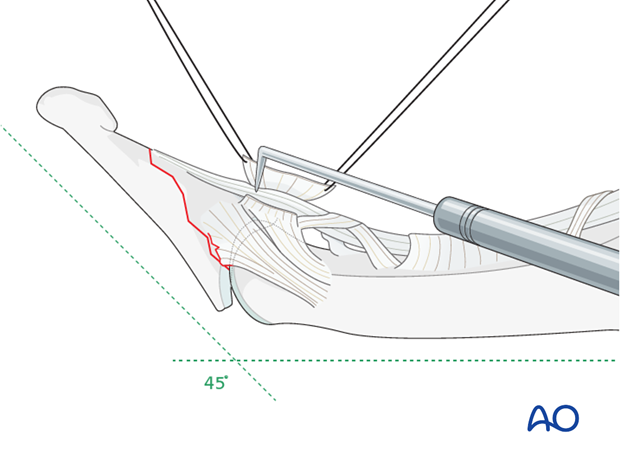
Direct reduction
Gently use a dental pick to reduce the fracture accurately.
Check the reduction using image intensification.
In some cases, the A5 pulley should be elevated for better visualization and reduction of the fracture.
5. Fixation
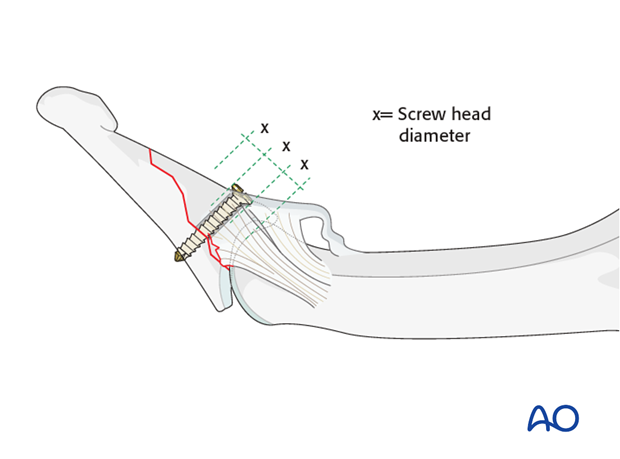
Choosing screw size
The maximal permitted diameter of the screw head is one third of the diameter of the avulsed fragment.
Screw length needs to be sufficient for the screw just to penetrate the opposite cortex.
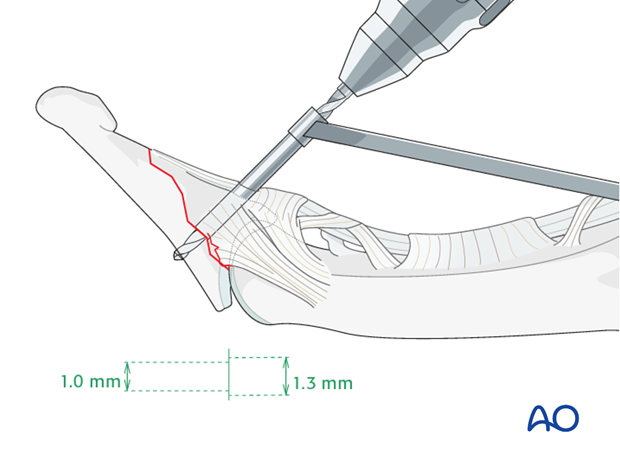
Either a 1.0 mm, or a 1.3 mm, screw is used. The procedure illustrates the use of a 1.3 mm screw.
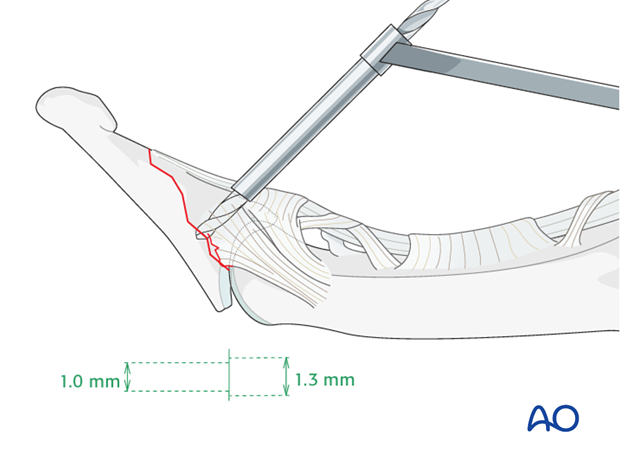
Drilling
Maintaining the reduction with a drill guide, drill a gliding hole using a 1.3 mm drill bit. Insert a drill sleeve into the gliding hole.
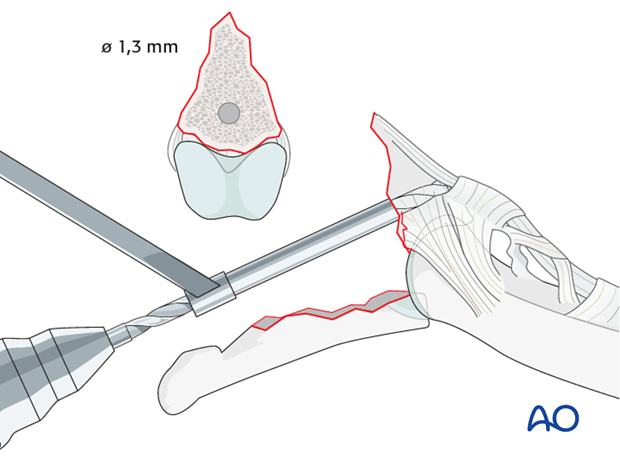
Alternative drilling: In-out hole in large fragments
Keeping the DIP joint hyperextended, drill an in-out gliding hole through the avulsed fragment.
The advantage of this technique is that it allows perfect positioning of the drill hole (perpendicular to the fracture plane and in the center of the fragment).
However, there is an increased risk of additional devascularization, which can disturb fracture healing.
Drill threaded hole
Insert a drill sleeve into the gliding hole.
Now use a corresponding drill bit to drill a thread hole through the opposite fragment, penetrating the far (trans) cortex.
Use a depth gauge to measure for screw length.
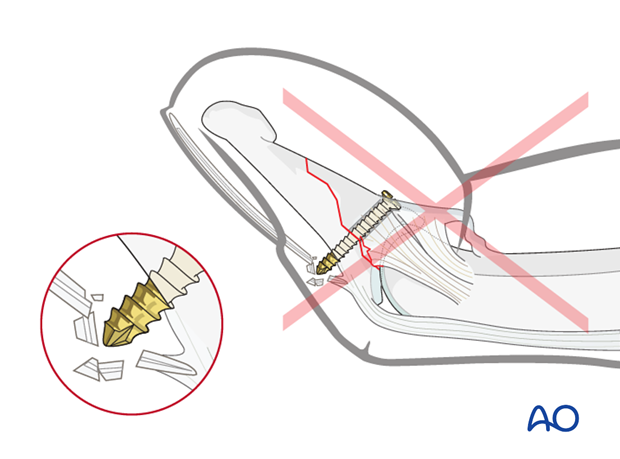
Pitfall: Too long screw irritates extensor tendon
If too long a screw is chosen, the protruding end may irritate the extensor tendon or damage the germinal matrix of the nail.
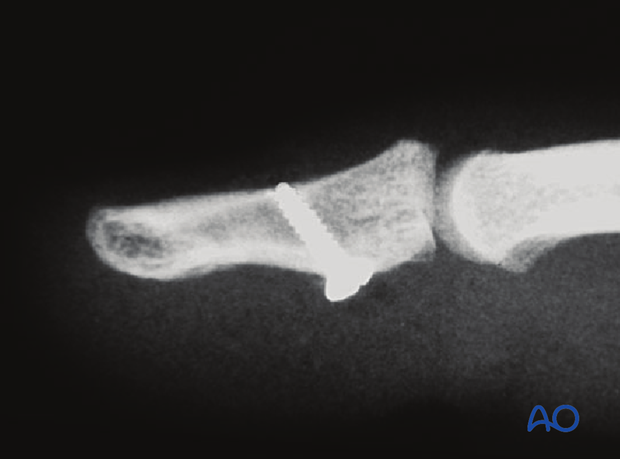
Screw insertion
Insert the lag screw and tighten it. The screw should just penetrate the opposite cortex.
Check the fixation using image intensification. Reduction must be anatomical.
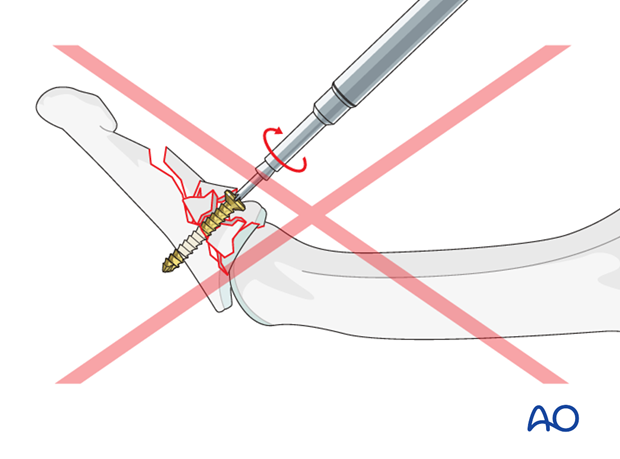
Pitfall: Overtightening the screw
Be careful not to overtighten the screw as this may result in comminution of the fragment.
6. Aftertreatment
Postoperatively
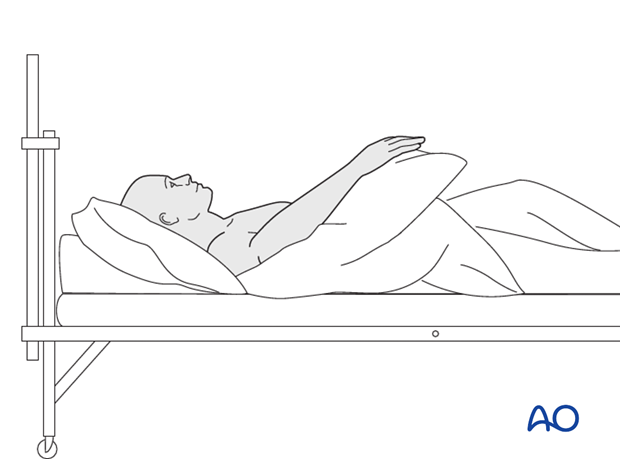
While the patient is in bed, use pillows to keep the hand elevated above the level of the heart to reduce swelling.
Postoperative splint
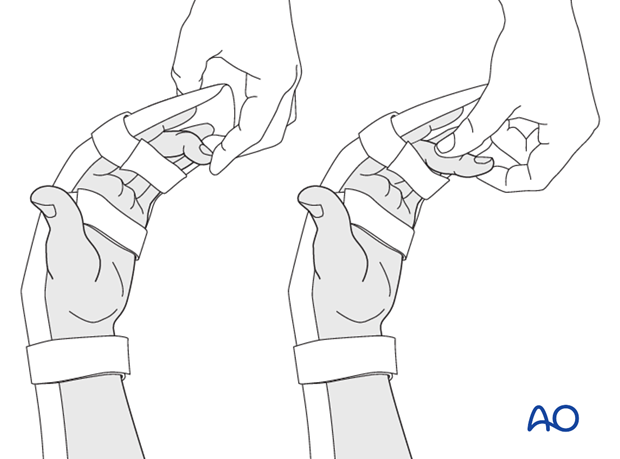
Depending on the strength of the fixation, a resting splint is applied, holding the wrist in 30 degrees of flexion, the MP joint in 70-90 degrees of flexion, and with the PIP joint in extension.
Passive flexion of the PIP and the DIP is recommended in order to avoid tendon adhesion, according to the Duran method for rehabilitation of flexor tendon lacerations.
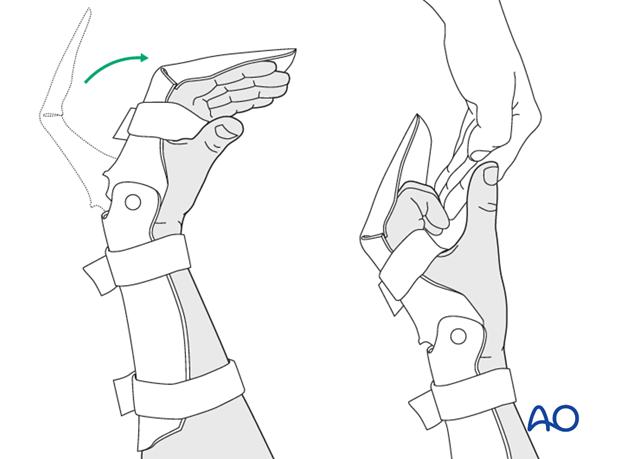
Another option is the synergistic hinged orthosis.
Follow up
See patient 5 days after surgery to check the wound, clean and change the dressing. After 10 days, remove the sutures. Check x-rays.
Functional exercises
The fixation will be vulnerable for the first 3 weeks.
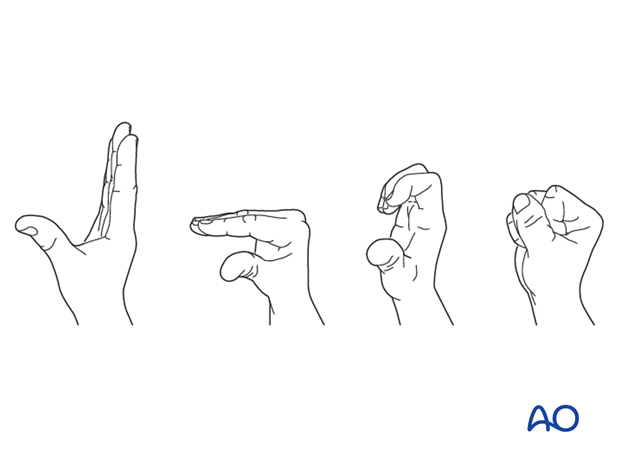
In cases with stable fixation, encourage the patient to take off the splint and start with very gentle flexion and extension exercises in order to prevent tendon adhesion.
After 3 weeks remove the splint and apply buddy strapping. Then begin with active motion exercises.
Instruct the patient to lift the hand regularly overhead, in order to mobilize the shoulder and elbow joints.

Implant removal
The implants may need to be removed in cases of soft-tissue irritation.
In case of joint stiffness, or tendon adhesion’s restricting finger movement, tenolysis, or arthrolysis become necessary. In these circumstances, take the opportunity to remove the implants.


