Medial malleolar osteotomy
1. Introduction
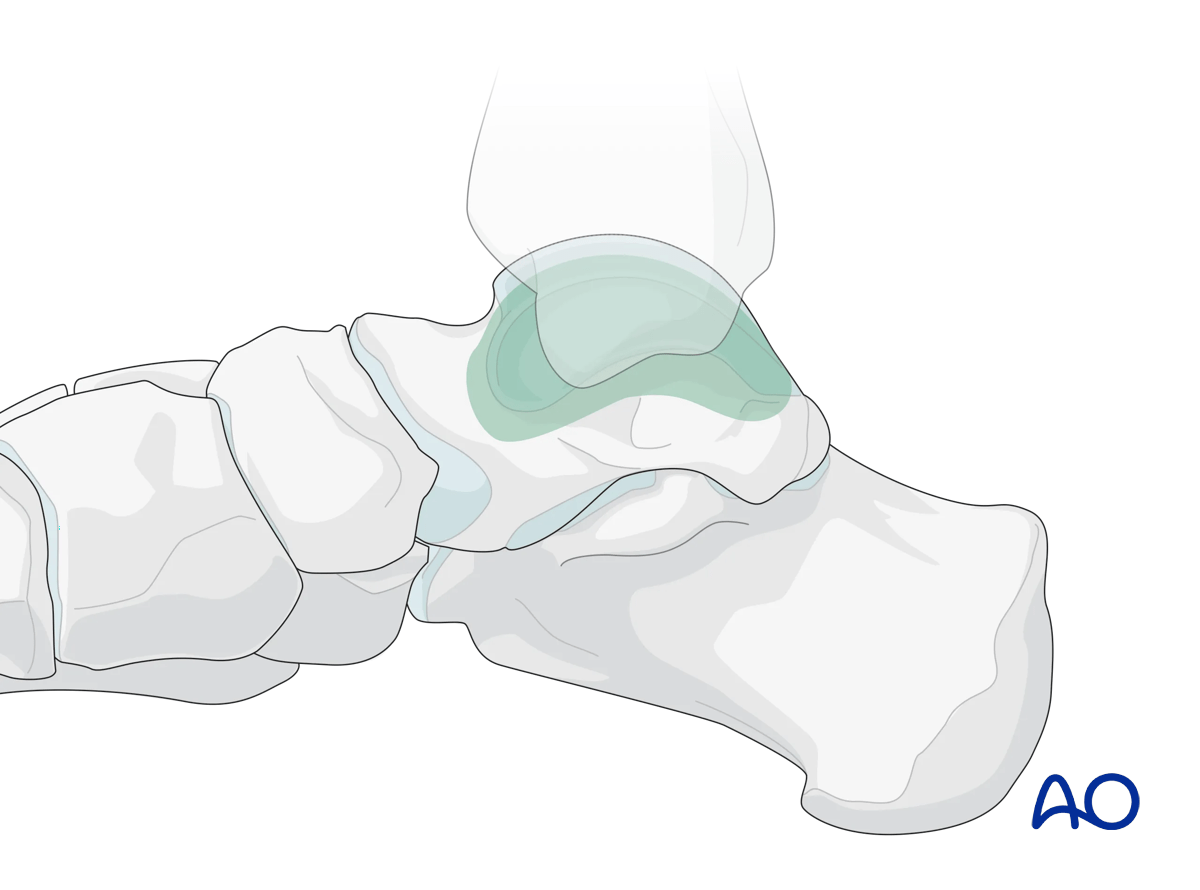
This approach may be used to improve visualization of complex talar body fractures, particularly those involving the medial weightbearing dome.
An osteotomy of the medial malleolus exposes the medial aspect of the talar body.
This illustration shows the areas of the talus that are visualized through this surgical approach.
2. Anatomy
Blood supply to the talus
Note: Fracture dislocations can easily compromise the blood supply to the body of the talus and lead to avascular necrosis.

Anterior view with main arteries
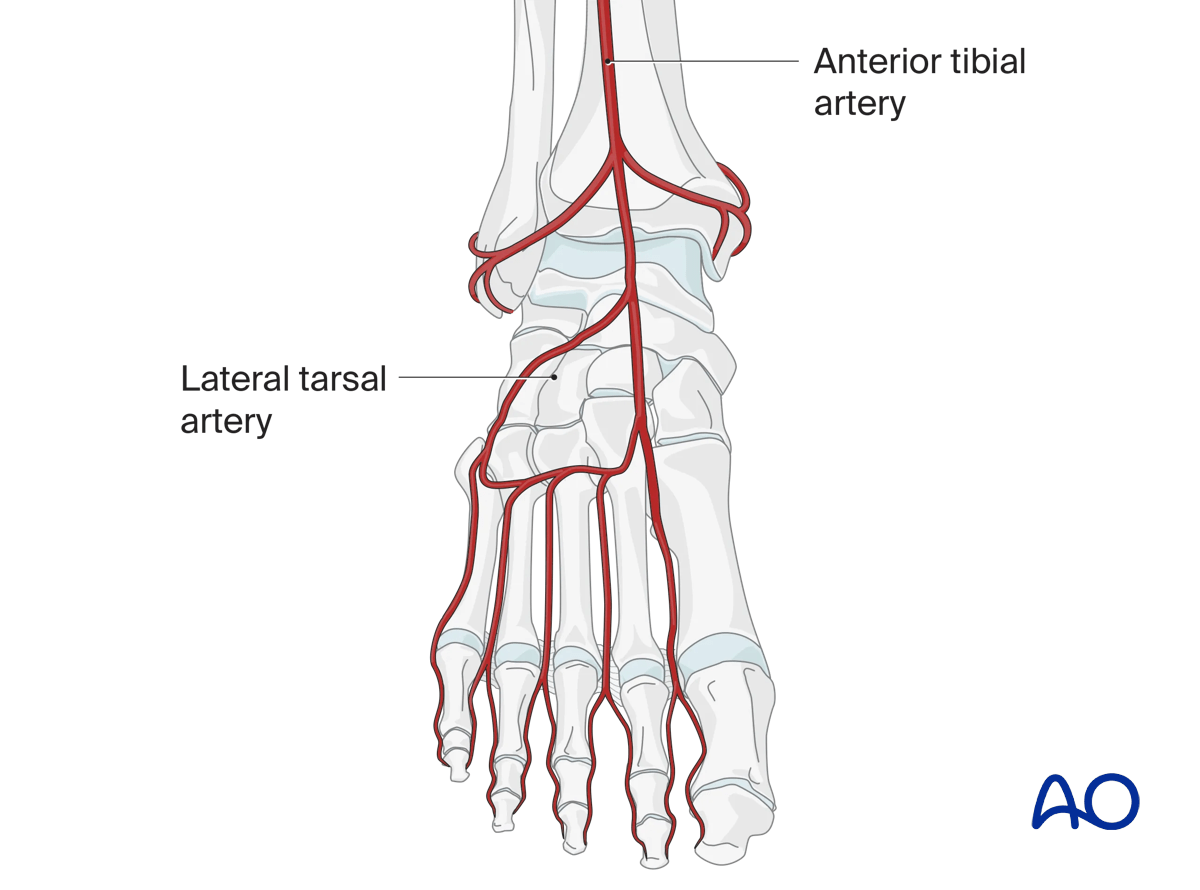
The talar neck receives arterial branches from the medial and lateral side (anterior and posterior tibial artery). The body of the talus is supplied almost exclusively from its posteromedial aspect.
The deltoid branches are important to supply blood to the medial talar neck and talar body. Branches from the dorsalis pedis supply the talar head and most of the dorsal talar neck.
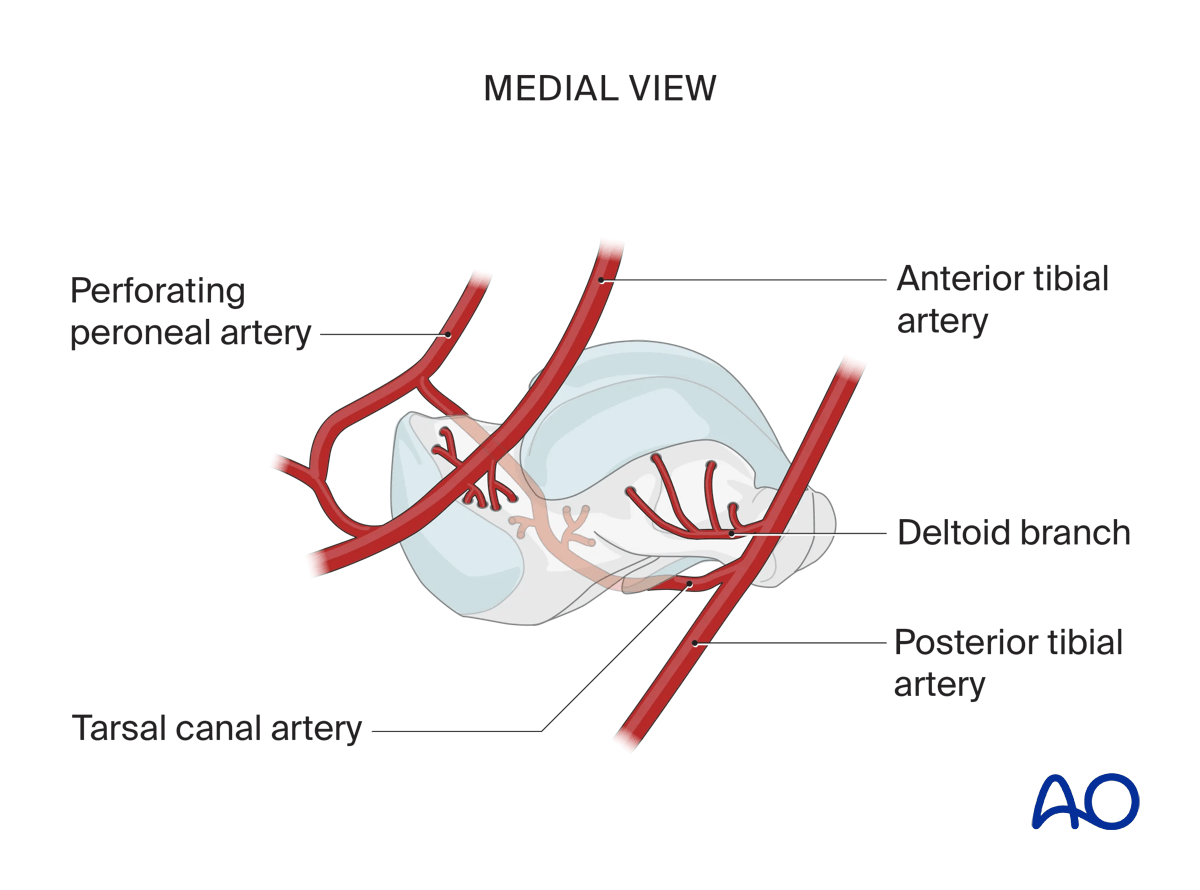
The artery of the tarsal canal coming from branches off the posterior tibial artery supplies most of the talar body.
The peroneal artery has the least contribution laterally and is not of concern during a medial malleolar osteotomy.
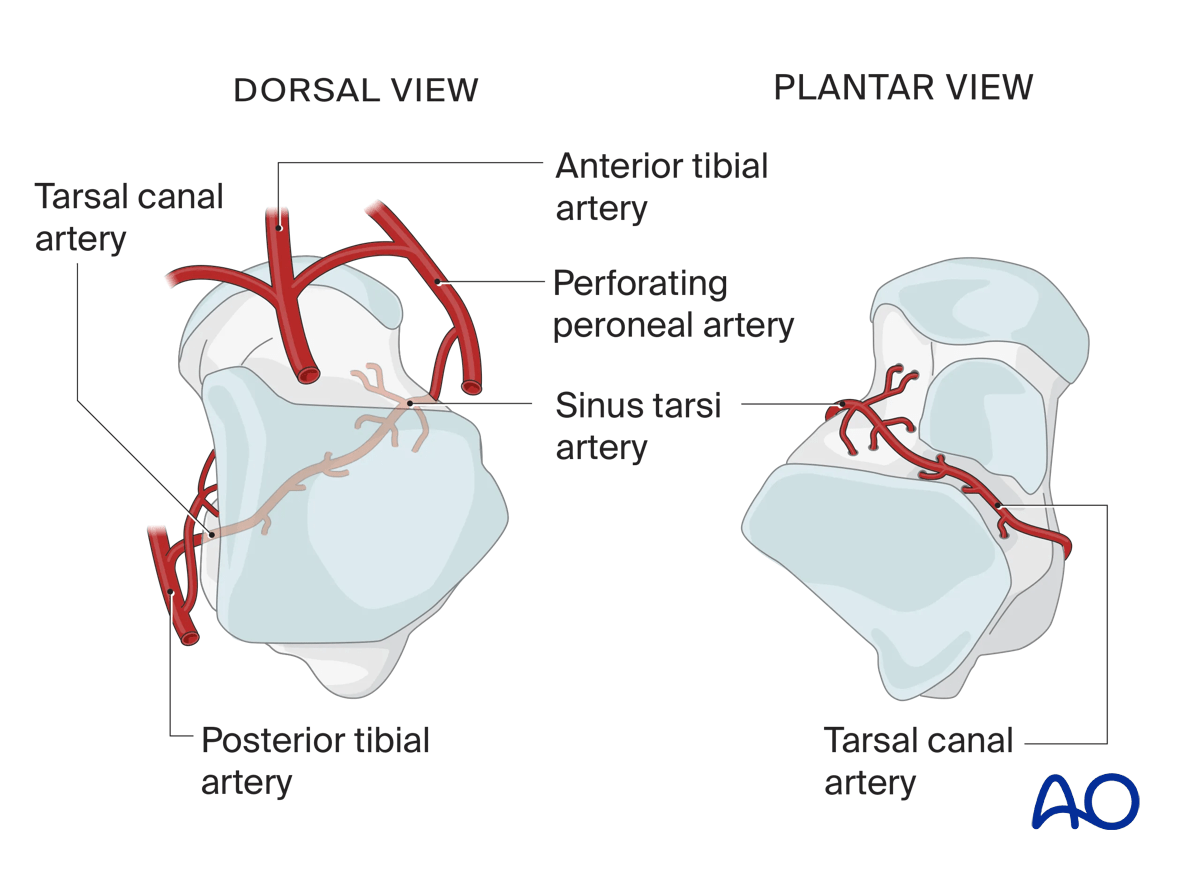
Illustration showing the contribution of arterial blood supply to the talus:
- Anterior tibial artery (blue)
- Posterior tibial artery (orange) including the deltoid branch
- Perforating peroneal artery (green)

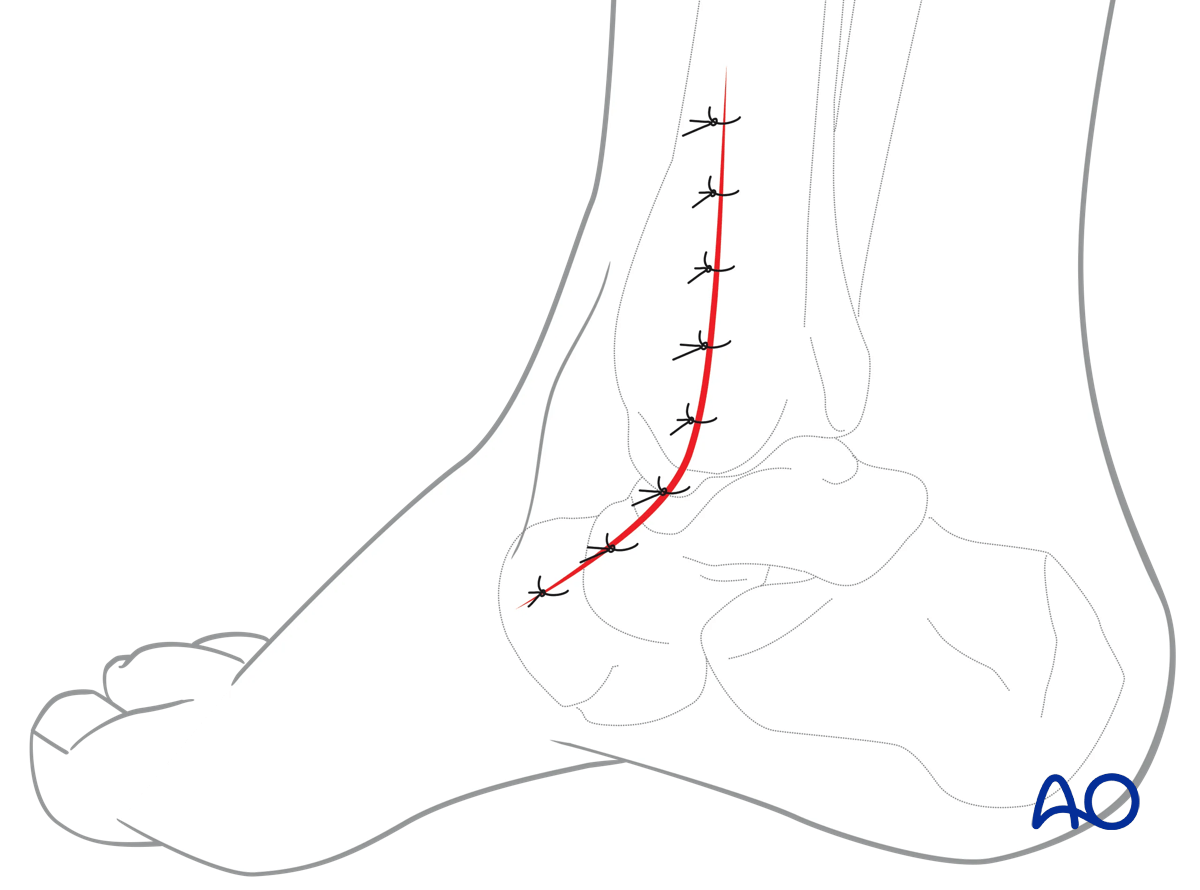
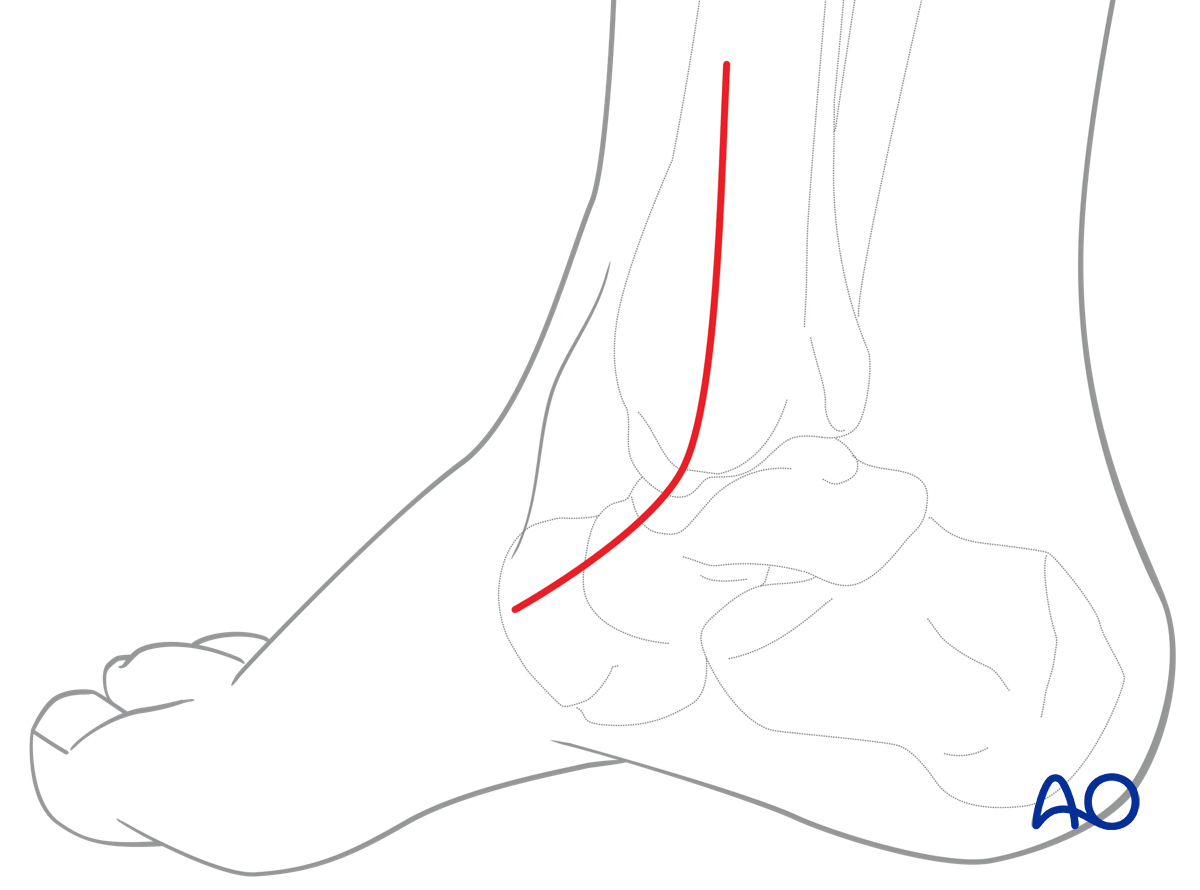
3. Incision
Perform a longitudinal incision over the distal tibia and medial malleolus and extend it distally towards the base of the 1st metatarsal, as necessary.
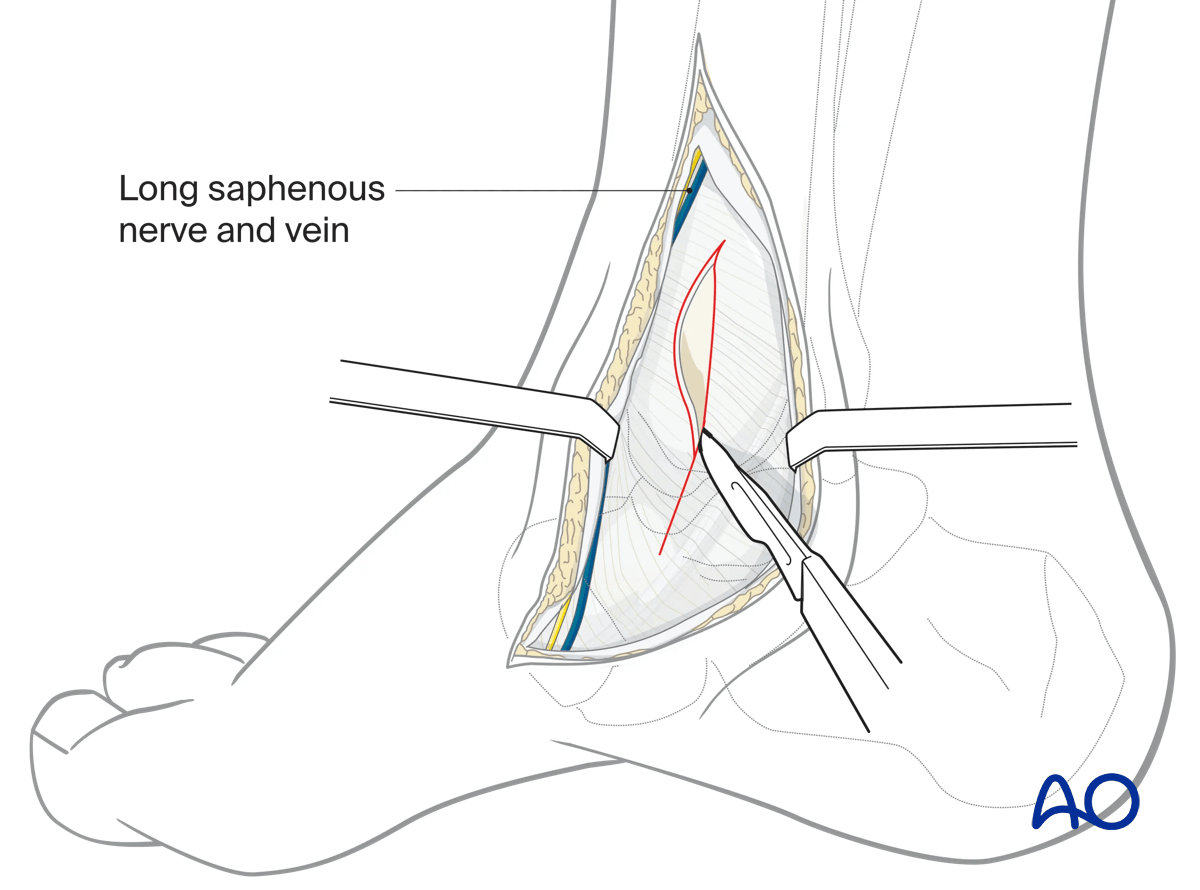
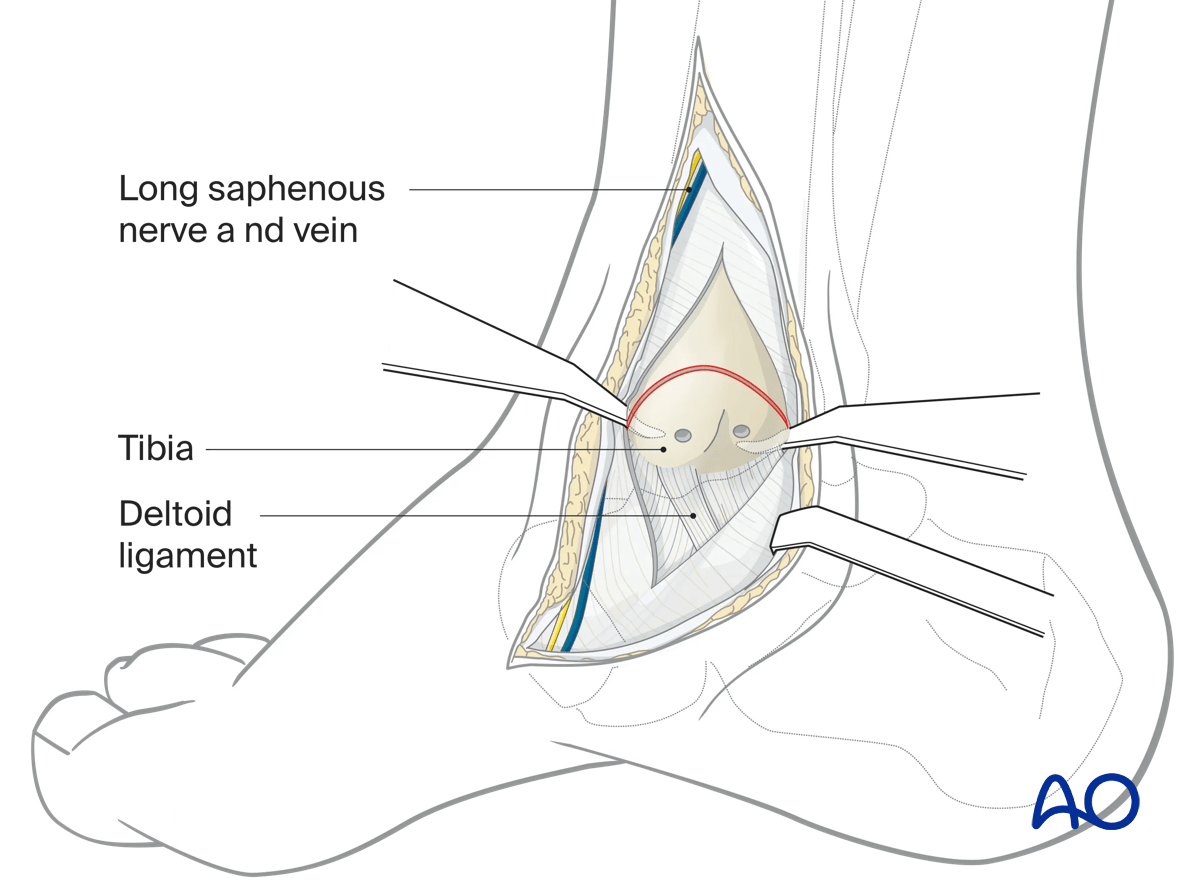
Avoid damage to the saphenous nerve. If necessary, coagulate or ligate the saphenous vein.
Incise the periosteum and capsule over the medial distal tibia and malleolus to identify the anatomical landmarks. This can be performed longitudinally or transversely. If undertaken longitudinally, care must be taken distally to avoid damage to the blood supply to the talus.
This allows for accurate positioning of the medial malleolar osteotomy.
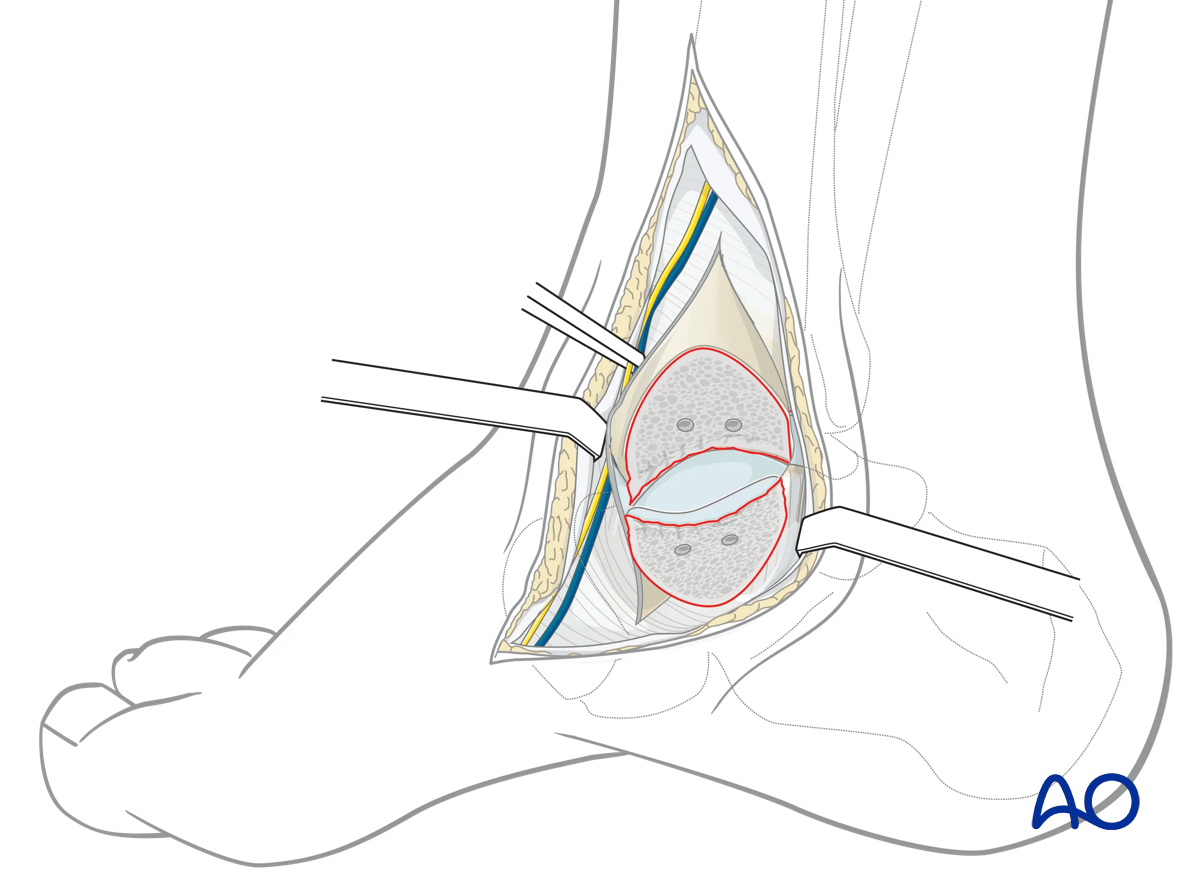
4. Osteotomy
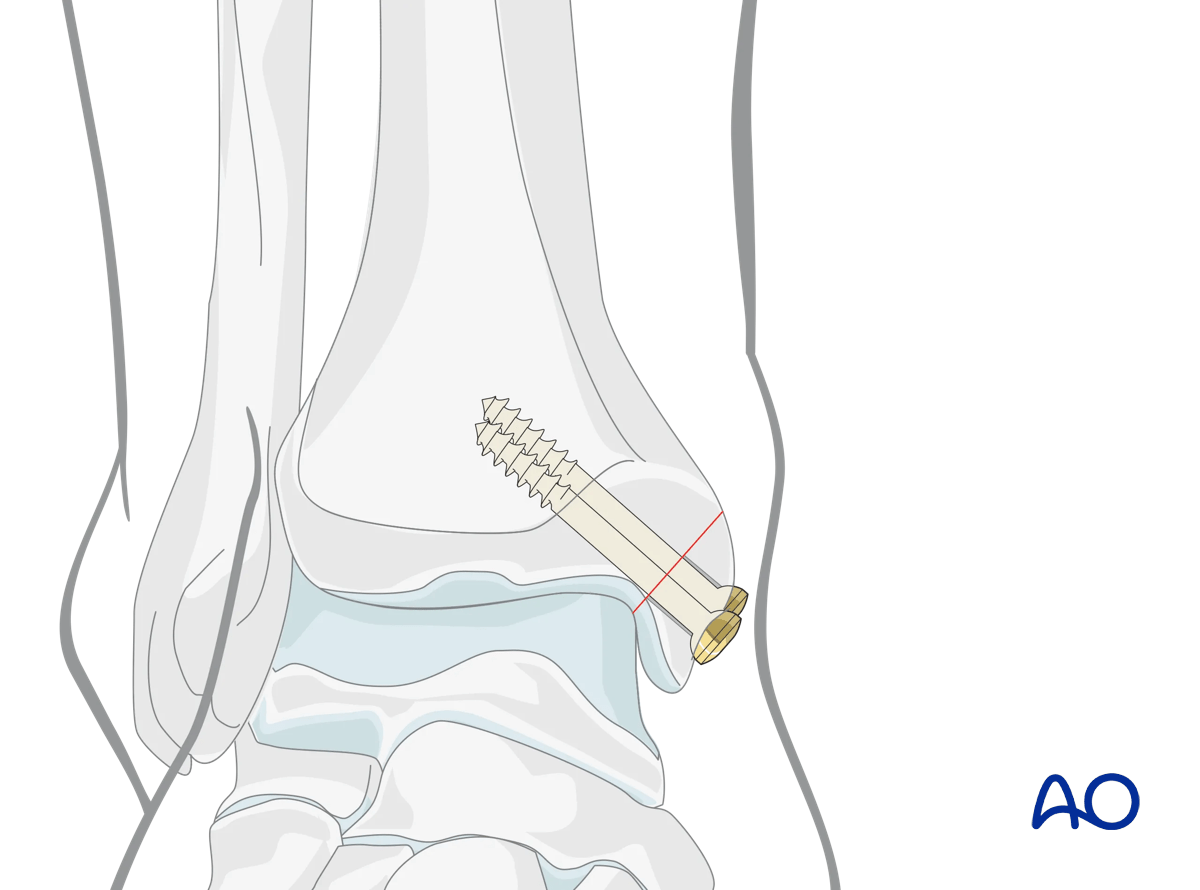
The osteotomy must be in such a way that it avoids the distal tibial plafond. The medial malleolus will be stabilized with two lag screws.
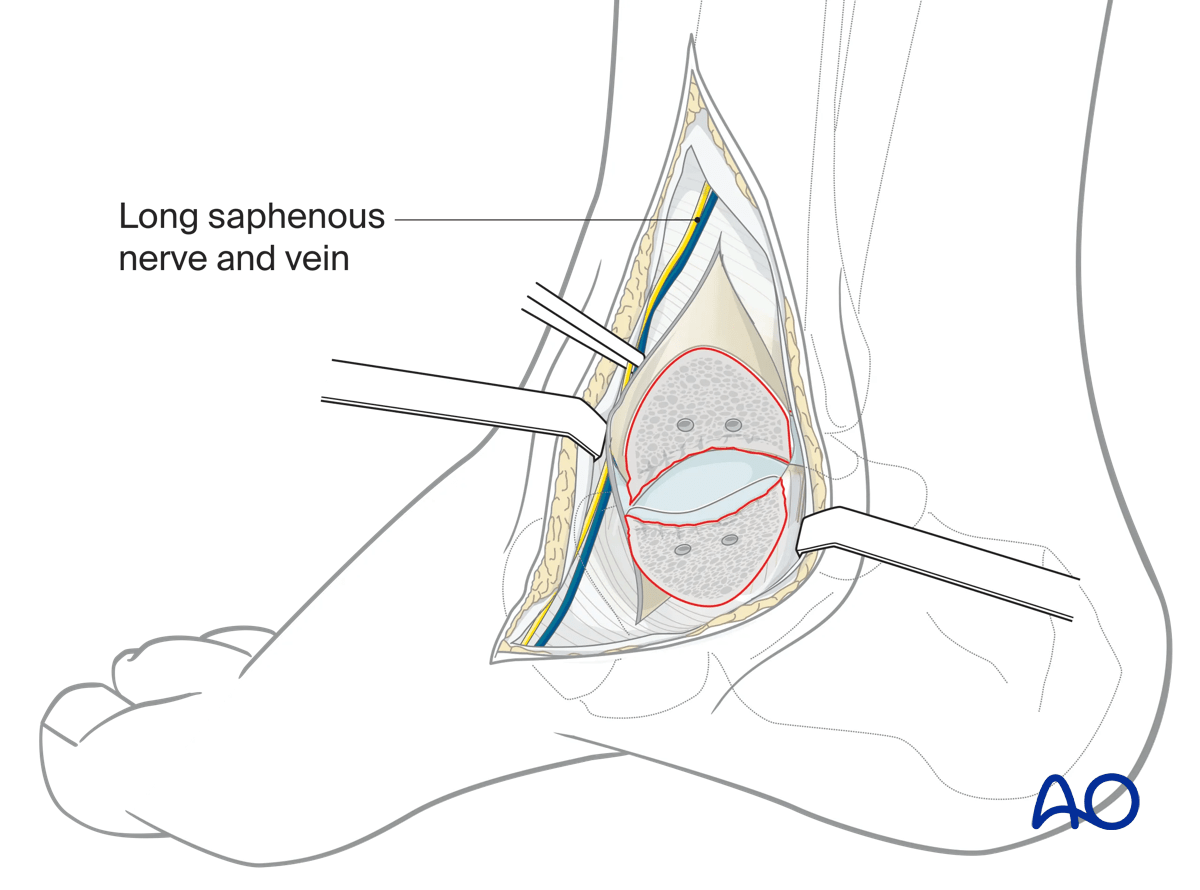
Visualize the joint surface before cutting by dissection medial to the anterior colliculus. The tibiotalar joint capsule can be incised to visualize the joint surface during osteotomy preparation.
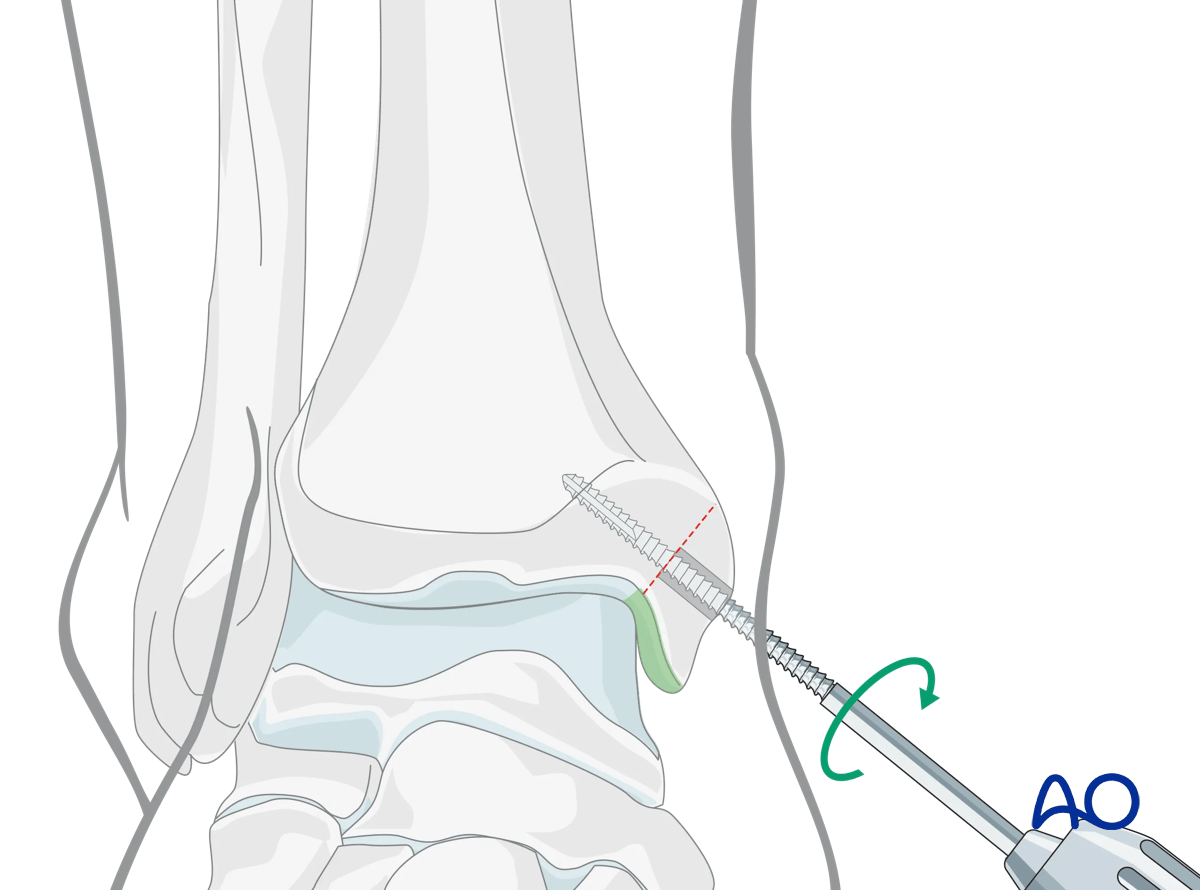
Predrill and -tap the medial malleolus for two screws, which will be ultimately used to fix the osteotomy. The screws should be placed parallel to each other and perpendicular to the planned osteotomy.
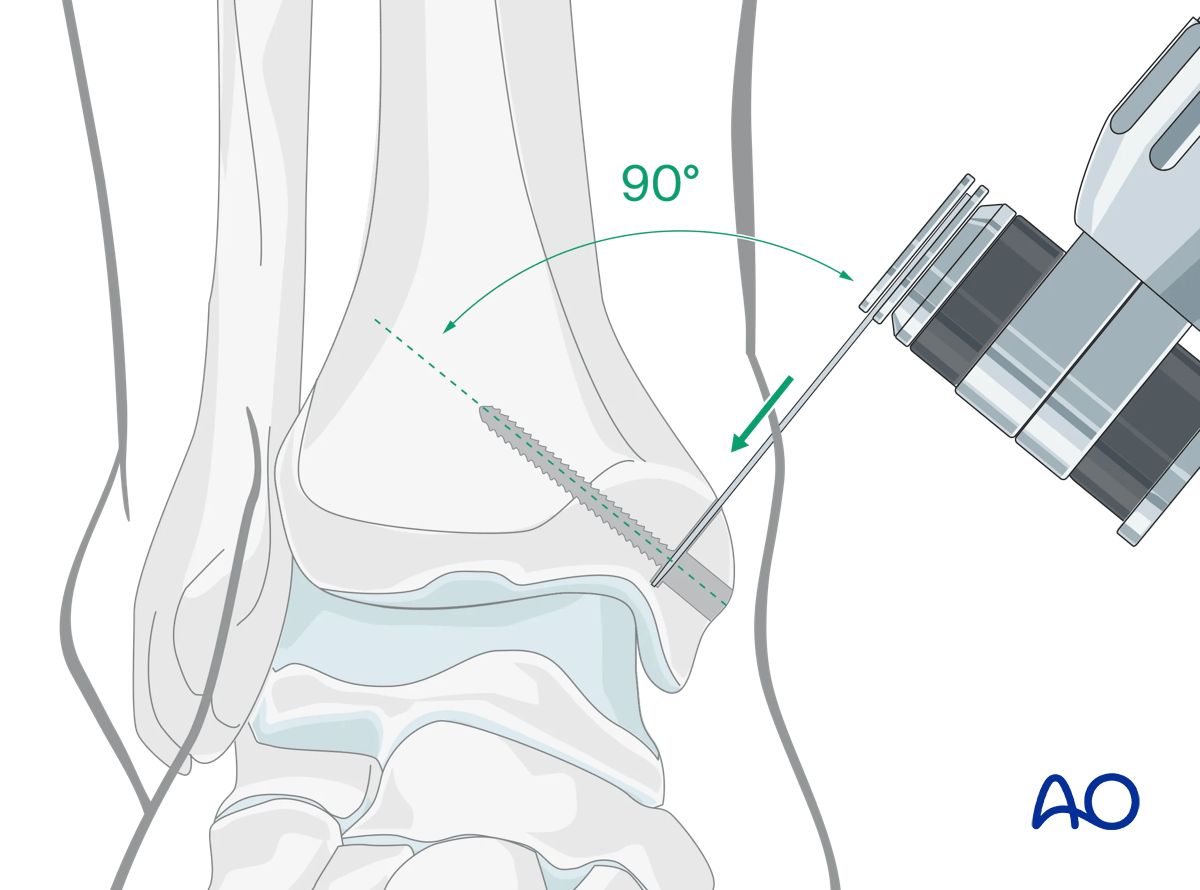
Cut the bone with an oscillating saw at 90° to the screw position almost to the articular surface.
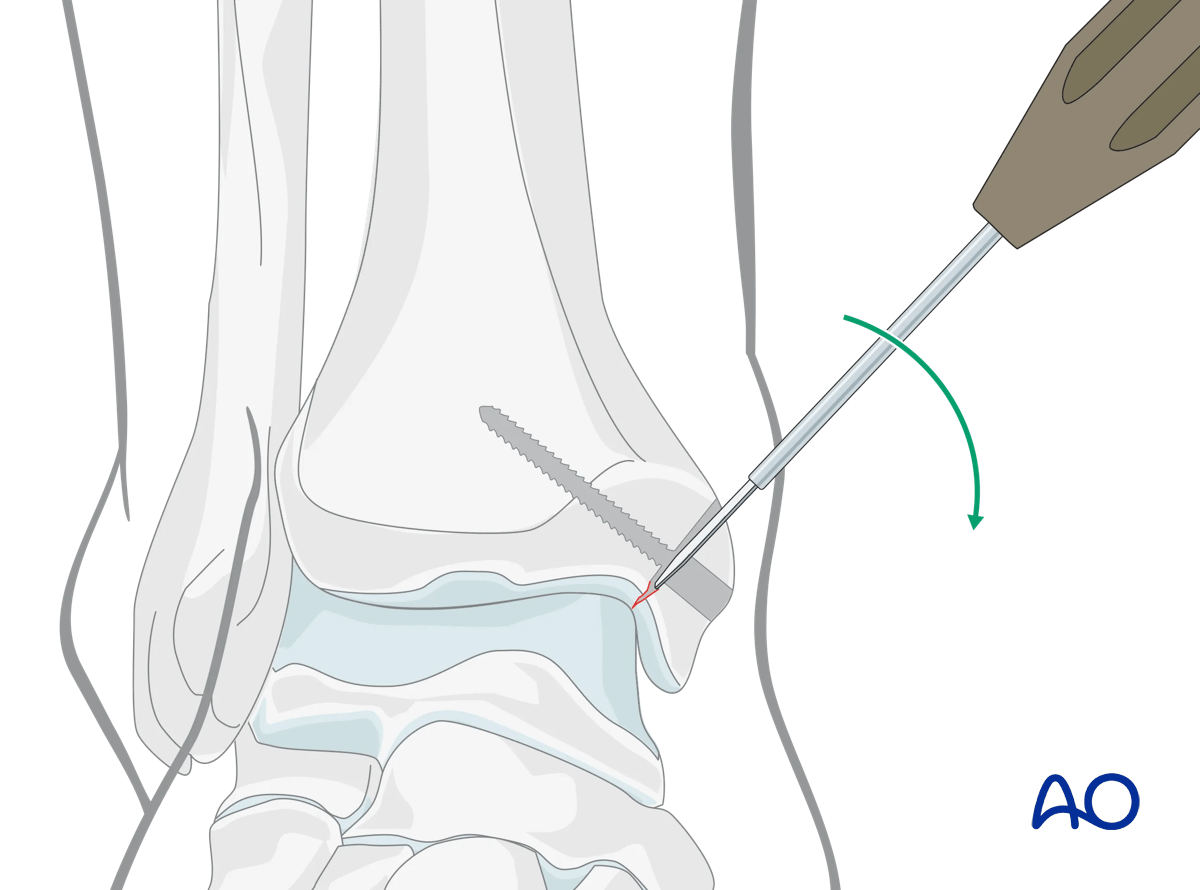
Insert anterior and posterior small flat retractors around the malleolus into the joint before completing the osteotomy to protect the dome of the talus and the posterior tibialis tendon.
Complete the medial aspect of the osteotomy with an osteotome.
This way, the articular surface can be reapposed without articular loss at the end of the operation.
Reflect the medial malleolar piece distally on its retained soft tissue and blood supply.
5. Repair of the osteotomy
Once the talar reconstruction is complete, reduce the medial malleolus and fix it with lag screws. This secures stable fixation of the osteotomy.
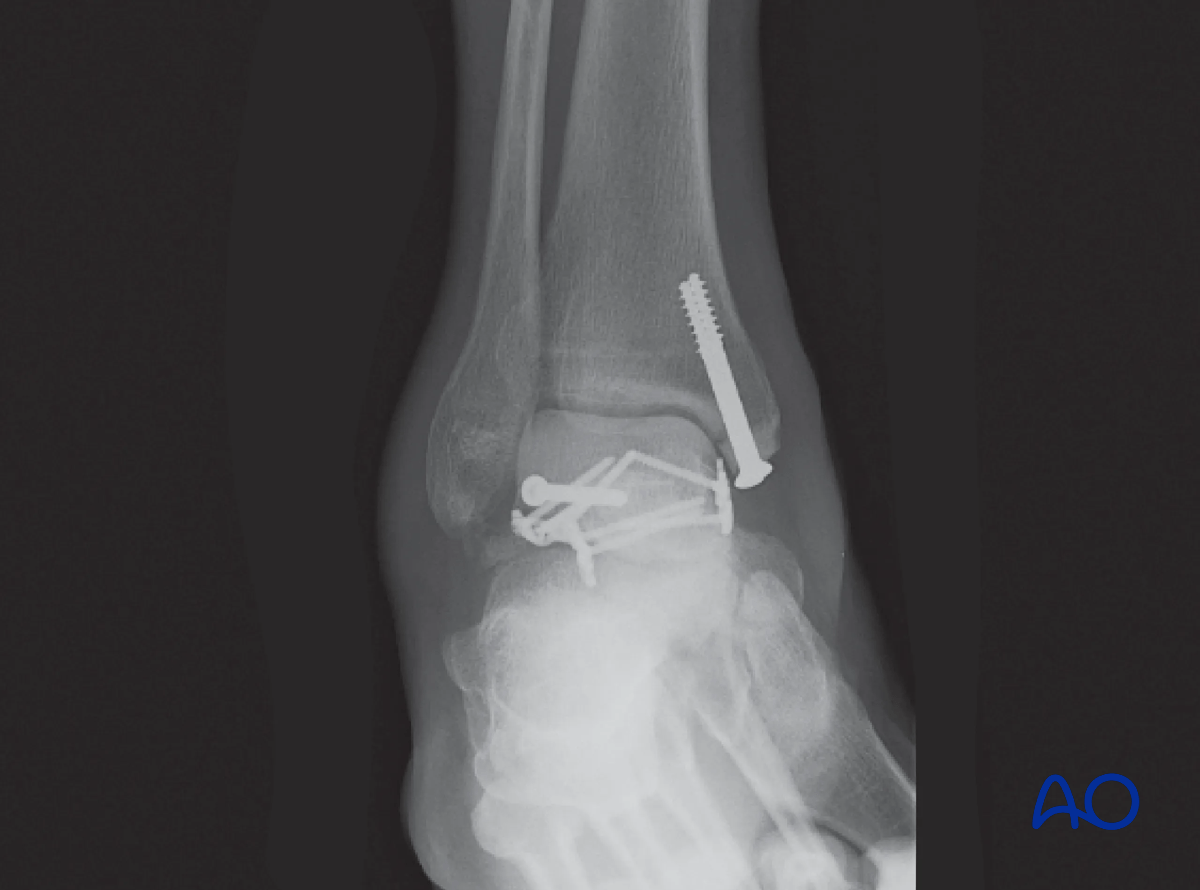
This postoperative x-ray shows the fixation of a complex fracture of the talus with an anterolateral approach and an anteromedial approach extended to a medial malleolar osteotomy which was reconstructed with lag screws.
In this case, the osteotomy has been performed more distally. This has the advantage of less bone dissection but may limit the amount of exposure to the talus.
6. Wound closure
This approach is closed in two layers.