Cannulated screws
1. General considerations
Introduction
Impacted subcapital femoral neck fractures are relatively stable; however, undisplaced fractures are potentially unstable.
Impacted subcapital femoral neck fractures should not be reduced!
Principles of cancellous screw fixation
Use three cancellous screws.
Washers for the superior screws may be used to stop the screw heads from penetrating the lateral cortex of the greater trochanter. One is not needed for the inferior screw.
These screws can be inserted through a small open or percutaneous incisions.
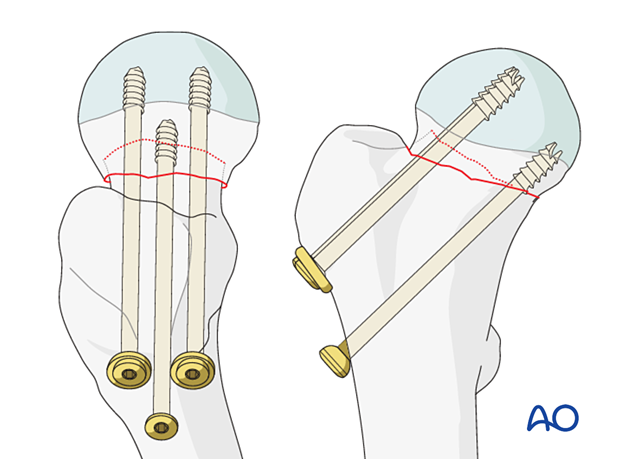
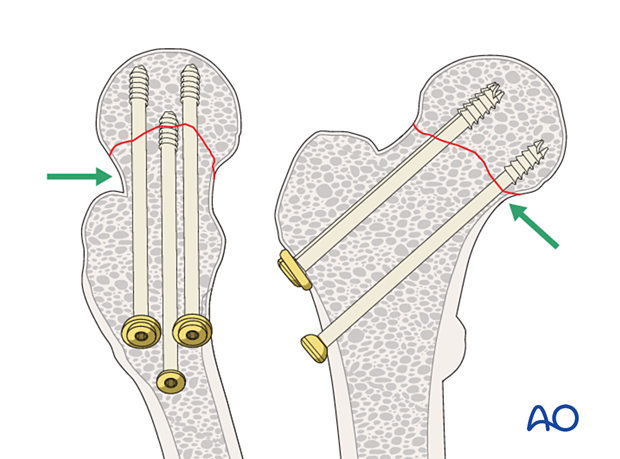
Since cancellous bone in the femoral neck in elderly patients is either absent or too osteoporotic to resist shearing forces screws must rest on the cortical endosteum to achieve three-point fixation.
The shaft of the inferior screw should rest on the endosteum of the proximal medial femoral neck. This cortical support of the screw provides a fulcrum to resist varus collapse.
The posterior screw should be within 3 mm of the endosteum of the posterior neck. This cortical support will effectively resist retroversion collapse.
Screw selection
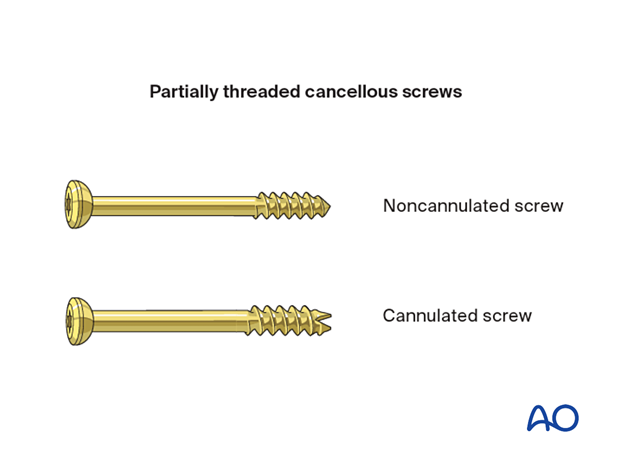
Cannulated (7.0 or 7.3 mm) or noncannulated (6.5 mm) cancellous screws may be used.
Cannulated screws are easier to insert but not available in some hospitals.
Insertion of cannulated screws is shown in this procedure.
2. Patient preparation and approach
Patient positioning
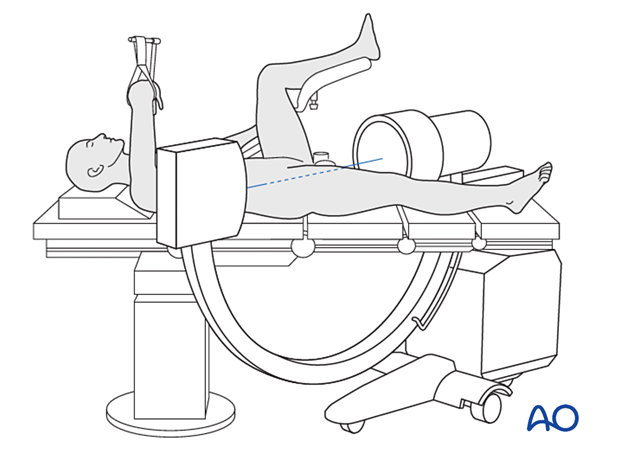
Position the patient supine on a conventional operating table or a fracture table.
C-arm image intensifier control during surgery is a must.
Be gentle in transferring the patient and do not apply traction to avoid disimpacting and displacing the fragments.
To obtain appropriate lateral views of the hip and proximal femur, the contralateral leg is best placed in a leg holder in flexion but can be scissored into hip extension.
For C-arm positioning to acquire optimal AP, lateral, and axial views, read the additional material on:
Approach
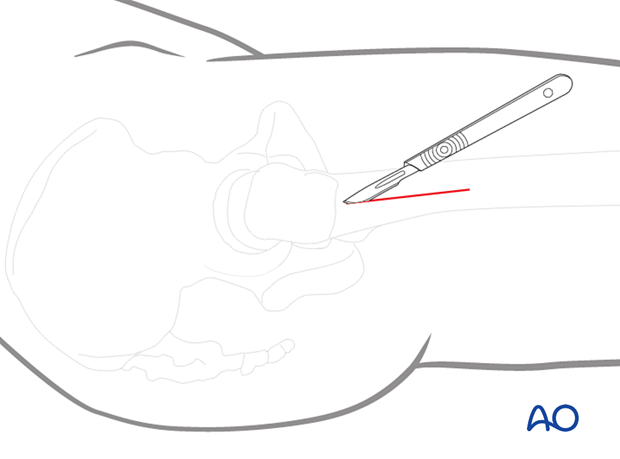
For this procedure, a limited lateral approach for screw insertion is used.
The incision should be large enough for the screw insertion and start at the vastus ridge extending about 5 cm distally.
3. Fixation
Guide-wire insertion
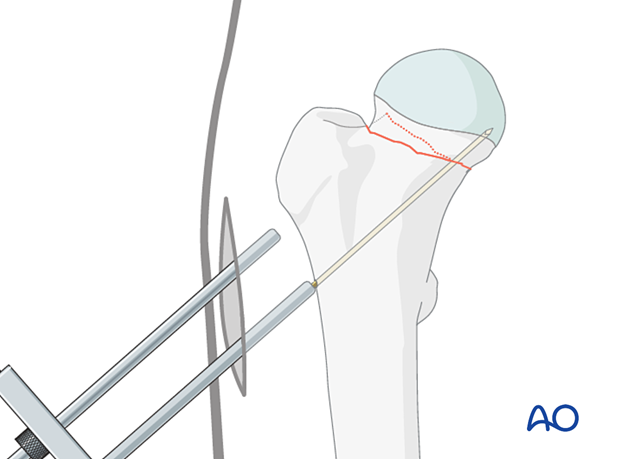
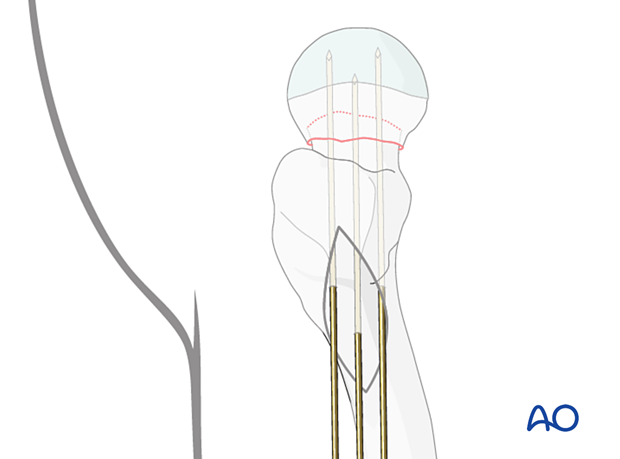
Insert the guide wires freehand under image intensifier control to ensure they are parallel to the head-neck axis and each other, or with an aiming device if available.
Make sure the tip of each wire stops in the subchondral bone of the femoral head and does not penetrate into the hip joint.
Confirm correct wire insertion with image intensification in AP, lateral, and axial views.
If using an aiming device, expose the proximal femoral lateral cortex through an incision just large enough for the device.
The first wire may be placed along or within 3 mm of the endosteum of the proximal aspect of the medial neck. This provides a fulcrum for optimal three-point fixation (head-neck-lateral cortex) to resist postoperative varus displacement.
The two superior wires are then placed parallel to the first. Optimally, the posterior cortex of the neck must be within 3 mm of the posterior wire to minimize the risk of retroversion collapse.
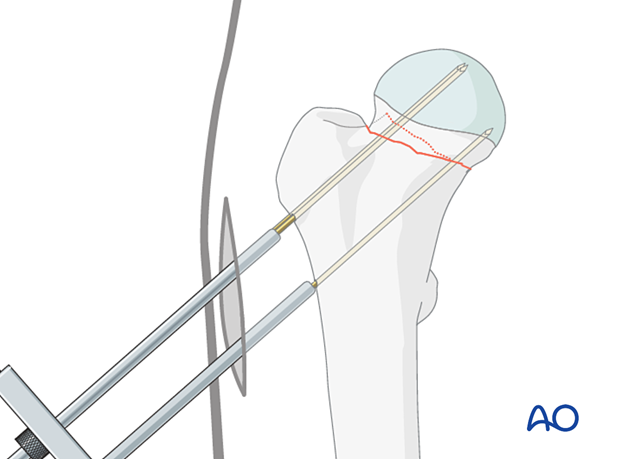
Lateral view with the guide wires inserted
Determining the screw length
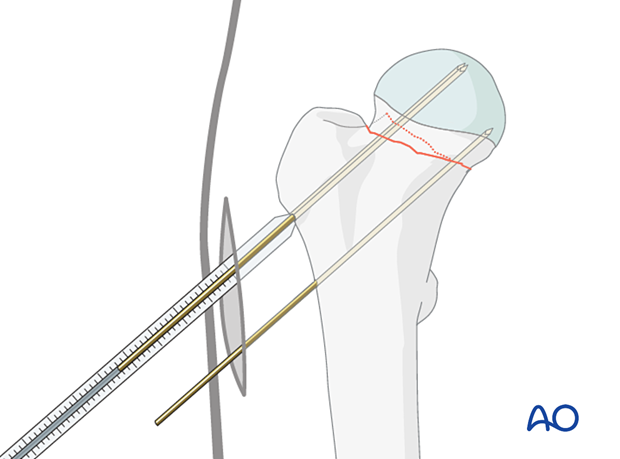
Determine the length of the screws with the aid of the measuring device.
Choose the length of the drill and screws 5 mm shorter than the length of the guide wires so that the screw tip will end 5 mm short of the subchondral bone.
The thread of the selected screws should not be across the fracture line.
Insertion of the cannulated screws
To prepare the path for the core diameter of the screws, drill over the wires with a 3.6 mm cannulated drill bit. Then insert three 7.0 mm or 7.3 mm cannulated cancellous screws over the wires.
In younger patients with dense cancellous bone, the cannulated tap may be necessary to precut the thread.
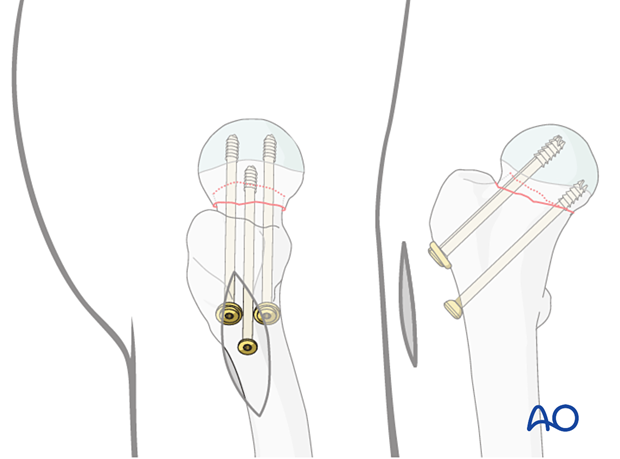
Washers may be used with the proximal screws to avoid penetration of the screw head through the thin cortex of the greater trochanter, particularly in patients with osteoporosis.
The screws must be tightened carefully and repeatedly during the procedure. If a fracture table is used, traction must be released before screw tightening.
4. Final assessment
Obtain final x-rays in all views.
5. Aftercare
Postoperative mobilization
The elderly patient may start with weight bearing as tolerated with walking aids the day after surgery.
Initial restricted weight bearing is required for the young patient. This can be reassessed at 6 weeks.
Unrestricted range-of-motion exercises of the hip joint are allowed.

Pain control
To facilitate rehabilitation and prevent delirium, it is important to control the postoperative pain properly, eg, with a specific nerve block.
VTE prophylaxis
Patients with lower extremity fractures requiring treatment require deep vein prophylaxis.
The type and duration depend on VTE risk stratification.
Follow-up
Follow-up assessment for wound healing, neurologic status, function, and patient education should occur within 10–14 days.
At 3–6 weeks, check the position of the fracture with appropriate x-rays.
Recheck 6 weeks later for progressive fracture union.
Longer follow-up, at 6 months and 1 year, is indicated to assess the development of posttraumatic arthritis and/or avascular necrosis.
Implant removal
Removal of the internal fixation devices is performed only if they are prominent and thought to be the cause of painful irritation. If so, the implants should not be removed before fracture union. The surgeon and patient should be aware that after implant removal, a risk of refracture exists.
There is a high risk of refracture in elderly patients. Therefore, implant removal is not recommended.
Prognosis of proximal femoral fractures in elderly patients
For prognosis in elderly patients, see the corresponding additional material.
