Skeletal traction
1. General considerations
Skeletal traction can be applied either through a distal femoral or proximal tibial pin. The application of the latter is shown here.
Skeletal traction may have multiple serious complications:
- Pin-track infections
- Muscle wasting
- Prolonged bed immobilization with resultant bed sores
- Increased resource utilization (nursing care)
- Less than adequate fracture reduction
Teaching video
AO teaching video: Skeletal traction
2. Application of pin and stirrup
Preparation for pin application
This is greatly aided by the use of a preassembled, sterile pack containing the following items:
- Sterile towels
- Disinfectant
- Syringe
- Needles
- Local anesthetic
- Scalpel with a pointed blade
- Sharp pointed Steinmann pin or Denham pin
- Jacobs chuck with T-handle
- Stirrup
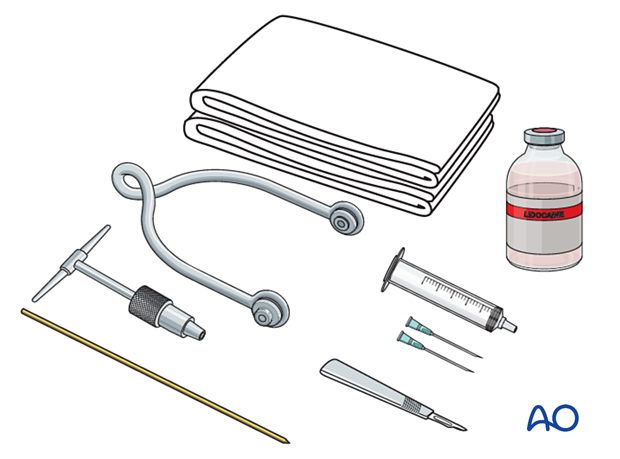
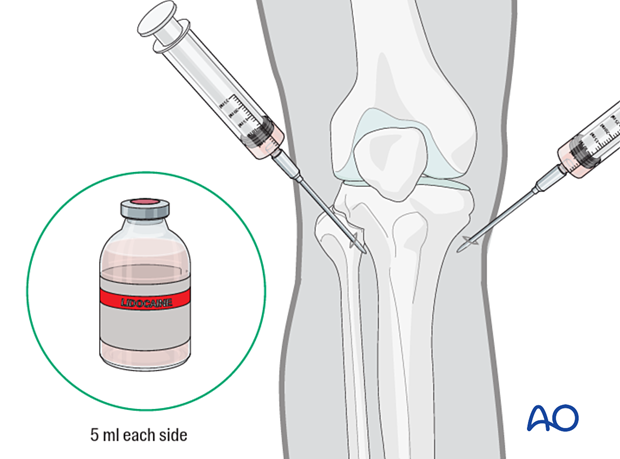
After painting the skin with antiseptic and draping with sterile towels, inject a bolus of local anesthesia (5 ml of 2% lidocaine) on each side of the tibial tuberosity into the lateral skin at the proposed site of pin insertion and medially at the anticipated exit point, infiltrating down to the periosteum.
Pin insertion
At the entry point, make a stab incision through the skin with a pointed scalpel.
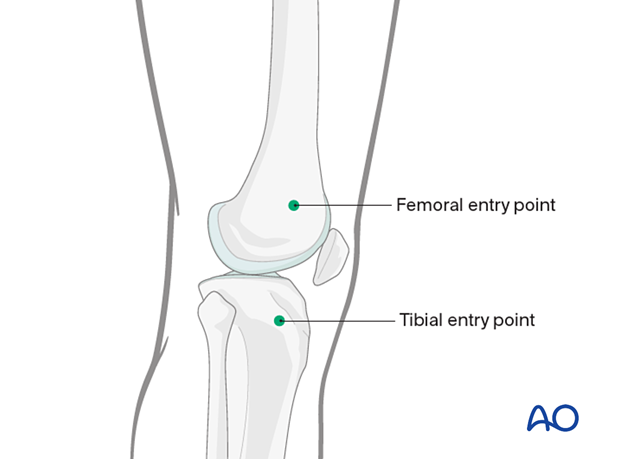
Insert a Steinmann, or preferably a Denham pin (a Denham pin has a short threaded section in the center to prevent side-to-side motion of the pin in the bone), mounted in the T-handle, manually at a point about 2 cm posterior to the tibial tuberosity.
If a femoral pin is preferred, enter the pin slightly proximal to the superior pole of the patella.
As the pin is felt to penetrate the far cortex, check that the exit will coincide with the area of local anesthetic infiltration. If not, inject additional local anesthetic. Once the point of the pin clearly declares its exit site, make a small stab incision in the overlying skin.
Once the pin is in place, ensure that there is no tension on the skin at the entry and exit points. If there is, then a small relieving incision may be necessary.
Application of stirrup
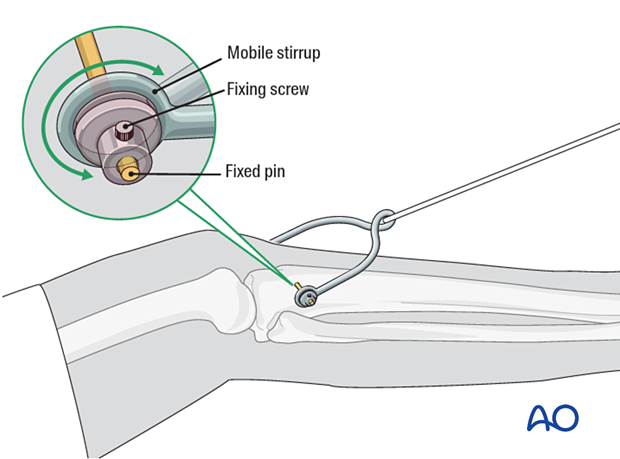
The stirrup must be freely mobile around the traction pin to prevent rotation of the pin within the bone. Rotating pins loosen quickly and significantly increase the risk of pin-track infection.
Positioning of the lower extremity
As the proximal fragment position can not be influenced, use traction to align the distal extremity to align the fracture. Typically, this requires mild flexion, abduction, and slight external rotation.
3. Setup of skeletal traction
A dedicated orthopedic bed, or a standard bed combined with a mobile Balkan beam frame, is needed.
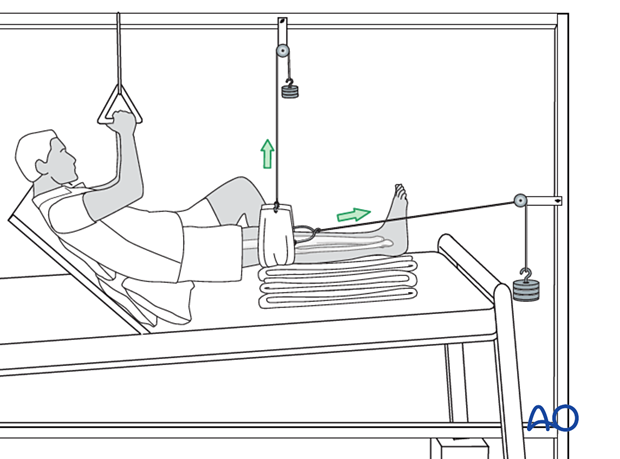
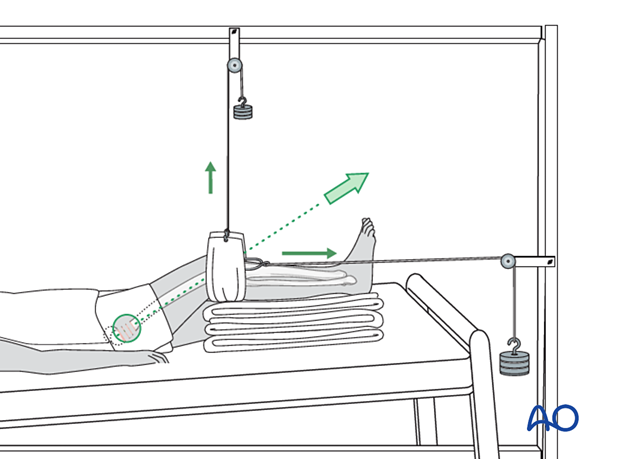
Place a padded sling behind the slightly flexed knee and apply skin traction to the lower leg. The traction cord and pulley system are shown here.
The principle of the parallelogram of forces determines that the upward pull of the sling and the longitudinal pull of the skin traction create a resulting force in the line of the femur, as illustrated.
This configuration of traction and leg support can also be adjusted to control femoral rotation by moving the overhead bar medially (internal rotation) or laterally (external rotation).
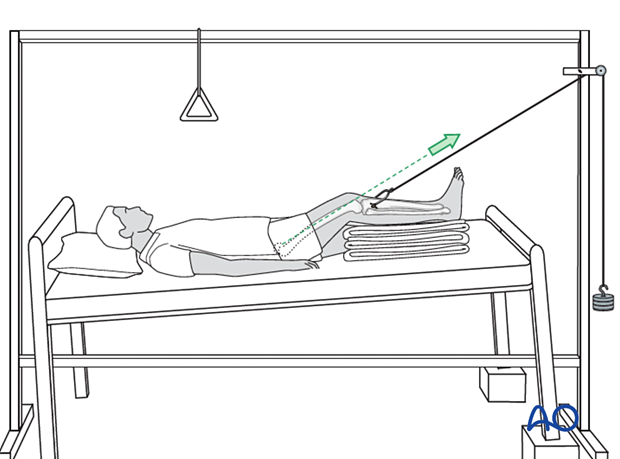
Optionally, the upward force can be applied with a rope tied to the stirrup. Distal force can then be applied separately via a loop of rope tied to each end of the pin and running distally along the medial and lateral surfaces of the calf. This must be padded to protect the skin, and a spreader (usually wood) distal to the foot is essential to avoid pressure on the malleoli.
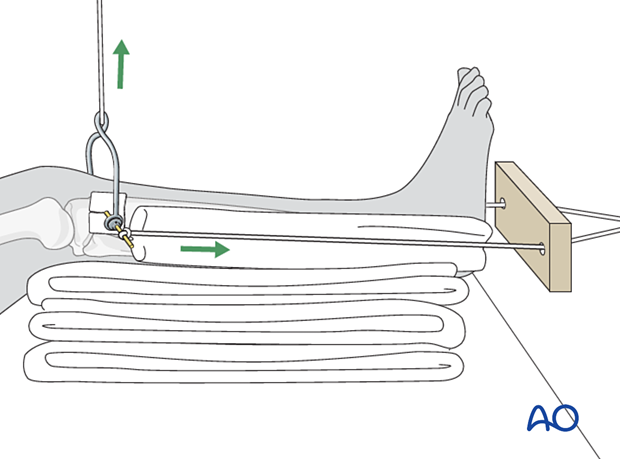
Often the simplest alternative is to use a single rope from the stirrup, directed overhead and distally through a pulley (and then through a second pulley at the foot of the bed). The position of the first pulley determines the force vector (direction) of the traction, presuming the patient remains in the selected location. Weight and direction of the traction should be adjusted to lift the knee approximately one fist-width off the bed. Pillows under the calf support the lower leg, prevent excessive knee flexion, and keep the heel off the bed, as shown.

4. Pin-site care
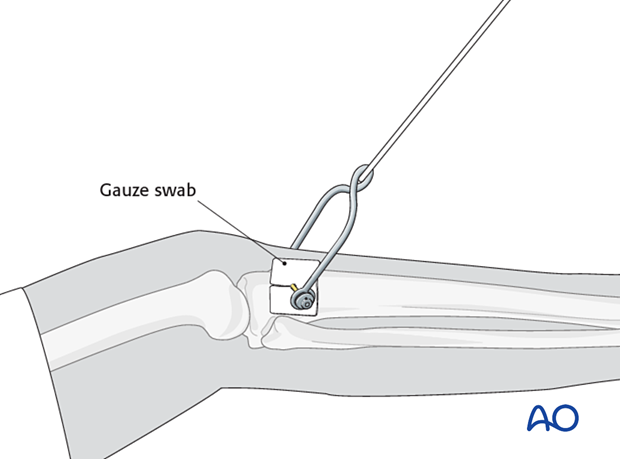
To prevent pin-track infection, apply a slit gauze swab (sponge) as a dressing around the pin. The gauze swab should only be changed when saturated.
5. Assessment of reduction
After traction has been set up, take an x-ray to check for acceptable fracture alignment.
Readjust as necessary.
6. Mobilization in bed
Assisted active mobilization and chest physiotherapy should start from the first day.
With the aid of a trapeze bar, as shown, patients can lift themself, and the traction system allows mobilization of the knee.
