ORIF - Anterior fixation SI Joint
1. Introduction
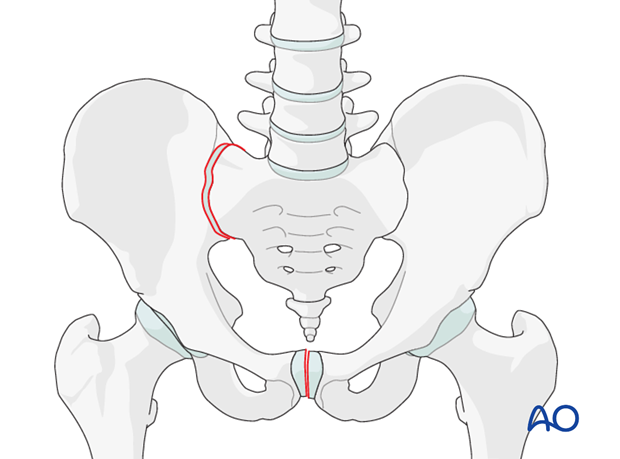
Sacroiliac joint instability, with or without associated fracture, is the most common cause of posterior instability of Type-C pelvic ring injuries.
Instability of the sacroiliac joint occurs most commonly with a pure disruption of the sacroiliac joint.
Most pure sacroiliac joint dislocations may be treated with closed reduction and percutaneous iliosacral screw placement. Therefore, open reduction and anterior plating should be reserved for only select cases, primarily when closed reduction is not possible, or when an anterior approach to the innominate bone is required for another injury.
2. Patient preparation and approach
Patient preparation
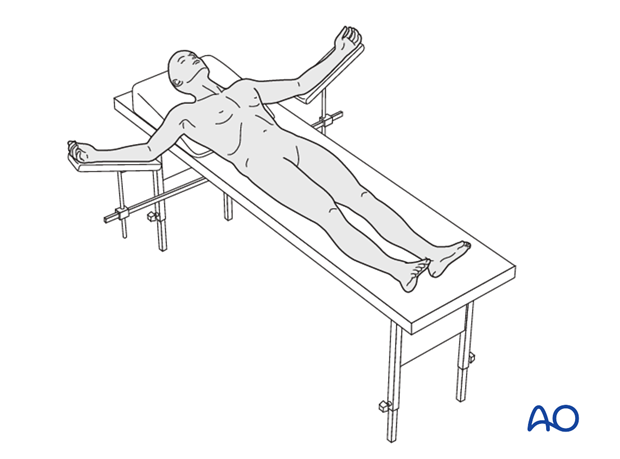
This procedure is performed with the patient in a supine position.
Approach
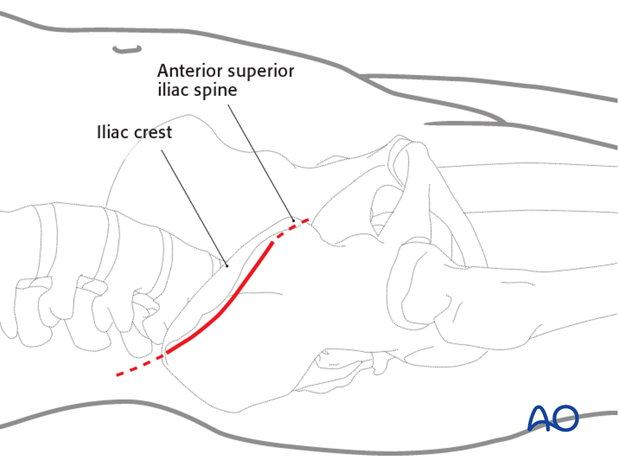
For this procedure an anterior approach to the iliac wing and SI joint is used.
3. Preparation of the sacroiliac joint
Use a Cobb elevator to elevate the anterior fibers of the sacroiliac ligament from the sacrum. Further medial dissection must respect the L5 nerve root but can be extended 1-2 cm and should be subperiosteal.
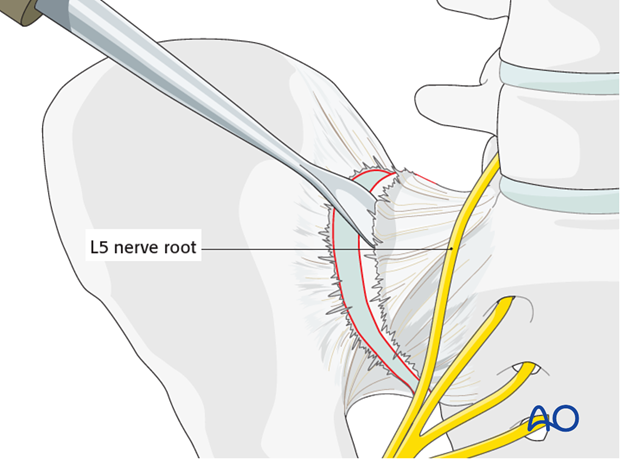
Prepare sacral ala for screw insertion
Insert sharp Hohmann retractors posteriorly and anteriorly into the sacrum to expose approximately 1–2 cm of the lateral section of the sacrum for later screw positioning.
The pointed tips of these retractors may be gently impacted into the bone of the sacral ala.
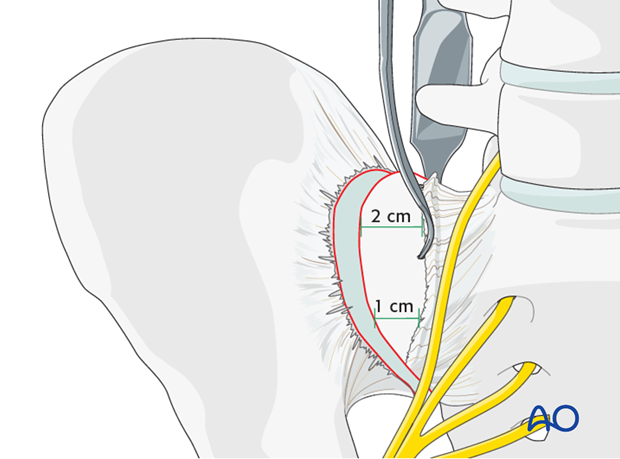
Inspect and debride the sacroiliac joint
The SI joint is distracted using a laminar spreader. The joint is inspected, irrigated, and small fragments are removed.
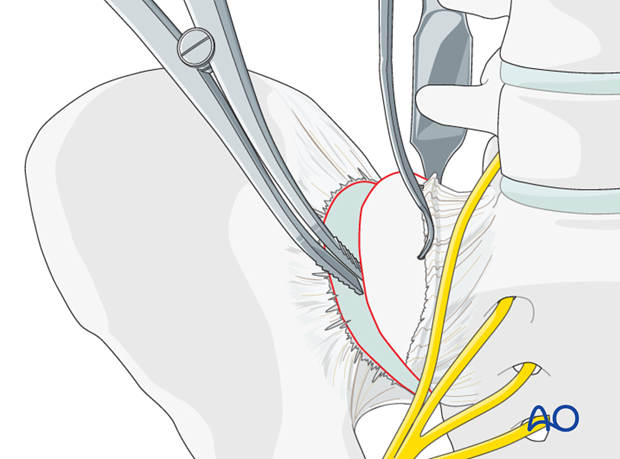
4. Reduction
Manual reduction with pressure on the ilium
It may be possible to reduce the sacroiliac joint by pushing the lateral surface of the iliac wing medially toward the sacrum.
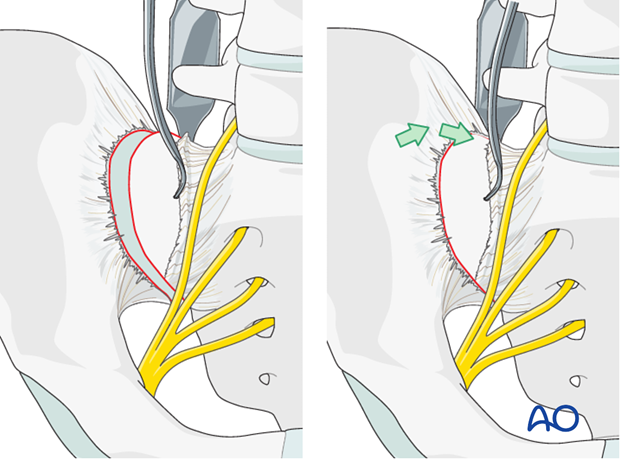
Reduction using Schanz screw
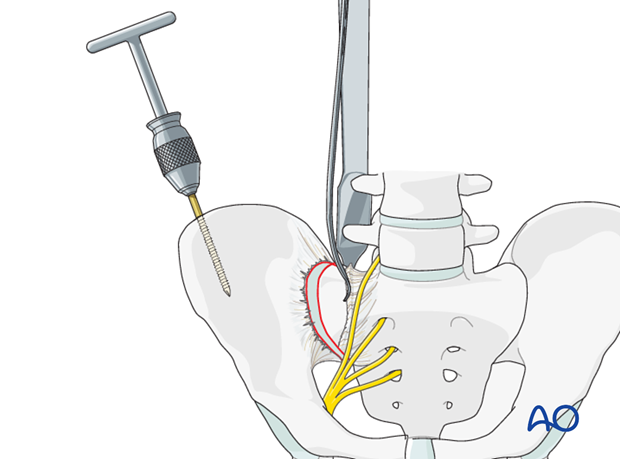
A Schanz screw may be inserted into the iliac crest or the supraacetabular region in order to aid reduction of the SI joint.
The Schanz screw may be used as a joy stick to allow manipulation of the iliac wing. This is particularly useful if there is a rotational displacement at the SI joint.
Reduction using a pointed reduction clamp
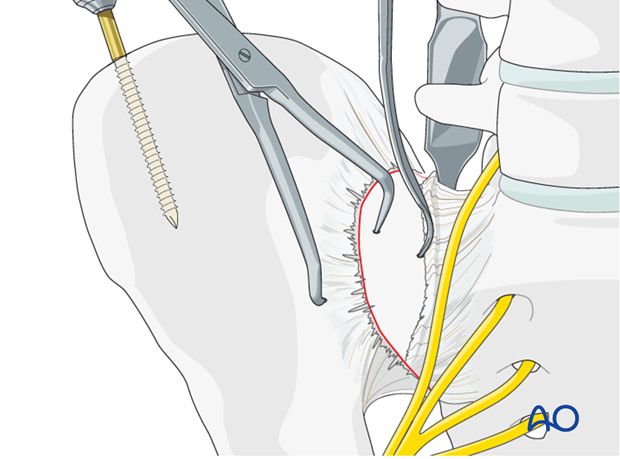
A pointed reduction clamp may be applied as an adjunct across the SI joint in order to achieve reduction. Alternatively, the clamp may be applied to maintain a reduction achieved by other means.
Reduction using a Farabeuf or Jungbluth clamp
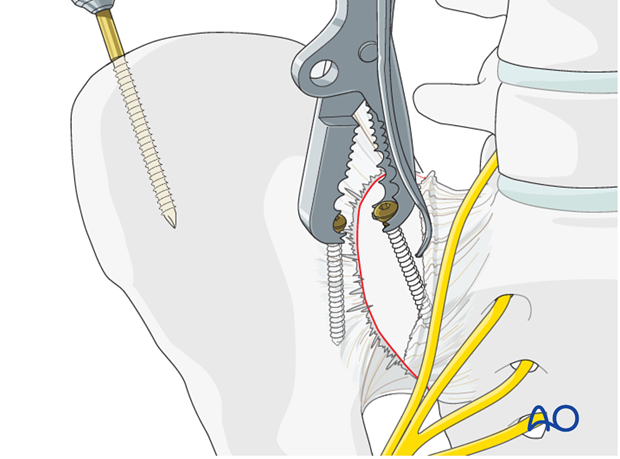
In order to apply the Farabeuf or Jungbluth clamp a screw is placed into the sacral ala. First, the drill hole is made. The drill is placed parallel to the SI joint under direct vision.
These screws are usually 50–60 mm in length.
There is a limited area (approximately 1–2 cm medial to the SI joint) that allows for safe placement of screws in the sacral ala, due to the proximity of the L5 nerve root.
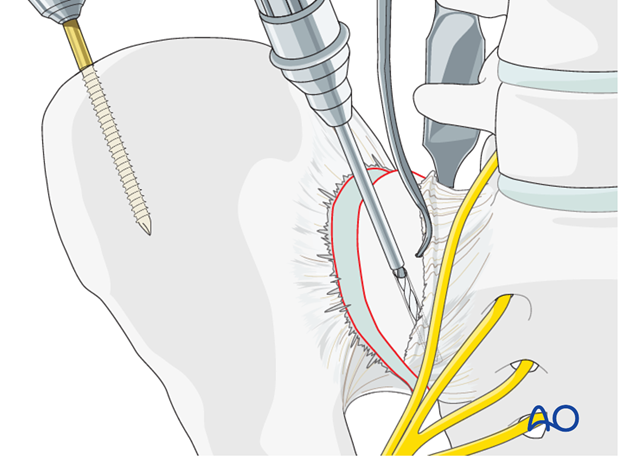
Insert a screw into the sacral ala using the previously drilled hole. A second hole is drilled in the ilium just lateral to the sacroiliac joint. Insert a second screw into this hole.
These screws should be placed in the central portion of the sacroiliac joint (from anterior to posterior) in order to leave room for the plates to be applied, both anteriorly and posteriorly to the reduction screws.
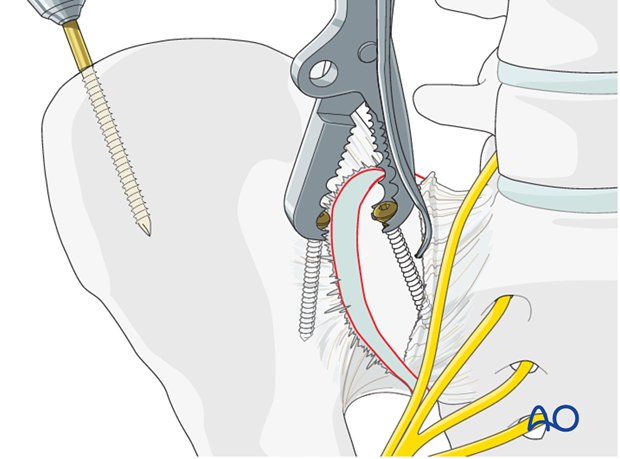
Next, apply a Farabeuf or Jungbluth clamp to these screws. The clamp can then be used to reduce the sacroiliac joint. The clamp allows for reduction in multiple planes.
Anatomic reduction should be confirmed by direct visualization and verified by image intensification.
Temporary iliosacral fixation with a K-wire is possible
Planning for plate fixation
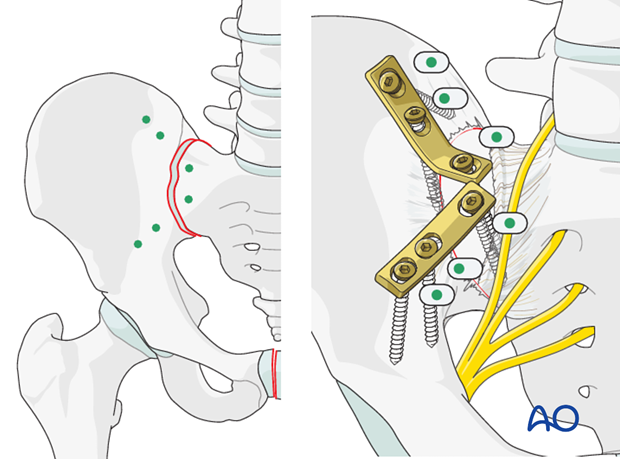
Two dynamic compression plates are necessary for control of rotation at the sacroiliac joint.
As shown in the illustration, the plates should be positioned across the SI joint.
Place them under compression using the dynamic compression holes.
Pre-contouring of the plates
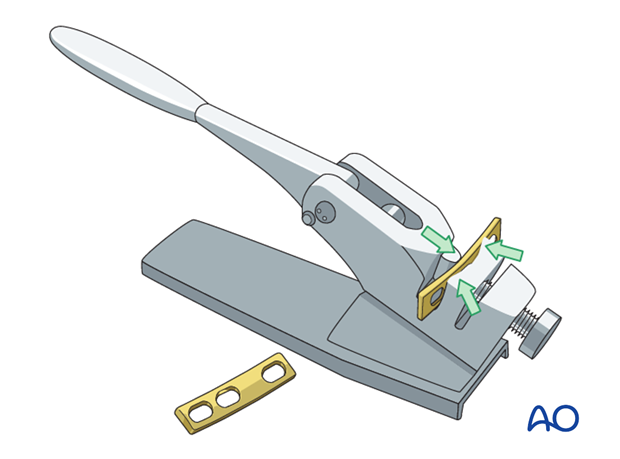
The plates are contoured using a table top bending press. The plates are contoured to fit across the SI joint with one screw in the sacrum and two in the ilium.
5. Plate application
Apply the stabilizing plate
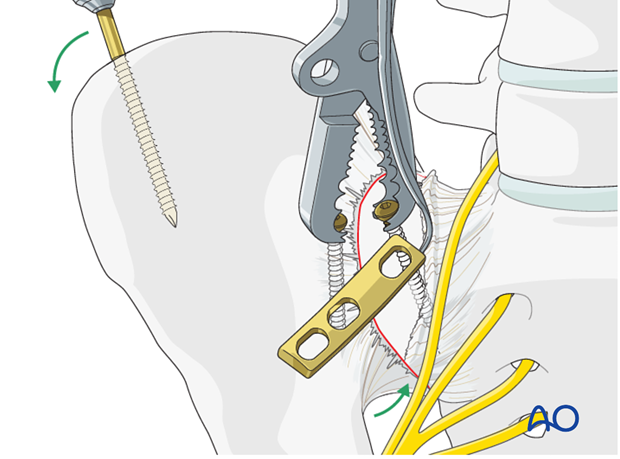
After reduction has been achieved, the plates are applied across the SI joint. If a Jungbluth or Farabeuf clamp has been used, one plate is applied anteriorly to the clamp.
If there is sufficient space, the second plate may be applied posterior to the clamp. Otherwise, once the first plate has been applied, the clamp may be removed to make room for the second plate.
Insertion of screws
Drill the sacral hole in a carefully selected site without the plate in place. The densest bone of the ilium is within the first 3 cm lateral to the sacroiliac joint.
After securing the plate to the sacrum the first iliac screw is placed eccentrically for compression.
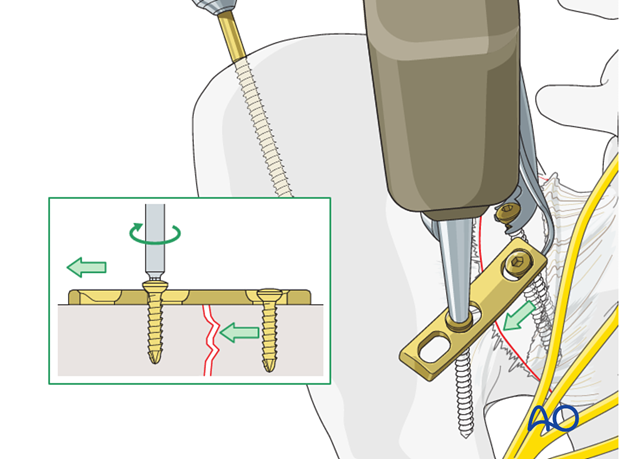
The most lateral screw is inserted in neutral position.
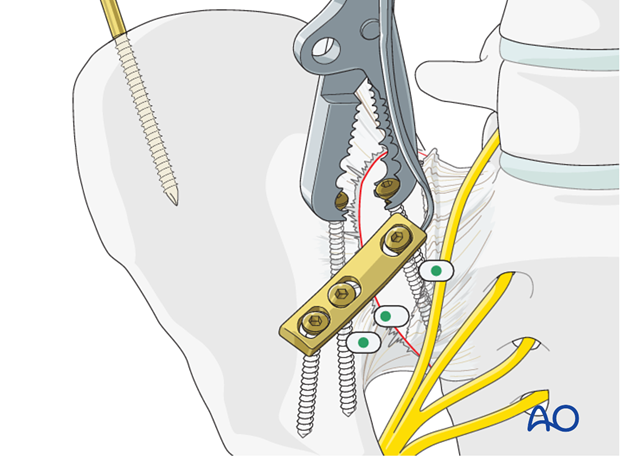
Placement of the second plate
Two plates are needed. Remove any clamps and insert the second plate in the same manner.
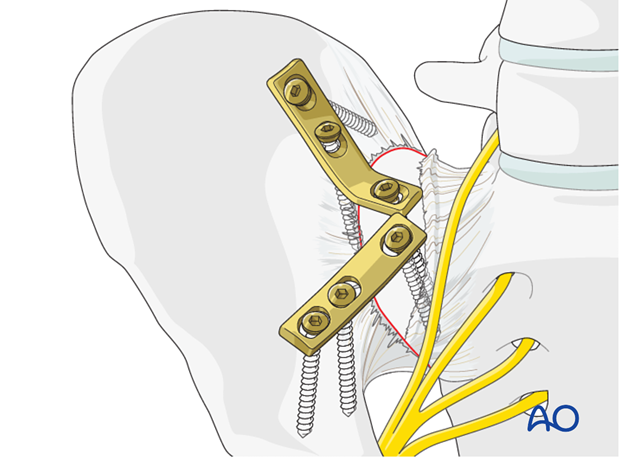
6. Postoperative x-ray control
After completion of internal fixation, confirm the final reduction and hardware position intraoperatively by AP, inlet and outlet radiographic imaging.

7. Aftercare following open reduction and fixation
Postoperative blood test
After pelvic surgery, routine hemoglobin and electrolyte check out should be performed the first day after surgery and corrected if necessary.
Bowel function and food
After extensile approaches in the anterior pelvis, the bowel function may be temporarily compromised. This temporary paralytic ileus generally does not need specific treatment beyond withholding food and drink until bowel function recovers.
Analgesics
Adequate analgesia is important. Non pharmacologic pain management should be considered as well (eg. local cooling and psychological support).
Anticoagulation
Prophylaxis for deep vein thrombosis (DVT) and pulmonary embolus is routine unless contraindicated. The optimal duration of DVT prophylaxis in this setting remains unproven, but in general it should be continued until the patient can actively walk (typically 4-6 weeks).
Drains
Dressings should be removed and wounds checked after 48h, with wound care according to surgeon's preference.
Wound dressing
Dressings should be removed and wounds checked after 48h, with wound care according to surgeon's preference.
Physiotherapy
The following guidelines regarding physiotherapy must be adapted to the individual patient and injury.
It is important that the surgeon decide how much mechanical loading is appropriate for each patient's pelvic ring fixation. This must be communicated to physical therapy and nursing staff.
For all patients, proper respiratory physiotherapy can help to prevent pulmonary complications and is highly recommended.
Upper extremity and bed mobility exercises should begin as soon as possible, with protection against pelvic loading as necessary.
Mobilization can usually begin the day after surgery unless significant instability is present.
Generally, the patient can start to sit the first day after surgery and begin passive and active assisted exercises.
For unilateral injuries, gait training with a walking frame or crutches can begin as soon as the patient is able to stand with limited weight bearing on the unstable side.
In unstable unilateral pelvic injuries, weight bearing on the injured side should be limited to "touch down" (weight of leg). Assistance with leg lifting in transfers may be necessary.
Progressive weight bearing can begin according to anticipated healing. Significant weight bearing is usually possible by 6 week but use of crutches may need to be continued for three months. It should remembered that pelvic fractures usually heal within 6-8 weeks, but that primarily ligamentous injuries may need longer protection (3-4 months).
Fracture healing and pelvic alignment are monitored by regular X-rays every 4-6 weeks until healing is complete.
Bilateral unstable pelvic fractures
Extra precautions are necessary for patients with bilaterally unstable pelvic fractures. Physiotherapy of the torso and upper extremity should begin as soon as possible. This enables these patients to become independent in transfer from bed to chair. For the first few weeks, wheelchair ambulation may be necessary. After 3-4 weeks walking exercises in a swimming pool are started.
After 6 weeks, if pain allows, the patient can start walking with a three point gait, with less weight bearing on the more unstable side.
Full weight bearing is possible after complete healing of the bony or ligamentous legions, typically not before 12 weeks.
