Triangular osteosynthesis
1. Introduction
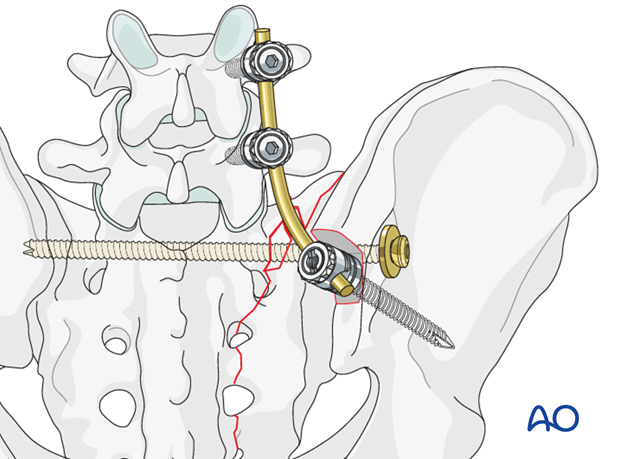
Triangular osteosynthesis is a subcategory of spinopelvic fixation. It combines
- lumbopelvic fixation ((usually unilateral) from the pedicle of L5 to the ipsilateral posterior ilium, and
- transverse sacral alar fracture fixation (iliosacral screw/s, sacral plate, etc.)
This technique offers mechanically better fixation for highly unstable, vertical shear sacral alar fractures. The lumbo-pelvic fixation, applied after reduction of the pelvic ring injury, helps prevent recurrent vertical displacement of the unstable hemipelvis.
As a result, early mobilization of the patient may be achieved, with avoidance of late deformity. However, prominent hardware, impaired healing, nerve root injury, and need for hardware removal are concerns. Improved techniques may reduce complication rates, especially reduction and fixation of the sacral fracture, with preliminary neural decompression, before applying distraction to the lumbo-sacral instrumentation.
For illustration purposes, we show here only the spinopelvic fixation which follows the IS screw insertion.
2. Insertion of the pedicle screws
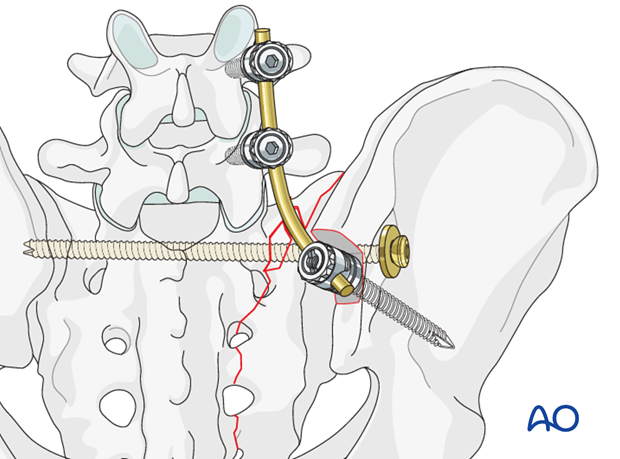
Pedicle screws are inserted in L4 and L5 and connected with the rod.
Pedicle screw entry points
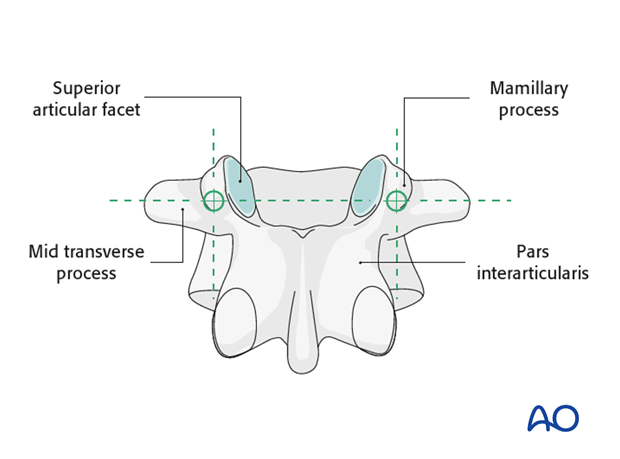
The entry point of the pedicle screw is defined as the confluence of any of the four lines:
- Pars interarticularis
- Mamillary process (shown)
- Lateral border of the superior articular facet
- Mid transverse process (shown)
Opening of the cortex
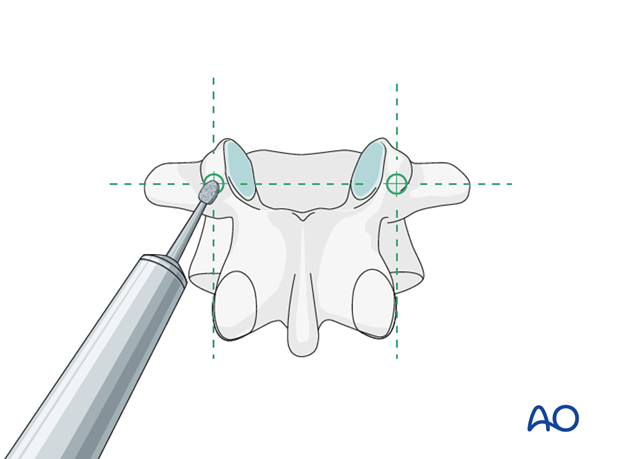
Open the superficial cortex of the entry point with a burr or a rongeur.
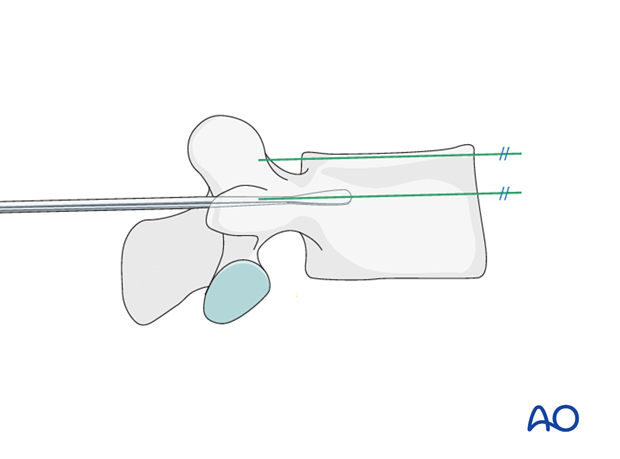
Sagittal plane angulation
A pedicle probe is used to navigate down the isthmus of the pedicle into the vertebral body.
The pedicle probe should be inserted in a trajectory superimposed on the transverse process and parallel to the superior endplate.
Transverse plane inclination
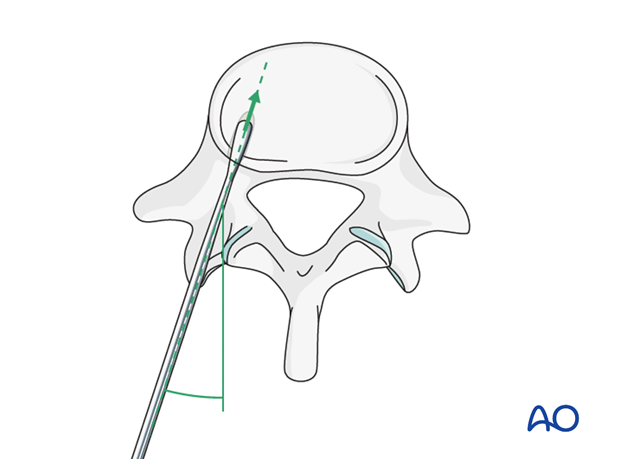
It is important to avoid medial penetration of the spinal canal superficially or lateral or anterior penetration of the vertebral body cortex at the depth of insertion.
Screw insertion
Once the pedicle track has been created, it is important to confirm a complete intraosseous trajectory by pedicle and body palpation using a pedicle probe. At any point in the process, radiographic confirmation can be obtained.
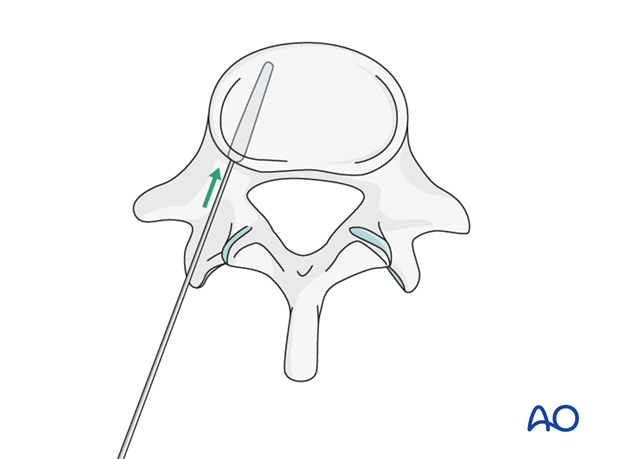
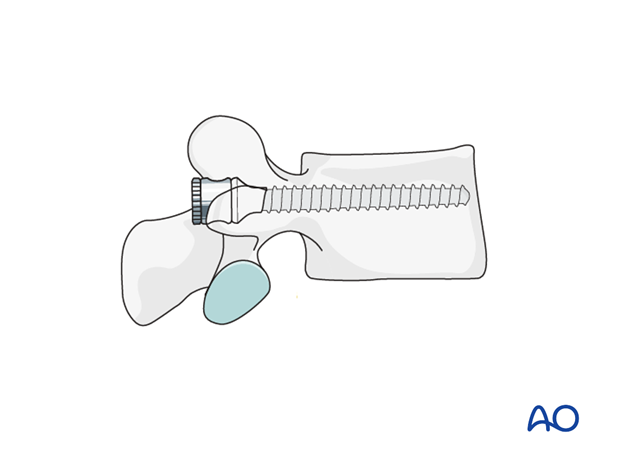
A screw of the appropriate diameter and length is carefully inserted into the prepared track.
3. Iliac pedicle screw
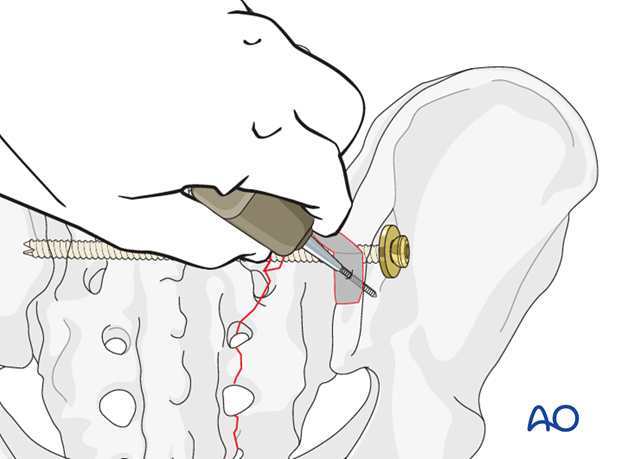
The iliac entry point is medial to the posterior iliac crest to prevent pressure ulcers over the implant.
1 cm^3 of bone is removed with a chisel or a saw to recess the implant to the level of the posterior ilium, and thus avoid soft tissue irritation.

An oscillating drill (3.5 mm) or awl is used to penetrate between the two cortices in a ventral, caudal direction.
When resistance is felt, the length is measured for the insertion of the pedicle screw.
The preferred diameter is 7.0 mm.
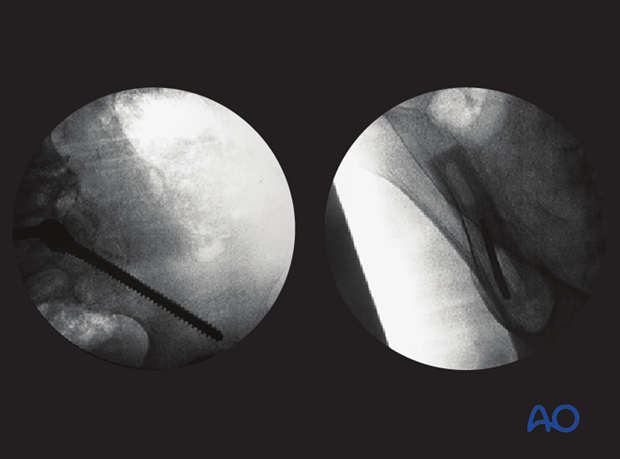
Use C-arm images to confirm appropriate screw location. A lateral view and one along the axis of the screw are required.
4. Vertical reduction
Insertion of the connection rod
It is important that the iliac screw heads and connecting rods lie flush to the bone. Avoiding prominent hardware prevents soft tissue irritation.
Cut the rod to the appropriate length. Attach it to the screw per the hardware system.
