Tendon reattachment (suture anchor)
1. General considerations
Goal of surgery
The main goal of the surgery is to restore the tibialis posterior tendon function.
Timing of surgery
The timing of surgery is influenced by the soft tissue injury and the patient's physiologic status.

2. Technique options
A suture anchor or the tibialis tendon pull-through technique may be used for this procedure.
3. Patient preparation and surgical approach
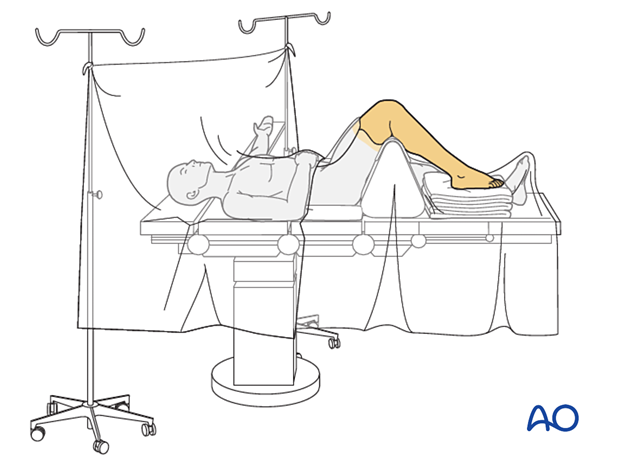
The procedure is performed with the patient placed supine with the knee flexed 90°.
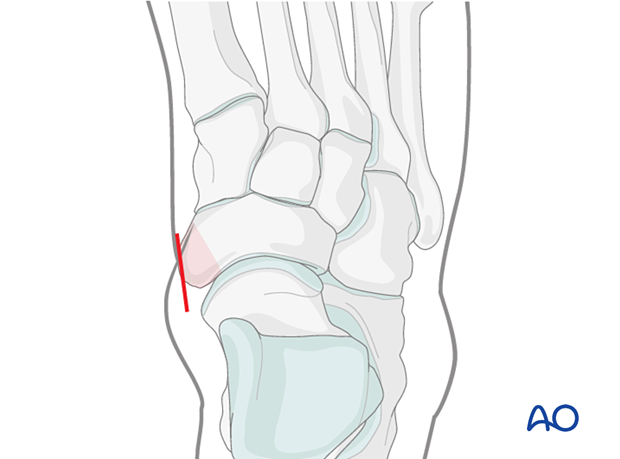
The procedure may be performed through a limited medial utility approach, centered over the navicular tubercle.
4. Excision of a small bony fragment
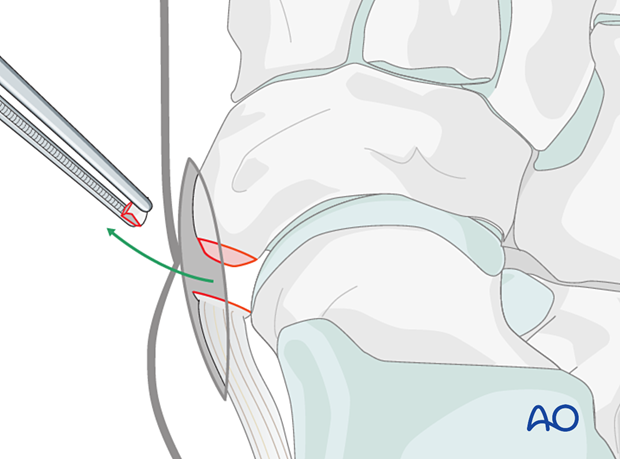
Excise any small avascular bone fragment.
5. Suture anchor technique
Drill a hole in the navicular tubercle using a drill bit corresponding to the suture anchor’s size.
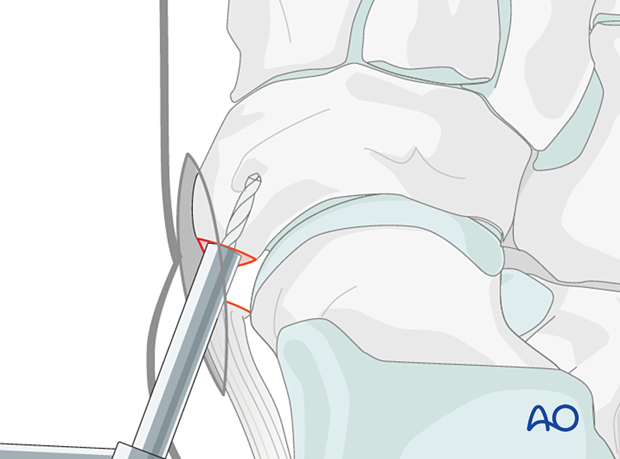
Insert the anchor. The anchors need to be placed sufficiently deep so that the metal part does not protrude above the bone surface.
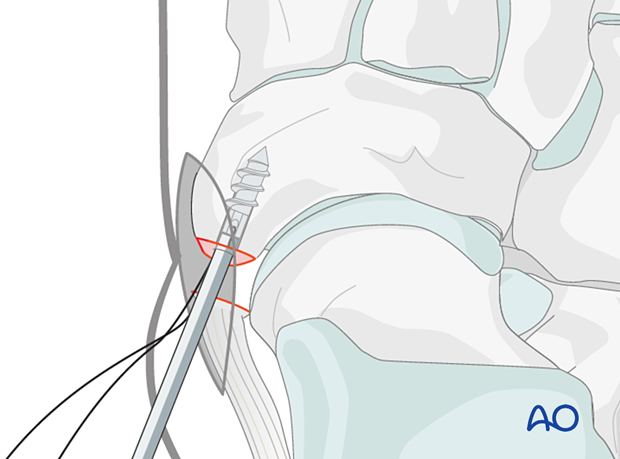
Remove the applicator and use the sutures to anchor the posterior tibialis tendon to the navicular tubercle.

6. Pull through technique
Drill a 5 mm deep hole in the navicular tubercle using a drill bit corresponding to the tibialis tendon’s diameter.
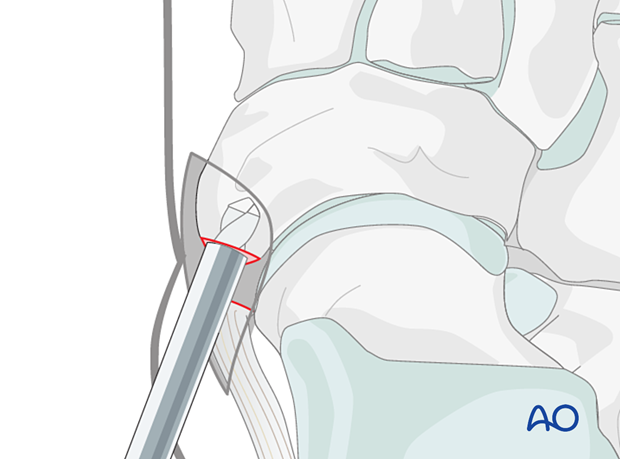
Two small drill holes are drilled from the navicular’s dorsal aspect to the distal end of the first drill hole.
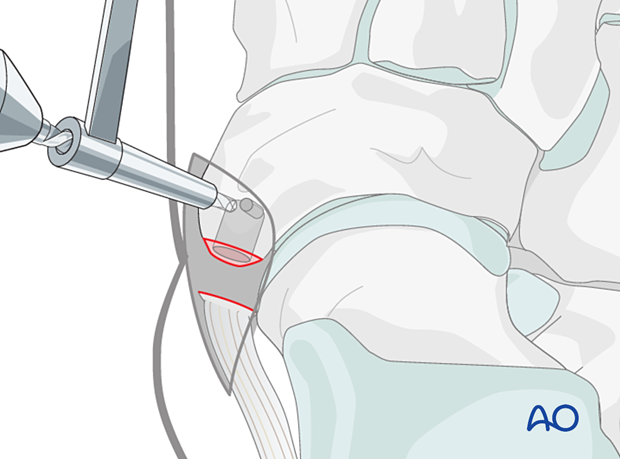
Two non-resorbable sutures are woven into the tendon, passed through the larger-diameter hole, and then through the smaller diameter hole with a suture passer or a free needle.
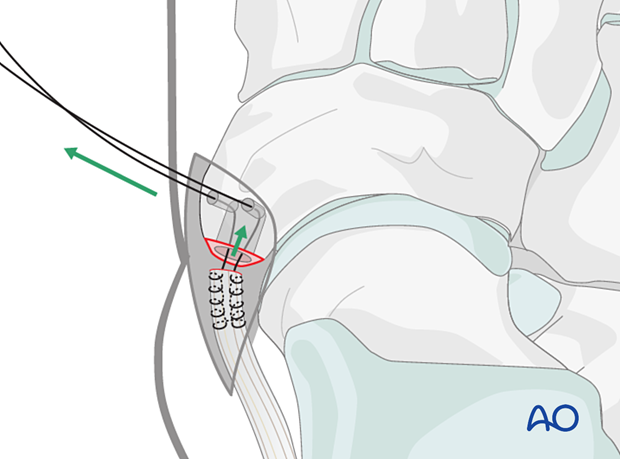
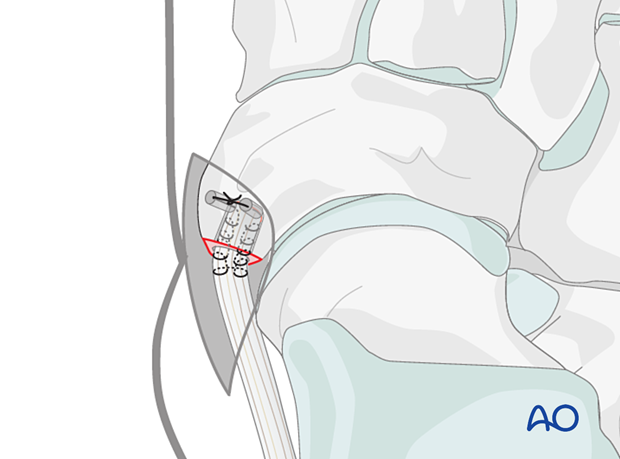
Use the sutures to pull the tendon into the larger-diameter hole and then secure the tendon by tying the suture ends together.
Care must be taken not to overtighten the sutures to prevent them from cutting into/through the bone.
7. Aftercare
Dressing
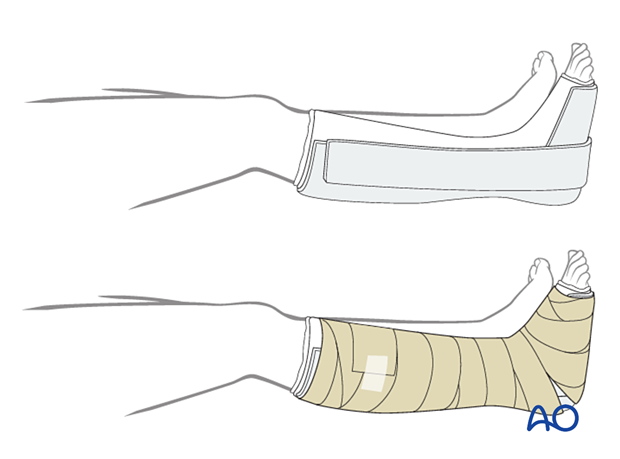
The non-adherent antibacterial dressing is applied as a first layer. Sterile undercast padding is placed from toes to knee. Extra side and posterior cushion padding are added.
Immobilization
The foot should be immobilized for the first two weeks, which can be achieved using a three-sided plaster splint. The anterior area is left free of plaster to allow for swelling. Ensure that the splint’s medial and lateral vertical portions do not overlap anteriorly and that the splint does not compress the popliteal space or the calf.
Follow-up
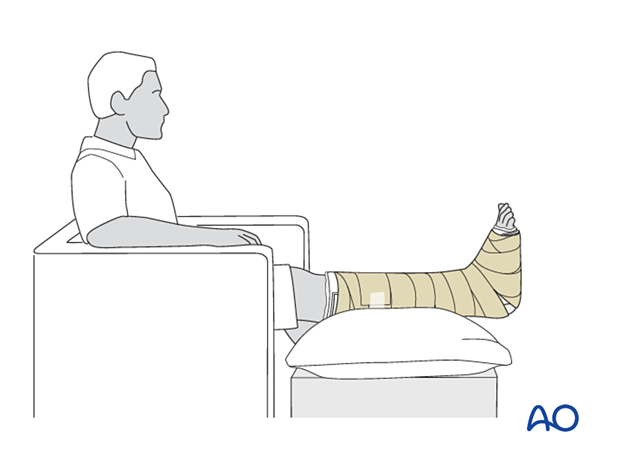
The patient should be counseled to keep the leg on a cushion and elevated. Remember not to elevate the leg too much as it may impede the inflow. The foot’s ideal position is halfway between the waist and the heart when the patient is sitting. While seated, the foot should be on a cushion and elevated, but if badly swollen, the patient must be supine since elevating the foot while seated decreases swelling less effectively.
Avoid direct pressure against the heel during recumbency to prevent decubiti.
The OR dressing is usually left in place and not changed until the first postoperative visit at two weeks when x-rays are obtained once the dressing is removed. If any complication is suspected (eg, infection or compartment syndrome), the dressing must be split and, if necessary, removed to allow full inspection.
The strict non-weight bearing should be maintained until there is evidence of healing and any transfixion K-wires (6–12 weeks) or bridging devices (min 12 weeks) are removed.
Daily toe movement is encouraged.
Formal physical therapy should not begin in the early postoperative period.
A gastrocnemius release may need to be performed in cases with postoperative gastrocnemius contracture. This occurs more typically in the mid and hind-foot.
