Closed reduction - Splinting
1. General considerations
Indications
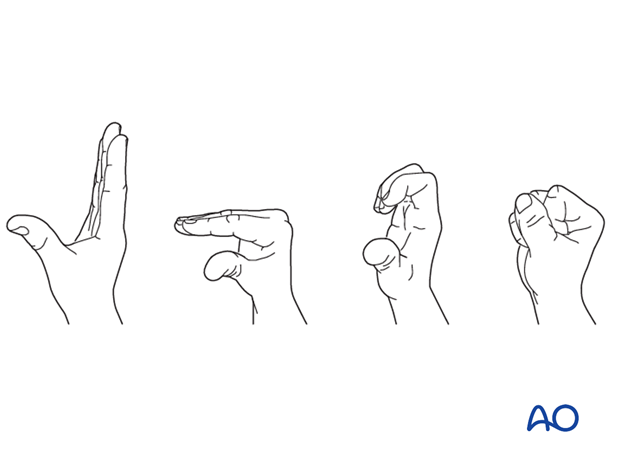
Minimally displaced fractures of the metacarpal shaft and metaphysis, if stable after reduction, can be treated with controlled movement by buddy strapping and restricted extension with a dorsal splint.
Acceptable deformity
Most of these fractures produce a flexion deformity and often minimal shortening. If the flexion deformity exceeds 10–20° in fractures of the 2nd and 3rd metacarpals or 20–30° in fractures of the 4th and 5th metacarpals, ORIF is recommended. Shortening of less than 2 mm does not interfere with function, but more than 5 mm cannot be accepted.
Irreducible rotational malalignment is a contraindication for nonoperative treatment.
Dorsal splinting
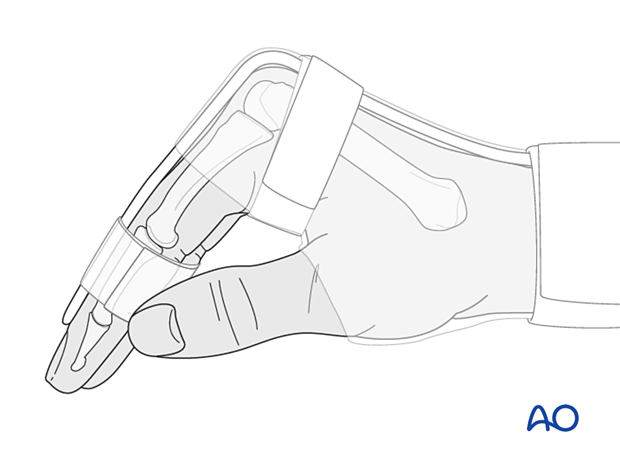
Apply a dorsal splint in a hand protection position. This splint is easy to apply and there is no hand therapy needed.
In the first week, a palmar protection splint should be added.
The dorsal splint allows immediate active mobilization (flexion) of the finger joints and help with pain and edema control.
Hand position for splinting
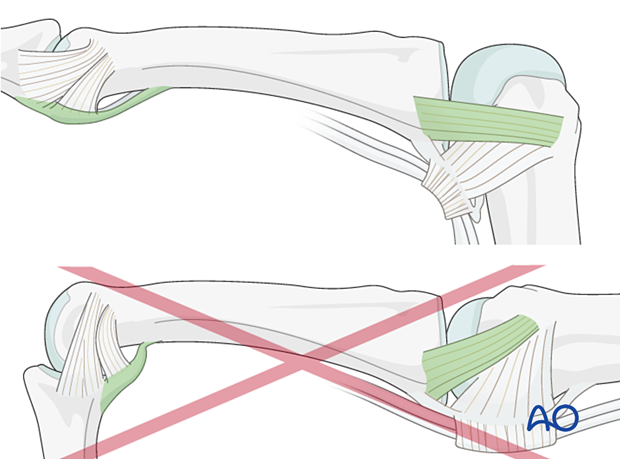
The hand is splinted in an intrinsic plus (Edinburgh) position:
- Neutral wrist position or up to 15° extension
- Metacarpophalangeal (MCP) joint in 90° flexion
- Proximal interphalangeal (PIP) joint in extension
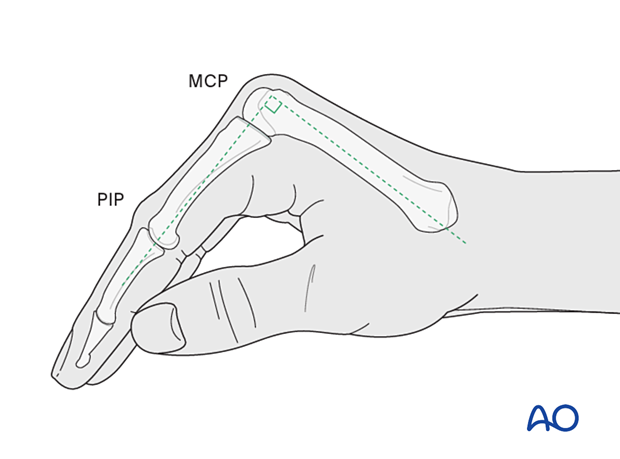
The reason for splinting the MCP joint in flexion is to maintain its collateral ligament at maximal length, avoiding scar contraction.
PIP joint extension in this position also maintains the length of the volar plate.
AO teaching video
Phalanx–Proximal Fractures–Extension Block Splint (Burke Halter)
2. Reduction
Displacement usually occurs as a flexion deformity that can be reduced by exerting pressure on the metacarpal head from the palmar aspect, either directly or using the proximal phalanx as a piston (Jahss maneuver).
Check for correct alignment with an image intensifier.
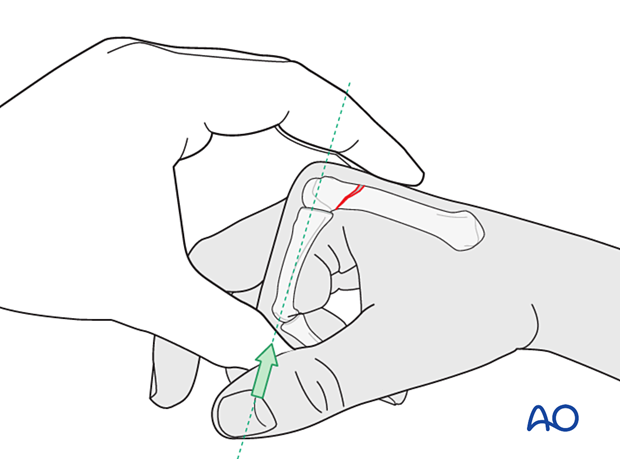
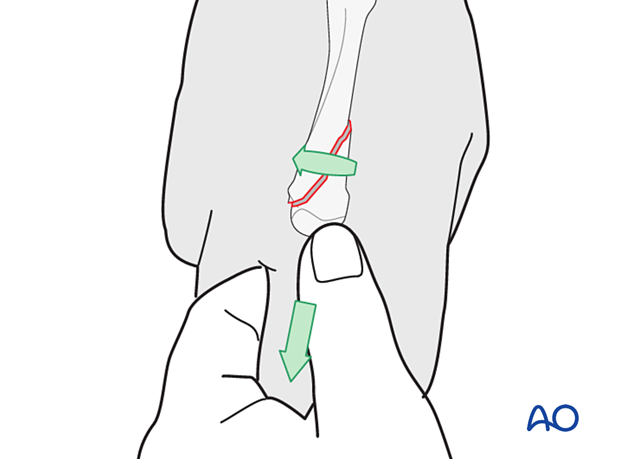
Especially in spiral oblique fractures, shortening of the metacarpal is associated with rotational malalignment. Reduction, therefore, is achieved by a combination of longitudinal traction on the finger and derotation.
There is a high risk of secondary redisplacement, indicating ORIF as the treatment of choice in such cases.
Check for correct alignment with an image intensifier.
3. Checking alignment
Identifying malrotation
At this stage, it is advisable to check the alignment and rotational correction by moving the finger through a range of motion.
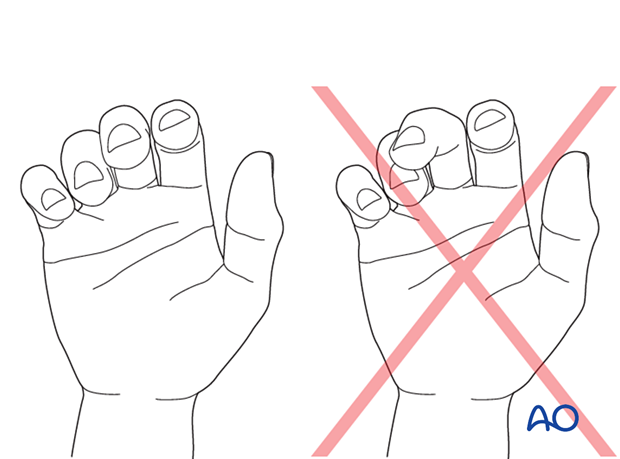
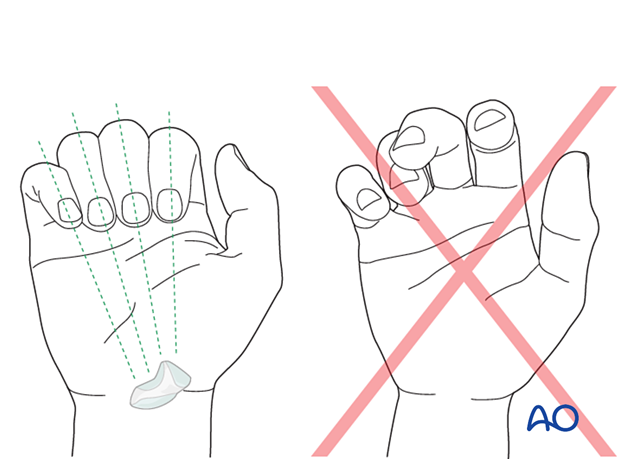
Rotational alignment can only be judged with flexed metacarpophalangeal (MCP) joints. The fingertips should all point to the scaphoid.
Malrotation may manifest by an overlap of the flexed finger over its neighbor. Subtle rotational malalignments can often be judged by a tilt of the leading edge of the fingernail when the fingers are viewed end-on.
If the patient is conscious and the regional anesthesia still allows active movement, the patient can be asked to extend and flex the finger.
Any malrotation is corrected by direct manipulation and later fixed. Flexing the MCP joints while preventing overlap of the fingers will reduce rotational displacement.
Using the tenodesis effect when under anesthesia
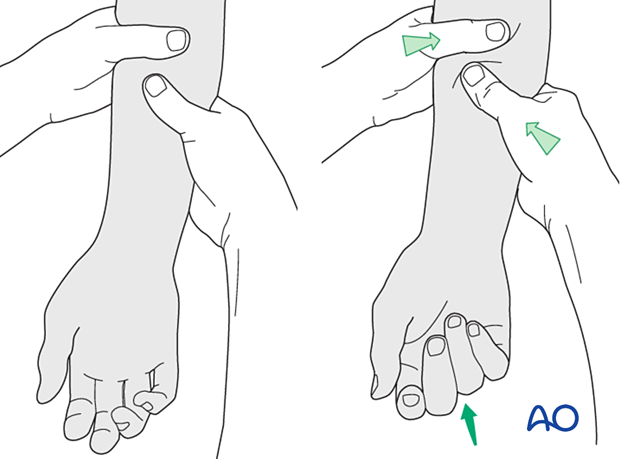
Under general anesthesia, the tenodesis effect is used, with the surgeon fully flexing the wrist to produce extension of the fingers and fully extending the wrist to cause flexion of the fingers.
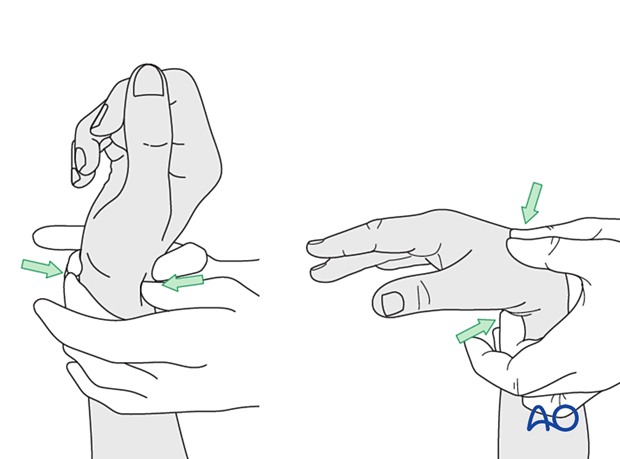
Alternatively, the surgeon can exert pressure against the muscle bellies of the proximal forearm to cause passive flexion of the fingers.
4. Buddy strapping
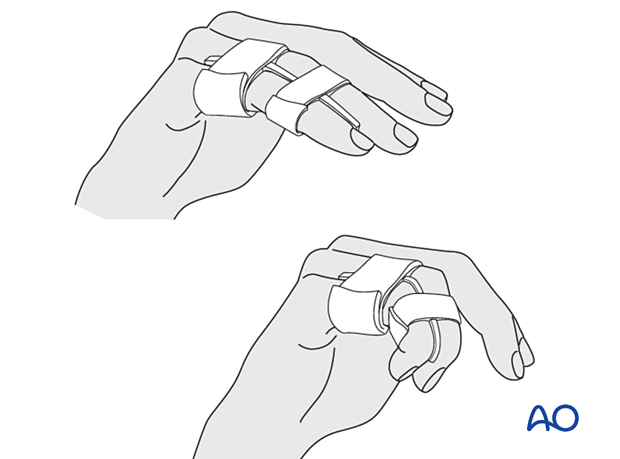
Strap the injured finger to a neighboring finger.
The strapping should leave the joints free for mobilization.
Direct skin contact with adjacent fingers should be prevented by placing gauze pads between them.
5. Splint application
Protect the skin of the arm and hand with padding/cotton sleeve to avoid pressure sores, especially on the distal ulna and styloid process of the radius.
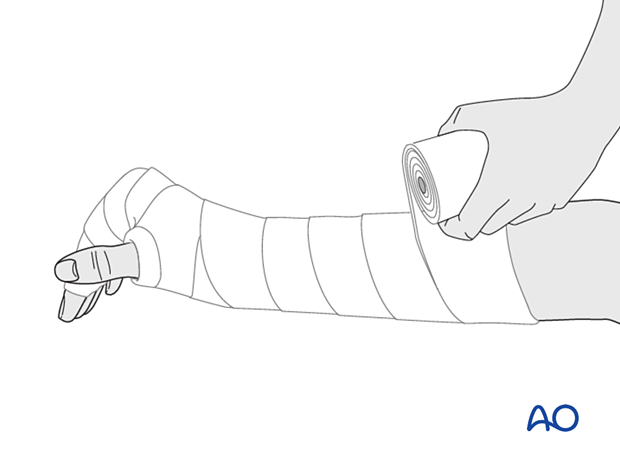
In compliant patients, only the affected and the directly neighboring fingers may be included in the splint.
Create a splint of at least 6 slabs of cast bandage. It should cover the dorsal or palmar half of the forearm, wrist, and hand.
The wrist should be in neutral or up to 15° extension.
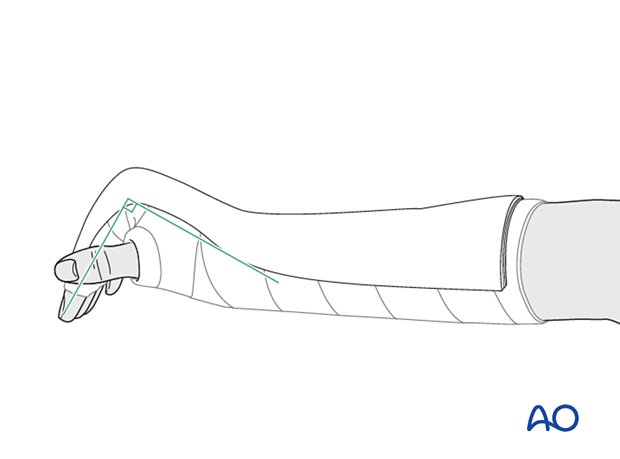
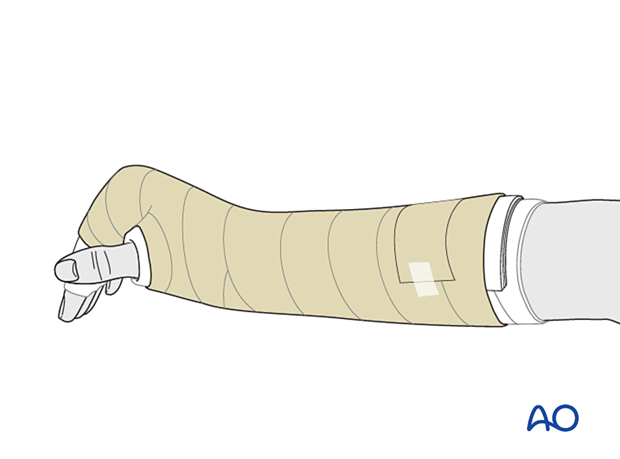
The splint is held in place with an elastic bandage. The bandage should not be overtightened at the level of the wrist joint to avoid excessive swelling of the hand.
Direct skin contact with adjacent fingers should be prevented by placing gauze pads between them.
6. Aftercare
Postoperative phases
The aftercare can be divided into four phases of healing:
- Inflammatory phase (week 1–3)
- Early repair phase (week 4–6)
- Late repair and early tissue remodeling phase (week 7–12)
- Remodeling and reintegration phase (week 13 onwards)
Full details on each phase can be found here.
Follow-up
X-ray checks of fracture position should be performed immediately after the splint has been applied.
Follow-up x-rays with the splint should be taken after 1 week and after 2 weeks if there is doubt about maintenance of reduction.
Splinting is continued until about 4 weeks after the injury. At that time, an x-ray without the splint is taken to confirm healing, and range of motion should be pain-free.
Mobilization
Splinting can then usually be discontinued, and active mobilization is initiated. Functional exercises are recommended.
If, after 8 weeks, x-rays confirm healing, full manual loading can be permitted.
